
 JupyterHub + Kubernetes (source: O'Reilly)
 Deploying JupyterHub on Kubernetes on Google Cloud
JupyterHub, a “multi-user server for Jupyter Notebooks,” is an essential tool for teaching and training at scale with Jupyter. As described in The course of the future – and the technology behind it, JupyterHub is being used to power an introductory class in data science taken by hundreds of students at Berkeley every semester.
JupyterHub is a complex piece of software, and setting up and operating has been out of reach for many organizations, but recent work by members of the Jupyter team – especially @CarolWilling, @choldgraf, @Mbussonn, @minrk, and @yuvipanda — has put JupyterHub within reach of a host organizations and individuals.
Their new project, a Helm package for JupyterHub and an accompanying article called Zero to JupyterHub on how to use it, describes the relatively straightforward steps needed to install and run JupyterHub on Google cloud.
In this article, I’ve followed along with the tutorial, adding additional detail on setting up gcloud, preparing a docker image with the content project you want to deploy in it, and provided more background on some of the tools used.
Introduction
Although there are a lot of steps, there are three core things to do:
- Create a k8s cluster on gcloud. In a traditional ops setting, this is kind of like setting up a new server.
- Install the JupyterHub application on the cluster using Helm, the k8s package manager.
- Configure the new JupyterHub instance to serve a default content project. In this case, I’ll have it serve Allen Downey’s ThinkDSP project. See Computational Publishing with Jupyter for more background information on this step.
By the end of this tutorial, you’ll have a public server (no DNS entry or https, which is something I’ll need to figure out how to add) where anyone can log in and get a running instance of ThinkDSP.
What’s not covered here:
- How to set up an “authenticator” for JupyterHub so that you can control who can log into Jupyter and get a notebook. Right now, anyone can just log in with any username and password. Probably unwise.
- How to handle persistent storage for the container. This is dependent on an unmerged issue on docker-stacks project. So, you won’t be able to save the notebooks served this instance of JupyterHub, but that should be fixed soon.
Install the gcloud CLI
You need the google cloud CLI for your platform. Once you download and install it, you should be able to run the gcloud tool on your machine:
$ gcloud version
Google Cloud SDK 155.0.0
bq 2.0.24
core 2017.05.10
gcloud
gsutil 4.26
Set your login credentials
Once you’ve got it installed, do gcloud init to set your credentials. This will open a browser and ask you login to the google account where you’ll be deploying JupyterHub.
Install kubectl plugin
Install kubectl:
gcloud components install kubectl
You only need to do this once.
Create a Kubernetes cluster
Once you’ve got the basic setup, you’re ready to create a kubernetes cluster where we’ll install the JupyterHub server. In an AWS context, this is kind of like setting up your EC2 instance.
I set up a cluster named notebook-test consisting of 3 high memory machine types with 2 virtual CPUs and 13 GB of memory operating in the US central zone.
gcloud container clusters create notebook-test \
    --num-nodes=3 \
    --machine-type=n1-highmem-2 \
    --zone=us-central1-b
Once the command completes, you can confirm your cluster is running like this:
$ kubectl get node
NAME                                           STATUS    AGE       VERSION
gke-notebook-test-default-pool-fc9a005b-64z2   Ready     41s       v1.6.4
gke-notebook-test-default-pool-fc9a005b-rjhm   Ready     43s       v1.6.4
gke-notebook-test-default-pool-fc9a005b-tj84   Ready     44s       v1.6.4
Set up Helm
Helm is the package manager for Kubernetes; it’s like apt/yum/homebrew for a cluster. It’s used to install charts, which are are packages of pre-configured Kubernetes resources.
$ brew install kubernetes-helm
==> Downloading https://homebrew.bintray.com/bottles/kubernetes-helm-2.4.2.sierr
######################################################################## 100.0%
==> Pouring kubernetes-helm-2.4.2.sierra.bottle.tar.gz
==> Using the sandbox
==> Caveats
Bash completion has been installed to:
  /usr/local/etc/bash_completion.d
==> Summary
ߍꠠ/usr/local/Cellar/kubernetes-helm/2.4.2: 48 files, 122.4MB
Then you have to run helm init; this has to be done once per k8s cluster.
$ helm init
Creating /Users/odewahn/.helm
Creating /Users/odewahn/.helm/repository
Creating /Users/odewahn/.helm/repository/cache
Creating /Users/odewahn/.helm/repository/local
Creating /Users/odewahn/.helm/plugins
Creating /Users/odewahn/.helm/starters
Creating /Users/odewahn/.helm/repository/repositories.yaml
$HELM_HOME has been configured at /Users/odewahn/.helm.

Tiller (the helm server side component) has been installed into your Kubernetes Cluster.
Happy Helming!
Prepare an initial JupyterHub config file
Now we’re ready to set up JupyterHub itself. In a AWS context, this is like we’ve got the server stood up and now we want to put our application on it.
Generate two random keys that you’ll using the in the config file:
$ openssl rand -hex 32
b85e9538b93761f2336025a3d5696cc237ee26c8115979d90b86b08b0c326957
$ openssl rand -hex 32
f13056563eafb75ab062020dadef8c941b18f69da623e8af58554c06c585881a
Then create a file called config.yaml with the following contents:
hub:
  cookieSecret: "b85e9538b93761f2336025a3d5696cc237ee26c8115979d90b86b08b0c326957"
token:
  proxy: "f13056563eafb75ab062020dadef8c941b18f69da623e8af58554c06c585881a"
You’ll need to keep this file around, so be sure to commit it to a GitHub repo. [THIS IS PROBABLY NOT GREAT ADVICE SINCE IT CONTAINS SECRETS, BUT WHAT IS THE BEST WAY TO DO IT?]
Install JupyterHub with Helm
Now that we have helm, we can (finally!) use helm install to put the JupyterHub app on the cluster. We’ll use the config file we created in the previous step, and use the name jupyterhub-test as the name and namespace of the application (this is how Helm keeps up with the apps running on the cluster).
helm repo add jupyterhub https://jupyterhub.github.io/helm-chart/
helm repo update
helm install jupyterhub/jupyterhub \
 --version=v0.4 \
 --name=jupyterhub-test \
 --namespace=jupyterhub-test \
 -f config.yaml
This will run for a while. When it finishes, it will produce some helpful log data, as well as the release notes for the JupyterHub app:
NAME:   jupyterhub-test
LAST DEPLOYED: Fri Jun  2 10:29:44 2017
NAMESPACE: jupyterhub-test
STATUS: DEPLOYED

RESOURCES:
==> v1/PersistentVolumeClaim
NAME        STATUS   VOLUME                       CAPACITY  ACCESSMODES  STORAGECLASS  AGE
hub-db-dir  Pending  hub-storage-jupyterhub-test  1s

==> v1/Service
NAME          CLUSTER-IP     EXTERNAL-IP  PORT(S)       AGE
hub           10.11.246.154  <none>       8081/TCP      1s
proxy-api     10.11.240.251  <none>       8001/TCP      1s
proxy-public  10.11.254.221  <pending>    80:30746/TCP  1s

==> v1/Secret
NAME        TYPE    DATA  AGE
hub-secret  Opaque  2     1s

==> v1/ConfigMap
NAME          DATA  AGE
hub-config-1  14    1s

==> v1beta1/Deployment
NAME              DESIRED  CURRENT  UP-TO-DATE  AVAILABLE  AGE
hub-deployment    1        1        1           0          1s
proxy-deployment  1        1        1           0          1s

==> v1beta1/StorageClass
NAME                                 TYPE
single-user-storage-jupyterhub-test  kubernetes.io/gce-pd
hub-storage-jupyterhub-test          kubernetes.io/gce-pd


NOTES:
Thank you for installing JupyterHub!

Your release is named jupyterhub-test and installed into the namespace jupyterhub-test.

You can find if the hub and proxy is ready by doing:

 kubectl --namespace=jupyterhub-test get pod

and watching for both those pods to be in status 'Ready'.

You can find the public IP of the JupyterHub by doing:

 kubectl --namespace=jupyterhub-test get svc proxy-public

It might take a few minutes for it to appear!

Note that this is still an alpha release! If you have questions, feel free to
  1. Come chat with us at https://gitter.im/jupyterhub/jupyterhub
  2. File issues at https://github.com/jupyterhub/helm-chart/issues
As you can see in the release notes from the log, it will take a while to for the app to initialize. Here’s the instruction you can run to monitor its progress:
$ kubectl --namespace=jupyterhub-test get svc proxy-public
NAME           CLUSTER-IP      EXTERNAL-IP   PORT(S)        AGE
proxy-public   10.11.254.221   <pending>     80:30746/TCP   36s
After a minute or two, the external IP field will be populated and the JupyterHub app is available:
$ kubectl --namespace=jupyterhub-test get svc proxy-public
NAME           CLUSTER-IP      EXTERNAL-IP      PORT(S)        AGE
proxy-public   10.11.254.221   104.155.179.31   80:30746/TCP   4m
Then you can open you browser to http://104.155.179.31 and boom!, Notebooks:
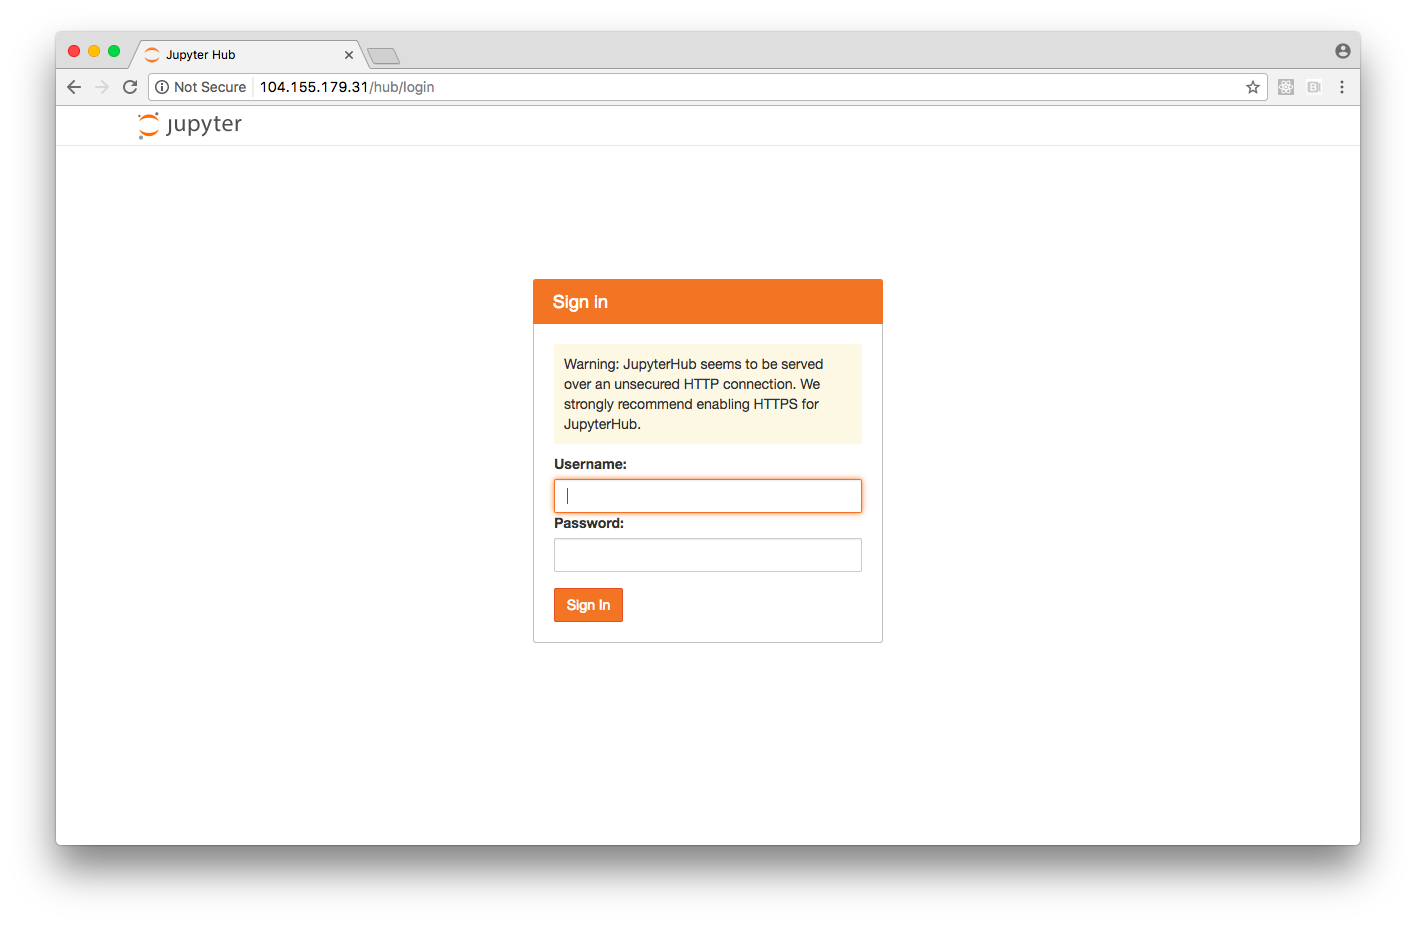
Note that JupyterHub is running with a default dummy authenticator, so you can just enter any username and password. See extending jupyterhub for details on how to set up authentication, which I won’t cover here.
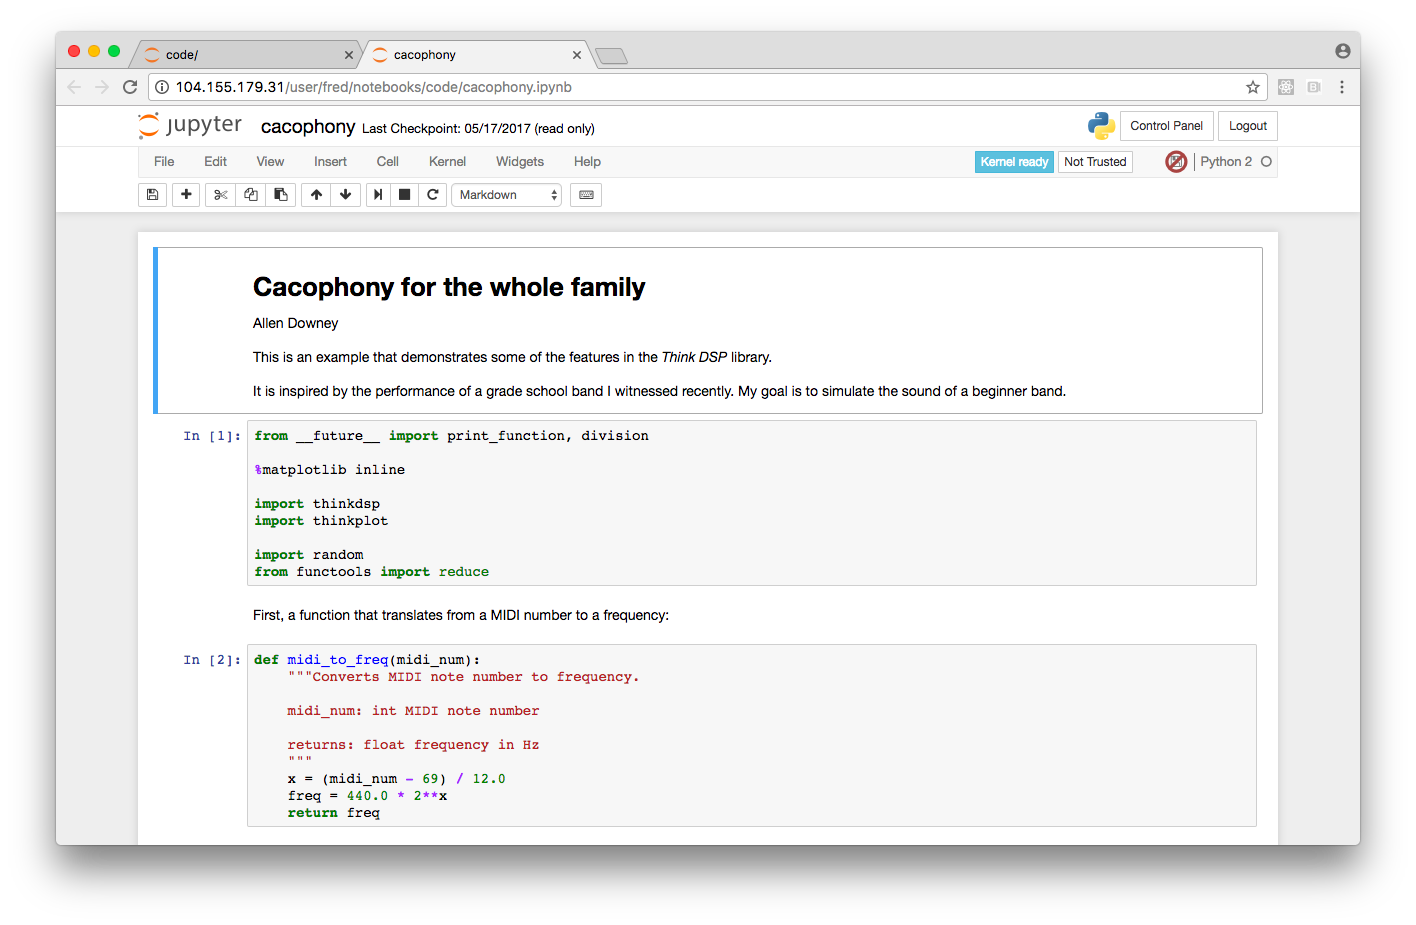
Prepare Default Notebook to run on JupyterHub
By default, JupyterHub just gives you a blank Notebook. However, if you’re teaching a class and you want to give your students access to something you’ve already created, you need to prepare a docker image that will be served by default.
To make a Docker image you can deploy onto JupyterHub, you need to ADD the repo to the /home/jovyan directory, and then set the WORKDIR to /home/jovyan.
If you’re using Launchbot or otherwise have an existing Dockerfile, you can create a new Dockerfile and call it Dockerfile.prod. For example:
FROM jupyter/scipy-notebook:latest

ADD . /home/jovyan

WORKDIR /home/jovyan

# Expose the notebook port
EXPOSE 8888

# Start the notebook server
CMD jupyter notebook --no-browser --port 8888 --ip=*
Once you have this, build the image:
docker build -f Dockerfile.prod . aodewahn/thinkdsp
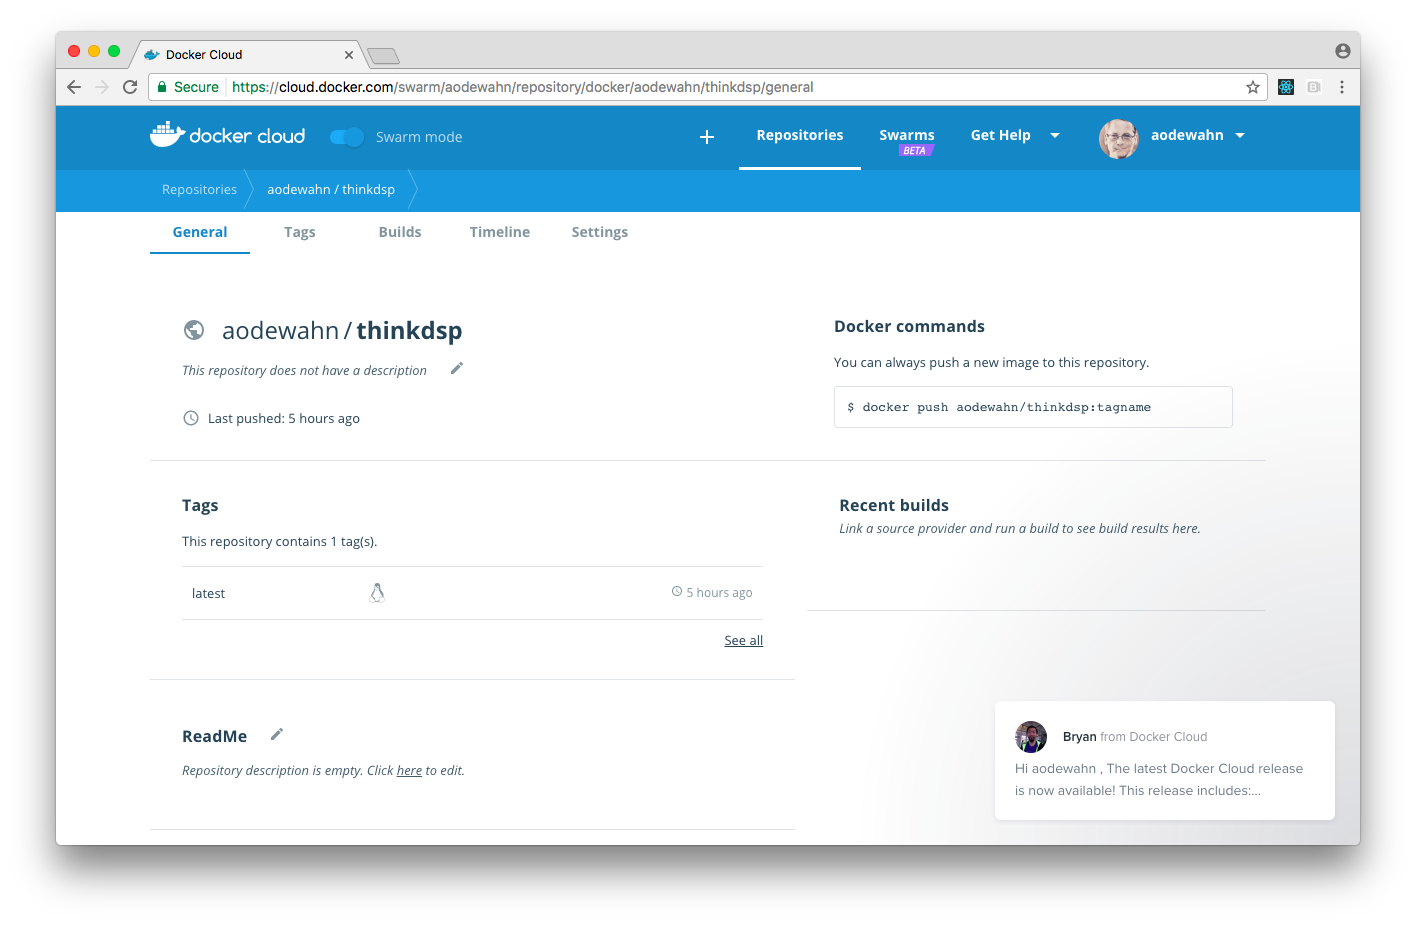
Then you’ll need to log into the Docker Hub and create an image for it. Once you do, you can do
docker push aodewahn/thinkdsp
Deploying the Default Image to JupyterHub
Once we’ve made a default image, we need to update the config.yaml to set our new image as the default content served by JupyterHub. (This is all covered in the extending jupyterhub article).
To do it, add this section that maps the image to the image we just put on DockerHub:
singleuser:
  storage:
    type: none
  image:
    name: aodewahn/thinkdsp
    tag: latest
Next, get the release name of the app, which you set up earlier. Note that if you forget the name, you can use helm to retrieve it:
$ helm list
NAME               REVISION    UPDATED                     STATUS      CHART                NAMESPACE
jupyterhub-test    1           Fri Jun  2 10:29:44 2017    DEPLOYED    jupyterhub-v0.4    jupyterhub-test
Then upgrade the cluster (this is what the doc says is necessary):
helm upgrade jupyterhub-test jupyterhub/jupyterhub --version=v0.4 -f config.yaml
You can run this command until the container is built:
$  kubectl --namespace=jupyterhub-test get pod
NAME                                READY     STATUS              RESTARTS   AGE
hub-deployment-1010241260-x506q     0/1       ContainerCreating   0          57s
proxy-deployment-2951954964-l94n5   1/1       Running             0          2h
Once it’s done building, you should be able to create a new notebook based on the base image.
Note that for now JupyterHub doesn’t support persistent storage with the jupyter-stack images, but they’re working on it.
Delete the cluster
Once you’re done, delete your cluster in order to stop further billing!
gcloud container clusters delete notebook-test --zone=us-central1-b
Conclusion
Clearly, this is still a pretty technical process. However, by combining the ease of use of Helm with the cost-effectiveness and scalability of kubernetes on gcloud, running a state-of-the-art JupyterHub deployment is within reach of most small organizations, or even an individual.
By removing the pain of installing and operating JupyterHub, this project opens the doors to the classroom of the future to everyone.