
 Panel of azulejos by Jorge Colaço (1864-1942) at the São Bento railway station, depicting Prince Henry the Navigator during the conquest of Ceuta. (source: Via HombreDHojalata on Wikimedia Commons)
 You love the idea of playing with hardware, but you studied programming, not electrical engineering. Maybe you’ve never even used a soldering iron and don’t have the slightest clue as to what a capacitor does—or even looks like. And physical hardware aside, you like to write code in Javascript, not C. Yet, you still have a desire to make something that reacts to and interacts with the physical world, not just the digital one.
I see it all the time. Javascript developers want to play with hardware but are intimidated by it. I actually find it funny because these are the same people who understand closures, asynchronous programming, and use a language where typeof(NaN) actually equals “number.” I promise if you are smart enough and patient enough to program in Javascript, you are smart enough to figure out hardware and make amazing things. In fact, I think programmers are the ideal candidates to help fill the talent void the Internet of Things movement is creating. And the Tessel 2 is a great platform to get you started. In this article, I’ll show you how to go from unboxing the T2 to a fully functional Internet of Things device (a simple remote sensor station) in just 20 minutes using T2 modules, Node.js, and Node Package Manager (NPM).
Tessel 2: Easy hardware abstraction and fewer entry obstacles
The Tessel 2 is the second generation of an IoT platform, originally created by Technical Machine, that stands out from other platforms in two key areas: hardware abstraction and barrier to entry. One of the biggest hurdles to getting started in Internet of Things development is the “Things” part. If you’ve never fiddled with electronics, it can be intimidating when trying to hook up a sensor for the first time. Which pins connect where and why do I need that capacitor? The Tessel 2 eliminates this problem completely with its module ecosystem. Modules are self-contained hardware abstractions that connect directly to the Tessel 2 and require no electronics experience to use. They are simple, plug-and-play units that add functionality to your project. Once you have a module connected to your Tessel, programming against it is as easy as npm install because it’s ready to run Javascript out of the box. This saves a lot of time when you first get started.
The second area that helps the Tessel 2 stand out from other platforms is the low barrier to entry. While platforms have come a long way in ease of setup and use, there are still often many steps just to get your first program running—things like installing an OS on an SD card, installing a proprietary IDE, and changing configuration files to enable certain maker functionalities. The Tessel 2 has none of these. As you’ll see, you can run your first program in less than five minutes from unboxing.
With hardware abstraction and a familiar programming environment, let’s see how the Tessel 2 enables you to take your project from idea to reality. The remainder of this article will take us from unboxing the Tessel 2 to creating a full Internet of Things example in about 20 minutes (assumes you already have NodeJS and NPM installed). Let’s build a simple remote sensor station.
What you’ll need
Before we get started, here is a list of materials used in this article.
- Tessel 2 – $45
- Tessel Climate Module – $25
Setup and power on
Out of the box, the first thing you might notice is the lack of an SD card slot on the T2. There is no need to download and prepare an SD card with an OS, as is the case with some other platforms, because the T2 runs OpenWRT, which is stored in onboard flash. It’s ready to go out of the box. Because Tessel 2 supports Node.js natively, the only development tools required are Node and NPM, which I’ll assume you already have installed on your computer. If not, it only takes a few minutes and instructions can be found on the Node.js website.
Installing the T2 command line utility
The first thing we need is the T2 command line utility, which we install from the command line (Command Prompt on Windows, Terminal on Mac or Linux) with:
npm install -g t2-cli
Notice that this is just regular NPM package installation syntax; you would use this to install any Node package. We’re now ready to turn on our T2 for the first time by connecting it to our computer with the included USB cable. It will immediately start to boot and takes about 30 seconds to fully do so; during this time, you will see a pulsing blue light on the side. When you see a solid blue light, your T2 is ready to go, so let’s go back to the terminal window and keep moving.
Get connected and updated
To confirm your T2 is awake and ready, run the following in your terminal window:
t2 list
You should see something similar to the following in the output:
INFO Searching for nearby Tessels…
            Tessel-AF768F095   USB
USB connectivity is nice but this is the Internet of Things, so we’re going to need a connection to the interwebs. No problem. Just run the following command, substituting your network information:
t2 wifi -n <network name> -p <password>
If the T2 is successful in connecting to your WiFi network, the onboard amber LED will start to flash randomly, as it will blink with every packet it receives. And just like that, you have Internet capability with a single command.
Pushing code to the T2
Next we need to authorize your computer to push code to the T2 over Wifi:
t2 provision
One more run of t2 list should show a slightly different output than before:
INFO Searching for nearby Tessels…
            Tessel-AF768F095   LAN
            Tessel-AF768F095   USB
This means your T2 is now connected via USB and your local network. The last thing we need to take care of is updating our Tessel 2 to ensure we have the latest bits. That’s as easy as:
t2 update
Time for some hardware: Connecting modules
For our simple sensor station, we’ll monitor temperature and humidity. Normally this would require finding an appropriate sensor or sensors to provide that information, figuring out how to hook them up, and determining what supporting components are required and how to hook those up. After that, you’d spend at least a good hour or two reading a datasheet to learn how to communicate with the sensor(s) so you could extract the desired data. In our case, we’ll just use the climate module, which features an onboard temperature and humidity sensor as well as all of the supporting components necessary for the sensor to operate. This is where modules save you a ton of time during the prototyping phase of your project.
Before we connect the module, let’s disconnect our T2 so that it is powered off.
Note: With the exception of peripherals you plug into the T2’s USB port, always make sure your T2 is turned off before connecting new modules.
When connecting modules to your T2, you only have to remember one thing (besides turning it off first). The module logos should always face down. This ensures that the pins are oriented correctly with the main T2 board.

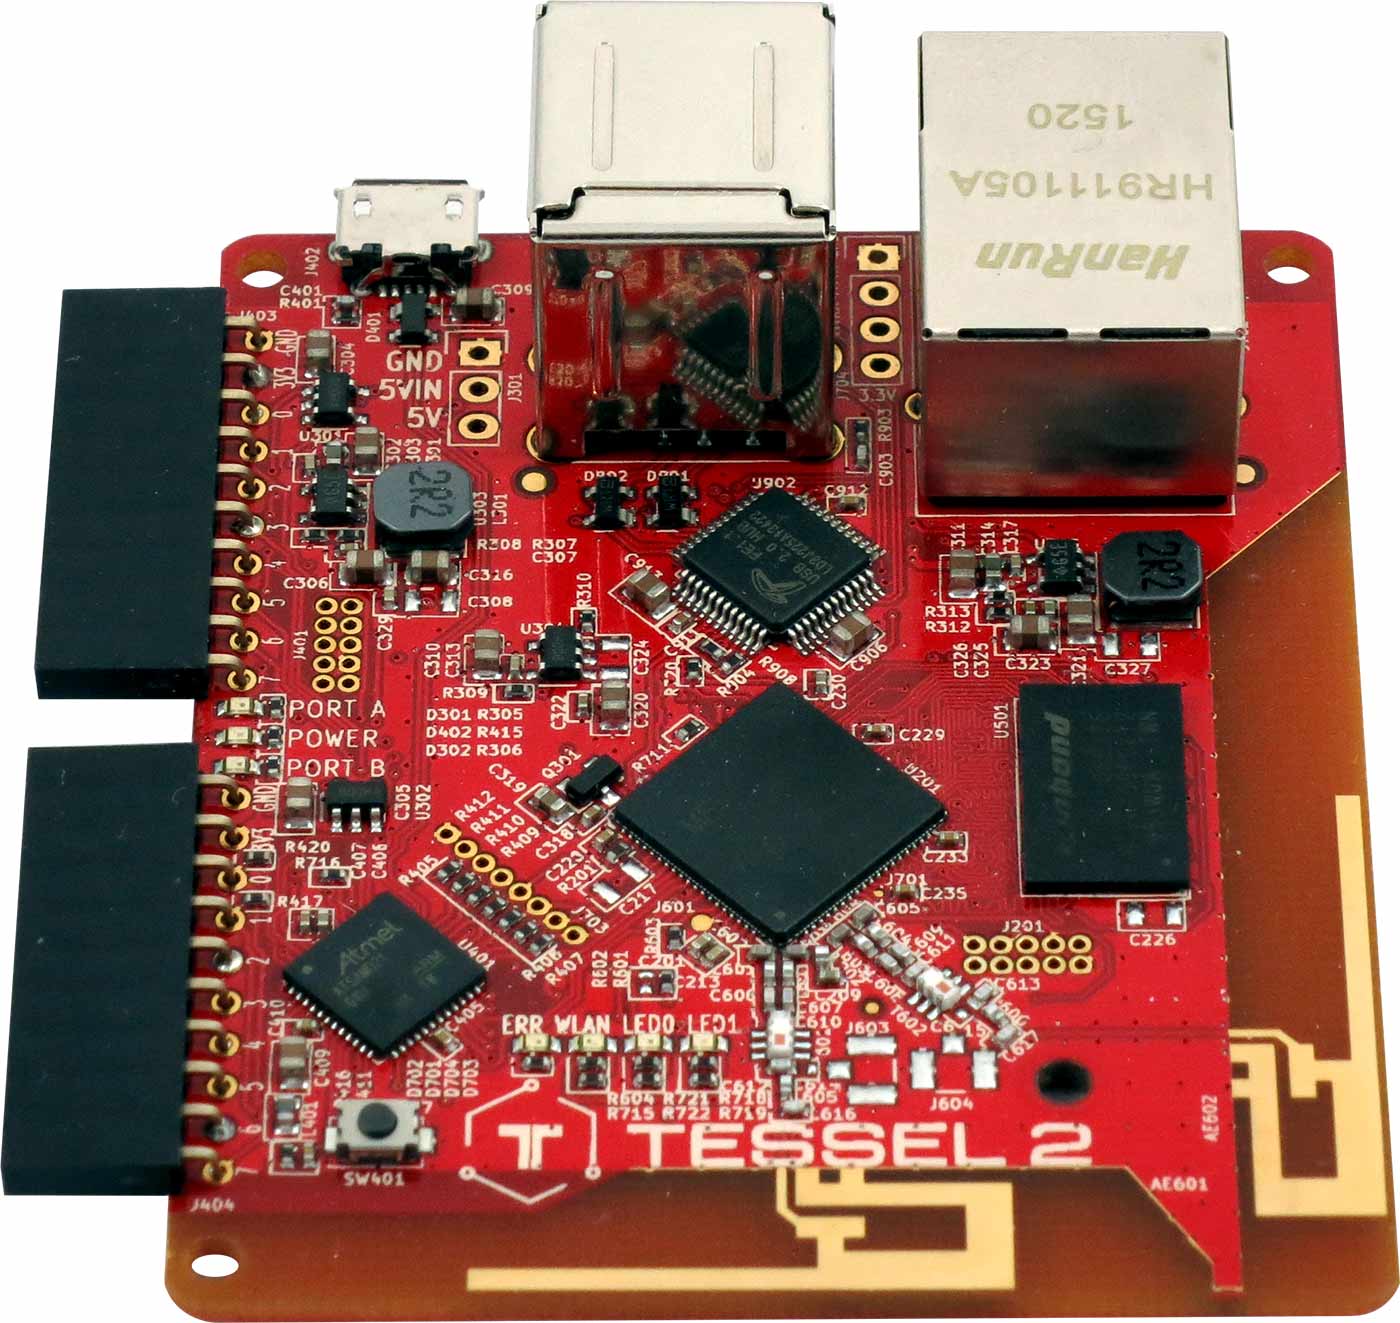
Let’s connect our climate module to Port A as the image below shows:

While connecting the module, you’ll notice that there are two module ports on the T2: Port A and Port B. Port A is the port closest to the micro USB port. You can connect the climate module to either one, but the code samples to follow will assume it is connected to Port A.
With the module connected, we’re ready to power up our T2 again. And that’s all it takes to add temperature and humidity sensors to your project. There are currently over 30 modules available to help get your project up and running quickly.
Your first program
Back in the terminal window, let’s create a new folder for our code and configure it as a T2 project. That’s as simple as:
mkdir tessel-sensor
cd tessel-sensor
t2 init
This takes care of some T2 housekeeping for us by creating a standard package.json and an index.js file for our code. If you open that file, you’ll see you have a simple LED-flashing program that’s ready to run on your T2:
// Import the interface to Tessel hardware
var tessel = require('tessel');

// Turn one of the LEDs on to start.
tessel.led[2].on();

// Blink!
setInterval(function () {
  tessel.led[2].toggle();
  tessel.led[3].toggle();
}, 100);

console.log("I'm blinking! (Press CTRL + C to stop)");
Let’s run your first program on the Tessel by using the following command in the terminal window:
t2 run index.js
Within a few seconds, you should see the blue and green LEDs (they are right next to the amber Wifi LED) start to blink back and forth. That’s all it takes to run Node.js programs on your T2. Go ahead and press Ctrl-C to exit the sample program.
Tip: If you would like this program to run as the default program when your T2 boots up, you would use a slightly different command of t2 push index.js.
Talking to sensors: NPM FTW!
That’s neat, but we aren’t interested in blinking LEDs. It’s time to write some code to talk to our sensors. This can often slow your project down, especially if you are new to hardware. Our temperate/humidity sensor supports a common embedded communication protocol known as I2C. Using I2C on any other platform would require you to have at least a basic knowledge of the protocol to extract sensor data. Even then, this particular sensor returns temperature data as two register values, where the lower byte is right-padded with two zeros. Humidity data is similarly returned as a 12-bit zero-padded value, which then needs to be run through a conversion algorithm before you get an actual relative humidity reading. All of this is completely abstracted by the climate module node package.
Every T2 hardware module has an accompanying node package that abstracts away the low-level hardware interactions. If you take another look at the climate module, you’ll notice a small box with the text climate-si7005:
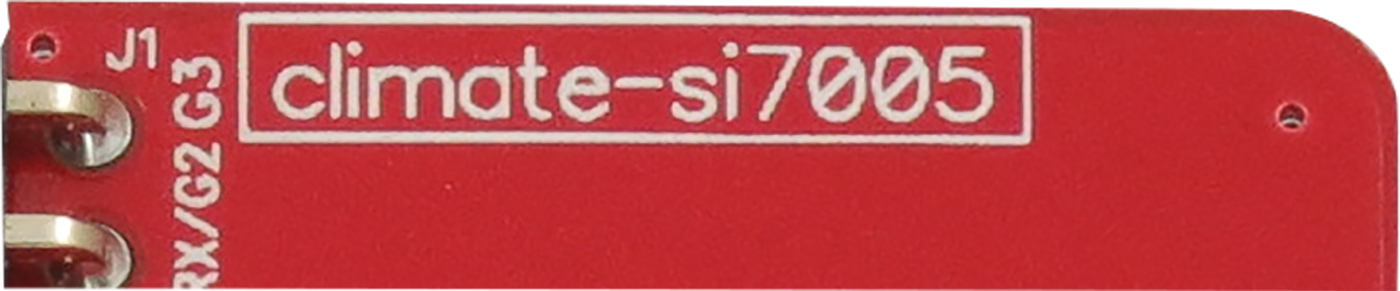
That is the name of the NPM package we need to install to interact with this module, so let’s install that now with:
npm install climate-si7005
This is just the standard NPM that you already know and love. Open your index.js file and replace the contents with the following:
// Import the interface to Tessel hardware
var tessel = require('tessel');

// Import the interface to our sensor
var climatelib = require('climate-si7005');

// 'Wire up' our sensor to the T2 using Port A
var climate = climatelib.use(tessel.port['A']);

climate.on('ready', function () {
  console.log('Connected to si7005');

  climate.readTemperature('f', function (err, temp) {
    climate.readHumidity(function (err, humid) {
      console.log('Temperature:', temp.toFixed(4) + 'F', 'Humidity:', humid.toFixed(4) + '%RH');
    });
  });
});

climate.on('error', function(err) {
  console.log('error connecting module', err);
});
Let’s dissect this code for just a minute. It is very straight forward. Every Tessel program will start with the same first line:
var tessel = require('tessel');
This brings in the base T2 hardware abstraction.
var climatelib = require('climate-si7005');
This require brings in a library for our sensor. It handles all of the low-level hardware details for us.
The next line is the software glue that connects our climate module to the main T2 board.
var climate = climatelib.use(tessel.port['A']);
This is an established Tessel pattern, and all modules are written to work in a similar manner. The code reads as you’d describe the physical connection. Our climate library will use Port A on the Tessel.
climate.on('ready', function () {
All of the first-party 10-pin modules follow the programming pattern of exposing an on event that fires when the module is configured and ready to be used in your code. Most of your program code will be nested inside the on event callback.
Finally, reading the temperature and humidity is as easy as calling .readTemperature and .readHumidity.
  climate.readTemperature('f', function (err, temp) {

    climate.readHumidity(function (err, humid) {

      console.log('Temperature:', temp.toFixed(4) + 'F',
                  'Humidity:', humid.toFixed(4) + '%RH');

    });

  });
Run your program using the same syntax as before.
t2 run index.js
After your code is built and pushed to the T2, you should see the current temperature and humidity print to the console window:
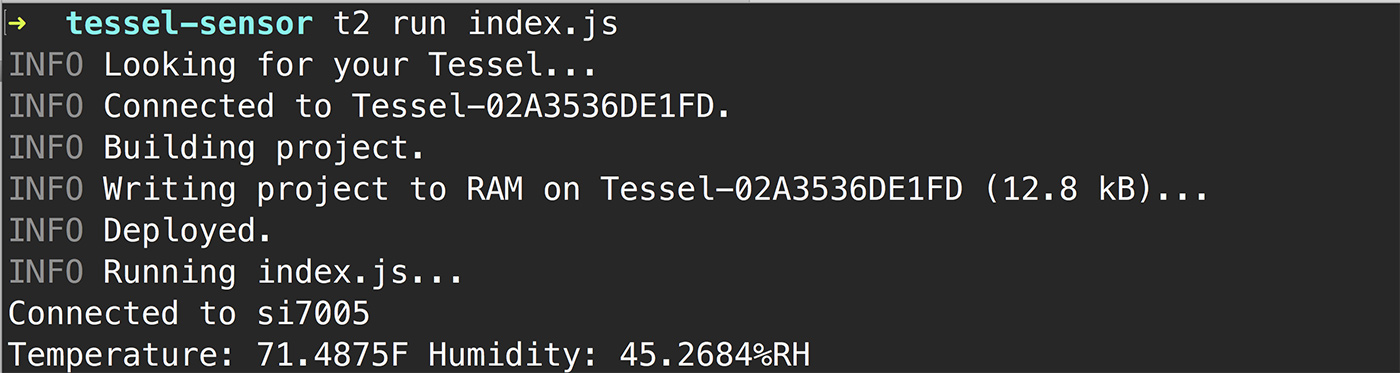
All we had to do to get sensor readings was:
- plug a module in
- npm install its package
- write a few lines of code
It’s the fastest getting-started experience of any platform I’ve used.
Connecting to the Internet
While reading sensor data is cool, we still haven’t used that nice Internet connection we setup earlier. So, what should we do with our sensor data? Let’s hook it up to IFTTT so we can trigger actions with it. This is amazingly simple since we’re using Node.js.
Stop: The following steps require an IFTTT account. If you don’t already have one, it takes less than a minute to set up.
Create a new IFTTT recipe
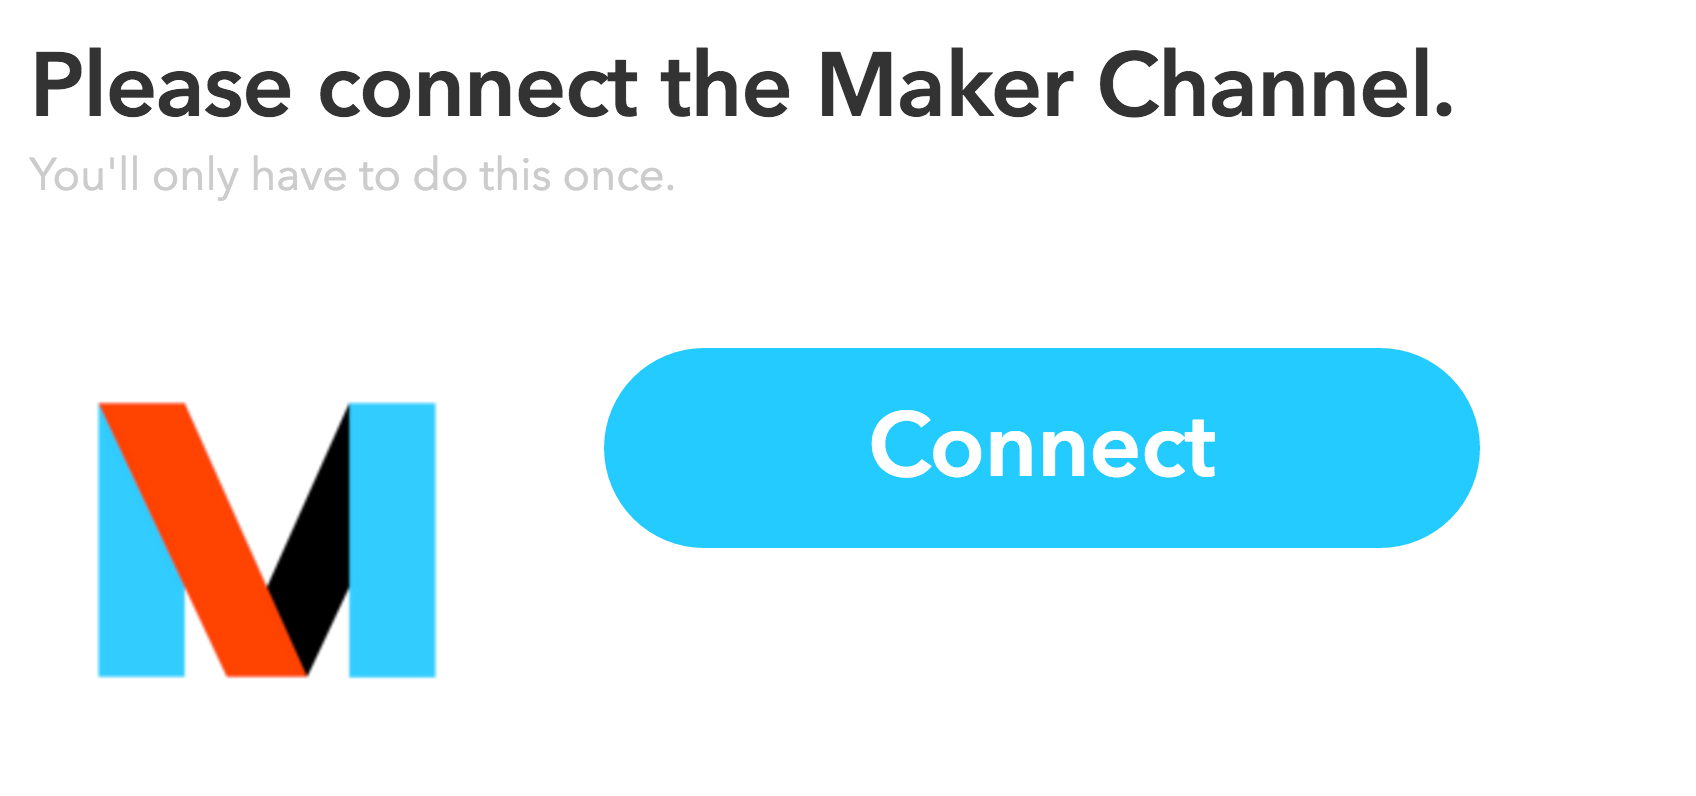
A very simple way to store our data is with Google Docs in a spreadsheet. Once you are signed into your IFTTT account browse to https://ifttt.com/myrecipes/personal/new to create a new recipe. On the “this” page, type “Maker” in the search box and select the Maker channel. If you haven’t already connected the channel to your account, you will be prompted to do so.
After you connect the channel, continue to the next step, which will prompt you to choose a Trigger. There is currently only one for the Maker channel, so select “Receive a web request.”
Next we need to give our trigger event a name. I chose “new_data.”
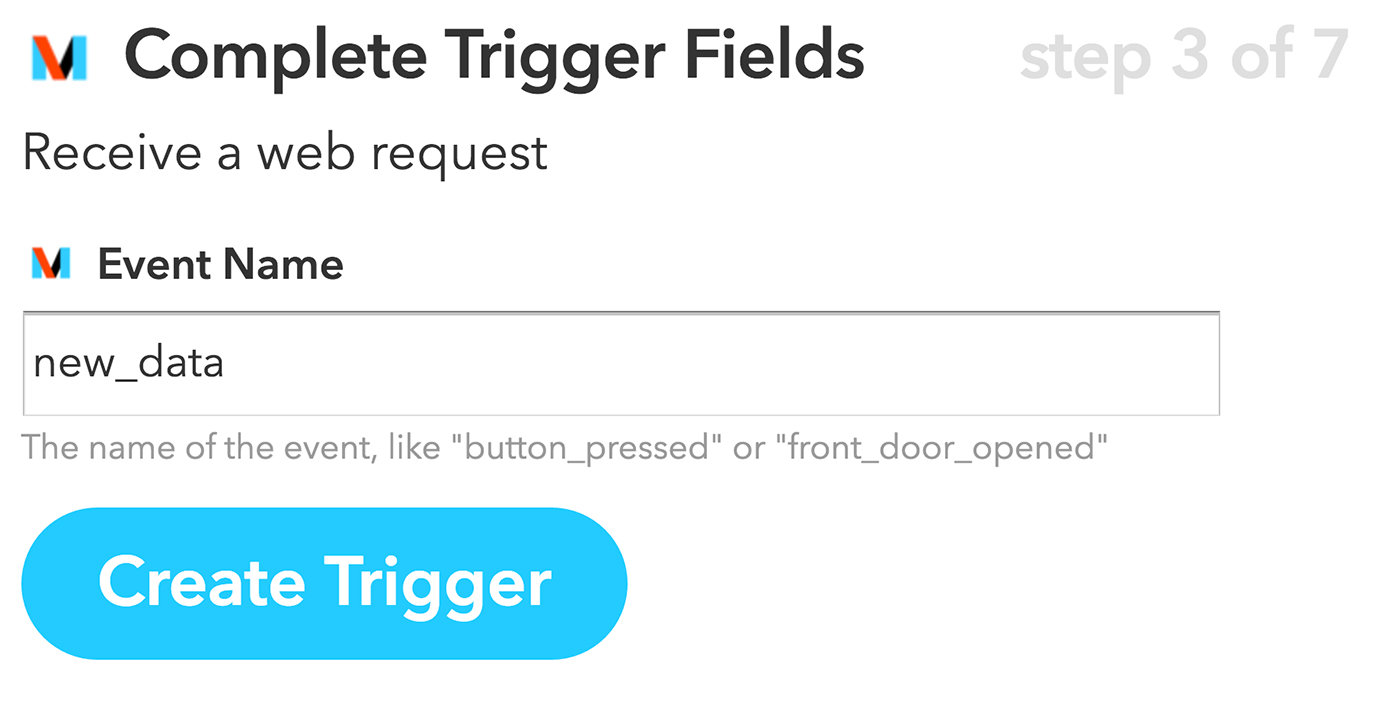
Click Create Trigger and then the word that to move on to the next step.
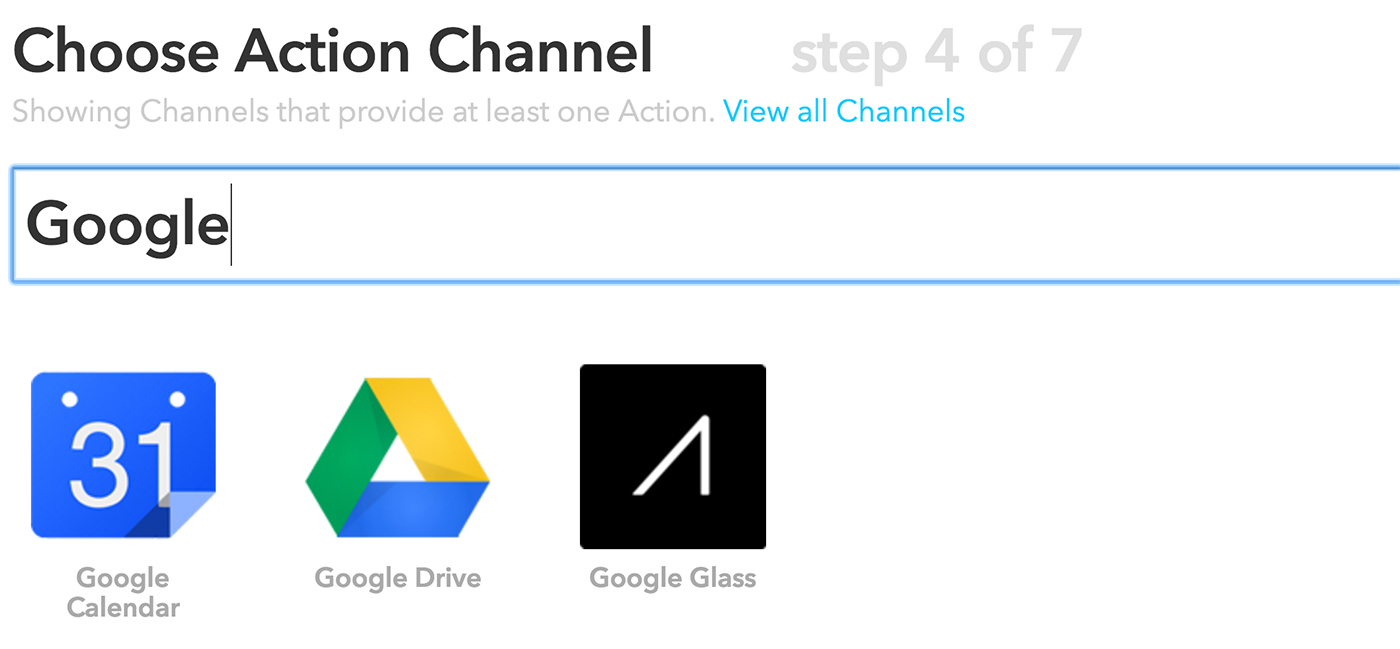
For our Action Channel, we’ll use Google Drive. To find it quickly, just type “Google” in the search box, as shown below:
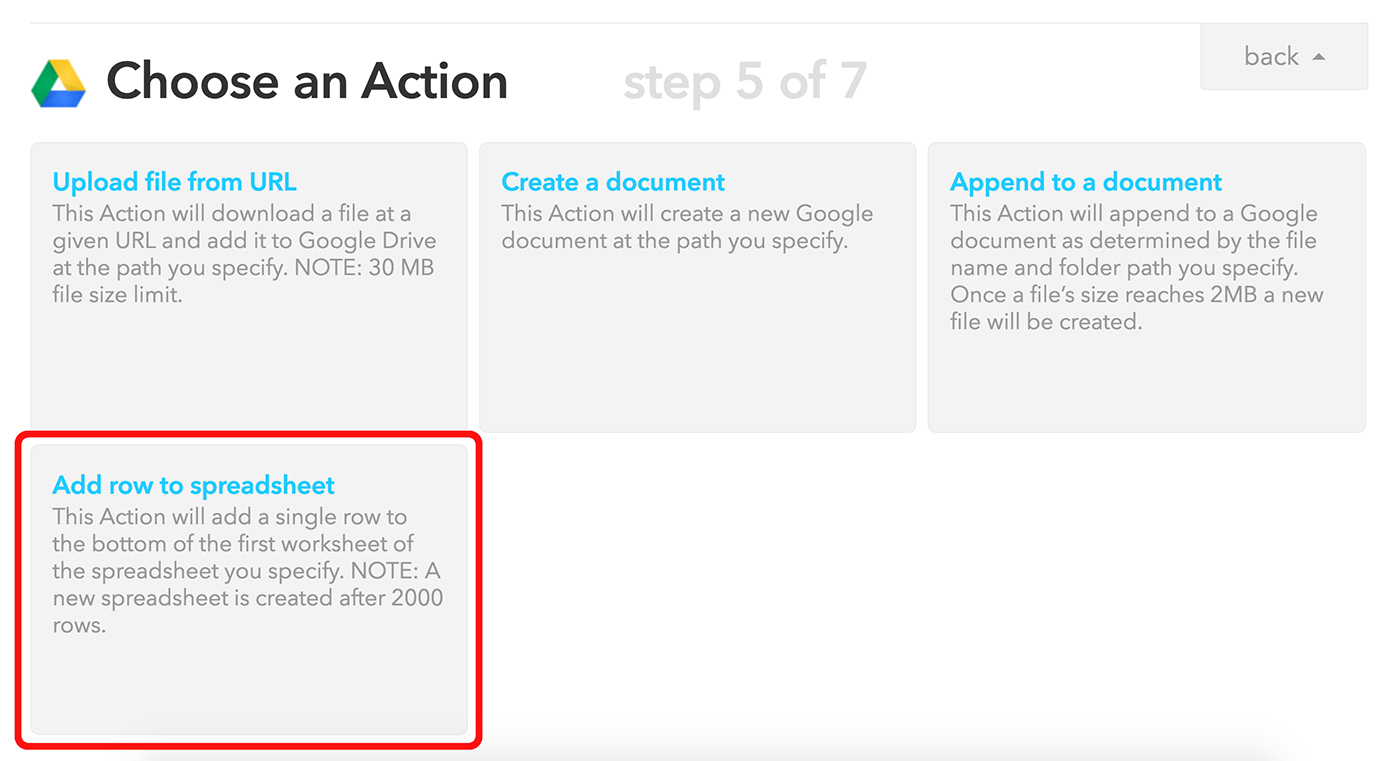
Select Google Drive and connect the service with your Google account if you haven’t already done so. When prompted to choose an action, select “Add row to spreadsheet.”
On the next page, you can configure where data is stored in your Google Drive and how the data is written to a spreadsheet. The settings I used are shown in the image below:
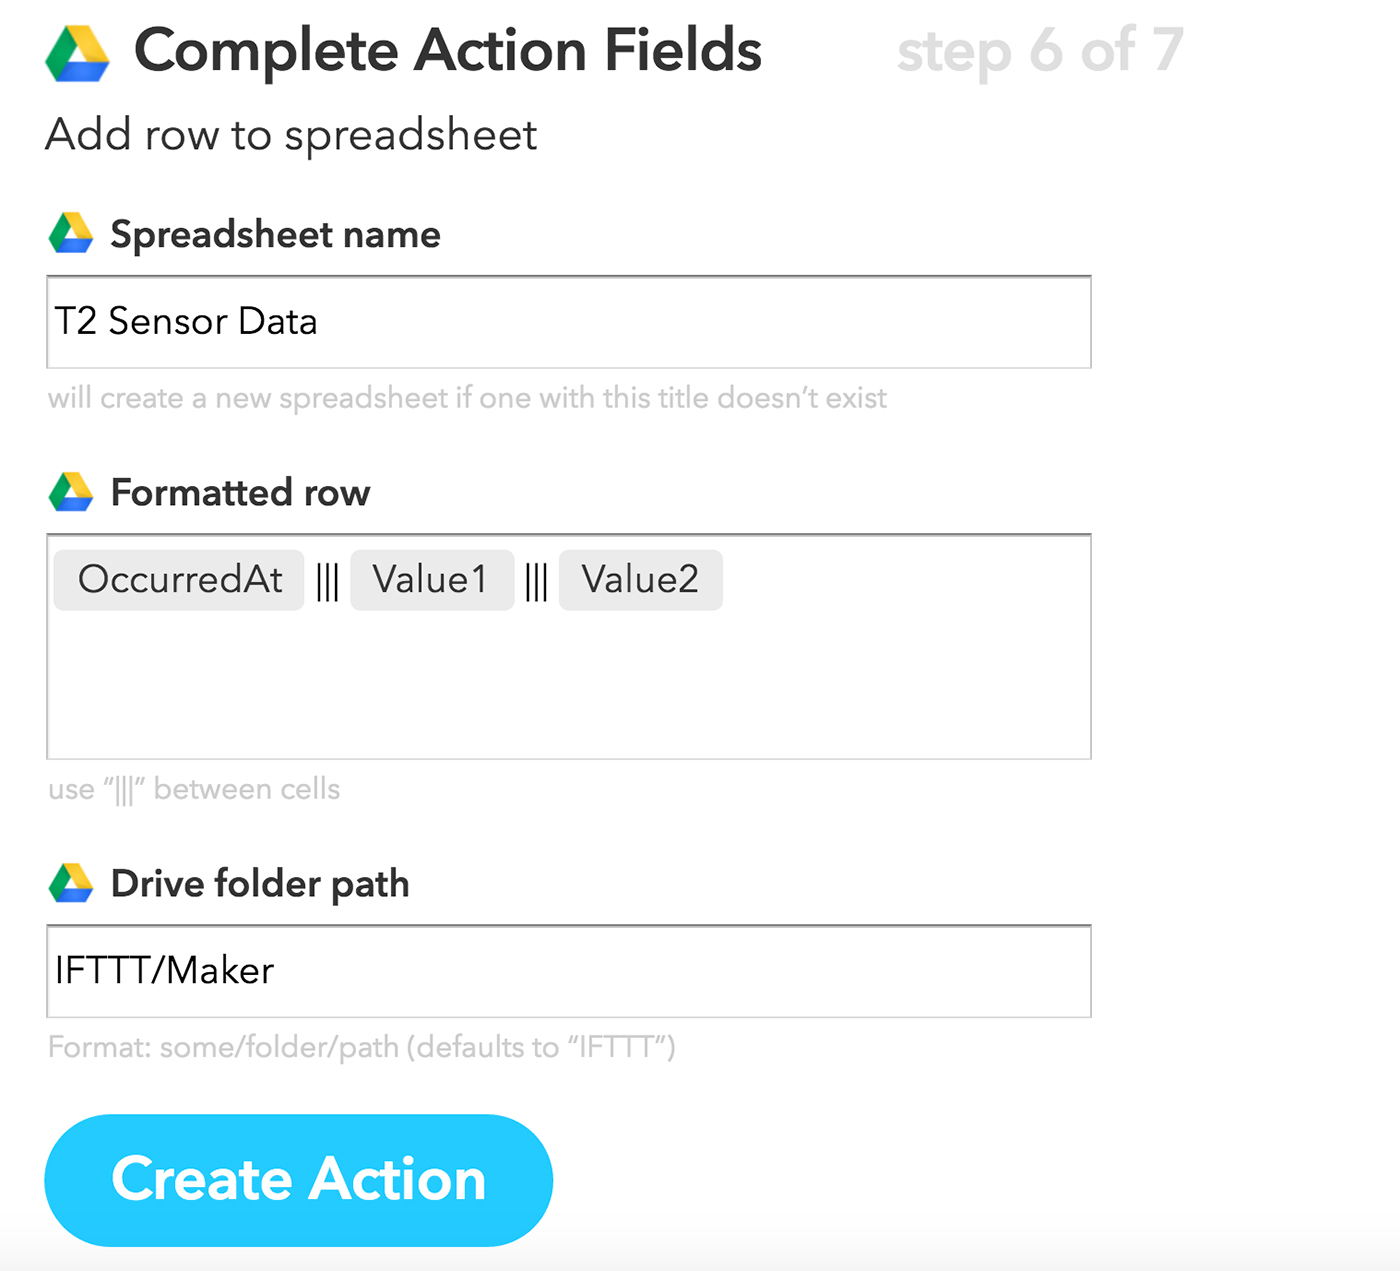
After clicking Create Action, you will be given the option to give your new IFTTT recipe a name. Change it from the default if you want and then click Create Recipe.
Now, let’s modify our T2 code to use the recipe we just created.
Update the T2 code
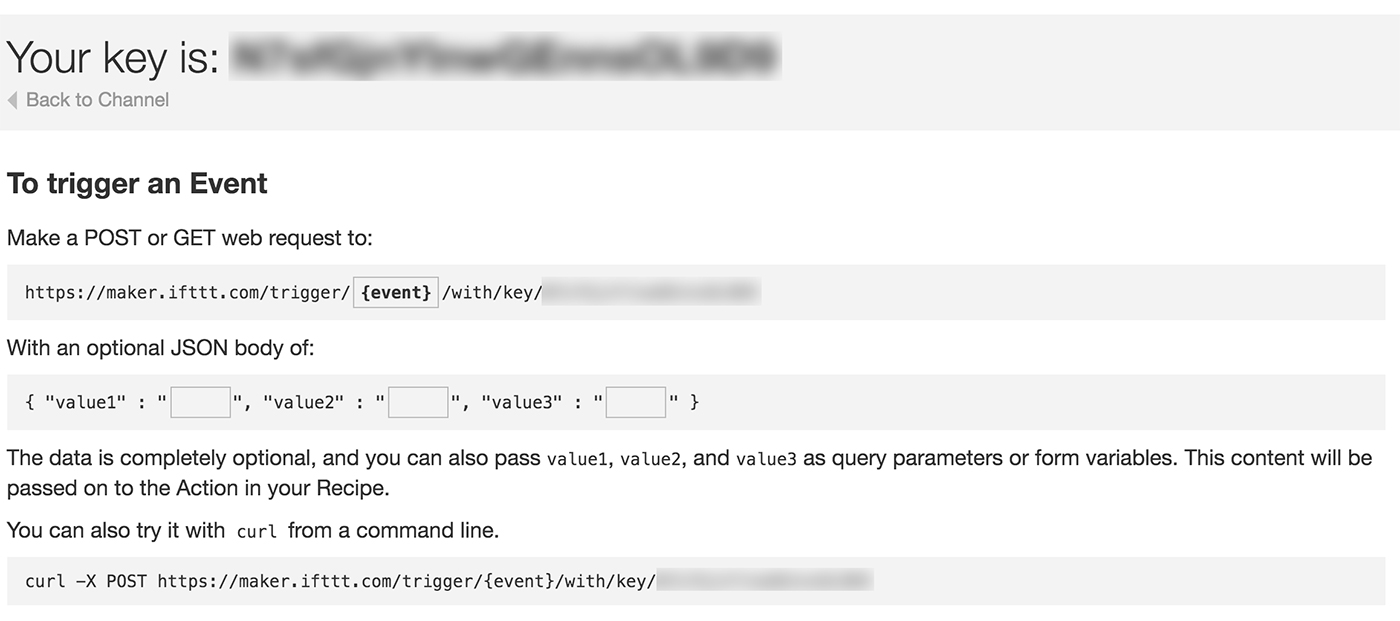
When we set up the Maker channel in IFTTT as part of our recipe, we decided on an event name that would cause the trigger to fire. In my case that event name was “new_data.” To see how to use that trigger, simply go to https://ifttt.com/maker and click on the “How to Trigger Events” link. This shows you that all we need to do is make an HTTP POST call to a specific URL that contains your unique key (as shown below). We can send the temperature and humidity data as JSON in the body of that request.
Now, we could use the built-in HTTP module in Node.js, but let’s simplify things a bit by using the request npm module. To install it, just run the following in your terminal window:
npm install request
All we have to do now is use it in our code, so let’s open up index.js and replace the contents with the following code:
// Import the interface to Tessel hardware
var tessel = require('tessel');
// Import the interface to our sensor
var climatelib = require('climate-si7005');

// 'Wire up' our sensor to the T2 using Port A
var climate = climatelib.use(tessel.port['A']);

// request module
var request = require('request');

climate.on('ready', function () {
  console.log('Connected to si7005');
  setImmediate(function loop(){
    climate.readTemperature('f', function (err, temp) {
      climate.readHumidity(function (err, humid) {
        console.log('Degrees:', temp.toFixed(4) + 'F', 'Humidity:', humid.toFixed(4) + '%RH');
        request.post(
          "https://maker.ifttt.com/trigger/new_data/with/key/[you're unique Maker channel key]",
          {form: {
            value1: temp.toFixed(4),
            value2: humid.toFixed(4)
            }
          },
          function (error, response, body){
            setTimeout(loop, 5000);
          });
      });
    });
  });

});

climate.on('error', function(err) {
  console.log('error connecting module', err);
});
The biggest change is that instead of getting the temperature and humidity readings once, we’ve created a loop that will get new readings every five seconds. In addition, we use the request module to make a POST call to our Maker IFTTT channel with the sensor data. Make sure you modify the secret key portion of the URL to contain your IFTTT Maker key. Save your changes and let’s give it a try:
t2 run index.js
The readings will log to the console as before, but if you go into your Google Drive account, you should see a new file at the path you specified when you created the IFTTT recipe. Open that spreadsheet and you will see sensor readings being added every five seconds.
Take it even further
Now that you’ve seen how easy it is to connect your T2 to web services like IFTTT, see if you can take this simple example to the next level:
- Try configuring your Google spreadsheet to graph the data you are logging using the built-in chart functionality.
- Try creating a recipe that sends you a text message if the temperature gets too hot or cold by using the IFTTT SMS Channel.
- You could even send out a team notification if the sensor readings indicated a problem by using the Slack Channel.
What’s next?
This article has shown how you can quickly go from unboxing the T2 to having a working Internet of Things project. To do so, we used the standard T2 modules and Node.js. But what if you start to advance beyond the basics and want to connect a module or sensor to your T2 that doesn’t exist already? That’s no problem at all. There is great documentation on their website for creating your own modules and new community-contributed modules are showing up all the time. As your knowledge of all things embedded grows, you will be able to unlock even more potential from your T2.
This article has also shown you how to connect the T2 to IFTTT, but you certainly aren’t limited to just that service. With an Internet connection and NPM in your toolbelt, you can connect to almost any web service. Here are just a few to give you some ideas:
- Firebase for storing data
- Twilio for more advanced SMS and phone communication
- Ubidots for advanced sensor data capture and display
- Plot.ly for graphing data
- PushingBox for advanced notifications
The Tessel 2 is a great introductory platform for software developers looking to get started in the Internet of Things movement. By combining the familiar development world of Node.js and NPM with abstracted hardware modules, the Tessel 2 enables even the most inexperienced beginner to create Internet of Things projects.
Editor’s note: all images courtesy of Kevin Sidwar.