Configuring a continuous delivery pipeline in Jenkins
Learn the basics for setting up a continuous delivery pipeline in Jenkins, from modeling the pipeline to integrating the software.
 Cargo pallets (source: Pixabay)
If you read many websites talking about assembling a pipeline with Jenkins and other technologies, you may get the feeling that doing this requires a mixture of deep research, extensive trial-and-error, cryptic command line invocations, black magic, and wishful thinking.
While not quite that bad, it can be difficult to navigate through the process without a guide and some examples of what to do (and what not to do). This is especially true given the different dimensions involved in putting together a Continuous Delivery pipeline. In this article, you’ll learn about the basics for setting up a Continuous Delivery pipeline in Jenkins, from modeling the pipeline to integrating the software.

Learn faster. Dig deeper. See farther.
First, there are the stages of the pipeline itself. The figure below shows a high-level view of a typical pipeline we can assemble with Jenkins.

We can use Jenkins to model the parts of each section as a job and then connect the jobs together to form the stages.
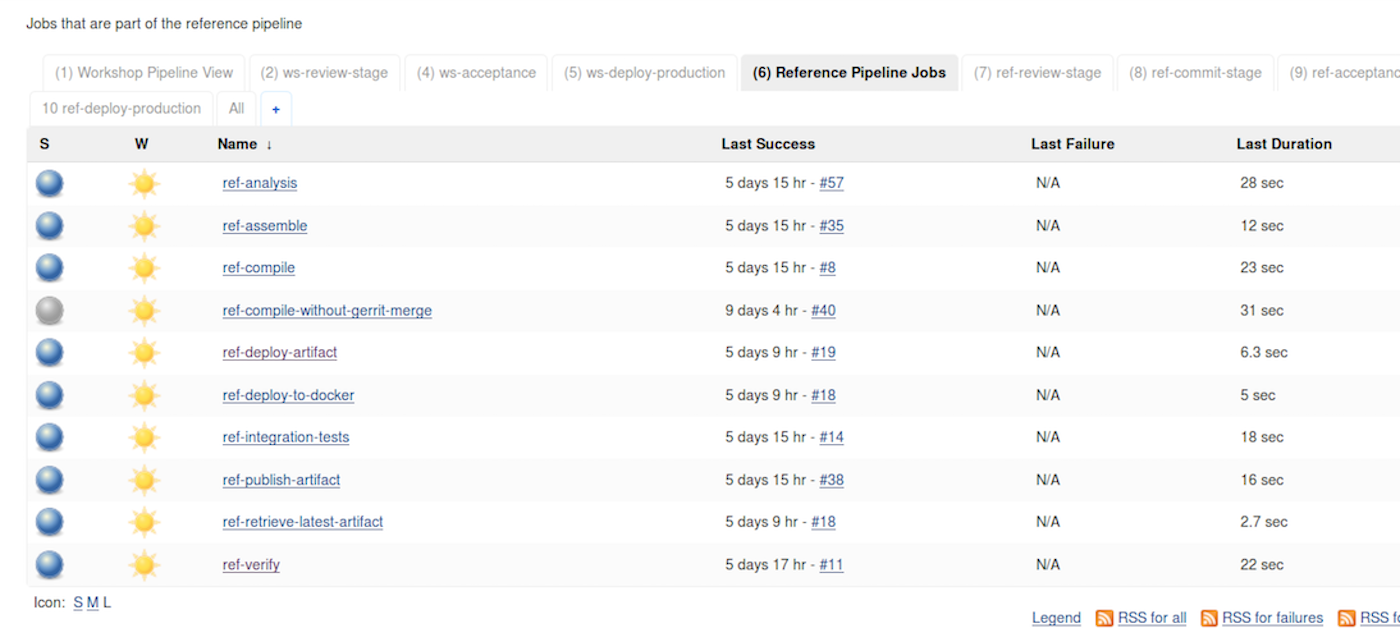
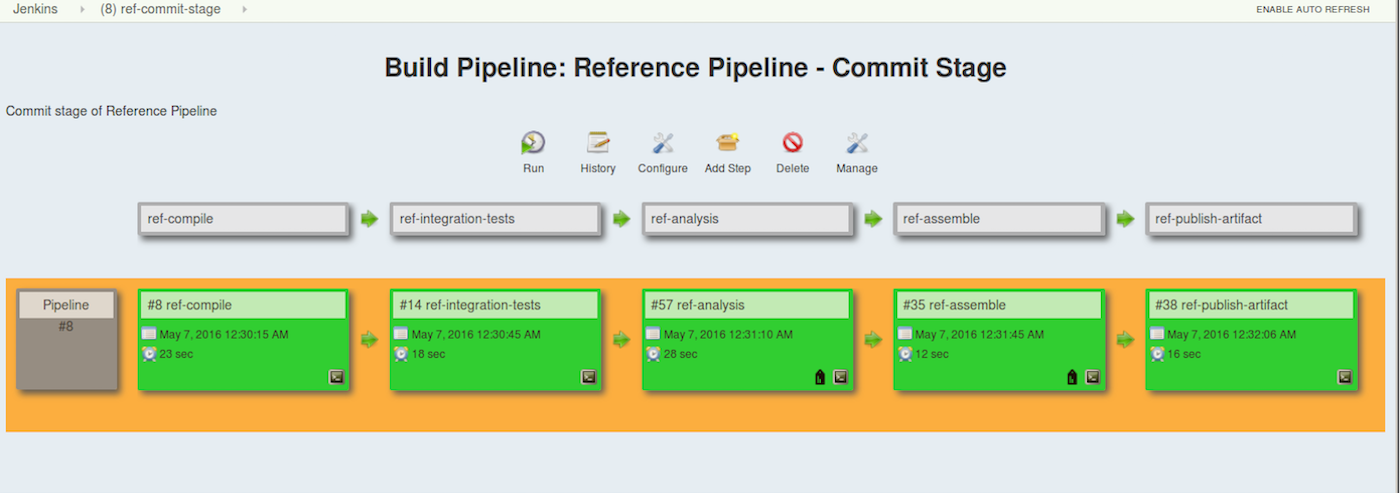
And even to see it in a more graphical form.
To implement the functionality for the jobs that make up the stages, we can leverage the many points of integration that Jenkins provides with other technologies—from very specific plug-ins to invoking external scripts. The trick lies in knowing how to integrate the right technology for each part and connect the parts together.
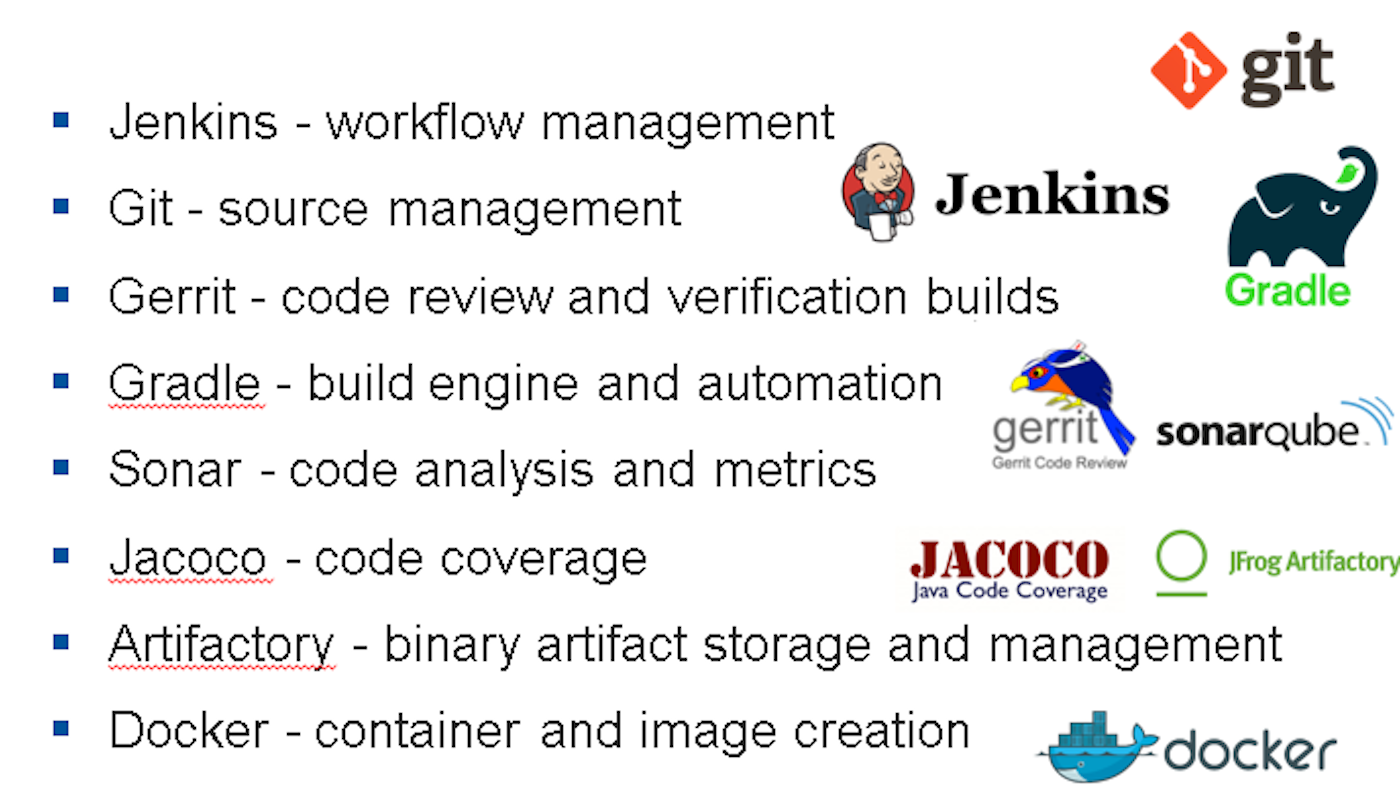
The core technologies (in addition to Jenkins) that we can use to produce a pipeline that matches the figures above are:
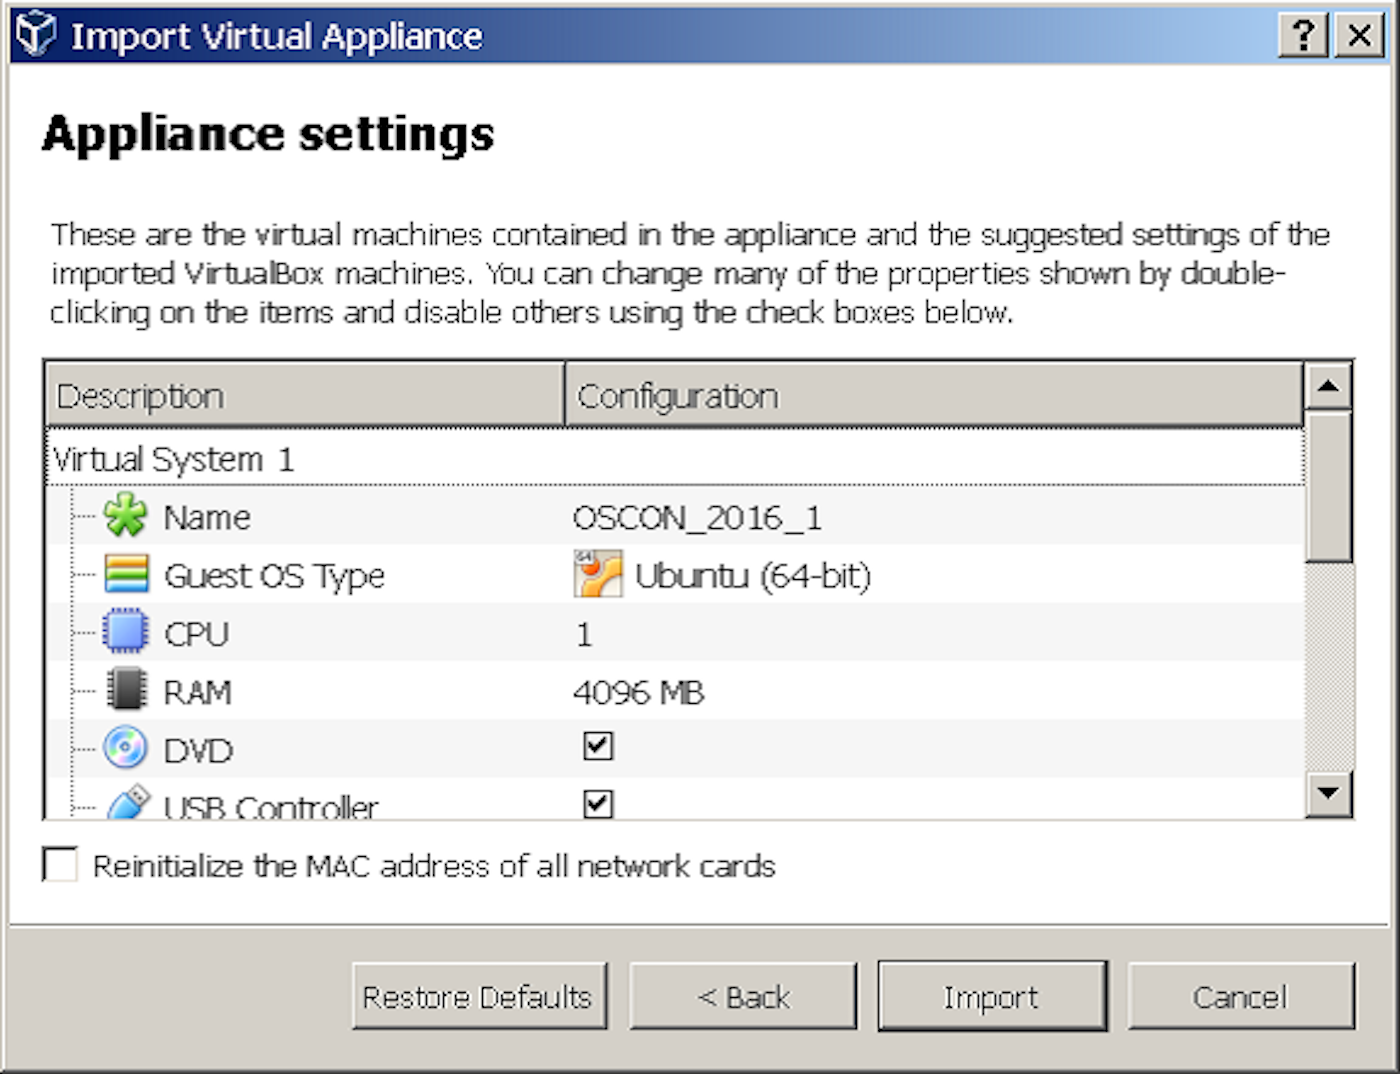
Of course, the other part of the setup for this is getting all of these technologies installed and co-existing on the same system. The easiest way to manage that is to work on a virtual system such as a VirtualBox VM in a simple Linux environment. Having an image already setup with all the pieces installed allows for focusing on how you connect the pieces rather than struggling through technology setup. (Setup here includes configuring the locations of the different applications in Jenkins so individual jobs can use them.)
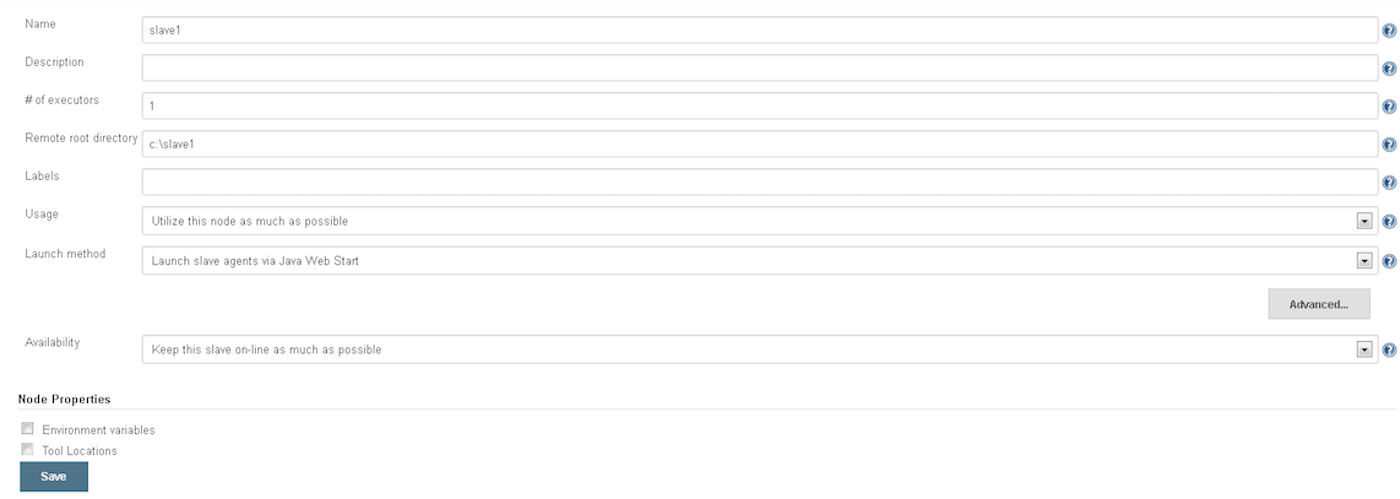
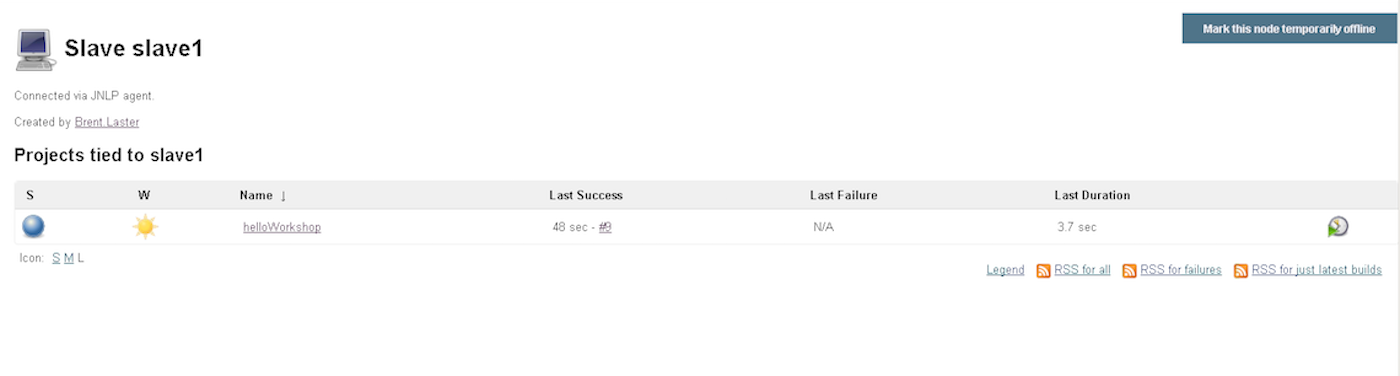
With Jenkins up and running and configured to have access to the different applications, it’s important to consider how the work of the pipeline will be distributed—for example, are there any other operating systems besides the host that need to execute jobs. As a best practice, setting up one or more Jenkins slave nodes to actually run the jobs is recommended.
From this point, with our foundation in place, putting the pipeline together becomes mainly a process of creating Jenkins jobs and filling in the configuration that includes how to interface through plugins to the applications appropriate for that step, defining build steps, and setting up any post-build processing that needs to be done.
Second only to Jenkins in all of this is our leveraging of Gradle as a “build automation” tool. Gradle’s modular approach of breaking work up into projects and tasks and its ease of convention over configuration to limit the amount of specification makes it a natural choice to handle many of our underlying pipeline tasks with Jenkins invoking and monitoring it to execute the workflow.
We can use Gradle’s inheritance characteristics to create new build and test configurations. For example, we can derive an integration test configuration from Gradle’s built-in test configuration using Gradle’s sourceSets functionality.
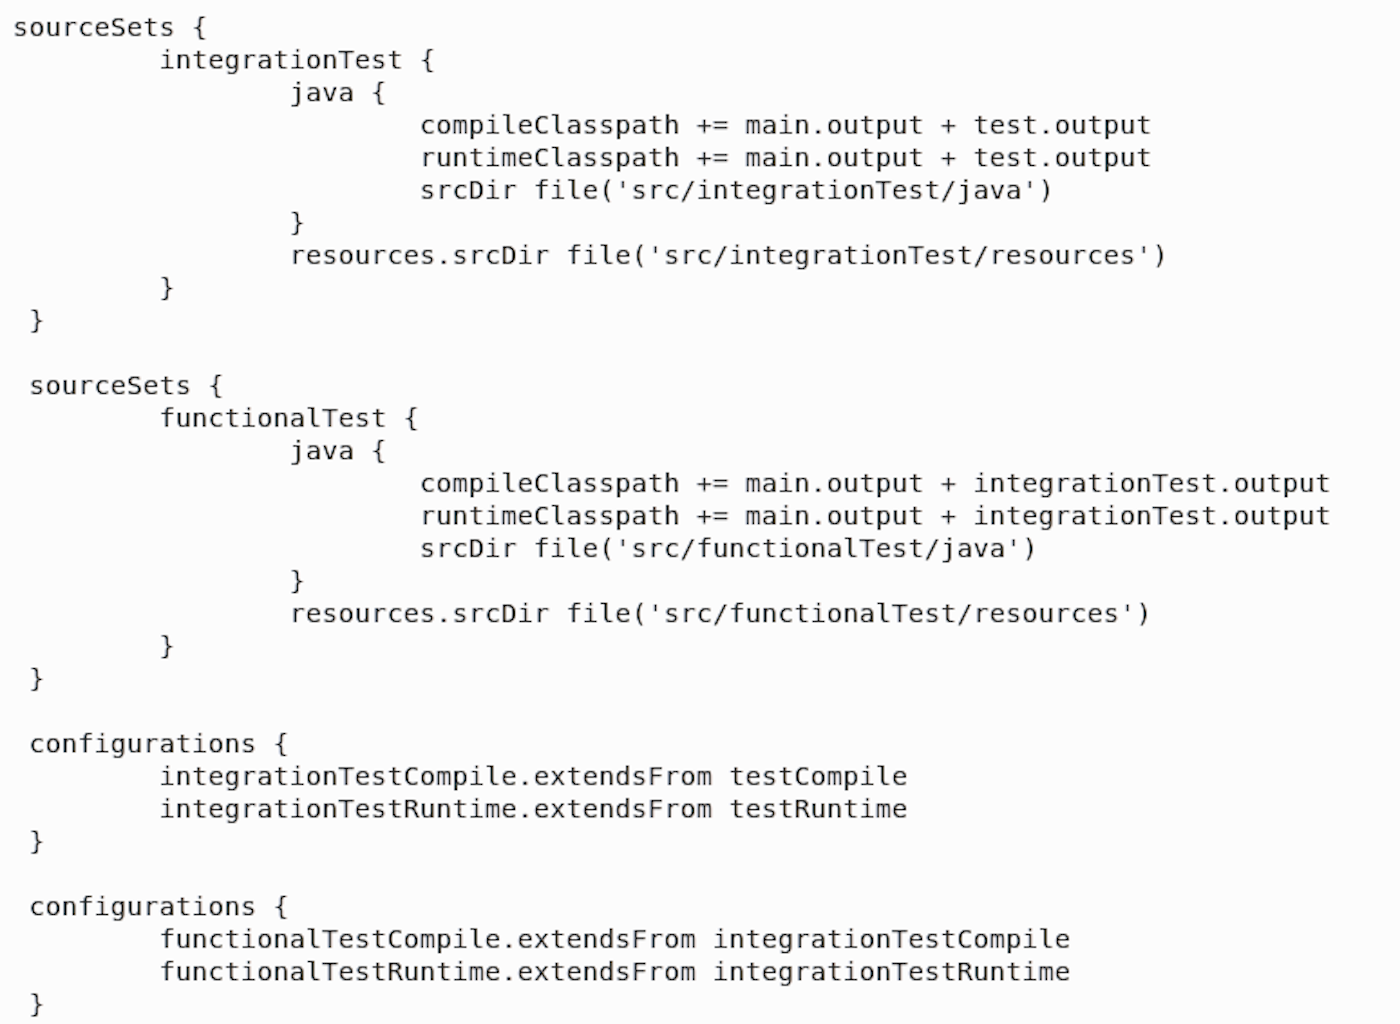
With the configurations defined and appropriate tasks created, we can use the combination of Jenkins and Gradle to execute the appropriate step.

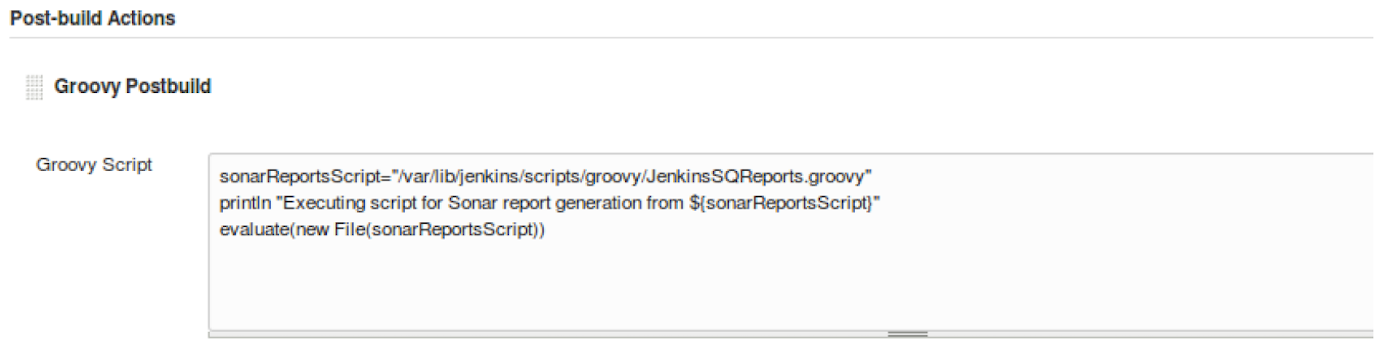
For some pieces, Jenkins and its array of plugins may be missing the custom functionality we need. We can still use Jenkins to run custom scripts for us to make things work the way we want.
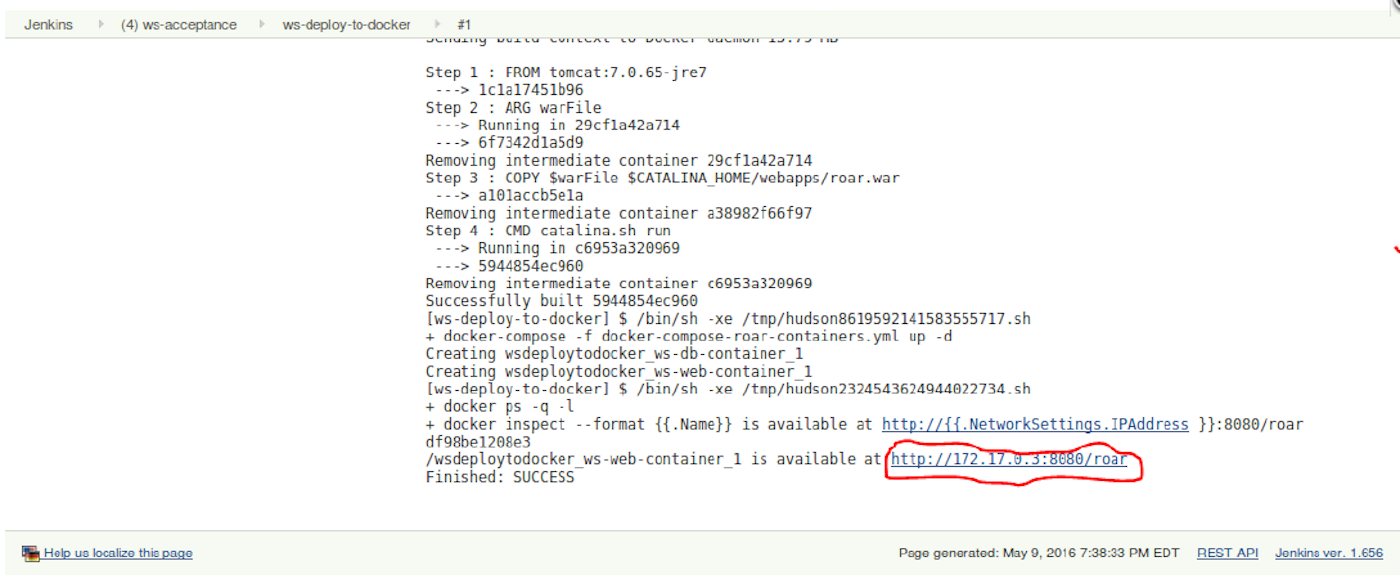
We can extend this to taking things we create via Jenkins and deploying them to test or production environments such as Docker.
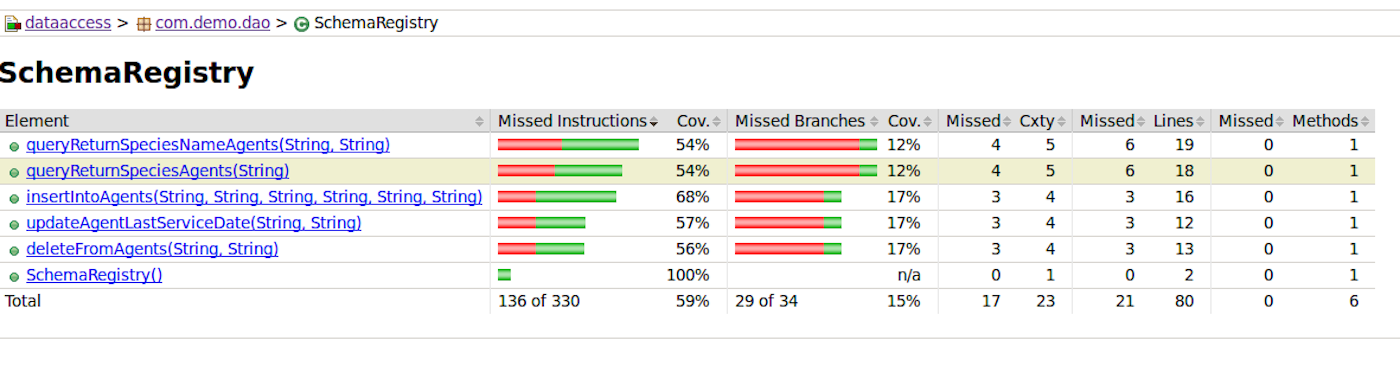
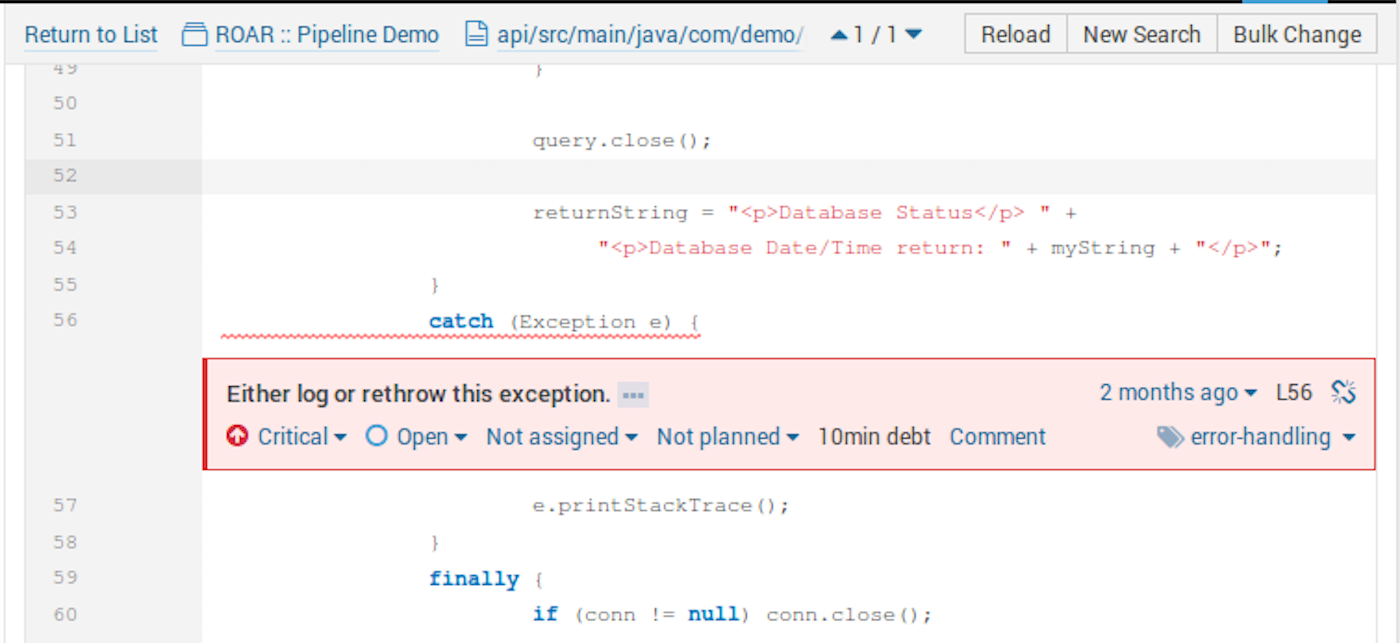
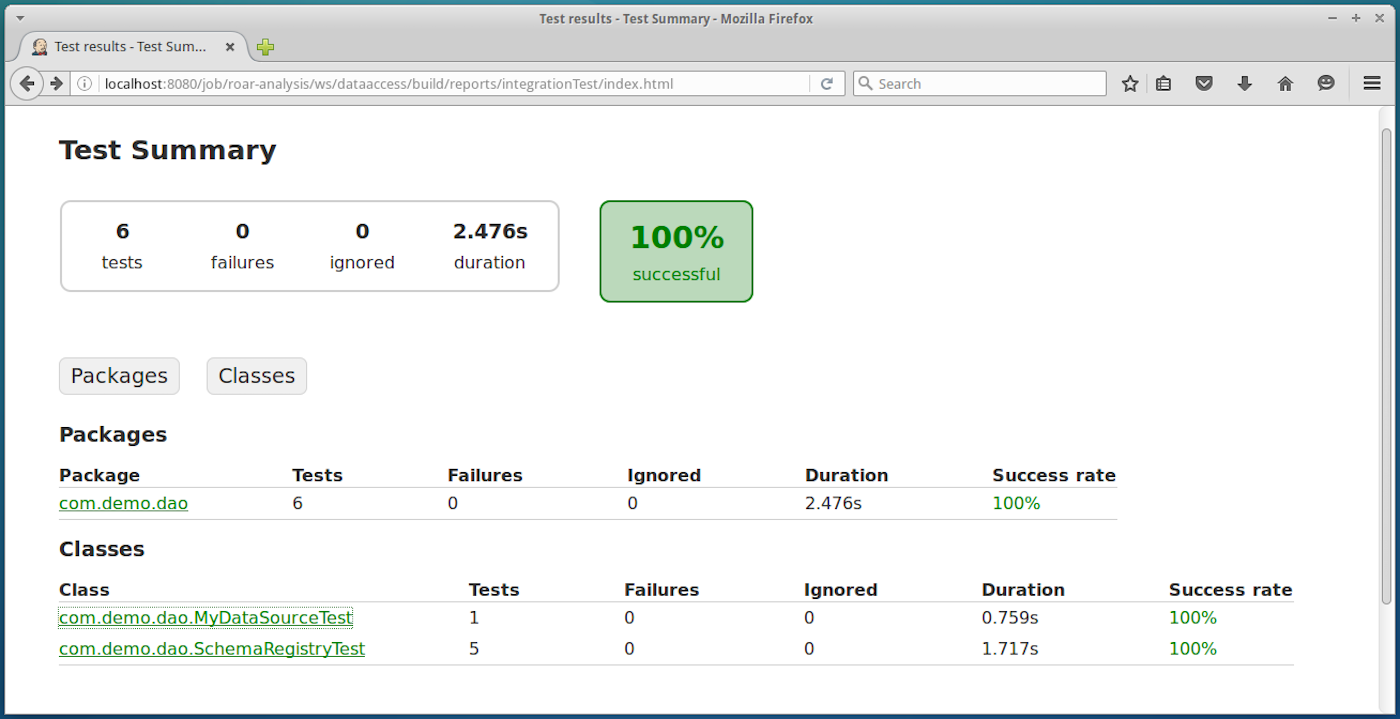
Throughout all of this, Jenkins and its family of plugins can provide integrated and web-based reports so we can see the quality of our code as it moves through the pipeline.

Once it’s setup and working, a Continuous Delivery pipeline can provide immense value in automating, monitoring, and reporting on your code as it makes its way to production readiness. There is as much value in keeping bugs and bad code out as there is in quickly processing the good code and having a sense of certainty that it has been through standard processes, verification, and passes your quality standards.
These kinds of pipelines can be complex to setup. For most people, trying to make everything work together can be a laborious process. If that’s the case, the best approach is to work with someone who has done this before and have them guide you through the process and provide an existing environment with the tools and documentation.