TensorFlow for mobile poets
Running your image classifier in your own iOS application.
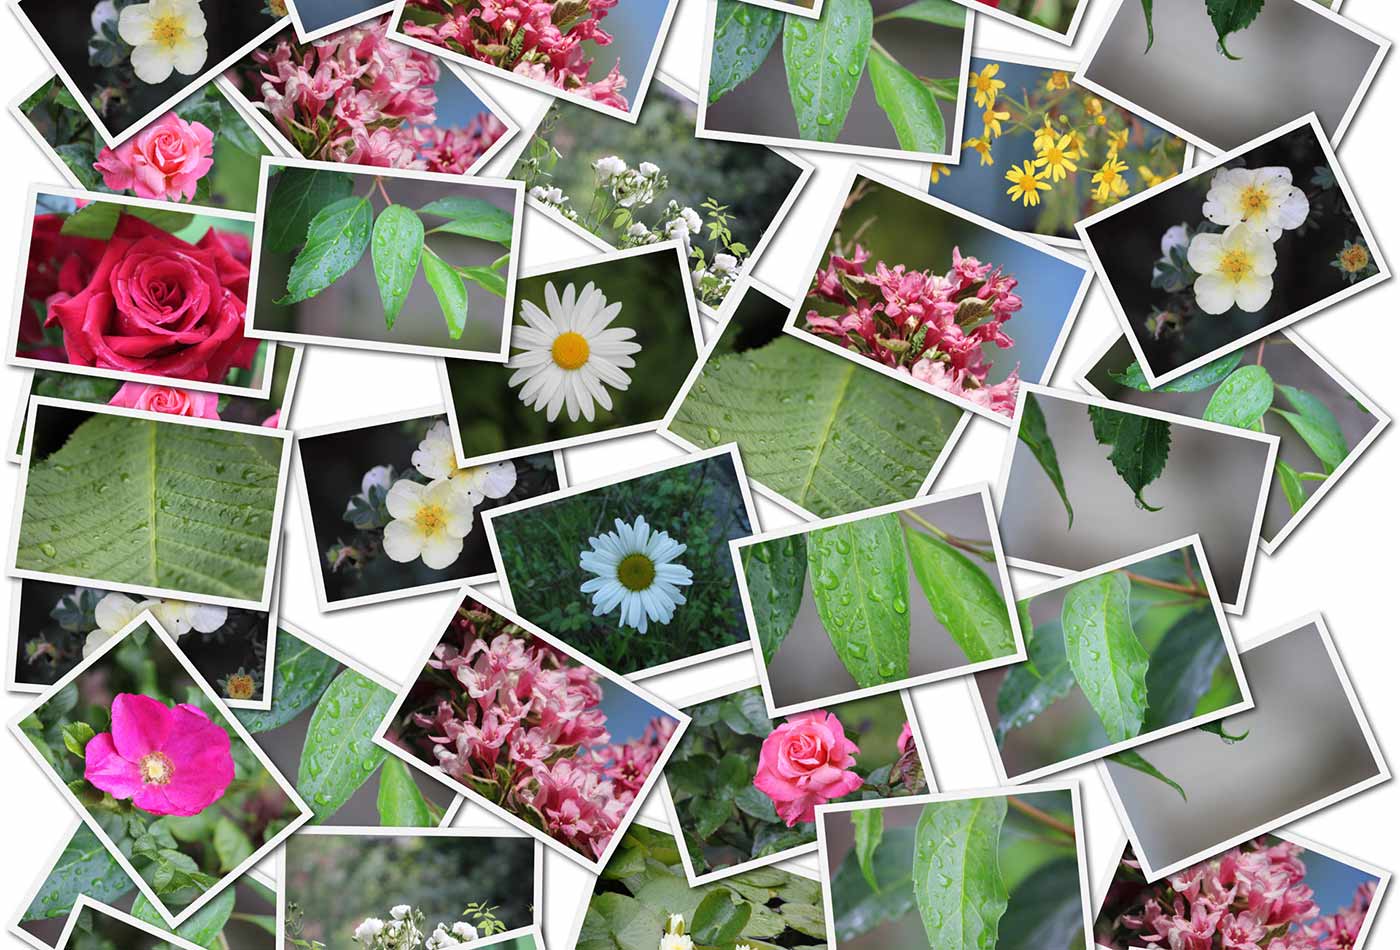 Flower and leaf photo collage. (source: PublicDomainPictures.net)
In TensorFlow for Poets, I showed how you could train a neural network to recognize objects using your own custom images. The next step is getting that model into users’ hands, so in this tutorial, I’ll show you what you need to do to run it in your own iOS application.
You’ll find written instructions in this post, along with a screencast with commentary showing exactly what I am doing.

Learn faster. Dig deeper. See farther.
I’m assuming you’ve already completed TensorFlow for Poets, so you should have Docker installed and a tf_files folder in your home directory that contains a retrained_graph.pb file containing your model. If you don’t, you’ll need to work through that example to build your own network.
As a first step, open the Docker QuickStart Terminal and start a new docker container using the latest Docker image. This tutorial relies on some newer features of TensorFlow, so the v0.8 image used for the original TensorFlow for Poets won’t work.
docker run -it -p 8888:8888 -v $HOME/tf_files:/tf_files tensorflow/tensorflow:nightly-devel
You should find yourself in a new shell where the prompt begins with root@ and ends with a ‘#’, indicating you’re running inside the Docker image. To make sure things are set up correctly, run this ls -lah /tf_files/ and make sure that the retrained_graph.pb file appears.
Next, we’re going to make sure that the model is producing sane results at the start. Here I’m using the default flower images to test, but if you have trained on custom categories, substitute the image file with one of your own. The compilation process may take a few minutes, too, and if things are running too slowly, make sure you have updated the VirtualBox settings to take advantage of your machine’s memory and processors.
cd /tensorflow/
bazel build tensorflow/examples/label_image:label_image
bazel-bin/tensorflow/examples/label_image/label_image \
--output_layer=final_result \
--labels=/tf_files/retrained_labels.txt \
--image=/tf_files/flower_photos/daisy/5547758_eea9edfd54_n.jpg \
--graph=/tf_files/retrained_graph.pb
This should hopefully produce a sensible top label for your example, in the case of flowers with the daisy at the top. As we do further processing on the model file to prepare it for use in a mobile app, we’ll be using this command to make sure we’re still getting sensible results.
Mobile devices have limited amounts of memory and apps need to be downloaded, so by default, the iOS version of TensorFlow only includes support for operations that are common in inference and don’t have large external dependencies. You can see the list of supported ops in the tensorflow/contrib/makefile/tf_op_files.txt file. One of the operations that isn’t supported is DecodeJpeg, because the current implementation relies on libjpeg—which is painful to support on iOS and would increase the binary footprint.
While we could write a new implementation that uses iOS’s native image libraries, for most mobile applications we don’t need to decode JPEGs. This is because we’re dealing directly with camera image buffers.
Unfortunately, the Inception model we based our retraining on includes a DecodeJpeg operation. We normally bypass this by directly feeding the Mul node that occurs after the decode, but on platforms that don’t support the operation, you’ll see an error when the graph is loaded, even if the op is never called. To avoid this, the optimize_for_inference script removes all nodes that aren’t needed for a given set of input and output nodes.
The script also does a few other optimizations that help the speed, such as merging explicit batch normalization ops into the convolutional weights, thus reducing the number of calculations. Here’s how you run it:
bazel build tensorflow/python/tools:optimize_for_inference
bazel-bin/tensorflow/python/tools/optimize_for_inference \
--input=/tf_files/retrained_graph.pb \
--output=/tf_files/optimized_graph.pb \
--input_names=Mul \
--output_names=final_result
This creates a new file at /tf_files/optimized_graph.pb. To check that it hasn’t altered the output of the network, run label_image again on the updated model:
bazel-bin/tensorflow/examples/label_image/label_image \
--output_layer=final_result \
--labels=/tf_files/retrained_labels.txt \
--image=/tf_files/flower_photos/daisy/5547758_eea9edfd54_n.jpg \
--graph=/tf_files/optimized_graph.pb
You should see very similar results to the first time you ran label_image, since the underlying mathematical results should be preserved regardless of the changes made to streamline it.
The retrained model is still 87MB; that guarantees a large download size for any app that includes it. There are a lot of ways to reduce download sizes, but there’s one very simple approach that’s a big help without adding much complexity. Because Apple distributes apps in .ipa packages, all the assets are compressed using zip.
Usually models don’t compress well because the weights are all slightly different floating point values. Yet you can achieve much better compression by rounding all the weights within a particular constant to 256 levels, while still leaving them in floating-point format.
Applying these changes: gives more repetition for the compression algorithm to take advantage of; doesn’t require any new operators; and only reduces the precision by a small amount (typically less than a 1% drop).
Here’s how you call the quantize_graph script to apply these changes:
bazel build tensorflow/contrib/quantization/tools:quantize_graph
bazel-bin/tensorflow/contrib/quantization/tools/quantize_graph \
--input=/tf_files/optimized_graph.pb \
--output=/tf_files/rounded_graph.pb \
--output_node_names=final_result \
--mode=weights_rounded
If you look on disk, the raw size of the rounded_graph.pb file is the same at 87MB, but if you right click on it in the finder and choose “Compress,” you should see it results in a file that’s approximately 24MB. This difference reflects what size increase you’d see in a compressed .ipa on iOS or an .apk on Android.
To verify that the model is still working, run label_image again:
bazel-bin/tensorflow/examples/label_image/label_image \
--output_layer=final_result \
--labels=/tf_files/retrained_labels.txt \
--image=/tf_files/flower_photos/daisy/5547758_eea9edfd54_n.jpg \
--graph=/tf_files/rounded_graph.pb
This time, I would expect the results to show slightly more noticeable changes (thanks to the effects of the quantization), but the overall size and order of the labels should still be the same.
The final processing step we need to run is memory mapping. Because the buffers holding the model weight values are 87MB in size, the memory needed to load these into the app can put a lot of pressure on RAM in iOS, even before the model is run. This can lead to stability problems, as the OS can unpredictably kill apps that use too much memory. Fortunately, these buffers are read-only, so it’s possible to map them into memory in a way that the OS can easily discard them behind the scene when there is memory pressure, avoiding the possibility of crashes.
To support this, we need to rearrange the model so the weights are held in sections that can be easily loaded separately from the main GraphDef, though they’re all still in one file. Here is the command to do that:
bazel build tensorflow/contrib/util:convert_graphdef_memmapped_format
bazel-bin/tensorflow/contrib/util/convert_graphdef_memmapped_format \
--in_graph=/tf_files/rounded_graph.pb \
--out_graph=/tf_files/mmapped_graph.pb
One thing to watch out for is that the file on disk is no longer a plain GraphDef protobuf, so if you try loading it into a program like label_image that expects one, you’ll see errors. You need to load the model file slightly differently, which we’ll show in the iOS example below.
So far, we’ve been running all these scripts in Docker. For demonstration purposes, it’s a lot easier to run scripts in Docker, as installing the Python dependencies is more straightforward on Ubuntu than OS X.
Now, we’re going to switch to a native terminal so we can compile an iOS app that uses the model you’ve trained.
You’ll need Xcode 7.3 or later with the command line tools installed to build the app, which you can download from Apple. Once you have those, open up a new terminal window, download the TensorFlow source (using git clone https://github.com/tensorflow/tensorflow) to a folder on your machine. Replace ~/projects/tensorflow below with that location, then run the following commands to build the framework and copy your model files over:
cd ~/projects/tensorflow
tensorflow/contrib/makefile/build_all_ios.sh
cp ~/tf_files/mmapped_graph.pb tensorflow/contrib/ios_examples/camera/data/
cp ~/tf_files/retrained_labels.txt tensorflow/contrib/ios_examples/camera/data/
open tensorflow/contrib/ios_examples/camera/camera_example.xcodeproj
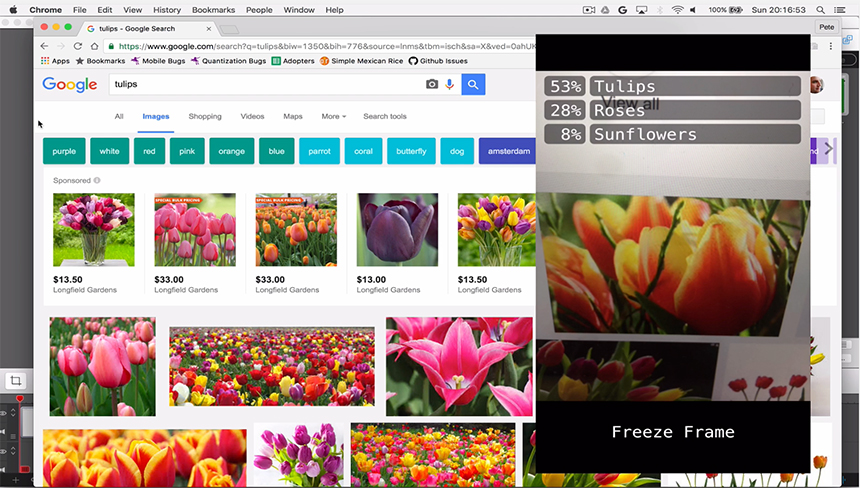
Check the terminal to make sure your compilation succeeded without errors. You should find the camera example project opened in Xcode. This app shows a live feed of your camera, together with the labels for any objects it has recognized, so it’s a good demo project for testing out a new model.
The terminal commands above should have copied the model files you need into the apps data folder, but you still need to let Xcode know that it should include them in the app. To remove the default model files, go to the left-hand project navigator pane in Xcode, select: imagenet_comp_graph_label_strings.txt and tensorflow_inception_graph.pb in the data folder. Delete them, choosing “Move to Trash” when prompted.
Next, open a Finder window containing the new model files, for example from the terminal like this:
open tensorflow/contrib/ios_examples/camera/data
Drag mmapped_graph.pb and retrained_labels.txt from that Finder window, into the data folder in the project navigator. Make sure the “Add to Targets” is enabled for CameraExample in the dialog’s checkbox. This should let Xcode know that it should include the files when you build the app, so if you see later errors about missing files, double check these steps.
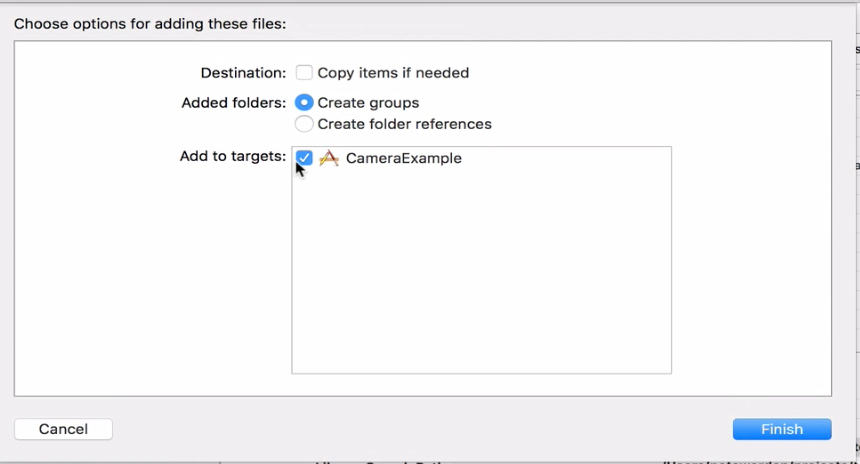
Figure 1:
We’ve got the files in the app; now, we need to update some other information. We update the name of the files to load, but also some other metadata about the size of the input images, the node names, and how to scale the pixel values numerically before feeding them in. To make those changes, open CameraExampleViewController.mm in Xcode, look for the model settings near the top of the file. Replace them with the following block:
C++
// If you have your own model, modify this to the file name, and make sure
// you've added the file to your app resources too.
static NSString* model_file_name = @"mmapped_graph";
static NSString* model_file_type = @"pb";
// This controls whether we'll be loading a plain GraphDef proto, or a
// file created by the convert_graphdef_memmapped_format utility that wraps a
// GraphDef and parameter file that can be mapped into memory from file to
// reduce overall memory usage.
const bool model_uses_memory_mapping = true;
// If you have your own model, point this to the labels file.
static NSString* labels_file_name = @"retrained_labels";
static NSString* labels_file_type = @"txt";
// These dimensions need to match those the model was trained with.
const int wanted_input_width = 299;
const int wanted_input_height = 299;
const int wanted_input_channels = 3;
const float input_mean = 128.0f;
const float input_std = 128.0f;
const std::string input_layer_name = "Mul";
const std::string output_layer_name = "final_result";
Finally, plug in and select your iOS device (this won’t run on the simulator because it needs a camera) and hit Command+R to build and run the modified example. If everything has worked, you should see the app start, display the live camera feed, and begin showing labels from your training categories.
To test it, find an example of the kind of objects you’re trying to recognize, point the camera at it and see if it is able to give it the right label. If you don’t have any physical objects handy, try doing an image search on the web and point it at your computer display.
Congratulations, you’ve managed to train your own model and run it on a phone!
Many of the same transformations can be used on Android or Raspberry Pi, and for all sorts of other models available in TensorFlow. They can be used for everything from natural language processing to speech synthesis. I am excited to see new apps emerge using the incredible capabilities of deep learning on devices, so I can’t wait to see what you come up with!
Related resources: