
 Photographic mosaic. (source: By J2thawiki on Wikimedia Commons)
 When I first started investigating the world of deep learning, I found it very hard to get started. There wasn’t much documentation, and what existed was aimed at academic researchers who already knew a lot of the jargon and background. Thankfully, that has changed over the last few years, with a lot more guides and tutorials appearing.
I always loved EC2 for Poets, though, and I haven’t seen anything for deep learning that’s aimed at as wide an audience. EC2 for Poets is an explanation of cloud computing that removes a lot of the unnecessary mystery by walking anyone with basic computing knowledge step-by-step through building a simple application on the platform. In the same spirit, I want to show how anyone with a Mac laptop and the ability to use the Terminal can create their own image classifier using TensorFlow, without having to do any coding.
I feel very lucky to be a part of building TensorFlow because it’s a great opportunity to bring the power of deep learning to a mass audience. I look around and see so many applications that could benefit from the technology by understanding the images, speech, or text their users enter. The frustrating part is that deep learning is still seen as a very hard topic for product engineers to grasp. That’s true at the cutting edge of research, but otherwise it’s mostly a holdover from the early days. There’s already a lot of great documentation on the TensorFlow site, but to demonstrate how easy it can be for general software engineers to pick up, I’m going to present a walk-through that takes you from a clean OS X laptop all the way to classifying your own categories of images. You’ll find written instructions in this post, along with a screencast showing exactly what I’m doing.
Docker
It’s possible to get TensorFlow running natively on OS X, but there’s less standardization around how the development tools like Python are installed, which makes it hard to give one-size-fits-all instructions. To make life easier, I’m going to use the free Docker container system, which will allow me to install a Linux virtual machine that runs on my MacBook Pro. The advantage is that I can start from a known system image, so the instructions are a lot more likely to work for everyone.
Installing Docker
There’s full documentation on installing Docker at docker.com, and it’s likely to be updated over time, but I will run through exactly what steps I took to get it running here.
- I went to docs.docker.com/mac/ in my browser.
- Step one of the instructions sent me to download the Docker Toolbox.
- On the Toolbox page, I clicked on the Mac download button.
- That downloaded a DockerToolbox-1.10.2.pkg file.
- I ran that downloaded pkg to install the Toolbox.
- At the end of the install process, I chose the Docker Quickstart Terminal.
- That opened up a new terminal window and ran through an installation script.
- At the end of the script, I saw ASCII art of a whale and I was left at a prompt.
- I went back to step one of the instructions, and ran the suggested command in the terminal:
docker run hello-world - This gave me output confirming my installation of Docker had worked:
Hello from Docker.
This message shows that your installation appears to be working correctly.
Installing TensorFlow
Now that I’ve got Docker installed and running, I can get a Linux virtual machine with TensorFlow pre-installed running. We create daily development images, and ones for every major release. Because the example code I’m going to use came in after the last versioned release, 0.7.1, we’ll have to do some extra work below to update the source code using git, but once 0.8 comes out you could replace the ‘0.7.1’ below with the 0.8.0 instead, and skip the ‘Updating the Code’ section. The Docker section in the TensorFlow documentation has more information.
To download and run the TensorFlow docker image, use this command from the terminal:
docker run -it b.gcr.io/tensorflow/tensorflow:0.7.1-devel
This will show a series of download and extraction steps. These are the different components of the TensorFlow image being assembled. It needs to download roughly a gigabyte of data, so it can take a while on a slow network connection.
Once that’s complete, you’ll find yourself in a new terminal. This is now actually the shell for the Linux virtual machine you’ve downloaded. To confirm this has been successful, run this command:
ls /tensorflow
You should see a series of directories, including a TensorFlow one and some .build files, something like this:

Optimizing Docker
Often Docker is just used for testing Web apps, where computational performance isn’t that important, so the speed of the processor in the virtual machine isn’t crucial. In our example, we’re going to be doing some very heavy number-crunching, though, so optimizing the configuration for speed is important.
Under the hood, Docker actually uses VirtualBox to run its images, and we’ll use its control panel to manage the setup. To do that, we’ll need to take the following steps:
- Find the VirtualBox application on your Mac. I like to use spotlight to find and open it, so I don’t have to hunt around on the file system.
- Once VirtualBox is open, you should see a left-hand pane showing virtual machines. There should be one called ‘default’ that’s running.
- Right-click on ‘default’ to bring up the context menu and chose ‘Close->ACPI Shutdown’. The other close options should also work, but this is the most clean.
- Once the shutdown is complete, ‘default’ should have the text ‘Powered off’ below it. Right click on it again and choose ‘Settings…’ from the menu.
- Click on the ‘System’ icon, and then choose the ‘Motherboard’ tab.
- Drag the ‘Base Memory’ slider as far as the green section goes, which is normally around 75% of your total laptop’s memory. So in my case, it’s 12GB, because I have a 16GB machine.
- Click on the ‘Processor’ tab, and set the number of processors higher than the default of 1. Most likely on a modern MacBook Pro 4 is a good setting, but use the green bar below the slider as a guide.
- Click ‘OK’ on the settings dialog.
- Right-click on ‘default’ and choose ‘Start->Headless Start’.
You should find that your terminal was kicked out of the Linux prompt when you stopped the ‘default’ box, but now that you’ve restarted it, you can run the same command to access it again:
docker run -it b.gcr.io/tensorflow/tensorflow:0.7.1-devel
The only difference is that now the virtual machine will have access to a lot more of your laptop’s computing power, so the example should run a lot faster!
Downloading images
The rest of this walk-through is based on the image-retraining example on the TensorFlow site. It shows you how to take your own images organized into folders by category and use them to quickly retrain the top layer of the Inception image recognition neural network to recognize those categories. To get started, the first thing you need to do is get some example images. To begin, go to the terminal and enter the ‘exit’ command if you still see the ‘root@…’ prompt that indicates you’re still in the Linux virtual machine.
Then run the following commands to create a new folder in your Downloads directory to hold training images, and download and extract the flower photos:
cd $HOME
mkdir tf_files
cd tf_files
curl -O http://download.tensorflow.org/example_images/flower_photos.tgz
tar xzf flower_photos.tgz
open flower_photos
This should end up with a new finder window opening, showing a set of five folders:
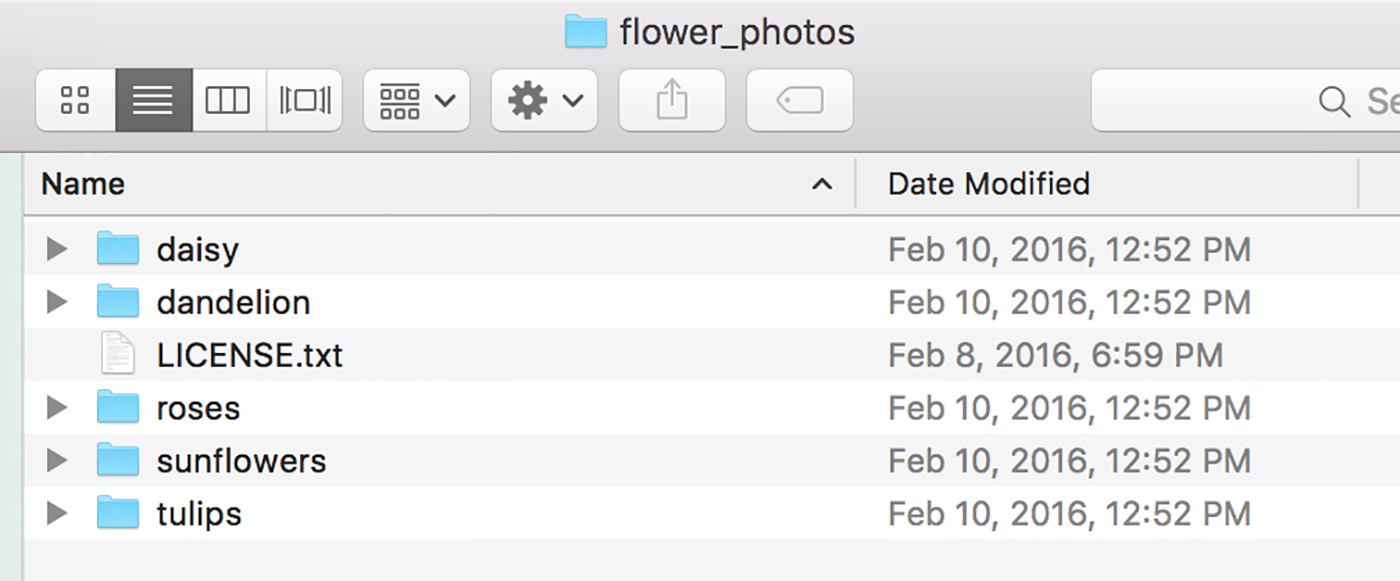
This means you’ve successfully downloaded the example flower images. If you look at how they’re organized, you should be able to use the same structure with classes you care about, just replacing the folder names with the category labels you’re dealing with, and populating them with photos of those objects. There’s more guidance on that process in the tutorial.
Running the VM with shared folders
Now that you’ve got some images to train with, we’re going to start up the virtual machine again, this time sharing the folder you just created with Linux so TensorFlow can access the photos:
docker run -it -v $HOME/tf_files:/tf_files b.gcr.io/tensorflow/tensorflow:0.7.1-devel
You should find yourself back in a Linux prompt. To make sure the file sharing worked, try the following command:
ls /tf_files/flower_photos
You should see a list of the flower folders, like this:
root@2c570d651d08:~# ls /tf_files/flower_photos
LICENSE.txt daisy dandelion roses sunflowers tulips
root@2c570d651d08:~#
Updating the code
For this example, we need the very latest code since it’s just been added. Unfortunately, getting it is a little involved, with some use of the source control program git. I’ll walk through the steps below.
Pulling the code requires a default email address, which you can set to anything, since we’re not planning on pushing any changes back.
git config --global user.email "you@example.com"
git config --global user.name "Your Name"
Now you should be able to pull the latest source.
cd /tensorflow/
git pull origin master
You’ll find yourself in a vim window. Just type ‘:quit’ to exit.
You should now have fully up-to-date code. We want to sync it to a version we know works, though, so we’ll run this command:
git checkout 6d46c0b370836698a3195a6d73398f15fa44bcb2
Building the code
If that worked, the next step is to compile the code. You may notice there’s some optimization flags in the command that help speed it up on processors with AVX, which almost all modern OS X machines have.
cd /tensorflow/
bazel build -c opt --copt=-mavx tensorflow/examples/image_retraining:retrain
This part can take five to 10 minutes, depending on the speed of your machine, as it’s compiling the full source code for TensorFlow. Don’t worry if you see a lot of warnings; this is normal (though we’re working on reducing them going forward).
Running the code
I can now run the retraining process using this command:
bazel-bin/tensorflow/examples/image_retraining/retrain \
--bottleneck_dir=/tf_files/bottlenecks \
--model_dir=/tf_files/inception \
--output_graph=/tf_files/retrained_graph.pb \
--output_labels=/tf_files/retrained_labels.txt \
--image_dir /tf_files/flower_photos
You’ll see a message about downloading the Inception model, and then a long series of messages about creating bottlenecks. There’s around 3,700 photos in total to process, and my machine does around 200 a minute, so it takes around 20 minutes in total. If you want to know more about what’s happening under the hood while you wait, you can check out the tutorial for a detailed explanation.
I’ve changed the default /tmp destination for things like the output graph and cached bottlenecks to the shared /tf_files folder so that the results will be accessible from OS X and will be retained between different runs of the virtual machine.
Once the bottlenecks are cached, it will then go into the training process, which takes another five minutes or so on my laptop. At the end, you should see the last output line giving the final estimated accuracy, which should be around 90%. That means you’ve trained your classifier to guess the right flower species nine times out of 10 when shown a photo!
Using the classifier
The training process outputs the retrained graph into /tmp/output_graph.pb, and to test it out yourself you can build another piece of sample code. The label_image example is a small C++ program that loads in a graph and applies it to a user-supplied image. Give it a try like this:
bazel build tensorflow/examples/label_image:label_image && \
bazel-bin/tensorflow/examples/label_image/label_image \
--graph=/tf_files/retrained_graph.pb \
--labels=/tf_files/retrained_labels.txt \
--output_layer=final_result \
--image=/tf_files/flower_photos/daisy/21652746_cc379e0eea_m.jpg
You should see a result showing that it identified a daisy in that picture; though, because the training process is random, you may occasionally have a model that makes a mistake on the image. Try it with some of the other photos to get a feel for how it’s doing.
Next steps
The first thing you’ll probably want to do is train a classifier for objects you care about in your application. This should be as simple as creating a new folder in your Downloads/tf_images directory, putting subfolders full of photos in it, and re-running the classifier commands. You can find more detailed advice on tuning that process in the tutorial.
Finally, you’ll want to use this in your own application! The label_image example is a good template to look at if you can integrate C++ into your product, and we even support running on mobile, so check out the Android sample code if you’d like to run on a smart phone.
Thanks for working through this process with me. I hope it’s inspired you to think about how you can use deep learning to help your users, and I can’t wait to see what you build!