Testing in Swift
Learn about automating the tedious yet essential task of testing a complex app in this excerpt from Learning Swift.
 Eye test (source: Pixabay)
Testing
While simple apps are easy to test, complex apps get very difficult to properly test. It’s simple enough to add some code and then check that it works; but the more code you add, the more you increase the chance that a change in one part of the code will break something elsewhere. In order to make sure that all of the app works, you need to test all of the app. However, this has many problems:
-
It’s tedious and boring, which means you’ll be less likely to do it thoroughly.

Learn faster. Dig deeper. See farther.
-
Because it’s repetitious, you’ll end up testing a feature in the same way every time, and you may not be paying close attention.
-
Some problems appear only if you use the app in a certain way. The more specific the use case, the less you’ll test it.
To address these problems, modern software development heavily relies on automated testing. Automated testing solves these problems immediately, by running the same tests in the same way every time, and by checking every step of the way; additionally, automated testing frees up your mental workload a lot.
There are two types of automated tests in Xcode: unit tests and user interface tests.
Unit Testing
Unit tests are small, isolated, independent tests that run to verify the behavior of a specific part of your code. Unit tests are perfect for ensuring that the output of a method you’ve written is what you expect. For example, the code that we wrote all the way back in not available to load a location from JSON is very straightforward to test: given some valid JSON containing values for lat and lon, we expect to be able to create a CLLocationCoordinates; additionally, and just as importantly, if we give it invalid JSON or JSON that doesn’t contain those values, we should expect to fail to get a coordinate.
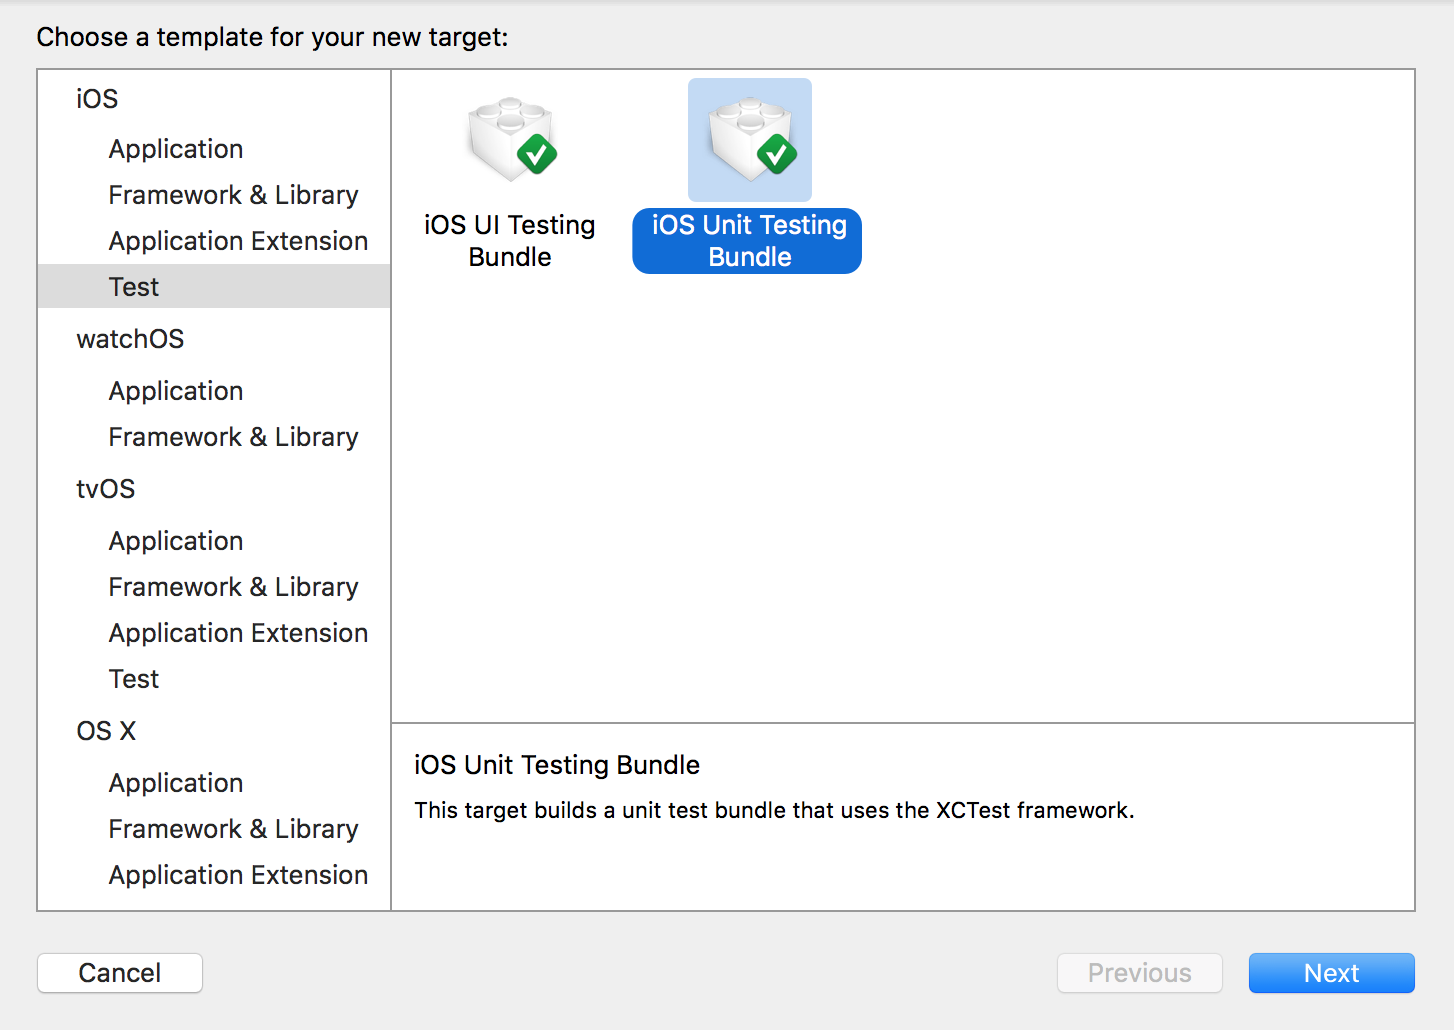
Unit tests are placed inside a unit test bundle. You can choose to either include unit tests when you create the project, or you can add one to an existing project by opening the File menu and choosing New→Target, then opening the Tests section and choosing Unit Tests (see Figure 1).
Test bundles contain one or more test cases; each test case is actually a subclass of XCTestCase, which itself contains the individual unit tests. A test case looks like this:
  func testDocumentTypeDetection() {

      // Create an NSFileWrapper using some empty data
      let data = NSData()
      let document = NSFileWrapper(regularFileWithContents: data)

      // Give it a name
      document.preferredFilename = "Hello.jpg"

      // It should now think that it's an image
      XCTAssertTrue(document.conformsToType(kUTTypeImage))

  }
The tests inside XCTestCase class are its methods. When Xcode runs the tests, which we’ll show in a moment, it first locates all subclasses of XCTestCase, and then finds all methods of each subclass that begin with the word test. Each test is then run: first, the test case’s setUp method is run, then the test itself, followed by the test case’s tearDown method.
You’ll notice the use of the XCTAssertTrue functions. This method is one of many XCTAssert functions, all of which test a certain condition; if it fails, the entire test fails, and Xcode moves on to the next test. You can find the entire list of XCTAssert functions in the Xcode testing documentation.
To run the unit test for your current target, press ⌘U, or click the icon at the left of the top line of a specific test, as shown in Figure 2.

Xcode will launch your app, perform the test(s), and report back on which tests, if any, failed.
UI Testing
To get a complete picture of how your app works, unit tests on their own aren’t enough. Testing a single isolated chunk of your code, while extremely useful, isn’t enough to give you confidence that the app itself, with all of its interacting components, is being tested. For example, it’s simply not feasible to write a concise unit test for “create a document, edit it, and save it.”
Instead, you can use UI tests to verify that the app is behaving the way you want it to as it’s used. A UI test is a recording of how the user interacts with the user interface; however, these recordings are done in a very clever way. While a UI test is being recorded, Xcode notes every interaction that you perform, and adds a line of code that reproduces that step.
The result is code that looks like this (we’ve added comments to describe what’s going on):
  func testCreatingSavingAndClosingDocument() {

      // Get the app
      let app = XCUIApplication()

      // Choose File->New
      let menuBarsQuery = XCUIApplication().menuBars
      menuBarsQuery.menuBarItems["File"].click()
      menuBarsQuery.menuItems["New"].click()

      // Get the new 'Untitled' window
      let untitledWindow = app.windows["Untitled"]

      // Get the main text view
      let textView = untitledWindow.childrenMatchingType(.ScrollView)
          .elementBoundByIndex(0).childrenMatchingType(.TextView).element

      // Type some text
      textView.typeText("This is a useful document that I'm testing.")

      // Save it by pressing Command-S
      textView.typeKey("s", modifierFlags:.Command)

      // The save sheet has appeared; type "Test" in it and press Return
      untitledWindow.sheets["save"].childrenMatchingType(.TextField)
          .elementBoundByIndex(0).typeText("Test\r")

      // Close the document
      app.windows["Test"].typeKey("w", modifierFlags:.Command)
  }
UI tests are run the same way as your unit tests. When they’re run, the system will take control over your computer and perform the exact steps as laid down in the test. This ensures that your app is tested in the exact same way, every time.
Tip
You can also record your interactions with an app directly into a UI test. This is extremely useful, since it means that you don’t have to learn the API involved—you can just use the app as you would normally, and Xcode will note what you did. For more information, see Writing Tests in the Xcode documentation.