Chapter 20. Deployment Workflow
There are many different development tools that you can use to develop your AIR applications. Adobe's various software packages include built-in support for deploying your project as a packaged AIR file. This chapter leads you through exploring these workflows, as well as learning how the command-line tools included with the Flex 3 SDK make it possible to develop and deploy AIR applications using development tools other than the ones offered by Adobe.
Deploying from the Flex Builder 3 IDE
Flex Builder provides a fairly straightforward, step-by-step process for deploying your project as an AIR file. To give Flex Builder a try at deploying your project, follow these steps:
Click the Export Release Build button. This button is located in Flex Builder's toolbar to the right of the Profile button. The Export Release Build button initiates the deployment process and a new window appears, as shown in Figure 20.1.
In the Export to file field, specify the AIR file's name if you would like to use a name other than the default.
Once you are satisfied with the settings, click Next. A new window for creating digital signatures appears, as seen in Figure 20.2.
Unless you already have a certificate ready to go, click Create to the right of the Certificate drop-down list. A window for creating a self-signed digital certificate appears, as shown in Figure 20.3.
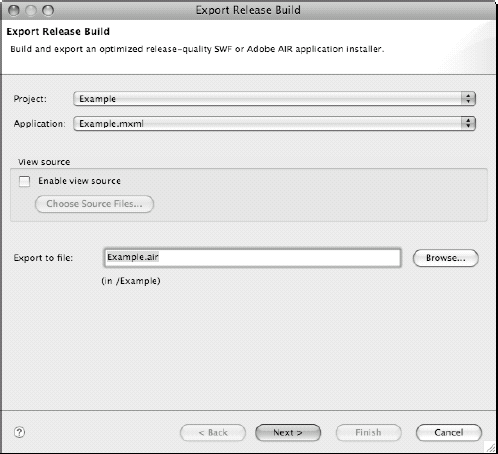
Figure 20.1. The ...
Get Adobe® AIR™ Bible now with the O’Reilly learning platform.
O’Reilly members experience books, live events, courses curated by job role, and more from O’Reilly and nearly 200 top publishers.

