
372
Compositing Techniques
LESSON 13
5 Use Motion on it to move it the lower right, spin it 180 degrees and change the
Drop Shadow Direction to have it fall at the correct angle (add 180 to whatever setting
you chose for the rst clip).
Your composited shot should look like the next gure.
Using matte keys: Lesson 13-5
Matte keys cut “holes” in one clip to allow portions of another clip to show through, or
create something like cutout gures you can place on top of other clips.
e nomenclature can be confusing. Matte keys are not the same as color mattes like the
orange matte you used earlier in this lesson. However matte keys generally use matte
graphics that you create to de ne the areas you want to make transparent or opaque.
ere are two basic types of matte keys:
• Garbage—Four-, eight- or 16-sided polygons, so named because you typically use
them to remove something you don’t want in the video. You move their vertices to
de ne the outline of an area you want to display.
• Graphic—You create a shape that you want to key out or key in using a graphic or
another clip. ese include: Di erence, Image, Remove, and Track.
In this mini-lesson you will work with the Sixteen-Point Garbage Matte Key and the
Track Matte Key. I’ll brie y explain Di erence, Image and Remove. You’ll start by trying
to use the Luma Key. You’ll see it has some limitations that a garbage matte can help
you overcome.
1 Drag Photo 13e and Photo 13g to Video 1 and Video 2 (place them a er the clips
you worked on in previous lessons).
ADOBE PREMIERE PRO 2.0
373
Classroom in a Book
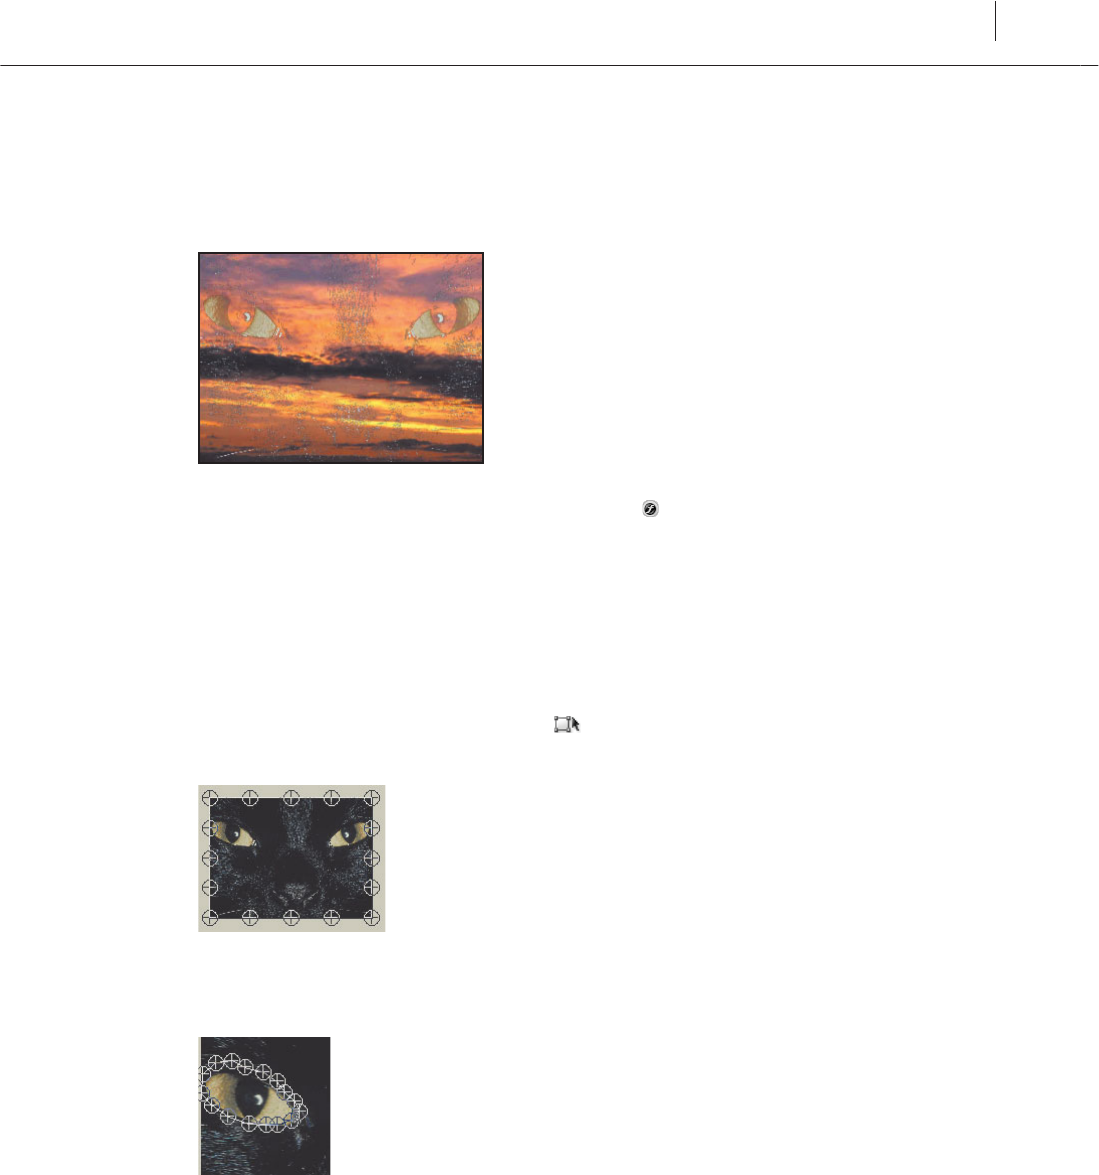
2 Apply Luma to the clip on Video 2 and adjust the parameters to attempt to show
only the cat’s eyes.
No matter what reshold and Cuto parameters you select, the white highlights on the
cat’s fur show through the sunset.
3 Toggle the Luma Key o by clicking the little ( ) next to its name in the E ect
Controls panel.
4 Drag Photo 13g from the Project panel to Video 3 above the other two clips.
You will use a garbage matte key on the clips on the Video 2 and 3 tracks to have only
the cat’s eyes display in the sky.
5 Drag the Sixteen-Point Garbage Matte Key to the clip on Video 3.
6 Click the e ect’s Transform button (
) (to the le of the e ect name) in the E ect
Controls panel to highlight its 16 crosshair target handles in the Program Monitor.
7 Drag the 16 handles to make a rough outline of the cat’s right eye (you’ll ne-tune
it later).
374
Compositing Techniques
LESSON 13
8 Click the clip in Video 2 to select it, drag the Sixteen-Point Garbage Matte Key to it
and follow the same procedure to outline the cat’s le eye.
Note: When you select the second clip, the cat looks unchanged. In fact what you’re seeing
is the cat’s right eye from the clip in Video 3 and the rest of the cat in the clip on Video
2 revealed when you created the garbage matte cut-out on Video 3. e reason you are
applying this garbage matte to two instances of the same clip is because you can’t apply
this e ect to the same clip twice. Once you create a cut-out, you can’t create another one
elsewhere in the same clip.
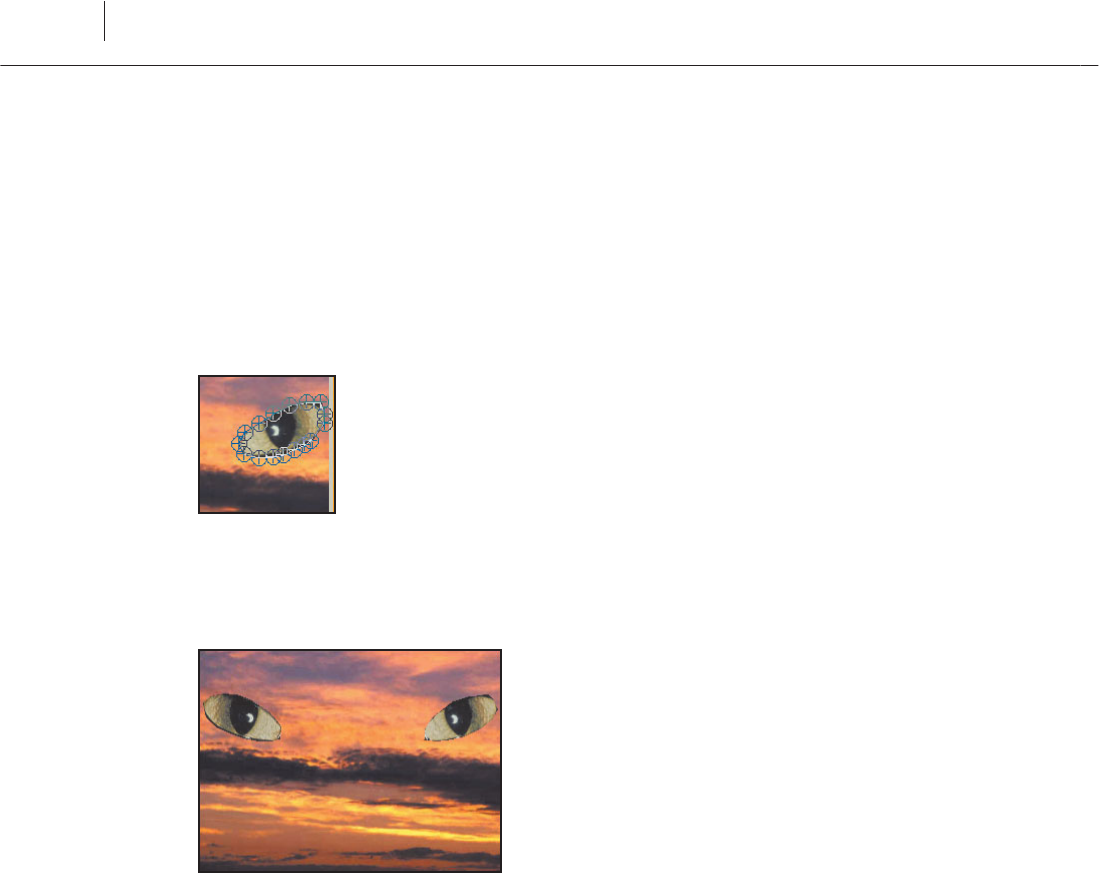
9 Fine-tune the placement of the garbage matte’s vertices using the View Zoom Level
in the Program Monitor to zoom in on the cat’s eyes. Try to remove the black areas
around the edges of the eyes.
Get Adobe® Premiere® Pro 2.0 now with the O’Reilly learning platform.
O’Reilly members experience books, live events, courses curated by job role, and more from O’Reilly and nearly 200 top publishers.

