144
Creating Cuts-only Videos
LESSON 5
16 Use the Source Monitor to create in- and out-points for Video 5m. I suggest
06;03 and 09;21.
17 Place the Timeline CTI between the rst and second clips (use the Page Up key).
18 Click the Insert button.
at does a standard Insert edit. It places the new clip at the CTI and shoves the
previous clip to its right farther down the sequence to make room.
19 Use the Source Monitor to create in- and out-points for Video 5n. I suggest
09;20 and 13;08.
20 Place the Timeline CTI between the second and third clips.
21 Click the Toggle Take Audio and Video button until you see the lmstrip
button (
). You will lay down video-only without changing the existing audio.
22 Click the Overlay button.
at covers the video portion of the previously placed third clip with this new clip but
does not change the audio. Play the sequence to see how the edit works.
Adjusting clips in the Trim panel: Lesson 5-5
e Trim panel is a very useful tool. You used it in Lesson 2 to do some quick Ripple
Edits. It also performs a so-called Rolling Edit. Its value is its large preview monitors,
precise controls and informative timecode displays.
Rolling and Rippling Edit behaviors
You apply a Ripple Edit to only one clip. It changes the length of your project as the rest
of the project slides over to accommodate the change. A Rolling Edit does not change the
length of your project. It takes place at an edit point between two clips: shortening one
and lengthening the other.
1 Continue with Lesson 5-4 or open Lesson 5-5.
2 Marquee select the clips in the Lesson 5-3 Sequence and press Delete.
3 Drag Video 5c and Video 5h to the Lesson 5-3 Sequence in the Timeline. You
worked with these clips in the Storyboard mini-lessons.
4 Place the CTI at the edit point between the two clips.
ADOBE PREMIERE PRO 2.0
145
Classroom in a Book
5 Click the Trim button ( —shortcut: Ctrl+T) in the lower right corner of the
Program Monitor.
is opens the Trim panel.
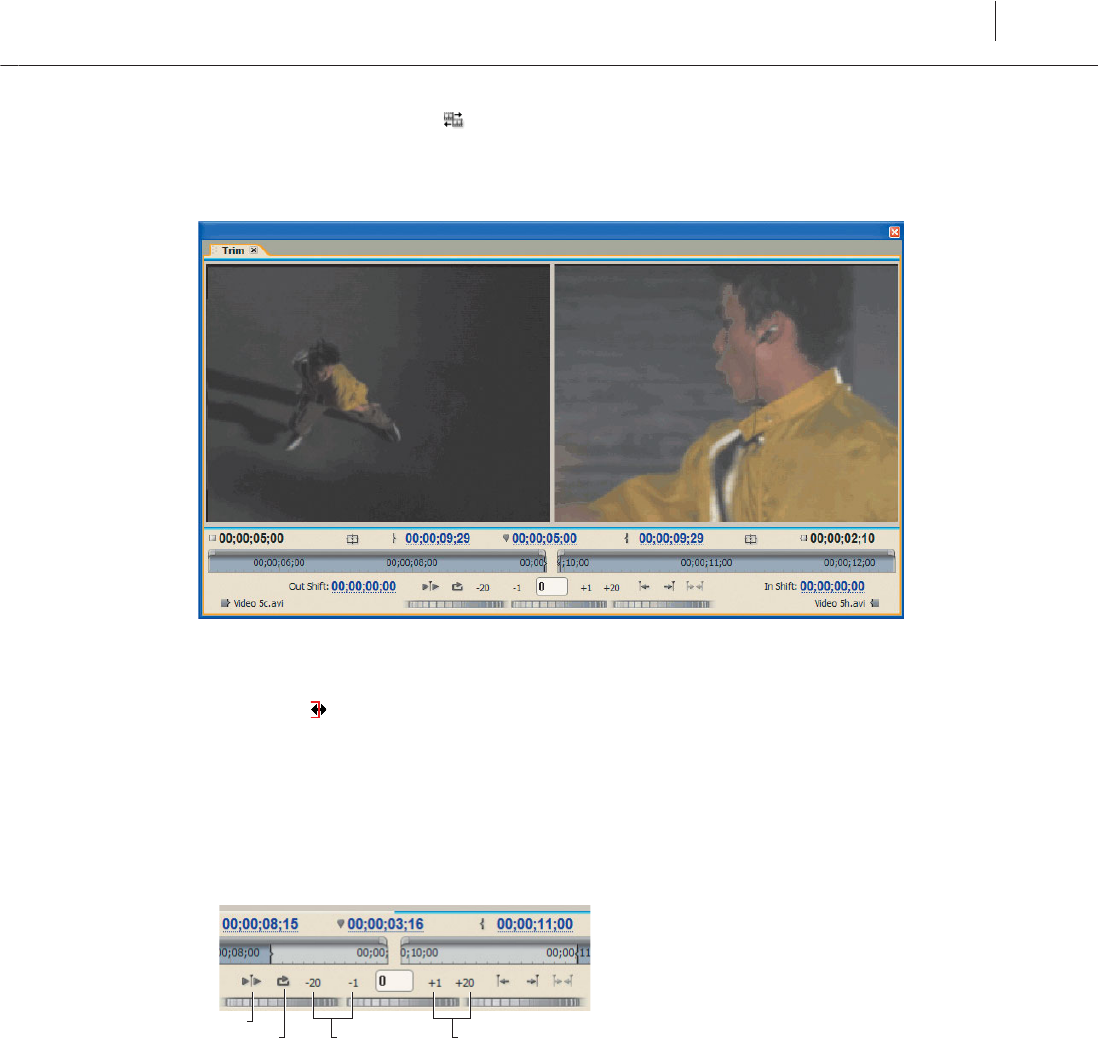
6 Hover the cursor over the le preview screen until it turns into a le -facing Ripple
Edit cursor (
).
7 Trim the right edge of clip (the out-point) by dragging it le to about one second
(use the Out Shi timecode below the center of the le screen).
8 Use the same method to trim the right clip’s in-point to the right to about one
second (use the In Shi timecode beneath the center of the right screen—highlighted in
the gure on the next page).
Play Edit
Loop Edit Trim Backward Trim Forward
Trim panel editing tools.
146
Creating Cuts-only Videos
LESSON 5
9 Click the precision trimming tools—the –1 and +1 numbers (highlighted in the
previous gure)—to trim or lengthen the clips a frame at a time until you have matched
the position of the dancer in both preview screens. I trimmed 1;04 from the le clip and
0;24 from the right.
Note: Click in the le or right preview screen to make it active (so the precise trim tools
apply to it). You can tell which preview screen is active by the thin blue line beneath it.
10 Click Play Edit to review your work.
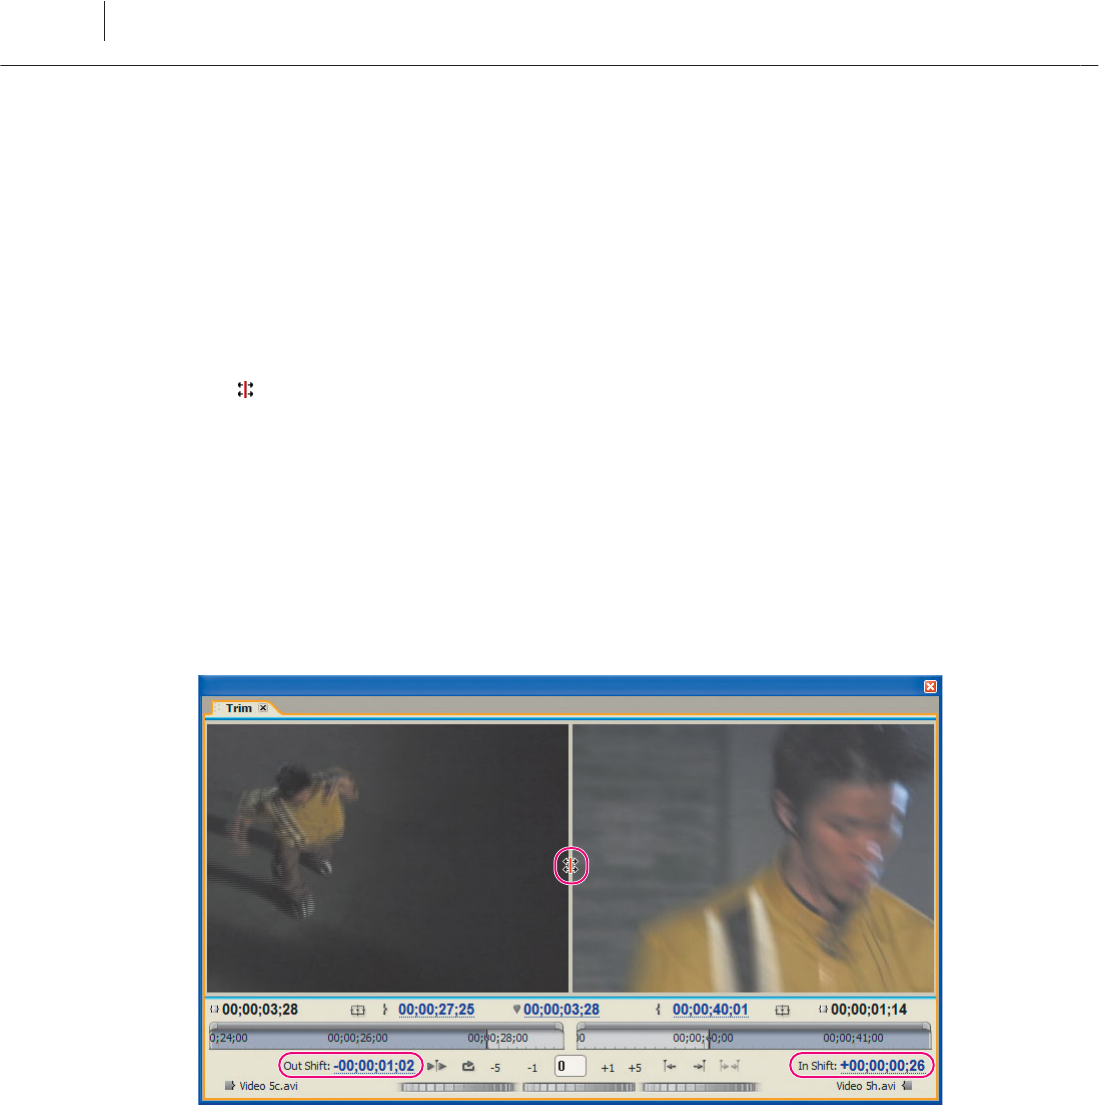
11 Hover the cursor between the two preview screens. It will turn into a Rolling Edit
tool
(highlighted in the next gure).
12 Drag it le and right to change the out- and in-points of the le and right clips
respectively. Notice how both clips move and the dancer’s motions remain matched.
13 See if you can nd a better edit point. I ended up by trimming 1;02 from the le
and 0;26 from the right.
14 Click Play Edit.
You might notice that you just gave the dancer one extra spin.
15 Close the Trim panel by clicking the little ‘x’ in its corner.
Get Adobe® Premiere® Pro 2.0 now with the O’Reilly learning platform.
O’Reilly members experience books, live events, courses curated by job role, and more from O’Reilly and nearly 200 top publishers.

