Having equipped ourselves with our initial design ideas, we can start implementing our project in practice. Follow these steps:
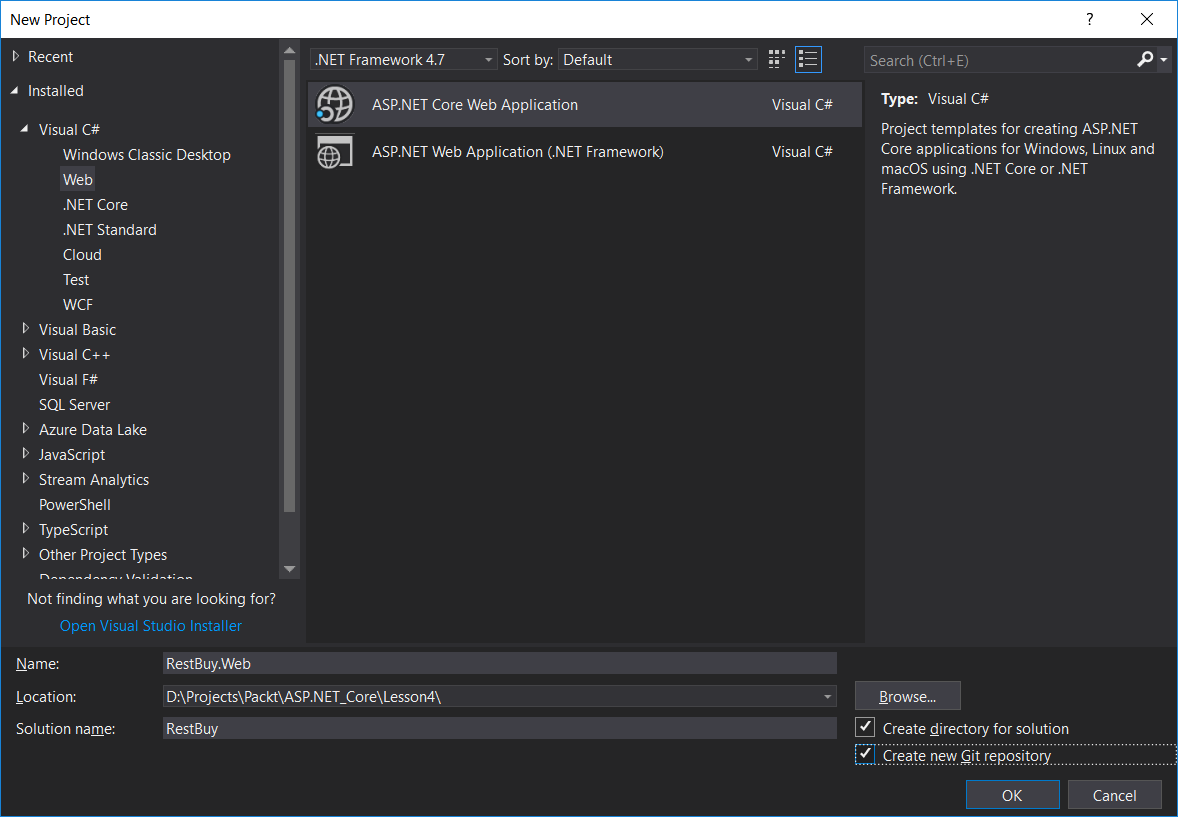
- Create a new solution and Web Application as shown in the following screenshot. Make sure we name the project RestBuy.Web, and the solution name as RestBuy:

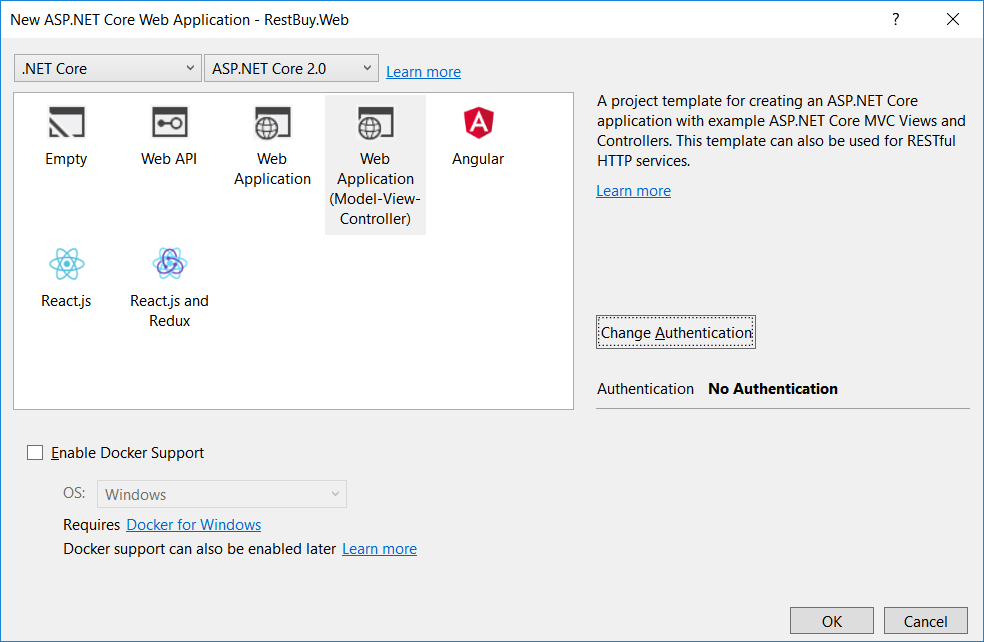
- Select the MVC option and click on OK:

You'll see this:

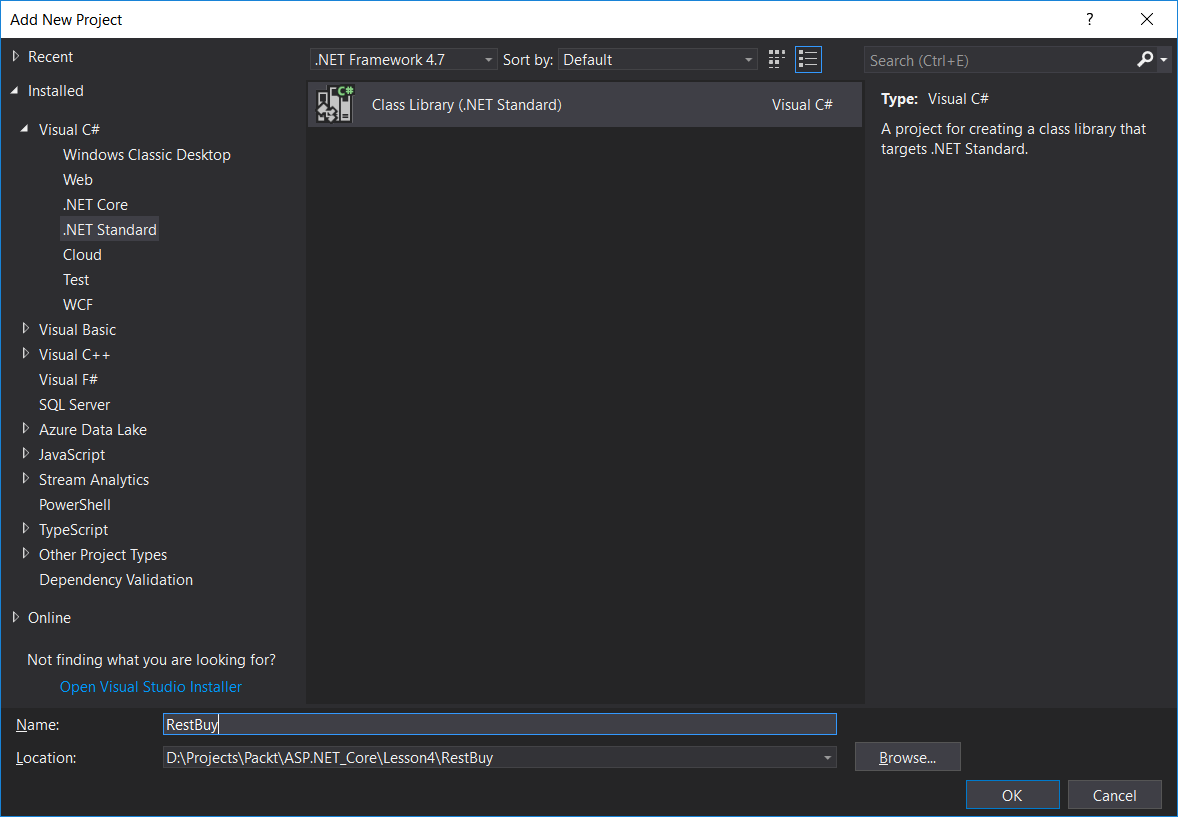
- Add a new project as a .NET Standard Class Library called RestBuy:

