Before we discuss exactly what’s happening here, and how the functionality works,
let’s implement a few small improvements.
If you agreed to let Visual Web Developer generate the DetailsView columns
for you, it will automatically have rewritten the templates we developed in the
last chapter, and added BoundField controls for each of the columns you’re
reading from the data source.
The HeaderTemplate is still intact, but we want to update it to show a different
display when we’re inserting details for a new employee. Currently, the header
is set to display the Name field of the selected employee, which means it will be
empty when we insert a new employee (as you could see in Figure 12.13). To
change this, modify the HeaderTemplate of your DetailsView as follows:
Visual Basic File: AddressBook.aspx (excerpt)
<HeaderTemplate>
<%#IIf(Eval("Name") = Nothing, "Adding New Employee", _
Eval("Name"))%>
</HeaderTemplate>
C# File: AddressBook.aspx (excerpt)
<HeaderTemplate>
<%#Eval("Name") == null ? "Adding New Employee" :
Eval("Name")%>
</HeaderTemplate>
IIf and the Ternary Operator
IIf (in VB) and the ternary operator (in C#) receive as parameters one
conditional expression (which returns True or False), and two values. If
the condition is True, the first value is returned, and if the condition is
False, the second value is returned.
In our case, the conditional expression verifies whether the Name field is
empty, which will be the case if we’re inserting a new row. So, when we’re
inserting a new row, we display “Adding New Employee” in the
DetailsView’s header; otherwise, we display the name of the employee
whose details are being edited.
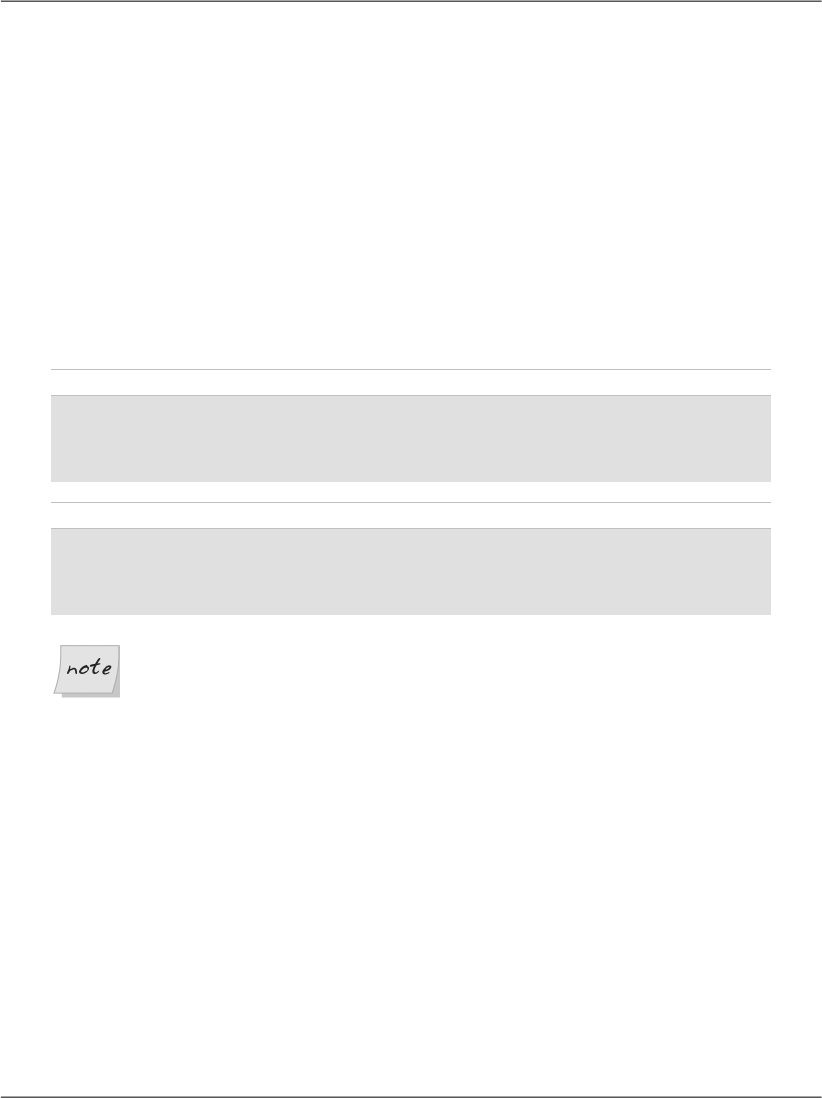
Now, when we insert a new employee record, DetailsView will display “Adding
New Employee” in its header; when we’re editing or displaying an existing emp-
loyee’s details, it will display the name of that employee, as Figure 12.14 shows.
484
Chapter 12: Advanced Data Access
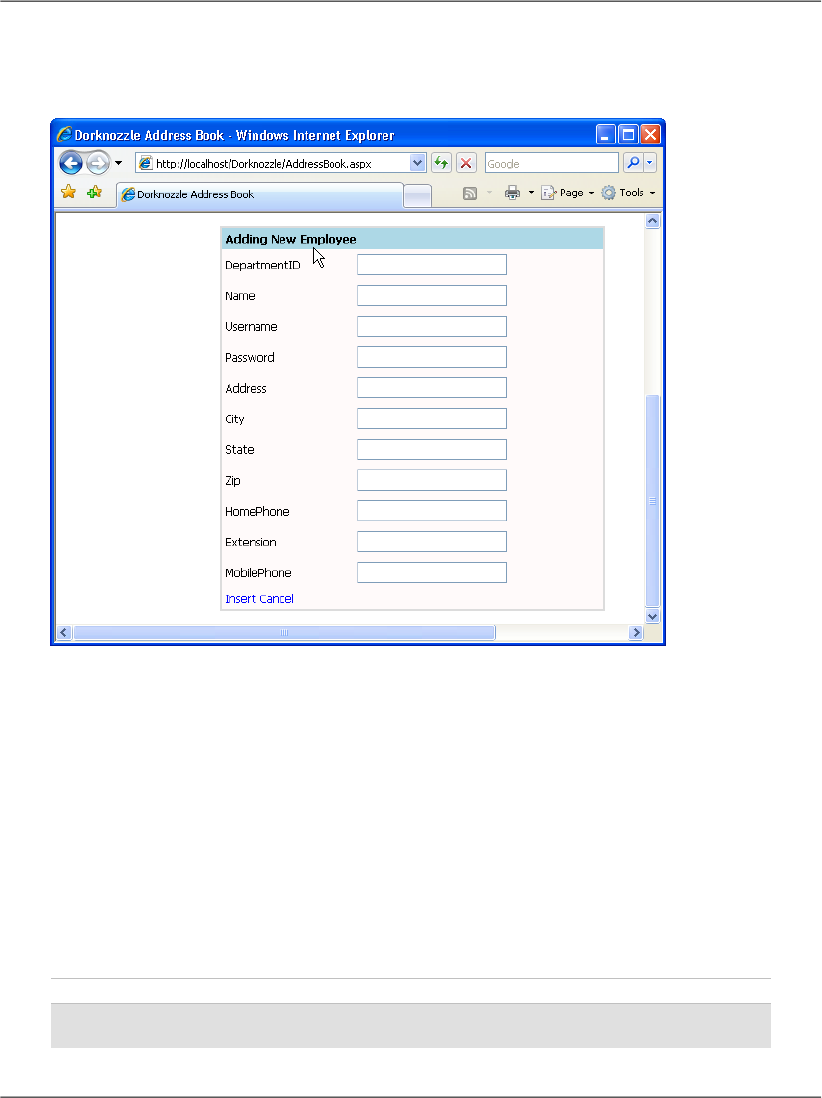
Figure 12.14. Adding a new employee, and displaying the new
header
One minor hitch with this solution is that the GridView isn’t instantly updated
when we make a change using the DetailsView control. Try modifying the name
of a user; even after you press the Update link in the DetailsView, the GridView
will still show the old value. Only after you reload the page will the data be dis-
played correctly by the GridView.
This issue occurs because the GridView is populated before the DetailsView
updates the database. To avoid this problem, we could use a simple workaround
that forces the GridView to update itself in response to the occurrence of certain
events raised by the DetailsView control. These events are ItemUpdated, Item-
Deleted, and ItemInserted. Use Visual Web Developer to generate the event
handlers for these events, and update the code like this:
Visual Basic File: AddressBook.aspx.vb (excerpt)
Protected Sub employeeDetails_ItemUpdated( _
ByVal sender As Object, ByVal e As _
485
Binding the DetailsView to a SqlDataSource

System.Web.UI.WebControls.DetailsViewUpdatedEventArgs) _
Handles employeeDetails.ItemUpdated
grid.DataBind()
End Sub
Protected Sub employeeDetails_ItemDeleted( _
ByVal sender As Object, ByVal e As _
System.Web.UI.WebControls.DetailsViewDeletedEventArgs) _
Handles employeeDetails.ItemDeleted
grid.DataBind()
End Sub
Protected Sub employeeDetails_ItemInserted( _
ByVal sender As Object, ByVal e As _
System.Web.UI.WebControls.DetailsViewInsertedEventArgs) _
Handles employeeDetails.ItemInserted
grid.DataBind()
End Sub
C# File: AddressBook.aspx.cs (excerpt)
protected void employeeDetails_ItemUpdated(object sender,
DetailsViewUpdatedEventArgs e)
{
grid.DataBind();
}
protected void employeeDetails_ItemDeleted(object sender,
DetailsViewDeletedEventArgs e)
{
grid.DataBind();
}
protected void employeeDetails_ItemInserted(object sender,
DetailsViewInsertedEventArgs e)
{
grid.DataBind();
}
Now your GridView and DetailsView controls will be permanently synchronized.
The last improvement we’ll make is to add an Add New Employee button to the
page. Right now, we can only add new employees if we select an employee from
the GridView, but this isn’t exactly an intuitive way to work! Let’s add a button
that will make the DetailsView control display in insert mode when it’s clicked
by a user.
486
Chapter 12: Advanced Data Access
Figure 12.15. The Add New Employee button
Add the new button above the grid like this:
File: AddressBook.aspx (excerpt)
<h1>Address Book</h1>
<asp:LinkButton id="addEmployeeButton" runat="server"
Text="Add New Employee" /><br />
<asp:GridView id="grid" runat="server" …
Double-click the button in Design View, and fill in its Click event handler like
this:
Visual Basic File: AddressBook.aspx.vb (excerpt)
Protected Sub addEmployeeButton_Click(ByVal sender As Object, _
ByVal e As System.EventArgs) Handles addEmployeeButton.Click
employeeDetails.ChangeMode(DetailsViewMode.Insert)
End Sub
C# File: AddressBook.aspx.cs (excerpt)
protected void addEmployeeButton_Click(object sender, EventArgs e)
{
employeeDetails.ChangeMode(DetailsViewMode.Insert);
}
487
Binding the DetailsView to a SqlDataSource
Get Build Your Own ASP.NET 2.0 Web Site Using C# & VB, Second Edition now with the O’Reilly learning platform.
O’Reilly members experience books, live events, courses curated by job role, and more from O’Reilly and nearly 200 top publishers.

