
113
This adventure is a chance to revisit many of our
different printing skills and combine them in a
finished collage. We’ll be looking again at mono print,
frottage, drawing with scissors, and object printing.
Use my collage as a springboard for your own ideas.
Choose a subject that inspires you and use any
combination of techniques we’ve explored so far to
create your own work. Flip through previous chapters
to remind yourself of favorite techniques and
approaches to use again here. As always, try not to be
too concerned with the finished piece, but focus on
the process of creation and enjoy the physicality of
this mixed media approach.
Print
Masterclass
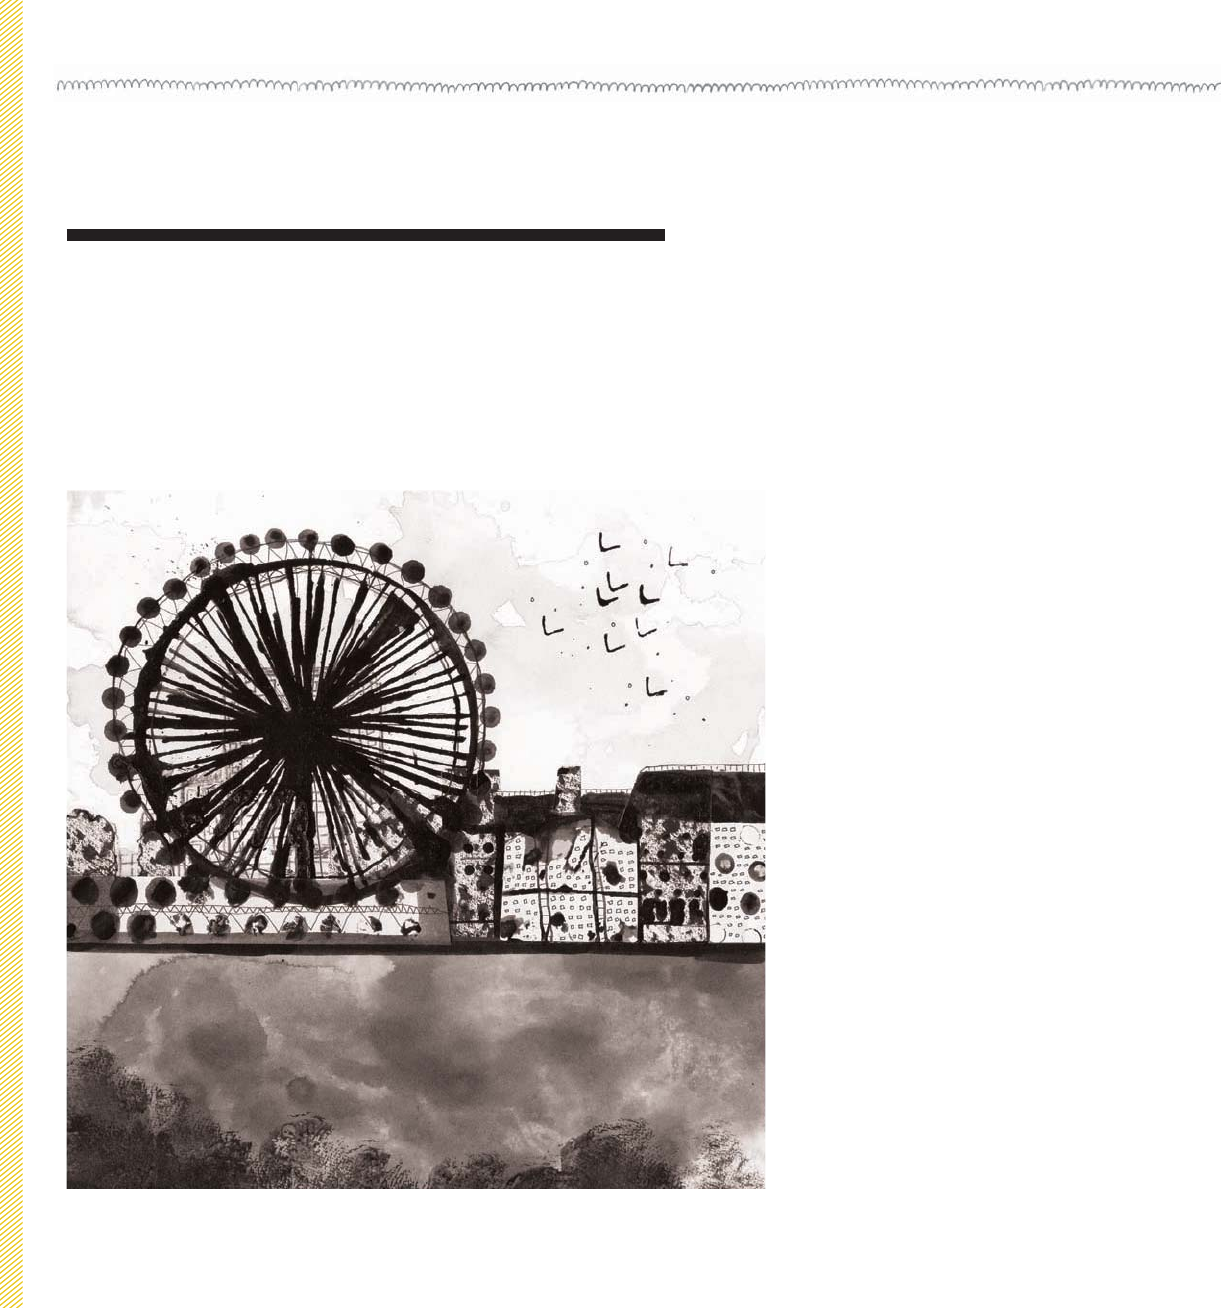
PRINT COLLAGE: LONDON EYE
For my collage I chose to depict a view of the River Thames in London featuring the
London Eye. On the opposite page are some of the individual pieces I created with
details of how I made them.
114 > Fearless Drawing

Birds and Sky
For the sky I watered down ink and splashed it onto the page. I then dabbed a kitchen towel into
some areas to make them lighter and suggest clouds. I created the birds by folding a small piece of
card into a V shape and using it to print the birds into the sky, adding a little hand-drawn detail.
Buildings
I cut these buildings from sheets of direct prints (the central building was a portion of a large leaf
print) and frottage (I created rubbings from tarmac).
River Thames
For the river I watered down ink and splashed it onto the page. Once dry I used scrunched kitchen
towels to print dark areas in the foreground. I then cut out a strip of this dark area and glued it onto
the lower half of the page.
Buildings
The buildings behind the London Eye Ferris wheel were created as mono prints. I cut out pieces of
paper in the shape of the buildings and colored oil pastel on the back of these pieces. I then placed
these shapes on the final artwork page (oil pastel side down) and used a ballpoint pen to create the
mono print drawing of the buildings and windows.
London Eye
I created the London Eye by printing the rim of a disposable cup. For the spokes, I inked the edge of a
piece of cardstock and used it to print the series of lines. I added the circular pods around the wheel
using a cotton swab, and once it was dry, added some extra details with a fine line pen.
Trees and Platform
The trees on the far left are collaged on from sheets of frottage, and the dotty platform is printed
using bubble wrap with hand-drawn embellishments. Once I’d collaged this piece in place, I had to
reprint the areas of the wheel that I’d covered.
Print Masterclass > 115
116 > Fearless Drawing
YOUR COLLAGE
Use the following page to create your own collaged image. Choose a subject that
excites you and try to use as many of the different printing and collage techniques as
you can. For this adventure, you’ll need the following supplies.
O
Stack of printer paper
O
India ink (or a substitute such as strong cold coffee, watercolor, or poster paint)
O
Oil pastel(s)
O
Wax crayon(s)
O
Scissors (large and small)
O
White PVA (Elmer’s, school, or similar glue)
O
Collage papers (tickets, receipts, postcards, etc.)
O
Suitable objects for printing or frottage (determined by your subject)
TIPS
Once you have an image in mind for your collage, decide which technique you will use to create
each element of the image.
Place all of your carefully cut out elements to one side in a separate bowl or cup to prevent them
from getting lost in your pile of clippings.
Once you’ve made all of your elements, cut them out and spend time arranging and rearranging
them on the page before committing to glue.
Feel free to add hand-drawn elements at the end if you like.
Print Masterclass > 117
Get Fearless Drawing now with the O’Reilly learning platform.
O’Reilly members experience books, live events, courses curated by job role, and more from O’Reilly and nearly 200 top publishers.

