Introduction
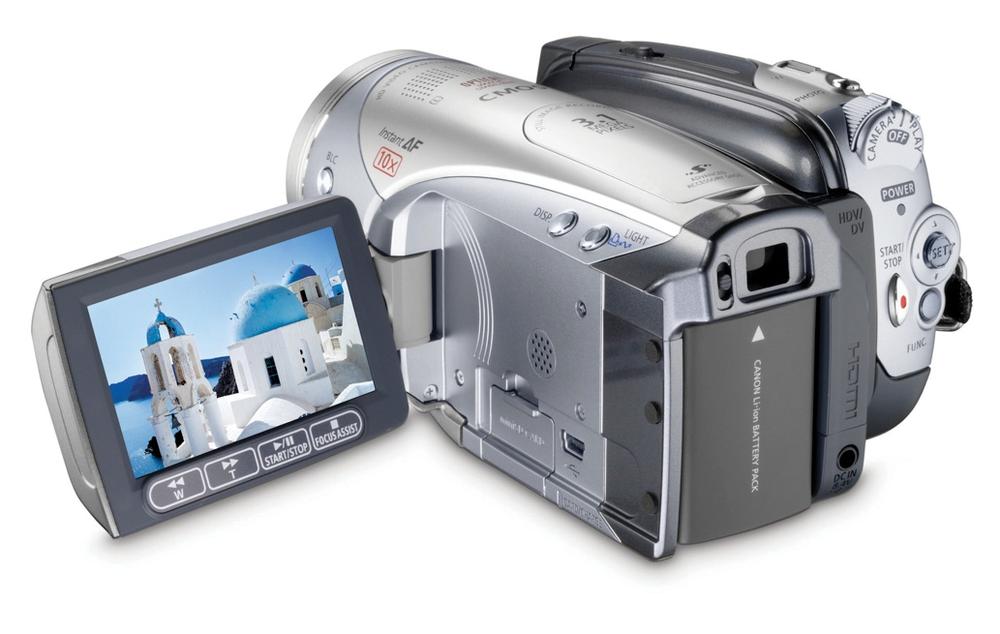
iMovie is video-editing software. It grabs a copy of the raw footage from your digital camcorder or still camera. Then it lets you edit this video easily, quickly, and creatively.
That’s a big deal, because over the years, home movies have developed a bad name. You know what it’s like watching other people’s camcorder footage. You’re captive on some neighbor’s couch after dessert to witness 60 excruciating, unedited minutes of a trip to Mexico, or 25 too many minutes of the baby wearing the spaghetti bowl.
Deep down, most people realize that the viewing experience could be improved if the video were edited down to just the good parts. But until iMovie came along, editing camcorder footage on the computer required several thousand dollars’ worth of digitizing cards, extremely complicated editing software, and the highest-horsepower computer equipment available. Unless there was a paycheck involved, editing footage under those circumstances just wasn’t worth it.
Then along came iMovie, the world’s least expensive version of what the Hollywood pros call nonlinear editing software. The “nonlinear” part is that no tape is involved while you’re editing. There’s no rewinding or fast-forwarding; you jump instantly to any piece of footage as you put your movie together.
The world of video is exploding. People are giving each other DVDs instead of greeting cards. People are watching each other via video on their Web sites. People are quitting their daily-grind jobs to become videographers for hire, making money filming weddings and creating living video scrapbooks. Video, in other words, is fast becoming a new standard document format for the new century.
If you have iMovie and a camcorder, you’ll be ready.
The Difficult Birth of iMovie ’08 and ’09
Within six months of its release in October 1999, iMovie had become, in the words of beaming iMovie papa (and Apple CEO) Steve Jobs, “the most popular video editing software in the world.”
Apple only fanned the flames when it released iMovie 2 in July 2000 (for $50), iMovie 3 in January 2003 (for free), and then—as part of the iLife software suite—iMovie 4, iMovie HD, and iMovie 6 in successive Januaries.
Then, in August 2007, Apple dropped a bombshell. Or, rather, it dropped iMovie.
The company’s new consumer video editing program, called iMovie ’08, was, in fact, not iMovie at all. It was a totally different program, using all-new code and a different design, and built by different people. It was conceived, according to Steve Jobs, by Randy Ubillos, an Apple programmer who wanted to edit down his vacation footage—but found the old iMovie too slow and complicated. So the guy sat down and wrote his own little program, focused primarily on editing speed above all. Steve loved it, and decided that it would replace the old iMovie.
Many people were stunned by Apple’s move—and I, your humble author, was among them. In my New York Times email column, I wrote about just how different iMovie ’08 was from its predecessors:
iMovie ’08 has been totally misnamed. It’s not iMovie at all. It’s designed for an utterly different task.
The new iMovie, for example, is probably the only video editing program on the market with no timeline—no horizontal, scrolling strip that displays your clips laid end to end, with their lengths representing their durations. You have no indication of how many minutes into your movie you are.
The new iMovie also gets a D for audio editing. You can’t manually adjust audio levels during a scene (for example, to make the music quieter when someone is speaking). All the old audio effects are gone, too. No pitch changing, high-pass and low-pass filters, or reverb.
The new iMovie doesn’t accept plug-ins, either. You can’t add chapter markers for use in iDVD, which is supposed to be integrated with iMovie. Bookmarks are gone. Themes are gone. You can no longer export only part of a movie. And you can’t export a movie back to tape—only to the Internet or to a file.
All visual effects are gone—even basic options like slow motion, reverse motion, and fast motion. Incredibly, the new iMovie can’t even convert older iMovie projects. All you can import is the clips themselves. None of your transitions, titles, credits, music, or special effects are preserved.
On top of all that, this more limited iMovie has steep horsepower requirements that rule out most computers older than about two years old.
Pretty harsh, I know. But listen, I was an absolute whiz at iMovie 6. I knew it like the back of my mouse. And it looked to me like Apple was junking that mature, powerful program for what amounted to a video slideshow program.
Fortunately, many of those “doesn’t haves” were restored in iMovie ’09. Furthermore, iMovie ’09 comes with so many useful features of its own, it’s far more difficult to resist.
It’s far more modern than the old iMovie, for example. It’s equally adept at importing video from the new tapeless camcorders (DVD, hard drive, or memory-card models)—and from digital still cameras—as it is at importing from tape. And it’s all hooked up to the Web, so that a single command can post your masterpiece on YouTube.
Then there are the cool features that the old iMovie could only dream about. The image-stabilizing, color-correction, and frame-cropping tools are unprecedented in a consumer program. You can really, truly delete unwanted pieces of your clips, thus reclaiming hard drive space. (iMovie ’08, on the other hand, preserves an entire 20-minute clip on your hard drive even if you’ve used only 3 seconds of it.)
iMovie ’09 creates titles, crossfades, and color adjustments instantly. There’s no “rendering” time, as there was in the old iMovie. So you gain an exhilarating freedom to play, to fiddle with the timing and placement of things.
So, no, iMovie ’09 is not a descendant of the old iMovies. It’s a different program, with a different focus and a different audience. But it’s here to stay, and it has charms of its own.
iDVD
As you may have noticed, this iMovie book comes with a free bonus book: iDVD ’09: The Missing Manual, which constitutes Chapters Chapter 16 through Chapter 18. iDVD can preserve your movies on home-recorded DVDs that look and behave amazingly close to the commercial DVDs you rent from Netflix or Blockbuster.
iDVD ’09 isn’t what you’d call a huge update from the previous version; in fact, it’s identical to the previous version. Be grateful that Apple even kept it alive, considering how strongly it feels that the DVD is a dead technology.
iMovie: What’s It Good For?
If you’re reading this book, you probably already have some ideas about what you could do if you could make professional-looking video. Here are a few possibilities that may not have occurred to you. All are natural projects for iMovie:
Home movies. Plain old home movies—casual documentaries of your life, your kids’ lives, your school life, your trips—are the single most popular creation of camcorder owners. Using the suggestions in the following chapters, you can improve the quality of your footage. And using iMovie, you can delete all but the best scenes (and edit out those humiliating parts where you walked for 20 minutes with the camcorder accidentally filming the ground bouncing beneath it).
This, too, is where iMovie’s Internet smarts come into play. Instead of burning and shipping a DVD of your home movies, you can shoot the finished product up to a Web page or YouTube, where your lucky, lucky family and friends can enjoy them.
Web movies. But why limit your aspirations to people you know? This is the YouTube Era, dude. If you’ve got something funny or interesting on “film,” why not share it with the Internet population at large? In iMovie, YouTube is only one menu command away—and that’s just the beginning. New film festivals, Web sites, and magazines are springing up everywhere, all dedicated to independent makers of short movies.
Business videos. It’s very easy to post video on the Internet or burn it onto a cheap, recordable CD or DVD, as described in Part 3. As a result, you should consider video a useful tool in whatever you do. If you’re a real estate agent, blow away your rivals (and save your clients time) by showing movies, not still photos, of the properties you represent. If you’re an executive, quit boring your comrades with stupefying PowerPoint slides and make your point with video instead.
Video photo albums. A video photo album can be much more exciting, accessible, and engaging than a paper one. Start by filming or scanning your photos. Assemble them into a sequence, add some crossfades, titles, and music. The result is a much more interesting display than a book of motionless images, thanks in part to iMovie’s Ken Burns effect (Crop, Fit, Rotate). This emerging video form is becoming very popular—videographers are charging a lot of money to create such “living photo albums” for their clients.
Just-for-fun projects. Never again can anyone over the age of eight complain that there’s “nothing to do.” Set them loose with a camcorder and the instruction to make a fake rock video, commercial, or documentary.
Training films. If there’s a better use for video than providing how-to instruction, you’d be hard-pressed to name it. Make a video for new employees to show them the ropes. Make a video that accompanies your product to give a humanizing touch to your company and help the customer make the most of her purchase. Make a DVD that teaches newcomers how to play the banjo, grow a garden, kick a football, use a computer program—and then market it.
Interviews. You’re lucky enough to live in an age where you can manipulate video just as easily as you do words in a word processor. Capitalize on this fact. Create family histories. Film relatives who still remember the War, the Birth, the Immigration. Or create a time-capsule, time-lapse film: Ask your kid or your parent the same four questions every year on his birthday (such as, “What’s your greatest worry right now?” or “If you had one wish…?” or “Where do you want to be in five years?”). Then, after five or 10 or 20 years, splice together the answers for an enlightening fast-forward through a human life.
Broadcast segments. Want a taste of the real world? Call your cable TV company about its public-access channels. (As required by law, every cable company offers a channel or two for ordinary citizens to use for their own programming.) Find out the time and format restraints, and then make a documentary, short film, or other piece for actual broadcast. Advertise the airing to everyone you know. It’s a small-time start, but it’s real broadcasting.
Analyze performances. There’s no better way to improve your golf swing, tennis form, musical performance, or public speaking style than to study footage of yourself. If you’re a teacher, camp counselor, or coach, film your students, campers, or players so that they can benefit from self-analysis, too.
Turn photos into video. Technically, you don’t need a camcorder at all to use iMovie; it’s equally adept at importing and presenting still photos from a scanner or digital camera. In fact, iMovie’s Ken Burns effect brings still photos to life, gently zooming into them, fading from shot to shot, panning across them, and so on, making this software the world’s best slideshow creator.
A Camcorder Crash Course
For years, when you said “camcorder,” it was understood that you meant "tape camcorder.” And, to be sure, the least expensive and most popular camcorder type today (by a hair) records onto tape: MiniDV cassettes.
The popularity of digital tape camcorders is crashing, however. Their sales have been declining 10 to 15 percent a year.
As you can imagine, these numbers are causing some consternation at the headquarters of Sony, Canon, and other camcorder makers. What’s going on? Don’t people want to preserve memories of their lives anymore?
As best they can tell, the problem is the cassettes themselves. They’re too hard to find in the drawer when the neighbors want to see the highlights of your latest vacation, and they take too long to rewind and fast-forward.
What the world wants, the camcorder manufacturers have decided, is random access: the ability to jump directly to any scene without having to wait. In theory, a tapeless camcorder also saves you time when transferring the video to your computer for editing, because you don’t have to play the video from the camcorder in real time. The video files are stored on a memory card, hard drive, or DVD as regular computer files, which you should be able to simply drag and drop onto your Mac’s hard drive. (In practice, it doesn’t quite work out that way—see Importing from DVD Camcorders—but you get the idea.)
That’s why the industry has been flooding the stores with tapeless camcorders: cameras that record onto memory cards, onto hard drives, or onto little DVDs—anything but tape.
The Downsides of Tapeless
Unfortunately, most tapeless camcorders can’t match the incredible video quality of MiniDV tape camcorders. In order to store a reasonable amount of video on that tiny memory card, hard drive, or DVD, the camera must compress it to an alarming degree, using less information to describe each frame of video. Video recorded onto MiniDV tapes, on the other hand, is essentially uncompressed. What you see on playback is what the camera recorded.
Remember, too, that each kind of tapeless camcorder has its own kinds of storage limitations:
DVD camcorders. The miniature blank DVDs used by DVD camcorders generally hold only 20 minutes of video apiece—only 15 minutes in high definition. (Some models can record onto the newer double-sided discs, which roughly doubles the recording time.) And you can’t play the resulting disc in a regular DVD player unless you first “finalize” it, a sort of software shrink-wrapping process that can take 10 or 15 minutes inside the camcorder. In fact, you can’t play the resulting DVDs in a Mac at all. Macs expect full-size DVDs; these miniature, 8-centimeter discs can literally trash your drive.
Hard-drive camcorders can record several hours of video (say, five hours at best quality) before running out of space—but at that point, you’re dead in the water. Your camcorder is useless until it has a date with your computer, so you can dump the video off the camcorder to empty its hard drive.
Memory-card camcorders might be able to store, for example, one hour of video on a four-gigabyte memory card. And you can carry a couple of extras around in case of emergency. But memory cards are far too expensive for long-term storage. In other words, nobody but Donald Trump can afford to buy a new memory card for every vacation, holiday, and wedding. Everybody else empties out the camcorder onto the computer every time the memory card gets full.
Note
The new world of tapeless camcorders is filled with exceptions, footnotes, and caveats. Apple has noted a few of the quirks here—http://support.apple.com/kb/HT3290—but the best advice is to use Google before you buy any camcorder to ensure its compatibility with iMovie. (Search for Sony SR7 imovie 09, for example.)
High Definition
A growing number of camcorders film in gorgeous, widescreen, ultrasharp high definition. The video looks absolutely incredible when viewed on an HDTV set. Your own life looks like it was filmed by a Hollywood movie crew.
If you’re shopping for a camcorder now, you should seriously consider going to high-def right now. High-definition camcorders are available in both tape and tapeless models. The really cool thing about the tape models, in fact, is that they record onto ordinary MiniDV cassettes, exactly the same ones used by regular tape camcorders. The signal recorded on these tapes is different, of course—it’s in a format called HDV—but you still gain the convenience and economy of those ordinary drugstore tapes (Figure 1).
You may as well start filming your life in high definition now, because in a few years, standard definition will look as quaint as daguerreotype photographs.
AVCHD, MPEG-2, and Other Such Jargon
Tapeless camcorder stores video as ordinary computer files—on a DVD, hard drive, or memory card—that you can copy to your Mac and edit in iMovie. But what are those files? Every computer document is some format, whether JPEG (the usual format for photos) or TXT (text files). What format are these video files?
Some digital camcorders, especially old ones, record in formats called MPEG-1, MPEG-2, and MPEG-4. (The abbreviation stands for Motion Picture Experts Group, the association of geeks who dream up these standards.) iMovie ’09 recognizes and imports MPEG-2—usually. Unfortunately, there are multiple flavors of MPEG-2, and iMovie doesn’t recognize all of them.
iMovie can also work with the movies created by most digital still cameras, like .mov, .avi and MPEG-4 files. Here again, though, your mileage may vary.
Tip
It’s worth repeating: If you’re tempted to buy a certain camcorder, but you’re not sure if iMovie works with it, Google it.
The good news is that iMovie also recognizes AVCHD, which is the most popular file format for high-definition tapeless camcorders. (It stands for Advanced Video Coding/High Definition, and yes, it’s an annoying acronym. Do they really think they’re going to make video editing more attractive by dreaming up names like this?)
Anyway, AVCHD is a high-def format concocted by Sony and Panasonic in 2006, and is now available on camcorders from Sony, Panasonic, Canon, Samsung, and others. This format offers roughly the same video quality as MPEG-2 or MPEG-4, but takes up even less space on your camcorder’s memory card, miniDVD, or hard drive.
As it turns out, AVCHD is the same as H.264, which is the video format as Blu-ray high-definition DVD discs (and also the format of videos from the iTunes Store). That’s a handy feature for people who own both an AVCHD camcorder that records onto miniature DVDs and a Blu-ray DVD player (or Playstation 3), because you can pop the DVD right out of the camcorder and into the Blu-ray player to play on your TV.
That’s the good news. The bad news is that AVCHD still takes up a lot of space; a DVD camcorder of this type holds only 15 minutes of best-quality video per disc. (On the newer double-sided discs and camcorders that accept them, you get 27 minutes.)
The bigger bummer is that AVCHD doesn’t take kindly to being edited. When you import AVCHD video to iMovie, for example, your Mac first converts it to another format that can be edited (Importing from DVD Camcorders), which takes a very long time. In fact, one hour’s worth of video takes over two hours to convert, which neatly erases the importing-time advantage that your tapeless camcorder would have had over a MiniDV tape camcorder.
Camcorder Features: Which Are Worthwhile?
So how do you know which camcorder to buy? Here’s a rundown of the most frequently advertised camcorder features, along with a frank assessment of their value to the quality-obsessed iMovie fan.
FireWire connector
FireWire is Apple’s term for the tiny, compact connector on the side of most MiniDV tape camcorders—and most Macs. When you attach a FireWire cable, this jack connects the camera to your Mac. Other companies have different names for this connector—you may see it called IEEE-1394, i.Link, DV In/Out, or DV Terminal.
On tapeless camcorders, FireWire jacks are usually missing altogether. That’s OK; you have other ways to get your video off the camcorder and onto the Mac, as described in Chapter 1.
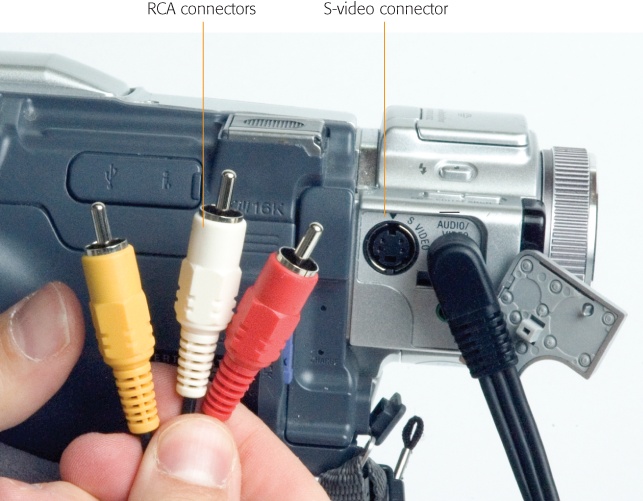
Analog inputs
This single feature may be important enough to determine your camcorder choice by itself. Analog inputs are connectors on the camcorder (Figure 2) into which you can connect older, pre-DV equipment, such as your VCR, your old 8mm camcorder, and so on.
Unfortunately, this is one of those features that the camcorder makers have been quietly eliminating in an effort to shave costs. That’s too bad, because there’s no easier, less expensive method of transferring older footage into your digital camcorder—or directly into iMovie.
This technique is described in more detail in Chapter 4. For now, note only that the only other method of transferring pre-DV footage into digital format is to buy a $200 converter box.
Three chips (CCDs)
Professional camcorders offer three individual image sensors, one for each color component of a video picture: red, green, and blue. These camcorders are advertised as having three chips or CCDs (charge-coupled devices—electronic plates, covered with thousands of individual light sensors, that convert light rays into a digital signal). The result is even more spectacular picture quality, resolution, and color rendition than the less-expensive, one-CCD cameras.
Unfortunately, three-chip camcorders tend to be more expensive than one-chip cams—but they deliver much better color.
Not all three-chip models are big and pricey. Panasonic, in particular, has developed a line of three-chip camcorders that aren’t much larger or more expensive than one-chip models. Note, however, that they usually contain three very small CCDs, so the quality improvement is visible primarily in bright, outdoor scenes.
Image stabilizer
Certain film techniques scream “Amateur!” to audiences. One of them is the instability of handheld filming. In a nutshell, professional video is shot using a camera on a tripod (Woody Allen’s “handheld” period notwithstanding). Most home camcorder footage, in contrast, is shot from the palm of your hand.
A stabilizing feature (which may have a marketing name, such as Sony’s SteadyShot) takes a half step toward solving that problem. As shown in Figure 3, this feature neatly eliminates the tiny, jittery moves present in handheld video. (It can’t do anything about bigger jerks and bumps, which are especially difficult to avoid when you’re zoomed in.) It also uses up your battery faster.
This kind of anti-shake feature comes in two forms:
Electronic or digital stabilization is what you get on cheaper camcorders. Its workings are described in Figure 3.
Optical stabilization is much preferable. This mechanism involves two transparent plates separated by a special optical fluid. As the camera shakes, these plates create a prism effect that keeps handheld shots clearer and steadier than electronic (digital) stabilizers. The images are clearer because optical stabilizers don’t have to crop out part of the picture as a buffer, unlike the stabilizers illustrated in Figure 3.
Note
What could possibly be better than image stabilization on your camcorder? Image stabilization in your editing software. iMovie ’09’s amazing stabilizing feature is described on Video Stabilization.
Manual controls
Better camcorders let you turn off the automatic focus, automatic exposure control, automatic white balance, and even automatic sound level. This feature can be useful in certain situations, like when you want to change focus between two objects in the same shot (known to the pros as a focus-pull). If you’ve decided to pay extra for this feature, look for a model that lets you focus manually by turning a ring around the lens, which is much easier than using sliders.

Optical zoom
When you read the specs for a camcorder—or read the logos painted on its body—you frequently encounter numbers like “12X/300X ZOOM!” The number before the slash tells you how many times the camera can magnify a distant image, much like a telescope. That number measures the optical zoom, which is the actual amount that the lenses themselves can zoom in. Such zooming, of course, is useful when you want to film something that’s far away. (As for the number after the slash, see Date/time stamp.)
You should know, however, that the more you’ve zoomed in, the shakier your footage is likely to be, since every microscopic wobble is magnified by, say, 12 times. You also have to be much more careful about focusing. When you’re zoomed out all the way, everything is in focus—things near you, and things far away. But when you’re zoomed in, very near and very far objects go out of focus. Put into photographic terms, the more you zoom in, the shorter the depth of field (the range of distance from the camera that can be kept in focus simultaneously).
Finally, remember that magnifying the picture doesn’t magnify the sound. If you’re relying on the built-in microphone of your camcorder, always get as close as you can to the subject, both for the sound and for the wobble.
Tip
Professional video and film work includes very little zooming, unlike most amateur video work. The best zooming is subtle zooming, such as when you very slowly “move toward” the face of somebody you’re interviewing.
For this reason, when shopping for camcorders, test the zooming if at all possible. Find out if the camcorder has variable-speed zooming, where the zooming speed increases as you press the Zoom button harder. Some camcorders offer only two different speeds—fast and faster—but that’s still better than having no control at all. (Variable-speed zooming isn’t something mentioned in the standard camcorder literature; you generally have to try the camcorder in the store to find out how it does.)
Minutes-remaining readout
Fortunately, the problems exhibited by camcorder batteries of old—such as the “memory effect”—are a thing of the past. (When you halfway depleted a pre-digital camcorder battery’s charge several times in a row, the battery would adopt that halfway-empty point as its new completely empty point, effectively halving its capacity.) Today’s lithium-ion battery technology eliminates that problem.
Some camcorders—mostly from Sony, JVC, and Canon—even display, in minutes, how much juice the battery has remaining. A glance at the viewfinder or the LCD screen tells you how many minutes of recording or playback you’ve got left—a worthy feature.
Tip
The number of minutes’ recording time advertised for camcorder batteries is continuous recording time—that is, the time you’ll get if you turn the camcorder on, press Record, and go out to lunch. If you stop and start the camera to capture shorter scenes, as almost everyone does, you’ll get much less than the advertised amount of time out of each battery charge.
Built-in light
Insufficient lighting is one of the leading causes of “amateuritis,” a telltale form of poor video quality that lets viewers know that the footage is homemade. In the best—and most expensive—of all possible worlds, you’d get your scene correctly lit before filming, or you’d attach a light to the “shoe” (light connector) on top of the camera. Those few cameras that have such a shoe, or even have a built-in light, give you a distinct advantage in filming accurate colors.
Scene modes
Many camcorders come with a number of canned focus/shutter speed/aperture settings for different indoor and outdoor environments: Sports Lesson, Beach and Snow, Twilight, and so on. They’re a useful compromise between the all-automatic operation of less expensive models and the all-manual operation of professional cameras.
Remote control
Some camcorders come with a pocket-sized remote control. It serves two purposes. First, its Record and Stop buttons give you a means of recording yourself, with or without other people in the shot. Second, when you’re playing back footage with the camcorder connected to your TV or VCR, the remote lets you control the playback without needing to have the camcorder on your lap. You may be surprised at how useful the remote can be.
FlexiZone or Push Focus
All camcorders offer automatic focus. Most work by focusing on the image in the center of your frame as you line up the shot.
That’s fine if the subject of your shot is in the center of the frame. But if it’s off-center, you have no choice but to turn off the autofocus feature and use the manual-focus ring. (Using the camcorder isn’t like using a still camera, where you can point the camera directly at the subject for focusing purposes, and then—before taking the shot—shift the angle so that the subject is no longer in the center. Camcorders continually refocus, so pointing the camera slightly away from your subject makes you lose the off-center focus you’ve established.)
Some Canon, Sony, and Sharp camcorders let you point to a specific spot in the frame that you want to serve as the focus point, even if it’s not the center of the picture. (This feature is called FlexiZone on the Canon models, or Push Focus on high-end Sony models. On Sony cams with touch-screen LCD panels, it’s especially easy to indicate which spot in the frame should get the focus.) If the model you’re eyeing has this feature, it’s worth having.
Night-vision mode
Most Sony camcorders offer a mode called NightShot that works like night-vision goggles. In this mode, you can actually film (and see, as you watch the LCD screen) in total darkness. The infrared transmitter on the front of the camcorder measures the heat given off by various objects in its path, letting you capture an eerie, greenish night scene. Rent The Silence of the Lambs for an idea of how creepy night-vision filming can be. Or watch any episode of Survivor.
The transmitter’s range is only about 15 feet or so. Still, you may be surprised how often it comes in handy: on campouts, during sleepovers, on nighttime nature walks, and so on.
Still photos
All modern camcorders can take still photos. The camcorder freezes one frame of what it’s seeing, and records it either on the tape (for, say, a 7-second stretch) or as a regular JPEG photo file on a memory card.
The photo quality, unfortunately, is pretty terrible. The resolution may be OK (some camcorders offer two- or even three-megapixel resolution), but the quality isn’t anywhere near what you’d get using a dedicated digital still camera. It turns out that the lenses and circuitry that best serve video are all wrong for stills.
If the camcorder you’re considering offers this feature, fine. But it may be redundant for the iMovie owner. iMovie can grab one-megapixel still frames from any captured video, as described in Chapter 10.
Progressive-scan CCDs
This special kind of image sensor is primarily useful for capturing still images. It ensures that the entire image is grabbed, not just one set of alternating, interlaced scan lines (the usual video signal). If you plan to catch still frames from your camcorder, a progressive-scan CCD will spare you some of the jagged lines that may appear. However, if your primary goal is to make movies, this expensive feature isn’t worth paying for, especially since you can buy a digital still camera with much greater resolution for about the same added cost.
Useless Features
Here are some features you’ll see in camcorder advertising that you should ignore completely (and definitely not pay extra for).
Title generator
Some camcorders let you superimpose titles (that is, lettering) on your video as you film. In your case, dear iMovie owner, a title-generating feature is useless. Your Mac can add gorgeous, smooth-edged type, with a selection of sizes, fonts, colors, and even scrolling animations, to your finished movies, with far more precision and power than the blocky text available to your camcorder. (Chapter 8 shows you how.)
Tip
A title generator on the camcorder is actually worse than useless, because it permanently stamps your original footage with something you may wish you could amend later. In fact, as a general rule, you should avoid using (or paying for) any of the in-camera editing features described in this chapter—title generator, fader, special effects—because you can do this kind of editing much more effectively in iMovie. Not only are they redundant, but they commit you to an editing choice in advance, thus limiting how you can use your footage.
Special effects
Most DV camcorders offer a selection of six or seven cheesy-looking special effects. They can make your footage look solarized, or digitized, or otherwise processed (see Figure 4).

Avoid using these effects. iMovie has its own special-effects options. And it gives you far greater control over when they start, when they end, and how intensely they affect the video.
In fact, unless you’re shooting a documentary about nuclear explosions or bad drug episodes, consider avoiding these effects altogether.
Date/time stamp
Every camcorder offers the ability to stamp the date and time directly onto the footage. As you’ve no doubt seen (on America’s Funniest Home Videos or America’s Scariest Cop Chases), the result is a blocky, typographically hideous stamp that permanently mars the footage. Few things take the romance out of a wedding video, or are more distracting in spectacular weather footage, than a huge 20 SEP 09 12:34 PM stamped in the corner.
Nor do you have to worry that you’ll one day forget when you filmed some event. As it turns out, digital camcorders automatically and invisibly date- and time-stamp all footage. You’ll be able to see this information when you connect the camcorder to your Mac; then you can choose whether or not to add it to the finished footage (and with much more control over the timing, location, and typography of the stamp).
Digital zoom
Much as camera owners mistakenly jockey for superiority by comparing the megapixel rating of their cameras (more megapixels don’t necessarily make sharper pictures), camcorder makers seem to think that what consumers want most in a camcorder is a powerful digital zoom. Your camcorder’s packaging may “boast” zoom ratings of “50X,” “100X,” or “500X!”
When a camcorder uses its digital zoom—the number after the slash on the camcorder box—it simply enlarges the individual dots that compose its image. Yes, the image gets bigger, but it doesn’t get any sharper. As the dots get larger, the image gets chunkier, coarser, and less recognizable, until it ends up looking like the blocky areas you see superimposed over criminals’ faces to conceal their identity on Cops. After your digital zoom feature has blown up the picture by 3X, the image falls to pieces. Greater digital zoom is not something worth paying extra for.
The Long-Term Storage Problem
No matter which kind of camcorder you choose, you have more to think about than just features and prices; you have the future to consider. Every kind of camcorder presents serious challenges if you hope to preserve your video for future generations.
DVD camcorders. Nobody has yet figured out how long those home-burned DVDs actually last. They don’t last essentially forever, as Hollywood DVDs do. In Hollywood, they stamp DVDs, pressing a pattern into the plastic. Home DVD burners, though, record a pattern in a layer of organic dye on the bottom of the disc—a dye that can take between several months and several decades to break down.
Memory-card and hard-drive camcorders. Once the card or drive is full, you’re finished shooting for the day. The camcorder is worthless until you offload the video to a computer, thereby freeing up space to continue shooting.
But what then? Are you going to burn hour after hour of captured video onto DVDs? Not only is that practically a full-time job, but then you’re stuck with those homemade DVDs and their questionable lifespan.
You could, of course, just keep the video on hard drives, even though that’s a very expensive and bulky solution. Here again, though, you have to wonder: Will the hard drive you buy today still be functioning 50 years from now?
Tape camcorders. Digital tapes may deteriorate over a decade or two, just as traditional tapes do.
The solution to all of these problems, of course, is simple vigilance. Every 10 or so years, you’ll have to copy your masterworks onto newer tapes, discs, hard drives, or whatever the latest storage format happens to be.
About This Book
Don’t let the rumors fool you. iMovie and iDVD may be simple, but they’re not simplistic. Unfortunately, many of the best techniques aren’t covered in the only “manual” you get with iLife—its electronic help screens.
This book is designed to serve as the iMovie/iDVD manual, as the book that should have been in the box. It explores each iMovie feature in depth, offers illustrated catalogs of the various title and transition effects, offers shortcuts and workarounds, and unearths features that the online help doesn’t even mention.
Note
The camcorder and iMovie produce video of stunning visual and audio quality, giving you the technical tools to produce amazing videos. But most people don’t have much experience with the artistic side of shooting—lighting, sound, and composition—or even how to use the dozens of buttons packed onto the modern camcorder. If you visit this book’s “Missing CD” at www.missingmanuals.com, you’ll find a bonus appendix in PDF form: three chapters designed to give you the basics of lighting, composition, and camera technique.
About the Outline
iMovie ’09 & iDVD: The Missing Manual is divided into three parts, each containing several chapters:
Part 1, Editing in iMovie, is the heart of the book. It leads you through transferring your footage into iMovie, editing your clips, placing them into a timeline, adding crossfades and titles, working with your soundtracks, and more.
Part 2, Finding Your Audience, helps you take the cinematic masterpiece on your screen to the world. iMovie excels at exporting your work to the Web, to YouTube, to an iPod or iPhone, to an Apple TV, to a QuickTime file on your hard drive, or to iDVD for burning (your best bet for maintaining the visual quality of the original). This part of the book offers step-by-step instructions for each of these methods, and also shows you how you can use QuickTime Player Pro to supplement the editing tools in iMovie.
Part 3, iDVD ’09, is just what you’d expect: a bonus volume dedicated to the world’s easiest-to-use DVD design and burning software. It goes way, way beyond the basics, as you’ll see.
At the end of the book, four appendixes await:
Appendix A provides a menu-by-menu explanation of iMovie menu commands.
Appendix B is a comprehensive troubleshooting handbook.
Appendix C is a master cheat sheet of iMovie’s keyboard shortcuts.
Appendix D is a visual reference to all of the little symbols, stripes, badges, and color-coded doodads that, sooner or later, will clutter up your iMovie window and leave you bewildered. Turn to this two-page cheat sheet in times of panic.
About → These → Arrows
Throughout this book, and throughout the Missing Manual series, you’ll find sentences like this one: “Open your Home → Library → Preferences folder.” That’s shorthand for a much longer instruction that directs you to open three nested folders in sequence, like this: “In the Finder, choose Go → Home. In your Home folder, you’ll find a folder called Library. Open that. Inside the Library window is a folder called Preferences. Double-click to open it, too.”
Similarly, this kind of arrow shorthand helps to simplify the business of choosing commands in menus, as shown in Figure 5.
Technical Notes for PAL People
If you live in the Americas, Japan, or any of 30 other countries, your camcorder, VCR, and TV record and play back a video signal in a format that’s known as NTSC. Even if you’ve never heard the term, every camcorder, VCR, TV, and TV station in your country uses this same signal. (The following discussion doesn’t apply to high-definition video, which is the same across continents.)
What it stands for is National Television Standards Committee, the gang who designed this format. What it means is incompatibility with the second most popular format, which is called PAL (Phase Alternating Line, for the curious). In Europe, Africa, the Middle East, Australia, and China (among other places), everyone’s equipment uses the PAL format. You can’t play an American tape on a standard VCR in Sweden—unless you’re happy with black-and-white, sometimes jittery playback.
Tip
France, the former Soviet Union countries, and a few others use a third format, known as SECAM. iMovie doesn’t work with SECAM gear. To find out what kind of gear your country uses, visit a Web site like www.vidpro.org/standards.htm.
Fortunately, iMovie converses fluently with both NTSC and PAL camcorders. When you launch the program, it automatically studies the camcorder you’ve attached and determines its format.
However, most of the discussions in this book use NTSC terminology. If you’re a friend of PAL, use the following information to translate this book’s discussions.
The Tech Specs of NTSC
Whether you’re aware of it or not, using the NTSC standard-definition format means that the picture you see is characterized like this:
30 frames per second. A frame is one individual picture. Flashed before your eyes at this speed, the still images blend into what you perceive as smooth motion.
575 scan lines. The electron gun in a TV tube paints the screen with this number of fine horizontal lines.
The DV picture measures 720 x 480 pixels. This figure refers to the number of screen dots, or pixels, that compose one frame of image in the DV (digital video) version of the NTSC format.
The Tech Specs of PAL
When iMovie detects a PAL camcorder (or when you inform it that you’re using one), it makes the necessary adjustments automatically, including:
25 frames per second. Video fans claim that the lower frame rate creates more flicker than the NTSC standard. On the other hand, this frame rate is very close to the frame rate of Hollywood films (24 frames per second). As a result, many independent filmmakers find PAL a better choice when shooting movies they intend to convert to film.
625 scan lines. That’s 20 percent sharper and more detailed than NTSC. The difference is especially visible on large-screen TVs.
The DV picture measures 720 x 576 pixels. This information may affect you as you read Chapter 12 and prepare still images for use with iMovie.
About MissingManuals.com
At www.missingmanuals.com, you’ll find news, articles, and updates to the books in this series.
But if you click the name of this book and then the Errata link, you’ll find a unique resource: a list of corrections and updates that have been made in successive printings of this book. You can mark important corrections right into your own copy of the book, if you like.
In fact, the same page offers an invitation for you to submit such corrections and updates yourself. In an effort to keep the book as up to date and accurate as possible, each time we print more copies of this book, we’ll make any confirmed corrections you’ve suggested. Thanks in advance for reporting any glitches you find!
In the meantime, we’d love to hear your suggestions for new books in the Missing Manual line. There’s a place for that on the Web site, too, as well as a place to sign up for free email notification of new titles in the series.
The Very Basics
You’ll find very little jargon or nerd terminology in this book. You will, however, encounter a few terms and concepts that you’ll see frequently in your Macintosh life. They include:
Menus. The menus are the words in the lightly striped bar at the top of your screen. You can either click one of these words to open a pull-down menu of commands (and then click again on a command), or click and hold the button as you drag down the menu to the desired command (and release the button to activate the command). Either method works fine.
Note
Apple has officially changed what it calls the little menu that pops up when you Control-click (or right-click) something on the screen. It’s still a contextual menu, in that the menu choices depend on the context of what you click—but it’s now called a shortcut menu. That term not only matches what it’s called in Windows, but it’s slightly more descriptive of its function. Shortcut menu is the term you’ll find in this book.
Clicking. This book offers three kinds of instructions that require you to use the mouse or trackpad attached to your Mac. To click means to point the arrow cursor at something onscreen and then—without moving the cursor at all—press and release the clicker button on the mouse (or laptop trackpad). To double-click, of course, means to click twice in rapid succession, again without moving the cursor at all. And to drag means to move the cursor while keeping the button continuously pressed.
When you’re told to ⌘-click something, you click while pressing the ⌘ key (next to the Space bar). Such related procedures as Shift-clicking, Option-clicking, and Control-clicking work the same way—just click while pressing the corresponding key on the bottom row of your keyboard.
Note
On Windows PCs, the mouse has two buttons. The left one is for clicking normally; the right one produces a tiny shortcut menu of useful commands. (See the previous Note.) But new Macs come with Apple’s Mighty Mouse, a mouse that looks like it has only one button but can actually detect which side of its rounded front you’re pressing. If you’ve turned on the feature in System Preferences, you, too, can right-click things on the screen.
That’s why, all through this book, you’ll see the phrase, “Control-click the photo (or right-click it).” That’s telling you that Control-clicking will do the job—but if you’ve got a two-button mouse or you’ve turned on the two-button feature of the Mighty Mouse, right-clicking might be more efficient.
Keyboard shortcuts. Every time you take your hand off the keyboard to move the mouse, you lose time and potentially disrupt your creative flow. That’s why many experienced Mac fans use keystroke combinations instead of menu commands wherever possible. ⌘-P opens the Print dialog box, for example, and ⌘-M minimizes the current window to the Dock.
When you see a shortcut like ⌘-Q (which closes the current program), it’s telling you to hold down the ⌘ key, and, while it’s down, type the letter Q, and then release both keys.
If you’ve mastered this much information, you have all the technical background you need to enjoy iMovie ’09 & iDVD: The Missing Manual.
— David Pogue
Safari® Books Online
When you see a Safari® Books Online icon on the cover of your favorite technology book, that means the book is available online through the O’Reilly Network Safari Bookshelf.
Safari offers a solution that’s better than e-Books. It’s a virtual library that lets you easily search thousands of top tech books, cut and paste code samples, download chapters, and find quick answers when you nee the most accurate, current information. Try it free at http://my.safaribooksonline.com/?portal=oreilly.
Get iMovie '09 and iDVD: The Missing Manual now with the O’Reilly learning platform.
O’Reilly members experience books, live events, courses curated by job role, and more from O’Reilly and nearly 200 top publishers.

