The beauty of tapeless camcorders is that, because they store video as computer files on a hard drive, on a DVD, or in memory, you don't have to wait for them to play into your Mac in real time. Instead, the importing process takes only as much time as iMovie needs to copy those files onto your Mac's hard drive. (At least in theory; read on.)
Note
If your camcorder records onto miniature DVDs, see Importing from DVD Camcorders for some additional notes.
Once you're ready to transfer some video from your camcorder, here's what to do:
Connect the camcorder's USB cable to your Mac.
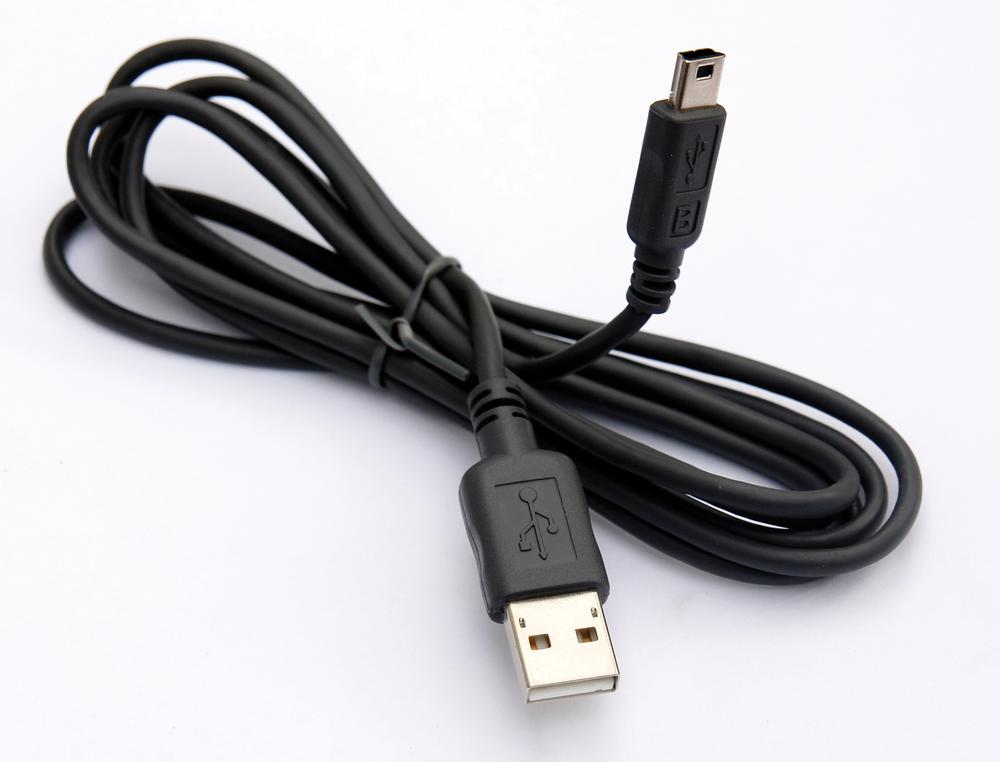
Most tapeless camcorders connect to the Mac using a USB cable, which comes right in the box. It connects to any of the Mac's skinny rectangular USB jacks, as shown in Figure 1-7. (If you have one of those tiny, very popular Flip camcorders, plug in its pop-out USB jack instead.)
Figure 1-7. Tapeless camcorders generally come with a USB cable. The little end plugs into the camcorder (you may have to open some tiny plastic doors on the camera to find the jack). The big end plugs into any of your Mac's USB jacks.
Note
If you're using an original Flip or Flip Ultra camera, you need to install the 3vix codec software that comes with your camera. When your Flip is connected, find its icon on your desktop. Double-click it to open a window containing the "Flip Video for Mac" installer software. Double-click the installer icon to get the necessary codec (The Export Pop-up Menu). Once you've done that, iMovie can talk to your Flip camera without a problem.
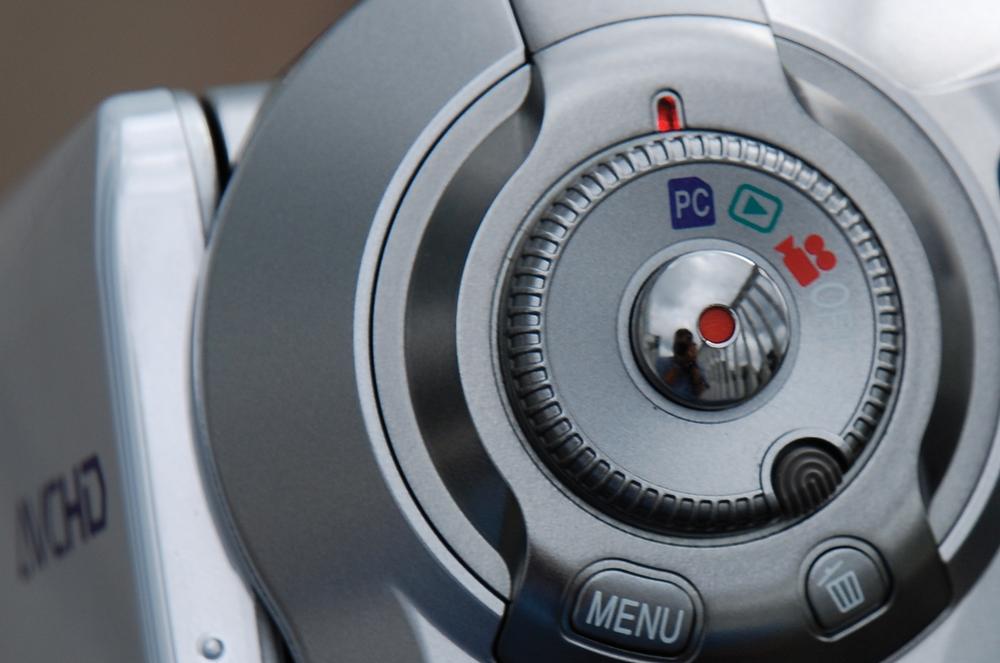
Turn on the camcorder. Switch it into PC mode.
The wording might vary, but every tapeless camcorder has a mode for making PC or Mac connections (Figure 1-8).
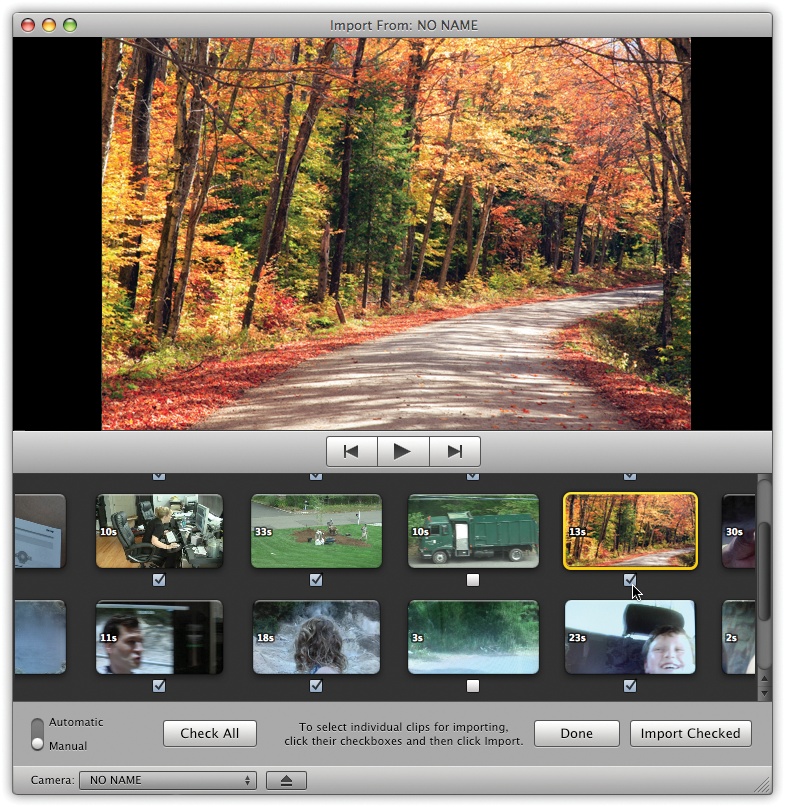
At this point, iMovie should open automatically, if it wasn't open already. If everything is going well, a message appears at the top of the screen that says, "Generating thumbnails." Then, after a minute, you see the Importing screen depicted in Figure 1-9.
If iMovie doesn't open, or if the Importing screen doesn't appear, then choose File → Import From Camera, or run through the troubleshooting steps described on iMovie Doesn't See the Tapeless Camcorder.
Figure 1-8. Every camcorder has a switch or command that lets you connect it to a PC (or, in this case, a Mac). Most tapeless camcorders have a dedicated position on the main mode dial for this purpose, like this one.
Figure 1-9. You can select individual scenes for importing without rewinding or fast-forwarding. You can also preview the recorded scenes before you bother importing them to the Mac. If your intention is to bring in most of the clips, just turn off the checkboxes that you don't want. If you want to import less than half of them, though, click Uncheck All, and then turn the checkboxes back on for the shots that you do want.
You're about to experience one huge payoff of using a tapeless camcorder: instant access to individual scenes on the camcorder. That means, first of all, that you don't have to rewind or fast-forward to find a certain shot. Furthermore, as you can see in Figure 1-9, iMovie lets you import only the shots you want, leaving the duds behind. That feature alone can represent a huge time savings over the old "import the whole tape" method.
Tip
If your camcorder stores its video on memory cards—SD cards, for example—then you have another option at this juncture. You could remove the card from the camcorder and insert it into a card reader that's attached to your Mac. (Card readers are super cheap—under $10. They're like tiny disk drives that attach to your Mac's USB jack.) The advantage of the card-reader method is that you don't use up the camcorder's battery power while you're transferring your video.
Inspect the shots on the camcorder to see what's worth importing.
To play a shot, click its thumbnail and then click the ► button. Click the
 or
or  buttons to skip to the previous or next shot
on the camcorder (or just click the thumbnails on the screen in front of you).
buttons to skip to the previous or next shot
on the camcorder (or just click the thumbnails on the screen in front of you).Specify which shots you want to import.
If you want to import everything on the camcorder, click Import All; then skip to step 5.
If you want to import only some of the shots, move the Automatic/Manual switch in the lower-left corner of the Import window to Manual. Now you'll see little checkboxes appear on the shot thumbnails. All of them start out with checkmarks, meaning that iMovie intends to import all of them. See Figure 1-9 for tips on selecting the scenes you want. Once the correct shots have checkmarks, click Import Checked.
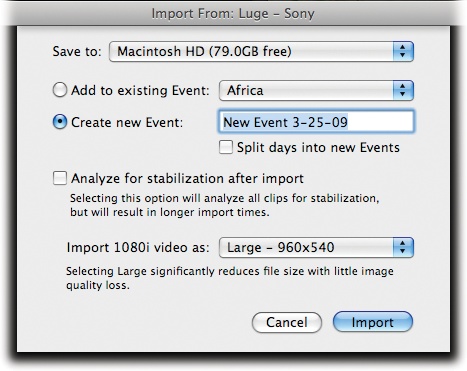
At this point, the top of the window sprouts a little sheet of options (see Figure 1-10).
Indicate where you want to save the transferred video clips.
Most people save the incoming clips onto the main Mac hard drive. But if you've bought additional hard drives to hold your movies, you can use the "Save to" pop-up menu to choose a different hard drive to hold your video.
Specify an Event.
The pair of choices shown in Figure 1-10 lets you answer these questions: Were the scenes you're about to import filmed at a new Event? Or should they more properly be filed along with scenes you've already imported as part of an existing Event? See the box on Importing from Tapeless Camcorders for the definition of an Event—and suggestions on what to choose here.
If you have a high-def camcorder, choose either "Large – 960 x 540" or "Full – 1920 x 1080".
You may not see the final option shown in Figure 1-10. It appears only when you're importing video from a high-definition camcorder, one that captures video in the so-called 1080i format. See the box on Automatic Scene Detection for a discussion of this option and advice on what to choose.
Turn on "Analyze for stabilization after import", if you've got the time.
The built-in footage stabilizer is one of iMovie's most important, and most effective, new features. It converts unsteady video into footage that looks as though the camera was on a tripod—but this "analysis" can take hours. See step 5 on page 30 for help in making this decision.
Click Import.
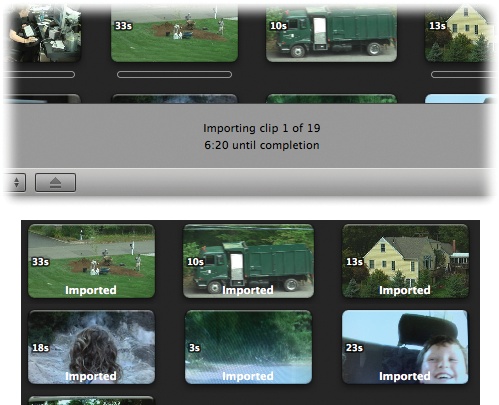
Now iMovie swings into action. It begins slurping in the video from the camcorder's hard drive, DVD, or memory card. As it works, a progress counter ticks off the remaining shots left to import (Figure 1-11).
Figure 1-11. Top: The counter here not only tells you how much longer you have to wait in "minutes:seconds" format, but also shows you how many video shots remain to be imported. Bottom: When it's all over, the word "Imported" appears on each thumbnail.That's a handy reminder when you've only opted to import some of the clips.
Considering that fact that a tapeless camcorder is supposed to spare you the real-time importing process of a tape, you may be surprised at how much time the importing takes. AVCHD footage, in particular (Camcorder Features: Which Are Worthwhile?), takes a long time because iMovie has to convert it into an editable format; depending on the speed of your computer, you may wind up waiting 2.5 minutes for each minute of video. An hour's worth of video, in other words, can take two and a half hours to import. You've been warned.
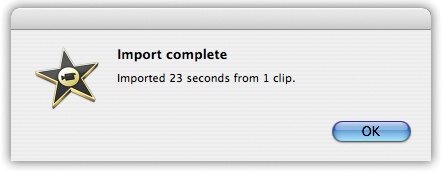
But never mind that; once the job is done, a message appears to congratulate you. It lets you know how many minutes and seconds of video you've imported, total, and how many clips (Figure 1-12).
Click OK.
The congratulations message goes away.
Click
 to eject the camcorder, and then click Done.
The Import screen goes away. You arrive at the main iMovie screen, where your new video appears in the Events list at the left side of the screen. Fine-Tuning the Events List describes this structure in more detail.
You can now turn off the camcorder to save battery power, if you like.
Get iMovie '09 & iDVD: The Missing Manual now with the O’Reilly learning platform.
O’Reilly members experience books, live events, courses curated by job role, and more from O’Reilly and nearly 200 top publishers.
