Autosizing the Button
Just as with the car image, you’ll have to specify how you want the button to act when the view rotates.
If you were to select the button and call up the Size inspector right now, you’d see that the button, like the car image before it, is set to keep a fixed left and top margin. (Refer to Figure 5-31.)
To have the button reposition itself so it stays in the center of the view no matter which orientation is displayed, deselect the top and right struts, as shown in Figure 5-32.
If you compile and run now, and in Landscape orientation, select Test Drive in the Master view, you’ll end up with what you see Figure 5-33.
Choose Hardware⇒Rotate Left (or whatever direction moves it to Portrait orientation, right side up) in the Simulator menu and you’ll see Figure 5-34, where the button maintains its position at the center of the view.
If you select the Detail button, it will take you back to the originating Detail View controller, which you will then be able to rotate back to Landscape orientation.
After you’ve added an object to your storyboard, you can check the results of your efforts at any time to see how things look. To do so, click Run in the Xcode toolbar and make sure you have the iPad Simulator scheme selected.
Figure 5-32: Keep it centered.
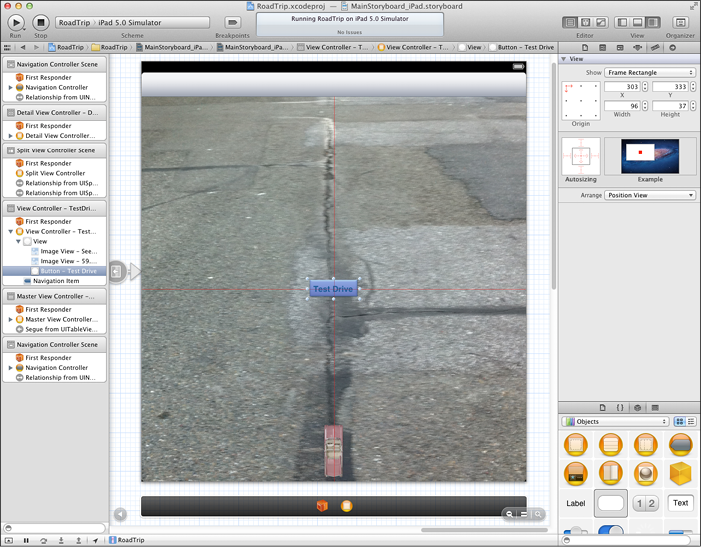
Figure 5-33: Select the Test Drive cell.
Figure 5-34: The view in portrait.
Get iPad Application Development For Dummies, 3rd Edition now with the O’Reilly learning platform.
O’Reilly members experience books, live events, courses curated by job role, and more from O’Reilly and nearly 200 top publishers.

