Most of us think of a word processor as a glorified typewriter, a simple way to organize ideas and arguments for the printed page. You craft words into paragraphs, juggle them, refine them, and then you’re done. Tap, tap, tap, print, and then it’s time to put your feet up.
Pages goes a step further, making it easy not only to compose your documents, but to design them, too. Whether you’re publishing a glossy newsletter or just writing a thank-you note to Aunt Peg, Pages lets you give your documents the visual pizzazz they deserve.
This chapter guides you through your new word-processing digs and gets you creating your own basic documents and simple projects—which just so happen to highlight Pages’ main features.
Note
If you need help installing Pages for Mac, see Appendix A.
Launch Pages by opening your Finder window and locating the Applications folder in the left-hand sidebar. Click the Applications folder to open it, and then scroll until you find the Pages icon. Double-click the icon to launch Pages. Alternatively, if you’ve added Pages to your Mac’s Dock (the strip of icons that runs along the bottom of your screen), you can jump straight into Pages by clicking the Dock’s Pages icon.
Tip
On a Mac, you launch every program in exactly the same way. So, now that you know how to launch Pages, you know how to launch Keynote and Numbers (and any other program), too.
The first time you launch Pages, you’re greeted by a “Welcome to Pages” screen, followed by a “New in Pages” screen. To take a look at your existing documents, select View My Documents (Opening an Existing Document has more info about opening existing documents).
To jump straight in and create a new document, click the New Document button, which launches the Template Chooser. The Template Chooser is where you, well, choose a template (glad that’s cleared up…).
Templates contain a mix of fancy things like images, tables, and shapes, not to mention dummy text, so you’re never confronted with a terrifyingly blank page (unless you want a blank page, of course, in which case take a deep breath and select the Blank template; In the Buff: The Blank Template has details). Templates can save you oodles of time. For example, if you’re organizing your local Small Animal Olympics event (hamsters vaulting through rings, rabbits doing the long jump—the usual), you could simply select the Event Poster template, type out a bit of text, replace the image placeholders with shots of fuzzy little animals, and you’re done.
Pages boasts 60 professionally designed templates to meet all of your wordsmithing needs, from newsletters to For Rent flyers, letters, cards, and everything in between. To make it easier to root out the template of your dreams, the Template Chooser is divided into categories (as shown in Figure 1-1). Select any category in the left-hand pane to see what that category has to offer. To ensure you pick the right template every time, the Template Chooser shows you miniature previews, or thumbnails, of each template. When you spy a template you want to use, either double-click its thumbnail, or click the thumbnail once and then click the Choose button.
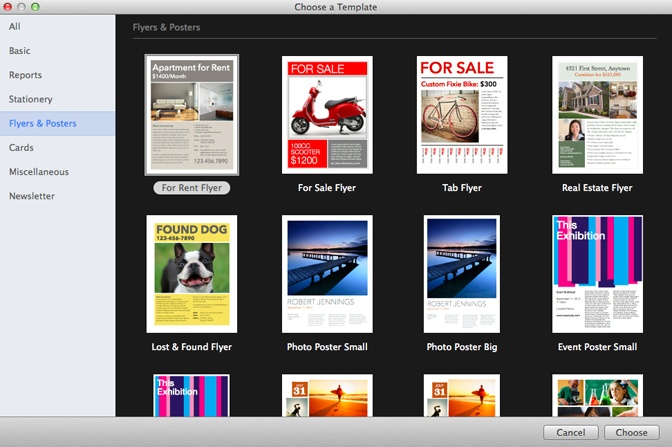
Figure 1-1. To browse the available templates, click a category in the window’s left pane, or choose All to see everything the Template Chooser has to offer. Use the arrow keys on your keyboard to browse the thumbnails for your chosen category.
Pages responds by opening a new document (in a new window) that’s based on your chosen template and gives it the riveting name “Untitled” (you’ll learn how to give it a new name on Saving and Printing). In addition to offering you lots of design options, these templates are built to last: When you choose a template, Pages actually opens a copy of the original, meaning you’re not editing the actual template itself. So feel free to work on your document, safe in the knowledge that the blueprint is locked away—unmodified—and will be right there waiting for you the next time you need it. (You can modify templates if you really need to, and you can create templates of your own, too. For all the ins and outs of template creation and manipulation, see Chapter 10.)
Tip
Got cold feet? If you’re no longer crazy about the template now that you’ve seen it up close and personal, you can throw it back and start over by closing the window (click the red Close button in the upper-left corner of the document window), and then going to File→New or pressing ⌘-N to pick a new template.
That was the warm-up; now it’s time to really dive in! The following sections show you how to put Pages’ templates to good use and start creating beautiful documents straight away. These quick-start introductions provide a high-level overview of Pages’ key features, but don’t fret: You’ll get acquainted with the program’s nuts and bolts in the following chapters.
Uh-oh, earnings are down at Crazyland Wonderpark (the less-than-amusing amusement park you grudgingly inherited from your Aunt Ethel)—time to get on the campaign trail and really market the park’s strong points. Who knows, if you design some great word-processing documents, maybe even that guy who wrote the really mean online review won’t be able to resist a repeat visit? Here’s hoping.
To create your first Pages document, launch the Template Chooser as explained above or by going to File→New, and hunt through the categories until you find the perfect template for your soon-to-be award-winning marketing campaign (the Elegant Brochure template in the Miscellaneous category looks perfect). Double-click your chosen template to create a new document based on it. The resulting new document, complete with dummy text and placeholder images, is shown in Figure 1-2.
Tip
If you decide that none of the templates are what you need, you can start with a blank document instead. For info on how to do that, flip to In the Buff: The Blank Template. And if you want Pages to use the same template every time you create a document (unless you specifically tell it to choose another template), In the Buff: The Blank Template explains how to set that up.
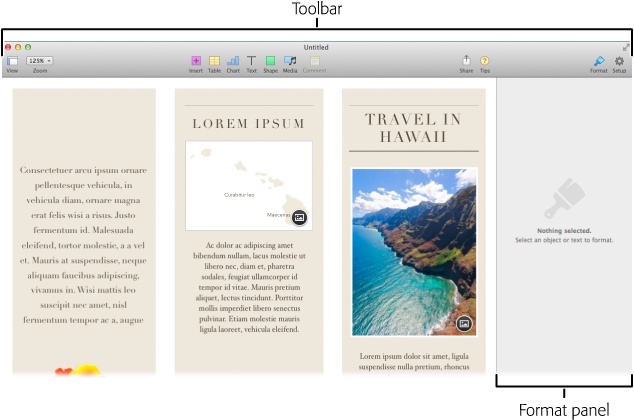
Figure 1-2. When you create a new document using a template, Pages fills up the whole layout for you, using placeholder text, images, shapes, and more. Across the top of the window is Pages’ toolbar, which you’ll use to add your own images, video, text, and so on. Along the right-hand side of the screen is the Format panel; stay tuned for more about this important feature!
Unless you opted for the Blank template (In the Buff: The Blank Template), your newly created document is composed of a collection of design elements called objects: text, shapes, images, movies, and even audio. Each object is contained in its own little box that you can drag, resize, and customize. At the most basic level, creating a document is all about filling these boxes with words and pictures.
Chapter 6 explores the ins and outs of working with objects. For now, though, the Elegant Brochure template has given you a leg up by providing you with a document that’s already bursting with nicely formatted objects. All that remains is to fill in your content.
Nearly all of Pages’ templates include placeholder text that shows where you can add text of your very own, and the Elegant Brochure template is no exception. Just click any placeholder text, and Pages selects the entire text block (as shown in Figure 1-3). Start typing, and the block disappears, replaced with your newly typed text.
The next chapter digs into all the nitty-gritty options for editing and formatting text. For now, we’ll keep it simple. If you’ve ever used a computer before, you already know how this works: Click to place the insertion point where you want to add or delete text, type your smooth-and-seductive prose promoting everything that’s good and wholesome about Crazyland Wonderpark, and hit the Return key every time you want to start a new paragraph or add a blank line.
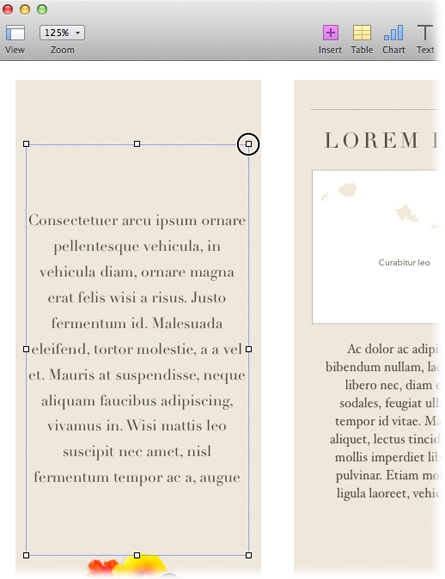
Figure 1-3. Clicking once on a text box selects the entire box, as shown here. You can then drag the text box to a new location, or resize it by grabbing one of the eight square handles around the box’s perimeter (the upper-right handle is circled here). Double-click the text itself to place your cursor inside the text box, and click anywhere outside the box to deselect the text box completely. For more about selecting and editing text boxes, see page 148.
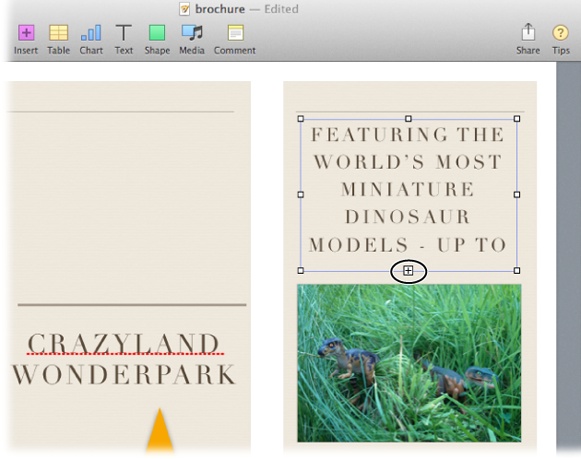
If you’ve gotten carried away singing the praises of Crazyland Wonderpark and your text box is overflowing, Pages lets you know by adding a clipping indicator, a + sign at the bottom of the text box (see Figure 1-4). This indicator gives you a heads-up that the box contains more text than it can display. To get out of this pickle, click anywhere inside the text box, and then drag any of the selection handles (or the clipping indicator) until all the text is visible. Or, if you don’t want to make the text box any bigger (or there isn’t any room to do so), simply edit your text down until it fits.
Nearly all templates contain placeholder images that you’ll want to replace with your own pictures; Figure 1-5 shows an example. The easiest way to replace these boring old stock images with your own works of art is to switch to the Finder, locate the image you want to use, and then drag it from the Finder into your Pages window. Drop the image onto the placeholder, and Pages swaps the new image in for the old one.
Say that you want your brochure to feature Crazyland Wonderpark’s all-new petting zoo, quite possibly the only petting zoo in the world with nothing but squirrels. You already have a bunch of squirrel photos in your iPhoto library that you’re itching to add to your brochure, and happily, all the iWork programs make it easy to plop pictures from iPhoto straight into your documents:
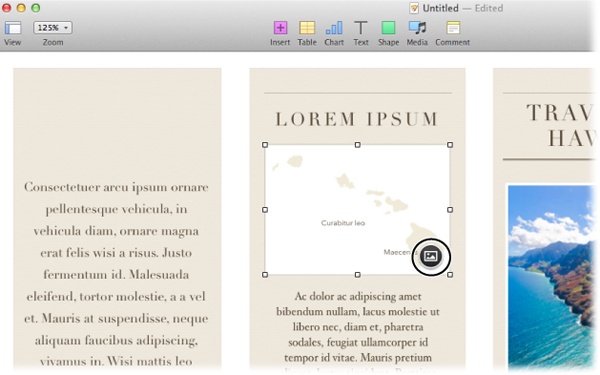
Click the icon in the placeholder image’s bottom-right corner.
Pages opens the Media Browser window, where you can browse your collections of audio, photos, and movies, as shown in Figure 1-6.
Figure 1-5. Media placeholders—which can contain photos, music files, and videos—are easy to identify because they have little icons in their bottom-right corners (circled). To replace a placeholder image, simply drag a new image onto it. When you drop the new picture on top of the placeholder, Pages makes the switch. You can drag pictures onto the placeholder from your desktop or directly from your iPhoto collection, as explained below.
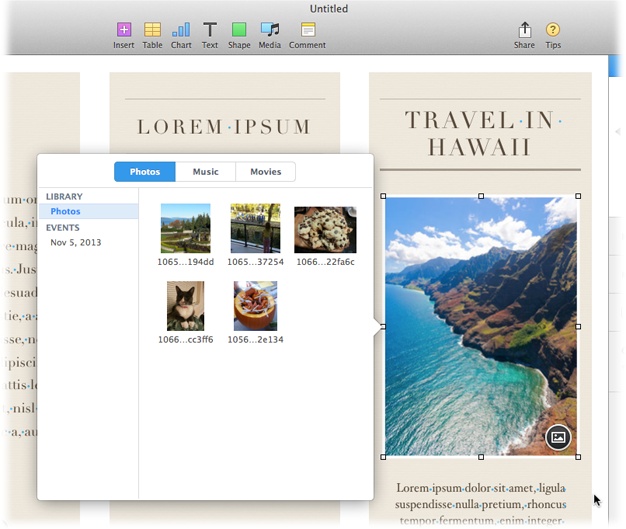
Figure 1-6. The Media Browser lets you access your computer’s collections of audio, photos, and movies. The Media Browser’s Photos tab (shown here) gathers your personal photo collections from iPhoto. In the left pane, you can explore your images based on the date they were added to iPhoto. If you’ve connected iPhoto to iCloud or My Photo Stream, these categories appear in the pane, too.
Note
iPhoto is free with every new Mac. If iPhoto didn’t come preinstalled on your shiny new Mac, you can download it for free from the App Store (see Appendix A for more about downloading iPhoto and other free apps). If you don’t own a new Mac, you can buy iPhoto (as of this writing, it cost $14.99). Learn more about iPhoto at www.apple.com/mac/iphoto.
In the Media Browser window, choose your photo.
Click the thumbnail preview of the photo you want to use.
The new photo appears in your document.
Pages replaces the placeholder image with your photo, automatically resizing it to fit the placeholder’s dimensions.
Tip
Once you replace a placeholder image with an image of your very own, the media placeholder icon (circled in Figure 1-5) disappears. Not to worry: If you want to replace this photo at any point, Control-click the photo and select Replace Image from the shortcut menu to relaunch the Media Browser window. Choose your new image, and Pages performs its placeholder squeezery again, formatting the new picture to fit the existing layout.
When you replace a placeholder image with one of your own, Pages sizes and crops your picture until it’s the right size to fit the existing space, hiding parts of the image that don’t quite fit, as shown in Figure 1-7.

Figure 1-7. Top: Here’s a photo of one of the cute critters from Crazyland Wonderpark’s petting zoo. Bottom: When the image was inserted into the brochure, Pages sliced off the right-hand side of the photo to fit the original placeholder’s dimensions.
Never fear: The missing bits of the photo aren’t gone for good; they’re just hidden by a mask. You can use masks to crop pictures throughout iWork. Think of a mask as a window with curtains that allow only part of the image to peek through. You can adjust the curtains or resize the picture under the mask to control the exact portion of the picture that’s visible.
Time to draw back those curtains! Figure 1-8 shows how Pages’ mask-editing features let you temporarily uncover the hidden portions of an image. To edit the mask, double-click the image to reveal the Edit Mask controls, along with two buttons: Edit Mask and Resize. When you’re in mask-editing mode, Pages reveals the entire photo, with the hidden parts of the image dimmed and transparent so that you can see what’s masked and what’s not. To change the mask, click the Edit Mask button and drag the slider.
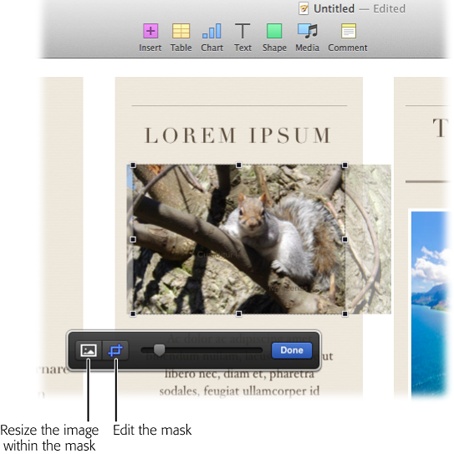
Figure 1-8. Editing a mask lets you change which part of the picture you reveal and which parts you keep hidden. Zoom the image in or out by dragging the slider next to the Edit Mask button. You may also want to try resizing the image within the mask by clicking the Resize button and then using the selection handles (which turn black to let you know that you’re editing the image and not the mask). When you put your cursor over the image, the cursor turns into a hand, and you can then drag the image to a new position behind the mask. If you accidentally drag the picture while mucking around with the mask controls, you can undo this change by pressing ⌘-Z or choosing Edit→Undo.
When you’re done editing the mask, hit Return, click Done, or click anywhere outside the image, and Pages proudly displays the final result. For complete details about adding, editing, and removing image masks, see Choosing a File from Your Hard Disk.
After replacing the dummy text
and placeholder images, it’s time to save your document so you can come back and continue working on it later:
Choose File→Save or press ⌘-S.
The Save dialog box appears (Figure 1-9).
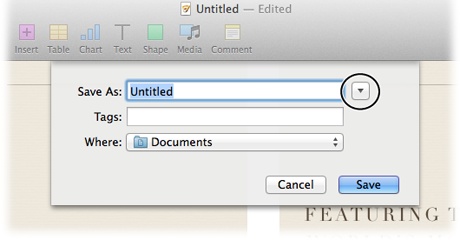
Figure 1-9. The compact version of the Save dialog box (shown here) has three fields: Save As, Tags, and Where. Type the name of your document in the Save As field. Tags are an optional extra that can help you find a file in a hurry; see the box on page 15 for more information on tags. Use the Where field to tell Pages where to save your document. If you want to take a look at the expanded version of the Save dialog box (it’s shown in Figure 1-10), click the downward-pointing triangle circled here.
Type a title for the document in the Save As field, and tell Pages where to save your document.
The Save As field is already highlighted, so just start typing. Click the Where menu and choose Documents (if it’s not already selected) to store this Pages file in your Documents folder. If you’re interested in tags, then see the box on Tagging Your Files for more info.
Tip
To see more options in the Save dialog box, click the button circled in Figure 1-9 to expand the dialog box as shown in Figure 1-10.
Click Save.
The Save dialog box vanishes, and Pages stores your document in the location you chose in the Where field. You can now continue to work on your document, periodically choosing File→Save (or, to save yourself some time, ⌘-S) to update the saved file with any changes.
Tip
Save often! Pages automatically saves your document at regular intervals, but you’ll want to get into the habit of saving your work every few minutes to make extra sure Pages is committing your most recent changes to memory. To find out more about these automatic backups, check out Changing Font Styles and Appearance.
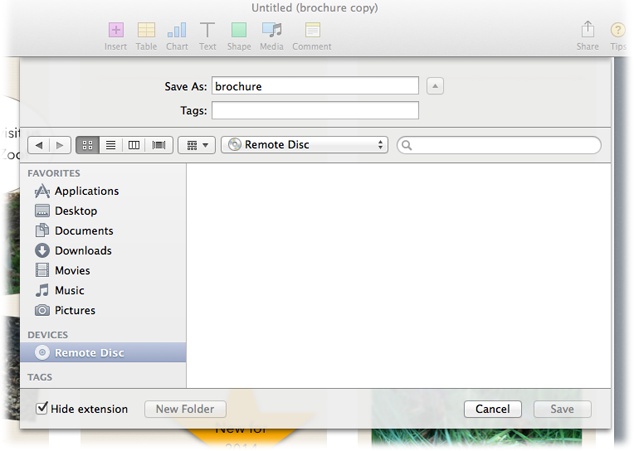
Figure 1-10. To take a peek at the expanded version of the Save dialog box, click the downward-pointing triangle next to the Save As field. The Save dialog box in its full glory (shown here) gives you access to locations not listed in its compact cousin. You can navigate through your entire computer—and even other computers on your network—to find the perfect destination for your document.
When you’re ready to unleash your marketing prowess on the world, print your document:
Choose File→Print or press ⌘-P.
The Print dialog box appears.
Make sure the right printer is selected.
If you have more than one printer connected to your computer, check that the correct one is selected in the Printer drop-down menu.
Type the number of copies you need in the Copies box.
If you just want one copy, there’s no need to make any changes.
Click Print.
Your printer starts whirring and chirping and, in short order, delivers the hard copy.
Now that you’ve finished creating your brochure, you can close its document window by clicking the red Close button in its upper-left corner. If Pages asks whether you want to save your changes, click Save. Your documents vanishes from the screen but remains safely stored away on your hard drive, ready to be reopened if you ever want to revise it or to print more copies.
After you’ve finished updating your brochure with your own text and photos, you’re ready to add more pages.
If you’re working with a word-processing document (a document that’s all about the text—such as the Note Taking, Blank, or Essay template) then when you hit the bottom of a page, Pages adds a new page automatically. But if you’re working with a page-layout document (a template that includes funkier objects, like placeholder images, tables, charts, or shapes), then you have to create new pages yourself.
Tip
Unsure whether you’re dealing with a word-processing document or a page-layout document? A surefire way to check is to click a blank area of your document. If the cursor turns into the I-beam cursor, ready for you to start typing, then you have a word-processing document on your hands. If nothing happens, then it’s a page-layout document. Another way to check is to click the Insert button in the toolbar: If you see a Page option, you’re working with a page-layout document. If the Page option is missing, you’re working with a word-processing document.
Adding a new page to a page-layout document is easy: Choose Insert→Page or click the Insert button in the toolbar and then click Page. To add a new page to a word-processing document, either continue typing until you reach the bottom of the page (at which point, the program automatically creates a new page) or click Insert in the toolbar and choose Page Break (page breaks are covered in more detail on Coping with Breakups).
And so it goes: Keep adding pages and filling them with your own text, photos of squirrels, and snaps from your forthcoming exhibit: The World’s Greatest Roundabouts and Where to Find Them.
Templates are particularly useful for getting off to a flying start with complex layouts. But let’s face it: Not all documents require a fancy, elegant design. If you’re dashing off a quick shopping list, organizing your thoughts, crafting a short story, or building a page layout from scratch, the best starting point is often a blank page.
Pages offers two blank templates for your word-processing delight—Blank and Blank Landscape—which you can find in the Template Chooser’s aptly named Basic category. Unlike all the program’s other templates, you won’t find any placeholder text or images in these two templates. Simply double-click whichever blank template suits your fancy, and Pages creates an empty document for you.
As you settle into a routine with Pages, the Blank template may become your go-to template, the fastest route to getting something down on paper. If you do fall into the habit of choosing Blank every time—or any other template, for that matter—there’s really no reason to go through the middle man Template Chooser every time you want to start a new document. Sure, it’s only trying to help, but couldn’t Pages just cut to the chase and automatically use your favorite template when you want a new document? Yep, you just have to ask nicely.
You can relieve the Template Chooser of its duties and nominate a default template at the same time. After that, whenever you go to File→New, Pages creates a new document based on your preferred template. Here’s how to set this up:
Choose Pages→Preferences, and Pages displays the Preferences window.
Click the General button (if it’s not already selected).
Next to the For New Documents heading, turn on the “Use template” option.
Click the Change Template button to display the Template Chooser, and then select your preferred template.
Double-click a template’s preview image, or click it once and then click the Choose button. Either way, the For New Documents setting updates to show the name of your new go-to template: “Use template: [Template name].”
Close the Preferences window by clicking the red Close button.
If you have a change of heart and want the Template Chooser back in your life, go to Pages→Preferences→General, and change the For New Documents setting back to Show Template Chooser.
After this flurry of creating and saving documents, you now have a tidy collection of Pages files on your hard drive. When you’re ready to get at ’em again, use any of these techniques to open a saved file:
In the Finder, double-click a Pages document.
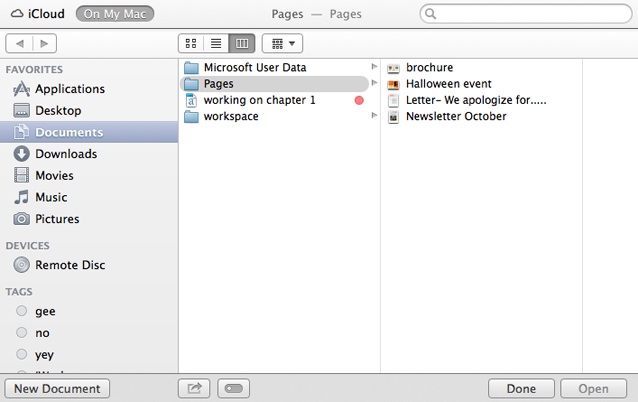
In Pages, choose File→Open, or press ⌘-O. Pages displays the Open dialog box (Figure 1-11), which is your doorway to browsing all the Pages (and Pages-compatible) files on your hard drive and choosing which one you want to open.
Figure 1-11. The Open dialog box lets you browse your computer, iCloud, or any other computer on your network to find your file. If you’ve forgotten exactly where you stashed the file you’re hankering after, use the search box at the top right to hunt down your file. Select the file that you want to open, and then click the Open button.
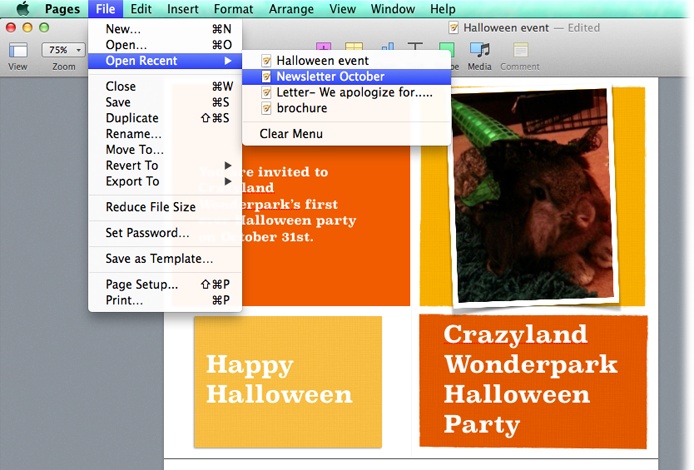
If you’re looking for the document you were working on 10 minutes ago, you can find it in Pages’ File→Open Recent submenu (Figure 1-12), which gives you fast access to the last 10 files you’ve dabbled with.
Figure 1-12. The Open Recent submenu contains a list of your most recently used Pages documents. Select the document you want, and Pages opens it for you in a new window. If other people are using your computer and you prefer them to not see that you’ve been editing a file named “Plans for Super Secret New Attraction,” then choose File→Open Recent→Clear Menu to make Pages forget your editing history.
In the Open dialog box, Pages grays out any files that it doesn’t know how to open, so you can see at a glance which files it can work with. Pages can open Microsoft Word (.doc and .docx) and plain text (.txt) documents, not just Pages documents.
When Pages opens these other file types, it imports them into a brand-new Pages document. That means you’re actually working with a copy rather than with the original file. Save the document (Saving and Printing), and you’re ready to start editing away.
When Pages opens a file from another program, it does its best to preserve the text and formatting of the original document. And with most documents, Pages spins effortlessly through these file-format gymnastics. But you may occasionally find some minor display differences, particularly for very complex Microsoft Word documents. So for ambitious layouts and important documents, it’s a good idea to make a careful review of the document to ensure that all the formatting looks the way you want.
Pages doesn’t stay quiet if it can’t cope with parts of an imported document. When it suspects some elements might not have made the transfer intact, it lets you know. Specifically, the Document Warnings window, shown in Figure 1-13, tells you what’s wrong with your imported document.
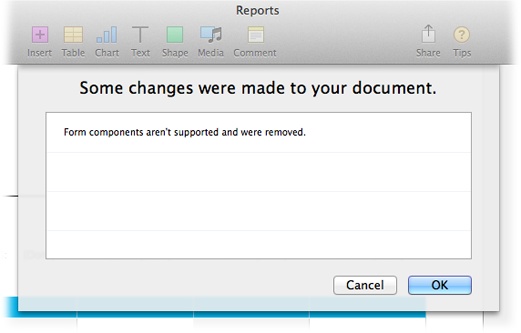
Figure 1-13. The Document Warnings window details any problems that occur when you import a document from another program. Here, for example, Pages is letting you know that it deleted some elements that it didn’t understand, so you should check the imported document extra carefully to make sure nothing vital is missing.
Even though you’ve already tried your hand at creating your own documents in this chapter, you might have noticed that you’ve barely touched Pages’ menus and toolbar buttons. As you’ve seen, the nuts-and-bolts editing of text and images takes place directly in the document window’s main work area with lots of typing and a bit of light mousework.
Over the next few chapters, as you get acquainted with Pages’ more advanced formatting and layout tools, you’ll get more hands-on with other parts of the program. Mastering the different buttons and menus is the next step to creating and editing show-stopping documents. Fortunately, Apple has gone easy on you. Rather than cramming every possible tool and button into Pages’ document window, it’s gone for a less-is-more approach.
In fact, when you opened your first Pages document, you may have thought, “Where is everything?” Don’t panic—it’s all there. Despite its minimalist design, Pages offers easy access to the tools and features you’re most likely to need by placing them in the toolbar and the Format panel, while keeping the ones you need less often hidden beneath the surface. See Figure 1-14 for a quick tour around the more interesting parts of your document-window cockpit.
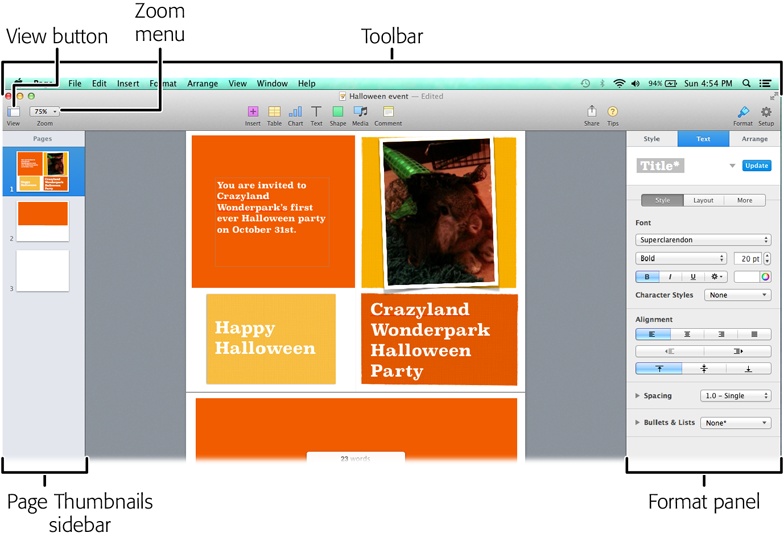
Figure 1-14. The toolbar is Pages’ most useful component, and it’s what you use to add objects to your document (shapes, tables, charts, and so on). The oh-so-useful Format panel changes according to the object you select; when you’re editing text, for example, it displays text-formatting options, as shown here. To quickly move among pages, use the Page Thumbnails sidebar. If it isn’t already open, click the View button and select Show Page Thumbnails. And the Zoom drop-down menu lets you control how big your document appears onscreen.
The toolbar runs along the top of the document window, complete with a set of colorful buttons for one-click access to common features, saving mileage on your mouse and strain on your memory. You’ll learn more about each of these buttons in the coming chapters, but here’s the condensed version:
View. The first button opens a drop-down menu that lets you show and hide parts of the document window. You can use it to display the Page Thumbnails sidebar, open the Find & Replace dialog box (The Find & Replace Dialog Box), show or hide the ruler (see Setting Tabs), and make Pages display your current word count to help you keep track of how much (or little!) you’ve typed.
Zoom. Click this button to make the onscreen size of your document bigger or smaller (see Changing Your Page View).
Insert. This drop-down menu lets you add non-object goodies to your document, such as new pages, page numbers, a page count, and column breaks (see Auto-Entry: Formatted Text Fields).
Table. This button inserts a table into your document (see Creating Tables).
Chart. Click this button to insert a variety of 2D, 3D, and interactive charts (see Moving Formulas).
Text. This button inserts a text box into your document (see Adding Objects).
Shape. The Shapes drop-down menu lets you add lines, arrows, and geometric shapes to your document (see Adding Shapes).
Media. Insert images, audio clips, and video clips by clicking this button (see Adding Columns to Text Boxes).
Comment. This button adds a note to your text, letting you annotate your document, which is handy for collaboration and tag-team editing (see Adding Comments).
Share. If you’re in the mood to share, click this button to access a ton of options. Want to share this document via email? How about Twitter, Facebook, or AirDrop? Your sharing options are discussed on Emailing Your Document. You can even share your document via iCloud; Emailing Your Document has the skinny on the exciting new world of iCloud.
Tips. This button is your ticket to handy hints about Pages. When you click this button, Pages draws your attention to important menus and buttons by plastering sticky notes all over your screen. If you see an arrow inside a sticky note, click it to see additional info about whatever’s mentioned in the sticky note. To hide the sticky notes, simply click this button again.
Format. Click this button to hide or reveal the Format panel, which is covered in more detail on Shape Shifter: The Format Panel.
Setup. Click this button to open the Document and Section tabs (see Document Formatting).
If you find the toolbar too distracting, you can banish it by choosing View→Hide Toolbar; by pressing Option-⌘-T, or by Control-clicking the toolbar, and then selecting Hide Toolbar. Hiding the toolbar also lets you see more of your document without needing to scroll.
Chances are, though, you’ll want to keep the toolbar around while you’re working on most documents. If you want to coax the toolbar back into your life, either repeat the keyboard shortcut listed above, select View→Show Toolbar, or Control-click the gray band that runs along the top of Pages’ document window and then select Hide Toolbar.
The toolbar is pretty slimmed down compared with what it looked like in Pages ’09, but you can still fully customize this sleek little bar. To add and remove icons from the toolbar, either Control-click the toolbar and choose Customize Toolbar or choose View→Customize Toolbar. Either way, Pages opens the Customize Toolbar window shown in Figure 1-15 and puts faint boxes around the parts of the toolbar that you can drag and drop additional icons onto.
To remove an icon from the toolbar, grab the icon and drag it down, off the toolbar; when you release it, the icon vanishes in a puff of smoke. To add icons to the toolbar, grab any icon from the Customize Toolbar window, and then drop it onto one of the empty boxes on the toolbar. Once the toolbar is full, Pages adds scrolling arrows to the toolbar, so you can continue to pack in icons. Once you’re happy with the toolbar, click Done.
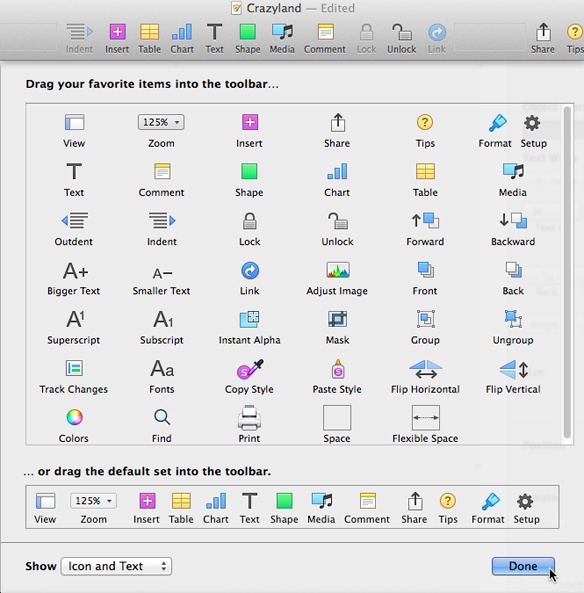
Figure 1-15. You can add more icons to the toolbar by opening the Customize Toolbar window and dragging icons from this window onto the toolbar. If the toolbar is beginning to look a bit unruly, you can restore it to its original state by dragging the “default icon set” (the boxed set of icons near the bottom of the window) onto the toolbar. When you’re finished, click Done.
You can also remove the labels from underneath the toolbar’s icons. Doing so makes the toolbar even sleeker, if you’re a fan of that less-is-more look. To hide the labels, Control-click the toolbar, and then select Icon Only from the drop-down menu shown in Figure 1-16. If you’re racking your brain to remember what an icon means, you can get the labels back by Control-clicking the toolbar and then selecting “Icon and Text.” You can also change these labels by opening the Customize Toolbar window and choosing Icon Only from the drop-down menu in the window’s bottom-left corner.
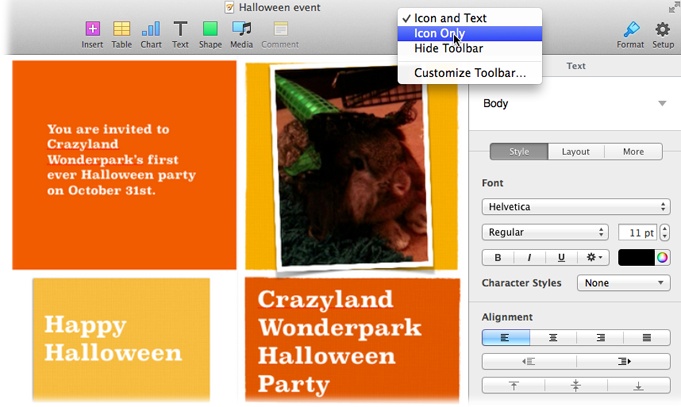
Figure 1-16. You can hide the labels that appear underneath each icon in the toolbar (in this screenshot, the labels are visible). To hide these labels, Control-click the toolbar, and then choose Icon Only. To display them again, choose “Icon and Text” instead. You can access further toolbar-customizing options by clicking Customize Toolbar.
The Format panel is one of the most important and useful tools Pages has to offer; an ever-changing shape shifter that always has just the right options you need to edit the currently selected object. For example, if you select an image, the Format panel contains options for adjusting the image’s exposure, swapping in a new image, and adding a drop shadow. No matter what part of the document you’re editing, the Format panel keeps up with you, dispatching tools that are no longer relevant to make room for options you’re more likely to use.
Note
Technically, Apple calls the Format panel the “Format inspector.” But since it looks like a panel, this book calls it the Format panel. Just don’t be confused if you read a tutorial from Apple that mentions the Format inspector—it’s referring to the Format panel.
Since it contains only relevant buttons, sliders, and checkboxes, the Format panel is uncluttered and easy to navigate, with nothing hidden away in strange nooks and crannies. Figure 1-17 shows the Format panel in action.
Depending on the object you select, the Format panel may be split into two or more tabs. In Figure 1-17, for instance, the Format panel is displaying the Style, Text, and Arrange tabs. To move among the different tabs, simply click the tab you’re interested in. The Arrange tab is a permanent fixture when you’re dealing with objects, as it contains controls for resizing, repositioning, and rotating objects. You may also see additional tabs, such as Shape and Text, when you select a shape.
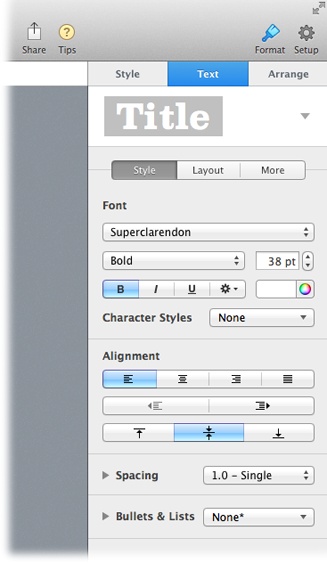
Figure 1-17. The Format panel lets you fine-tune the appearance of whatever object is currently selected. For example, if you’re typing inside a text box, the Format panel shows options for formatting text, such as changing the font; adding a bold, italic, or underlined effect; changing the font size; and so on.
If the panel’s slim silhouette requires more space than you care to give up, you can send it packin’ by clicking the Format button in the toolbar. Had a change of heart? Bring it back by clicking the Format button once again.
Pages always displays your document just the way it will look on the printed page, complete with margins, page breaks, and the like. When Pages opens a document, it sets the zoom level to 125% magnification, a comfortable, medium-sized view that’s about the size of your printed document.
To shrink or magnify how your document appears on your screen, click the Zoom button in the toolbar, and then select the percentage you want to use. Or, if you’re in a hurry, you can use keyboard shortcuts to change the zoom level:
These options are also available from the View→Zoom submenu.
Zooming in and out doesn’t affect the actual size of your document, only the way that Pages previews it for you onscreen. Think of zooming as holding up a sheet of paper for a close look or pushing it away—it doesn’t change the size of the document, just how much detail you see.
At the bottom of the Zoom drop-down menu (and in the View→Zoom submenu), you’ll find two automatic zoom settings that you can use as alternatives to the percentage settings. Fit Width adjusts the zoom level so the page fills the full width of the document window—no matter how narrow or wide (don’t you wish that your pants had this setting at Thanksgiving?). Fit Page, on the other hand, adjusts the zoom level so that an entire page fits into your window. Select either of these settings, and Pages automatically changes the zoom level as you adjust the size of the document window by dragging any edge or switching to Full Screen view (Editing in Full-Screen View).
Scooting around a one-page brochure isn’t too much of a challenge, but finding your way around a 200-page manifesto is much tougher. Pages provides a number of tools that help keep you oriented, and let you move quickly through even the chubbiest of documents. To bring earlier parts of your document into view (known as scrolling up), press the up arrow key on your keyboard. To bring later parts of your document into view (scrolling down), use the down arrow key. When you’re scrolling, a scroll bar briefly appears along the left-hand side of the Format panel to give you some idea of your position within your document.
Tip
If you’re using Pages on a laptop, you can also scroll using gestures. Place two fingers on your Mac’s touchpad and drag up and down to move around your document. For more on Mac gestures, see http://support.apple.com/kb/ht4721.
But why bother with all this mousing around when Pages has kindly provided you with all sorts of keyboard shortcuts? Table 1-1 reveals all.
Table 1-1. Pages keyboard shortcuts
PRESS THIS… | …TO DO THIS. |
|---|---|
← or → | Move insertion point one character to the left or right. |
↑ or ↓ | Move insertion point to the line above or below. |
Option-← | Move insertion point to the beginning of the current word; if the insertion point is already at the beginning of a word, then it jumps to the beginning of the previous word. |
Option-→ | Move insertion point to the end of the current word; if the insertion point is already at the end of a word, then it jumps to the end of the next word. |
⌘-← or → | Move insertion point to the beginning or end of the current line. |
⌘-↑ or ↓ | In a word-processing document, move insertion point to the beginning or end of the document. In a page-layout document, this shortcut moves the insertion point to the beginning or end of the text in the selected object (such as a shape or text box). |
Option-↑ or ↓ | Move insertion point to the beginning or end of the current paragraph. |
Think of the Page Thumbnails sidebar as a visual table of contents for your document. This sidebar is turned off when you open a document, but you can toggle it on and off using the View button in the toolbar or by selecting View→Show/Hide Page Thumbnails. If you’re in a hurry, you can press Option-⌘-P to show/hide the Page Thumbnails sidebar. Whichever method you use, the sidebar opens along the left side of the document window (Figure 1-18).
The sidebar shows numbered thumbnail images of each page within your document; use the up and down arrow keys on your keyboard to move through the pages in your document. The Thumbnails sidebar makes it easy to find the exact page you’re looking for—especially if your document features big, colorful pictures or distinctive page layouts. You can recognize the page you’re after at a glance, since the thumbnails are images of the pages themselves—including headlines, columns of text, pictures, and so on.
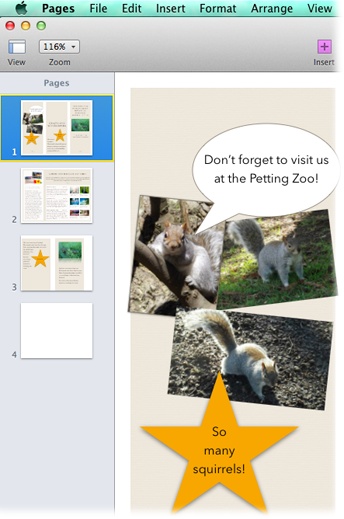
Figure 1-18. The Pages Thumbnail sidebar contains miniature previews of all the pages in your document. Click any thumbnail image to jump to the corresponding page, or use the up and down arrow keys to move between pages. Pages’ highlights the selected thumbnail with a yellow border. You can adjust the width of the Page Thumbnails sidebar by putting your cursor over the line where the sidebar meets the main editing area. When the cursor turns into a double-headed arrow, drag left or right to resize the sidebar. The thumbnails grow as you make the sidebar wider, so this is a handy way to get a closer look at those page previews.
To jump to a specific page, click its thumbnail in the sidebar. The page then appears in the main viewing area, ready for editing. In the sidebar, Pages highlights the current page, so you can see your exact position within the document. As you’ll learn later, you can also use these thumbnails to delete pages—or even entire sections—of your document (see Page Numbering).
The Find & Replace dialog box trawls through every last word in your document and pinpoints specific words you tell it to look for. To open this handy feature, click the View button and select Show Find & Replace; go to Edit→Find→Find; or simply press ⌘-F (that’s F for “find”). Whatever method you use, the Find & Replace dialog box appears smack-bang in the middle of your screen. Happily, you can drag it to a more convenient location so you can keep it open and continue editing your document. Type a word or a phrase into the dialog box’s text field, and as you type, the field displays a grayed-out tally of how many matching words it has zeroed in on, as shown in Figure 1-19.
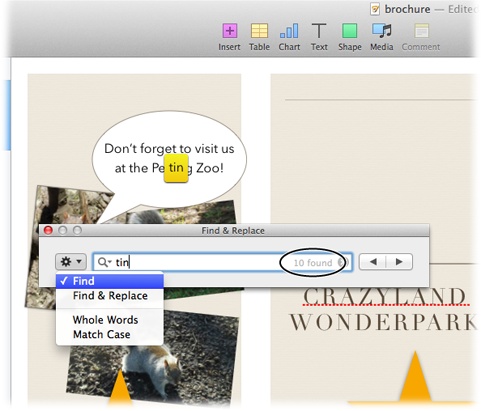
Figure 1-19. You can search for specific words using this dialog box. Enter your search term, and Pages shows you how many matches it found (circled). Click the dialog box’s arrows to move back and forth among the results, and use the gear menu shown here to fine-tune what matches you see. For example, you can tell Pages to find only words that match the case of your search term.
When you first open this dialog box, its searches aren’t case-sensitive, and it also finds matches in the middle of words. So if you type tin, for example, it will find matches in the words “Tiny” and “petting.” To make the dialog box pickier, click the gear icon on its left side, and then click Whole Words (to strip out results from the middle of words) or Match Case (to see results only if they have the same capitalization as what you typed). You can tell which search settings the dialog box is using because Pages puts a checkmark next to each option in the gear menu. If you change your mind, you can turn any option off by clicking the gear icon again and reselecting whatever option is giving you grief.
Once you’re happy with your settings, you can scroll through the matches by clicking the dialog box’s arrow buttons.
Note
This section just scratched the surface of what the Find & Replace dialog box has to offer. Changing Your Mind: Find & Replace takes a closer look at this handy feature.
The marvelous curse of your Mac is that it plays so many roles. Your word-processing machine is also an engine for entertainment, communication, news, and—if you’re not disciplined—rampant procrastination. When you’re trying to buckle down and actually do some work, your Mac’s many tools and toys can be distracting. Pages’ full-screen view helps you remain focused by making your document the one and only thing on your screen, hushing the siren calls of Facebook, Twitter, and all the other goodies vying for your attention.
Choose View→Enter Full Screen, click the double-arrow icon in the upper-right corner of the Pages window, or press Control-⌘-F, and Pages banishes everything except your current document. Even the menu bar disappears, leaving you with only the bare bones you need to really concentrate on creating the perfect document (Figure 1-20).
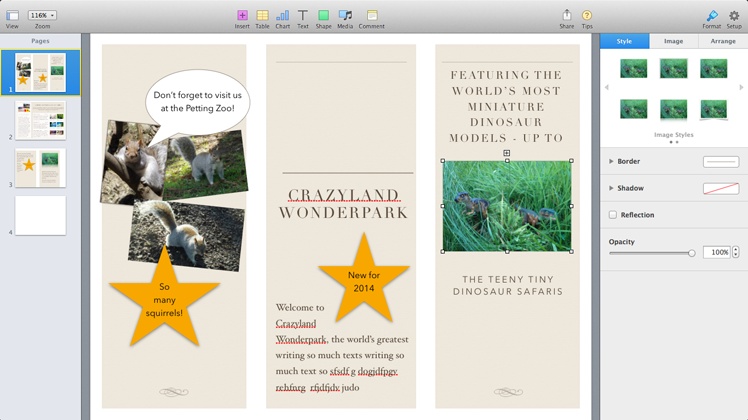
Figure 1-20. Pages’ full-screen mode lets you focus exclusively on your document. This mode is also handy for reviewing documents in meetings, as it makes your document big enough for several people to see while huddled around your Mac.
If this stripped-down look makes you feel a bit naked, don’t get nervous. The menus at the top of your screen haven’t gone far; they’re waiting quietly behind the scenes, and you can get them back at any time by moving the pointer to the top of the screen.
Even in full-screen view, you can adjust the zoom as usual (Changing Your Page View). With all this screen space devoted only to your Pages document, you may want to choose a more magnified view.
When you’re done with full-screen view and want to return to the regular window view, press Esc. Or move your pointer to the top of the screen to temporarily uncover the menu bar, and then choose View→Exit Full Screen or click the double-arrow icon at the right end of the menu bar.
With this newfound ability for extraordinary focus, you’re ready to start cranking out words. The next chapter gives you a leg up by exploring everything you need to know about adding, editing, and formatting text.
Get iWork: The Missing Manual now with the O’Reilly learning platform.
O’Reilly members experience books, live events, courses curated by job role, and more from O’Reilly and nearly 200 top publishers.

