- Open Visual Studio 2017.
- Now open the solution from the previous recipe. Click File | Open | Open Project/Solution, or press Ctrl + Shift + O, and select the Chapter1.Library solution.
- Now click on the Chapter1.Library solution label. Click File | Add | New Project.
- In the Add New Project template dialog box, expand the Visual C# node in the left-hand pane.
- Select Windows Classic Desktop and select WPF App (.NET Framework) in the right template pane.
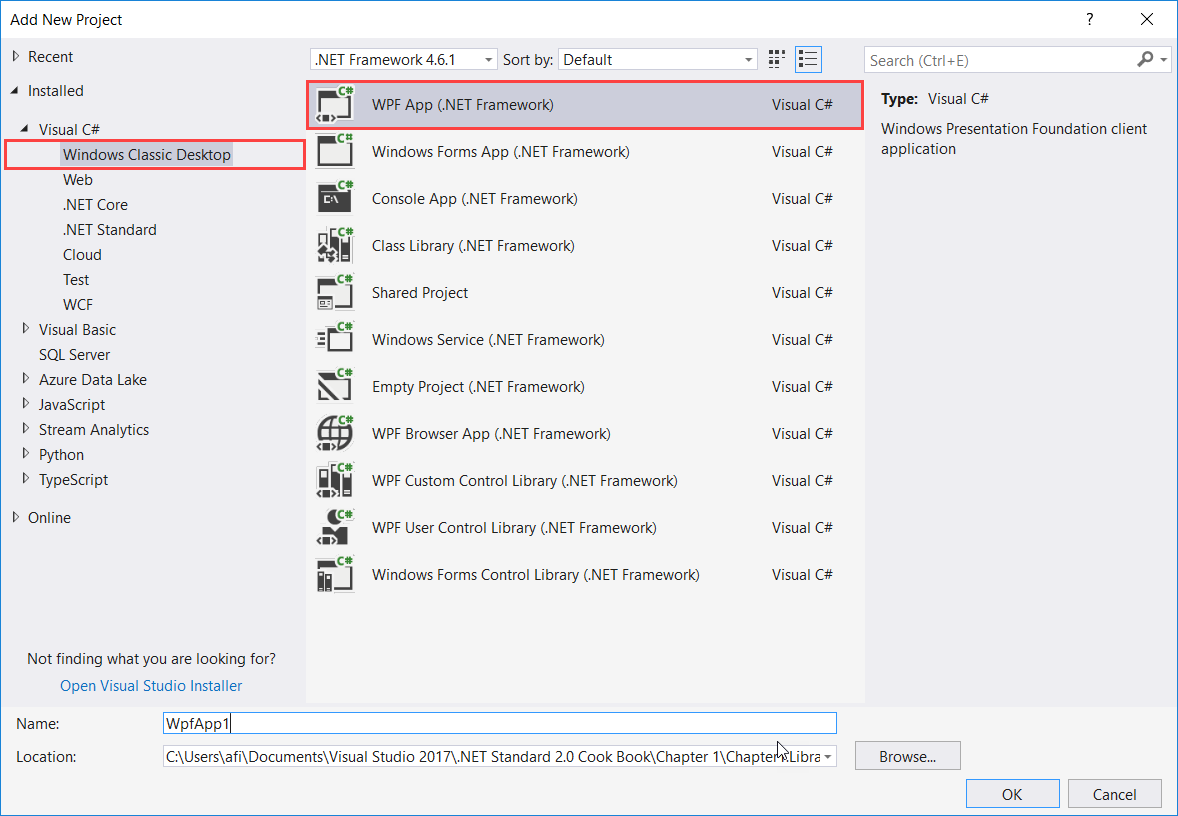
- Now, in the Name: text box, type a name for the new project. Let's type Chapter1.Library.HelloWPF and leave the Location: as it is and the defaults as well. Click OK to create ...

