12.6. Creating New Shape Presets
The easiest way to create a brand-new preset (or group of themed custom shapes shown in the Custom Shape Picker dialog box) is to first create all your shapes so that they are available to you via the Custom Shape Picker dialog box. Then follow these steps to create the new preset by using the Photoshop CS4 Presets Manager window:
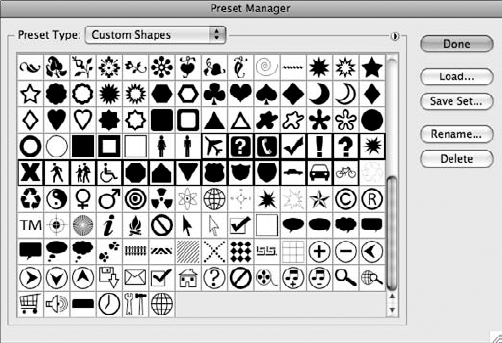
Click the Custom Shape Picker's fly-out menu and choose Preset Manager. Seen in Figure 12.14, the Preset Manager window opens with the Custom Shapes preset type selected.
Figure 12.14. Photoshop CS4's Preset Manager window, opened to the Custom Shapes area in preparation for creating a new custom shape preset for use in the future (Photoshop must be closed and re-launched to take advantage of newly created presets.)

Scroll to the bottom of the shape list, where your new custom shapes are found.
Select the shape icons that represent the items you wish to include in your new preset, using the Shift+click/Ctrl+click (PC) or Shift+click/
 +click (Mac) method to highlight them all simultaneously.
Once all your custom shape icons are selected (note you can combine the ones you made with the shapes that ship with Photoshop to create a new preset), click Save Set.
Name your preset according to whatever theme or purpose they serve and ...
Get Photoshop® CS4 Bible now with the O’Reilly learning platform.
O’Reilly members experience books, live events, courses curated by job role, and more from O’Reilly and nearly 200 top publishers.

