25.1. Digital Workflow Overview
The first part of this chapter focuses on different things you can do throughout the entire Photoshop workflow to get better results from your images, stay better organized, and hopefully be as efficient as possible. The topics covered include Adobe Camera Raw (ACR), workflow setup, file naming and saving tips, general editing sequence, leveraging layers and edit history, Web-related workflow features, general printing tips, and more.
25.1.1. Adobe Camera Raw
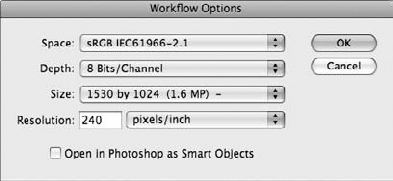
One of the most important things you can do in ACR is set the Workflow Options (Figure 25.1) to match your desired output type before opening your image in Photoshop and saving it.
Figure 25.1. Use the ACR Workflow Options to define your file's color space, bit depth, size, and resolution. The settings shown here reflect a file that is intended for minimal retouching and quick output to the Web.

|
If you choose to ignore your workflow options, you may end up tagging your document with a color profile that does not match your working RGB space in Photoshop, thus requiring ...
Get Photoshop® CS4 Bible now with the O’Reilly learning platform.
O’Reilly members experience books, live events, courses curated by job role, and more from O’Reilly and nearly 200 top publishers.


