Layer Basics
When you first start working with layers, you
need to master a few fundamental tasks. First,
you can create and name a new layer and
then add images (or parts of images) to it.
Once your image has multiple layers, you
must first select a layer to work on that
layer’s image. Keep in mind that any changes
you make will affect only the selected, or
active layer, and that only one layer can be
active at a time.
To create a new layer:
1.
From the Layer menu or from the Layers
palette menu, select New > Layer, or press
Shift+Ctrl+N/Shift+Command+N.
2.
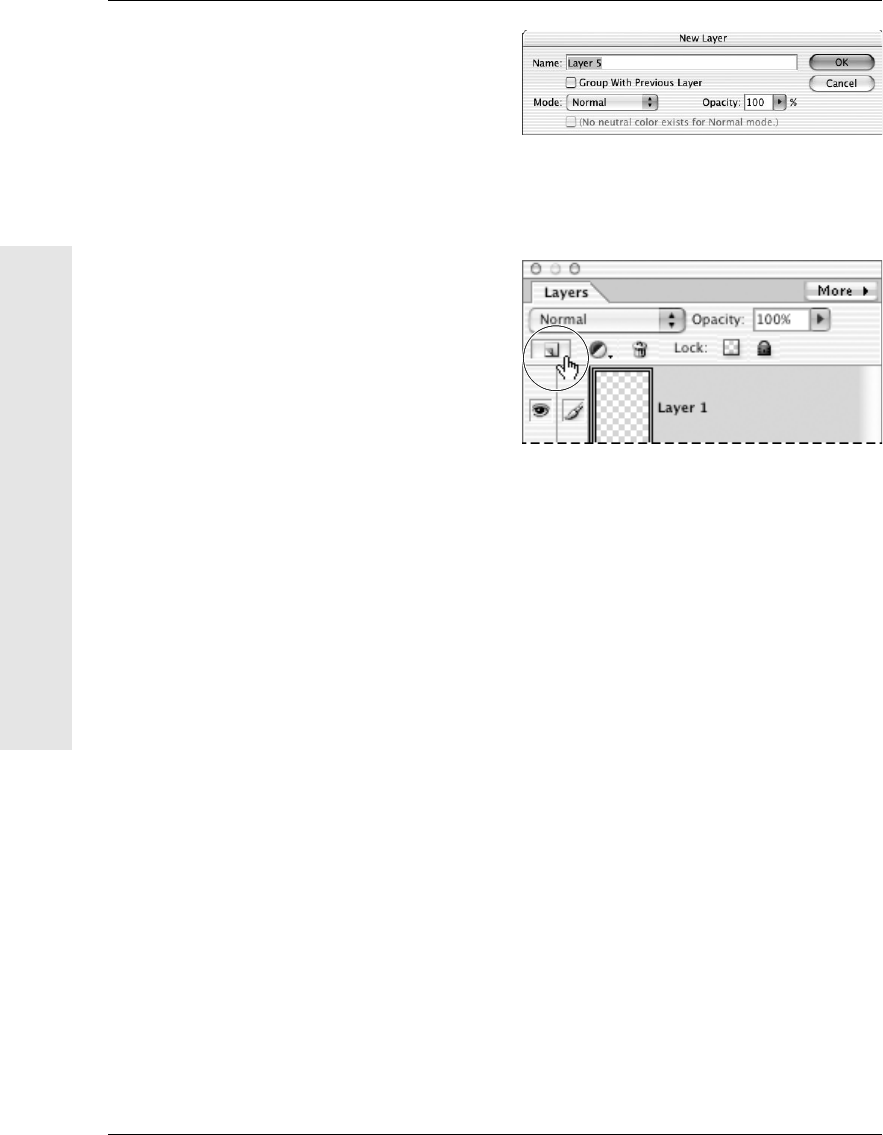
In the New Layer dialog box, choose from
the following options:
▲
Rename the layer with a more mean-
ingful and intuitive name related to
its contents. The default names are
Layer 1, Layer 2, Layer 3, and so on
(Figure 5.7).
▲
Choose a blending mode for the layer.
The default blending mode is Normal,
meaning that no change will be applied
to the layer. This option is fine for most
purposes. You can still decide to exper-
iment with blending modes later, by
selecting the layer and making adjust-
ments from the Layers palette.
▲
Choose the level of opacity for the layer.
Again, opacity is something that’s
often adjusted later, from the Layers
palette, so it’s perfectly fine to stick
with the default opacity mode (100
percent) for now.
Figure 5.8 Click the New Layer icon to quickly create a
new, blank layer.
Figure 5.7 Default layer names are Layer 1 for the first
layer you create, Layer 2, Layer 3, and so on. You can
enter a new name when creating a layer, or you can
rename it later.
126
Chapter 5
Layer Basics
✔ Tips
■
You can also quickly create a new layer by
clicking the New Layer icon near the top
of the Layers palette (Figure 5.8). The
new layer appears as the top layer in the
palette with the default blending and
opacity modes. To rename the new layer,
double-click its name in the Layers palette
and enter a new name directly there.
■
To work more easily on your image, you
can choose to show or hide any of its lay-
ers from the Layers palette.
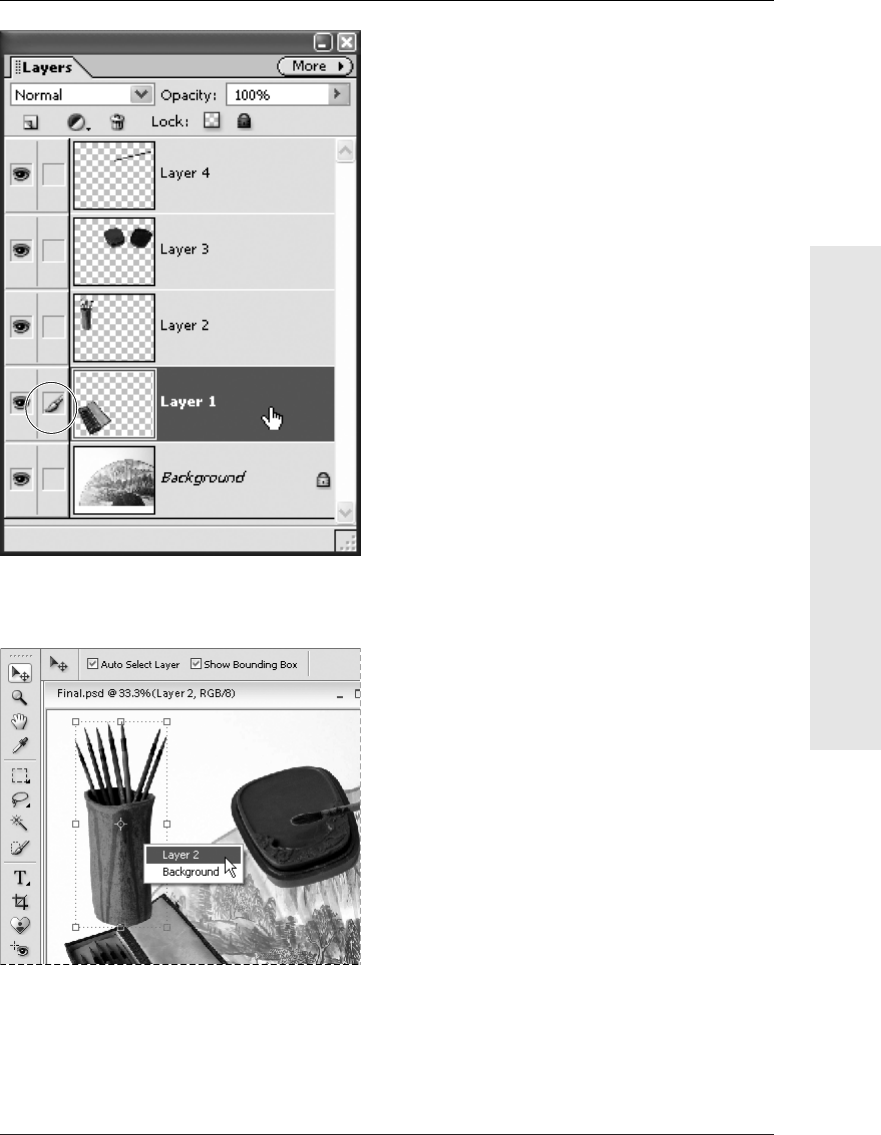
To select a layer:
Do one of the following:
◆
On the Layers palette, click the Layer
thumbnail or name to make that layer
active.
A paintbrush icon appears in the left col-
umn, indicating that this is the active
layer (Figure 5.9).
If you’ve just imported an image from a
digital camera or scanner, then by default
it will only have one layer—the back-
ground layer, which is selected by default.
◆
Select the Move tool and right-click/
Control-click a spot in your image where
the layers overlap.
A context-sensitive menu appears,
showing all of the layers containing pix-
els in that specific spot (Figure 5.10).
Select the desired layer from the context-
sensitive menu.
✔ Tip
■
When you try to select or make changes
to an area in your image, you sometimes
may keep getting weird and unexpected
results. For example, your selection can’t
be copied, or you apply a filter but noth-
ing happens. More often than not, this is
because you don’t have the correct layer
selected. Just refer to the Layers palette to
see if this is the case. Remember that the
active layer always has a paintbrush icon
to its left.
127
Working with Layers
Layer Basics
Figure 5.10 Right-click (Windows) or Control-click
(Mac OS) to view and select layers from the
context menu.
Figure 5.9 Click the layer name or thumbnail to make
it the active (editable) layer.

To show or hide a layer:
◆
On the Layers palette, click the eye icon
to hide the layer (the eye disappears).
Click again and the eye reappears, and
makes the layer visible again in the image
window (Figure 5.11).
✔ Tips
■
You can quickly show or hide multiple
layers by simply dragging through the eye
column.
■
To quickly display just one layer, Alt-
click/Option-click the eye icon for the
desired layer. All of the other layers will
become hidden. Alt-click/Option-click
again to show all of the layers.
To delete a layer:
1.
Select a layer on the Layers palette.
2.
Do one of the following:
▲
From the Layer menu or from the
Layers palette menu, choose Delete
Layer (Figure 5.12).
▲
Click the Trash icon on the Layers
palette (Figure 5.13) and then
click Yes.
▲
Drag the layer to the Trash icon on the
Layers palette.
Figure 5.13 Clicking the trash icon also removes the
selected layer.
Figure 5.12 Choose Layer > Delete Layer
from the Layer menu (or Layers palette
menu) to delete a selected layer.
Figure 5.11 Click the eye icon to hide a layer; click
again to make the layer visible.
128
Chapter 5
Layer Basics
Get Photoshop Elements 3 for Windows and Macintosh: Visual QuickStart Guide now with the O’Reilly learning platform.
O’Reilly members experience books, live events, courses curated by job role, and more from O’Reilly and nearly 200 top publishers.

