USING WINDOWS NETWORK PROJECTOR
Following are the steps to use the Windows Network Projector device:
1. Attach a projector to the eBox, and connect the eBox and notebook computer to the same Local Area Network, as shown in Figure 42-3.
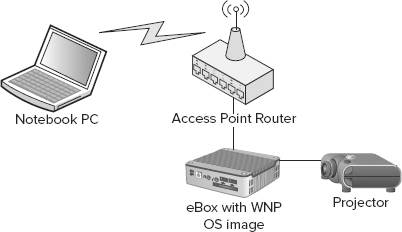
2. Power on the projector and eBox.
3. After the projector displays the output from the eBox (refer to Figure 42-2), it’s ready for use.
From the notebook computer, work through the following steps:
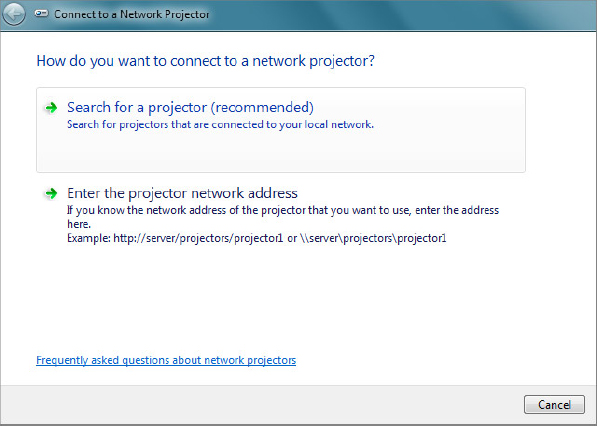
1. From the startup menu, select the Accessories group, and click Connect to a Network Projector to bring up the Connect to a Network Projector screen, as shown in Figure 42-4.
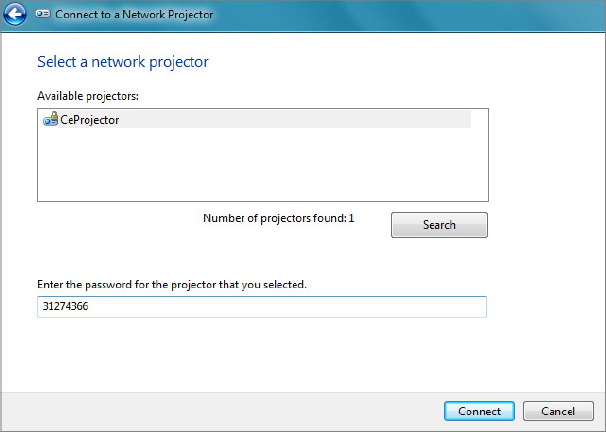
2. Click Search for a Projector. As Windows Network Projector is detected, the screen updates and lists the detected projector in the Available Projectors list, as shown in Figure 42-5.

3. From the Available Projectors list, click the CeProjector, enter the password from the screen, as shown in Figure 42-6, and click Connect.
4. As the Connect to a Network Projector Wizard attempts to connect, the Network Projector screen displays ...
Get Professional Windows® Embedded Compact 7 now with the O’Reilly learning platform.
O’Reilly members experience books, live events, courses curated by job role, and more from O’Reilly and nearly 200 top publishers.

