Chapter 1. Tour
Template Chooser
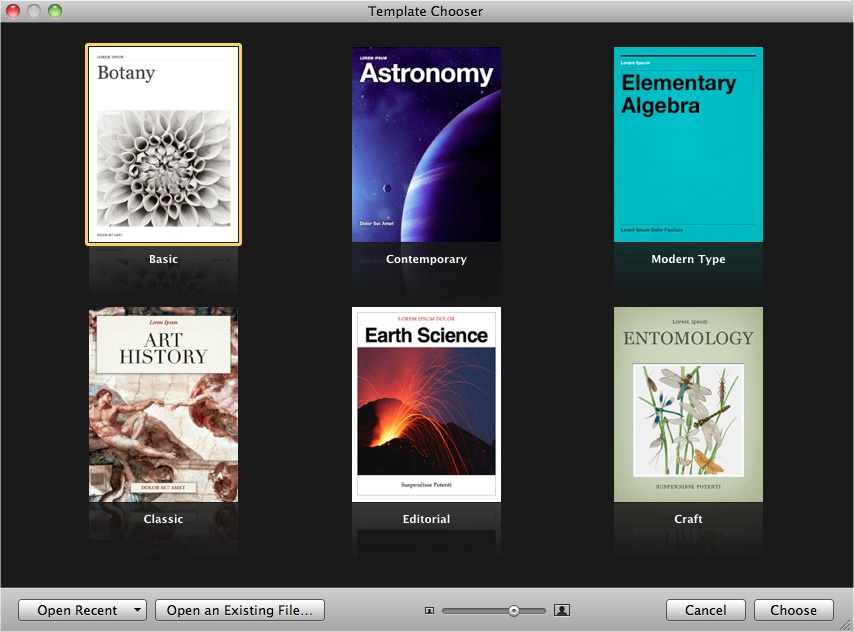
The first thing you see when you open iBooks Author is the Template Chooser (Figure 1-1). This is where you choose the general look of your book. You have six options: Basic, Contemporary, Modern Type, Classic, Editorial, and Craft. Each template has its own predefined styles and graphics for you to use. Most parts of the template can be changed, but not all. Only you can decide which template is right for you, but when you do, click it and select “Choose,” and Author opens up a brand new project for you, filled in with three or so spreads and dummy text.
If you have second thoughts about your selection or clicked the wrong icon by mistake, don’t sweat it. Just click the red x in the top left corner of the editing screen, and then go to File → New from Template Chooser, which brings you back to—you guessed it—the Template Chooser.
Editing Window
Your next stop after the Template Chooser is the editing window. This is where you’ll spend the bulk of your time in Author, adding text and images and making your book look amazing. The editing window is divided into a few sections. The majority of it is devoted to your book. The panel on the left by default shows thumbnails of all the pages in your book, as well as a few options with basics like the title page and table of contents and extras like a glossary and media to add as an intro for your book.
To resize the editing window so it takes up more or less of your computer screen, just grab the resize handle in the lower right corner and drag to the desired size.
The editing window consists of a few sections by default: the Toolbar, the Format Bar, and your book pages.
The Toolbar
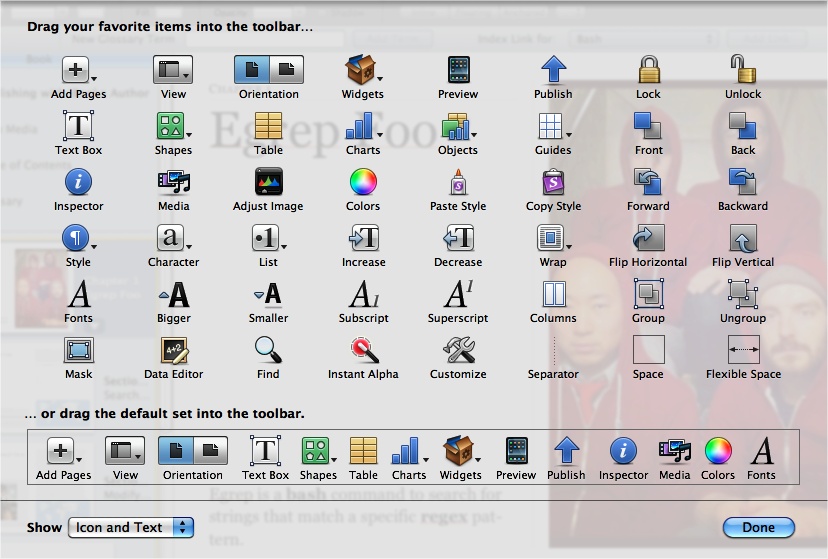
Running along the top of the editing window is the Toolbar (Figure 1-2). This gives you quick access to some of the main tools you’ll be using. Your default tools in the Toolbar are: Add Pages (see Adding Pages), View (see below), Orientation (see Orientation), Text Box (see Text Boxes), Shapes (see Shapes), Table (see Tables), Charts (see Charts), Widgets (see Widgets), Preview (see Previewing Your Book on the iPad), Publish (see Submitting Your Book to the iBookstore), Inspector (see Inspector), Media, Colors, and Fonts.

Apple knows that the default tools aren’t going to cut it for everyone, so they give you an option to add (or remove) almost anything you want to the Toolbar. Go to View → Customize Toolbar... and drag any of the tools that you want to have at hand onto the Toolbar (see Figure 1-3). If you want to clear out your customizations, from the Customize Toolbar dialog box, drag the default set onto your Toolbar (outlined near the bottom of the dialog box).
View
The View button on the Toolbar lets you adjust the different parts you see in the editing window:
Page Thumbnails. Choose this to show small page icons (called thumbnails) in the Book menu. You can choose either this or Book Outline, but not both, and you must choose one.
Book Outline. Instead of thumbnails, display the parts of your book in outline format.
Glossary Toolbar. Adds an extra toolbar below the main Toolbar, so that you can quickly add new glossary terms on the fly (see Glossary).
Show/Hide Styles Drawer. Toggles the Styles Drawer open or closed. The Styles Drawer has all the built in or custom text styles for you to choose from. More on those in Styles and the Styles Drawer.
Show/Hide Layouts. Inserts a new box at the top of the Book menu, with all the different page options for your chosen layout. Clicking one of the thumbnails gives you a preview of what that page layout looks like. There’s more on applying new layouts and adding pages in Chapter 5.
Show/Hide Format Bar. Controls whether or not the Format Bar shows up at the top of the screen (see The Format Bar).
Show/Hide Rulers. Displays rulers along the top and left edge of your page display. Rulers come in handy when you’re working with paragraph indents and tabs (Tabs), and when you’re adjusting the layout of your pages (see Creating Complex Layouts (Tutorial)).
Show/Hide Layout Boundaries. Turning this option on reveals the edges of your various frames, which is useful when arranging the elements on your pages, seeing where things overlap, and getting them in proportion.
Show/Hide Invisibles. Shows hidden text markers and characters that are usually invisible. When you turn this on, spaces between words show up as small blue dots and you get a special glyph to mark the ends of all your paragraphs. Text fields—strings of text that are used in multiple places, like chapter and section titles—are marked with a blue border.
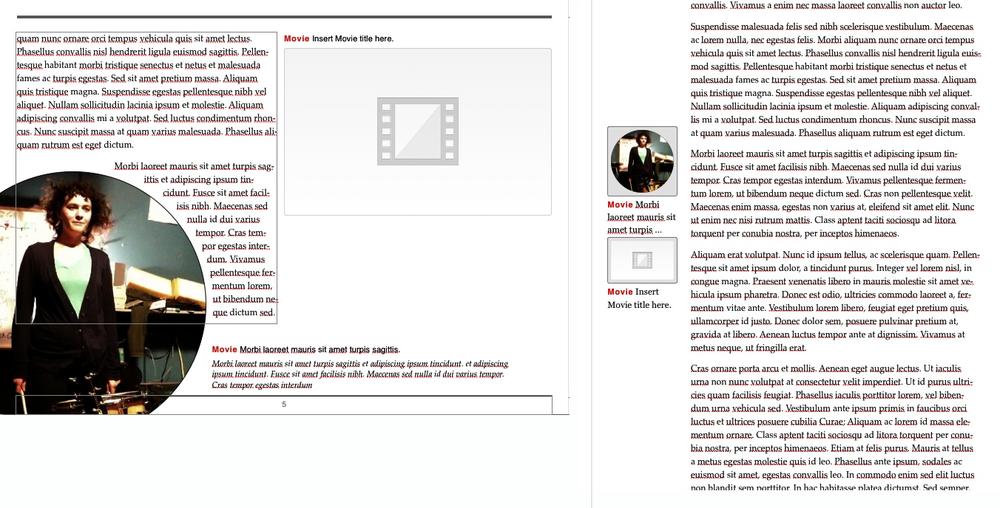
Orientation
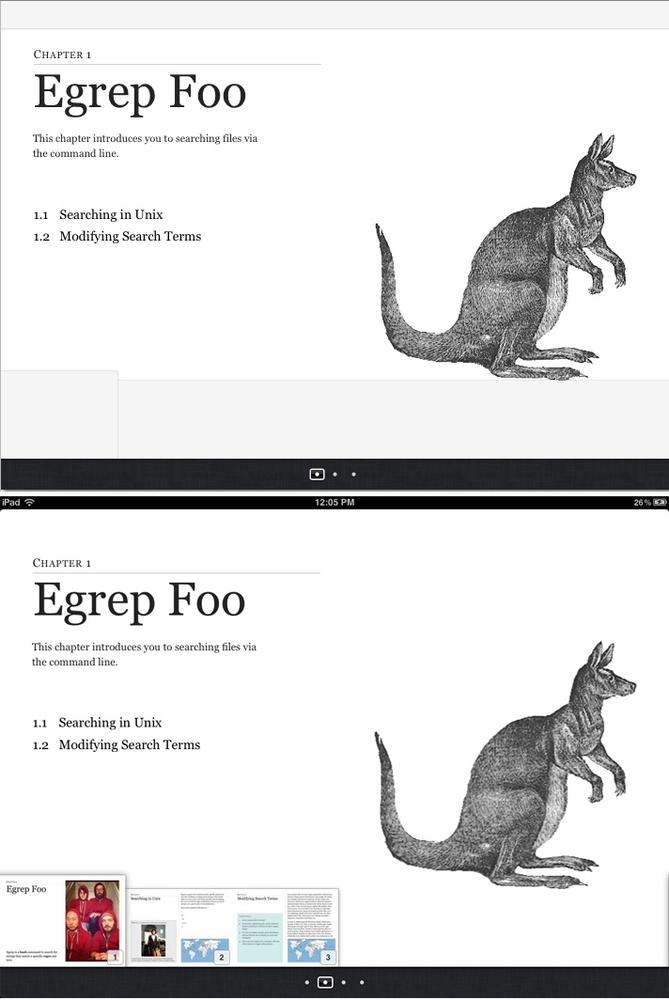
The two buttons here let you toggle between portrait and landscape mode (Figure 1-4). Portrait mode includes a very pared-down display of your content: all widgets appear as small icons in the margin and text scrolls up and down like a web page. Landscape mode is where you’ll do most of your work. You can create a book entirely in portrait mode without any bells and whistles, but why not take full advantage of iBooks Author, and create both kinds of pages? See Assembling the Pages in Chapter 2 for more about the two different orientations.
Warning
Some graphics and text boxes don’t show up at all in portrait view, so be careful. See the warning in Anchors for details.
Inspector
The Inspector is one of the most useful tools in the Toolbar, though it may not seem like it at first. Here you find tools to add metadata (see Document Inspector at the end of this chapter); adjust the overall page layout (Chapter 5); customize text wrap on objects; format text (Text Inspector), graphics (Images), and tables (Tables); adjust charts (Charts); add internal and external hyperlinks and bookmarks (Links); and drastically reformat widgets (Widgets) and objects (Chapter 4).
The Format Bar
Running just below the Toolbar is the Format Bar (Figure 1-5). The options here change depending on what you have selected, but they generally offer some basic ways to modify whatever the selected object is. For example, if you select some text, you’ll have quick access for changing the paragraph or character styles (Styles and the Styles Drawer); the font, text, and background colors; the font style (bold, italic, or underline); the alignment; the line spacing; the number of columns; and whether or not to style it as a list (see Formatting Text in Chapter 3 for more on all of these things). If you click on a text box or graphic, the options change to customize the border and fill, opacity, and drop shadow; how to anchor the box; and how to wrap text around it (see Chapter 4 for more on formatting boxes and graphics).

Zoom
To get a bird’s-eye view of your layout, or to get up close and personal, you can use the zoom controls at the bottom of the editing window. There are a few options to choose from, including “Fit Width,” which zooms the pages in or out to exactly the width of a page, cropping the page vertically as needed, and “Fit Page,” which adjusts to fit the whole page both vertically and horizontally. If you choose one of the “Fit...” options, the page will automatically adjust to the window no matter how you resize it.
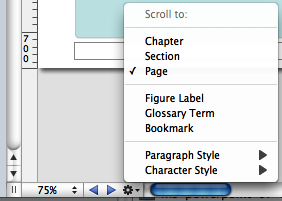
Navigation
Next to the zoom controls are two little arrows and a gear icon for navigating your book (Figure 1-6). The arrows will jump you between chapters, sections, or pages within sections of your book. Click the gear icon to choose what level you want to navigate between. You can also choose to jump between figures (Figures), glossary terms (Glossary), and bookmarks (Links), and also between every occurrence of a particular paragraph or character style (Styles and the Styles Drawer).
The Book Menu
All of your major book pieces are right at your fingertips here in the left portion of the screen. You’ve got four supplemental pieces—title page, Intro Media, Table of Contents, and Glossary—followed by either your page thumbnails or book outline, depending on which option you chose from the View button in the toolbar (see View).
Book Title
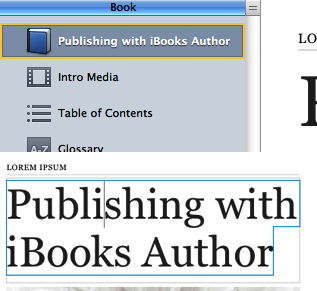
Click the Book Title option in the Book menu and your book’s title page opens up in the main editing window. This is where you set some of the basic pieces of information about your book: Title, Edition Number, and Author. There are two ways to change your book title: with the Book Title already selected, click once again on the Book Title Book menu item, and the text there becomes editable—change it to whatever you want, and the title page will update to match. The opposite also works: edit the text on the title page, and the Book menu updates (see Figure 1-7).
Tip
If you go the second route, make sure you’re editing the field text, and not just appending extra text to it. Your visual clue is the blue outline that shows up around the words as you’re typing.
There’s only one way to update the author name and edition number: via the title page. You can see there are two more text fields on that page: edit the field at the very top to change the edition number, and edit the field at the bottom to change the author name.
Intro Media
You can add an image, audio file, or movie to introduce your book. If you choose to include this, the first time a reader opens your book in iBooks, she’ll see just that intro file on a black background. If you’ve chosen an audio file or movie, it’ll start playing automatically, but readers can stop it at any time by clicking the little x in the top left corner of the iBooks page. To add some intro media, click the Intro Media item in the Book menu, and then drag your image, audio, or movie file from Finder or the Media Browser onto the black background. You can move images or movies around on the screen, but audio files are stuck centered vertically. Author also only supports limited media file formats—see Media for the full scoop.
Table of Contents
No need to worry about compiling a list of all the chapters and sections in your book—iBooks Author automatically generates a table of contents for you as you write (see Figure 1-8). You can see the latest TOC by clicking Table of Contents in the Book menu. iBooks pulls in the first image from each chapter in the TOC, but you can change that—just drag a new image from the Finder window onto the image box, and adjust it as described in Images. You can’t edit any of the auto-generated text on the TOC, but you can add new text boxes if you want—perhaps a short paragraph explaining what that chapter is about. Author adds a new TOC page for each Chapter in your book. (You can add more levels to your TOC—see Document Inspector.) When you click on Table of Contents in the Book menu, Author will take you to the TOC page for whatever chapter you were last working on, but you can navigate to the TOC page for different chapters by clicking the little dots at the bottom of the editing window.
Don’t worry about those little gray boxes at the bottom of each TOC page. When you export your book, Author fills those boxes with icons of the first page of each chapter and each section within a chapter, giving readers both a textual list and a visual way to navigate to those locations.
Glossary
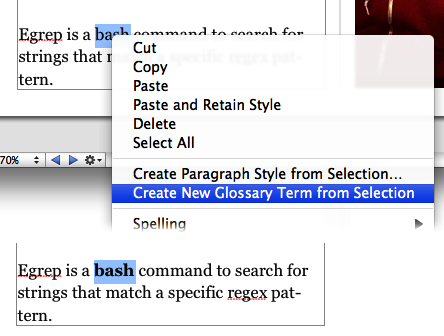
iBooks Author has special tools just for educational books, such as the Glossary function. You can turn any word in your book into a glossary term with just a few clicks. Double-click to select a word, then right-click or Command-click, and choose “Create New Glossary Term from Selection” from the content menu (Figure 1-9). The word turns bold, which is your indication that it’s been added to your Book’s glossary.
You can also add new glossary terms from the Glossary Toolbar (see Figure 1-10), by either typing the term in the New Glossary Term box and clicking Add Term, or by double-clicking to select a word in the text and, instead of right-clicking on the word, clicking the Add Term button. Note that if you add a new term without selecting a word in the text first, that term won’t link to any locations in the book until you set one or more index locations (see below).
Unfortunately, Author doesn’t take the trouble to define the term, too—that’s up to you (although once your book is finished and loaded into iBooks, readers have the choice of viewing the dictionary definition for a glossary term or the definition you add in the Glossary). Click on the word to jump straight to the Glossary (or click the Glossary item in the Book menu), where you can add a definition and see your full list of Glossary terms.
You can link multiple terms together to give readers more guidance if they need it. Just drag other terms from your Glossary into the Related Terms section; to unlink a term, drag it out of the Related Terms section and it disappears in a puff of smoke.
Note
Adding Related Terms doesn’t work both ways. For example, if you drag the word “coffee” into the Related Terms section of the word “beverage,” “coffee” will be added there, but “beverage” will not be added as a Related Term for “coffee.”
The Index section tells you where you can find the term in your book. It only automatically links to the place in the book where you first chose to turn the word into a glossary term, but you can add as many index entries to other locations as you want. To do so, make sure you have the Glossary Toolbar displayed (from the View button in the Toolbar), then select the word or location in your text that you want to add a link to, choose the glossary term from the “Index link for” drop-down menu, and click Add Link. You can use the “Find Term” button from the Glossary to search the book for every occurrence of a glossary term (note that this is only an option in Author; readers have to search the book themselves), and add Index Links to any or all of the found results. This opens up Apple’s standard Find/Replace dialog box, auto-filled with your glossary term, and jumps you to the first occurrence of that word in your text. Every word that you turn into a glossary index link becomes a clickable link to that glossary definition.

You can add or delete glossary terms in the Glossary as well, by clicking the + and – buttons below the search bar. Author won’t let you create multiple glossary terms for the same word; if you right-click on another occurrence of a word that already has a Glossary definition, the “Create New Glossary Term from Selection” option is grayed out. And if you try to add the duplicate term via the Glossary, Author automatically appends the word “duplicate” to the end.
Page Thumbnails and Book Outline
Below the Book menu, Author lists the pages in your book either as thumbnail icons or in outline view, depending on the option you chose from the View button in the Toolbar. Click any thumbnail or list item to open that page in the editing window; Author also outlines all the sections in that chapter with a yellow box, letting you know where you are in your book.
Document Inspector
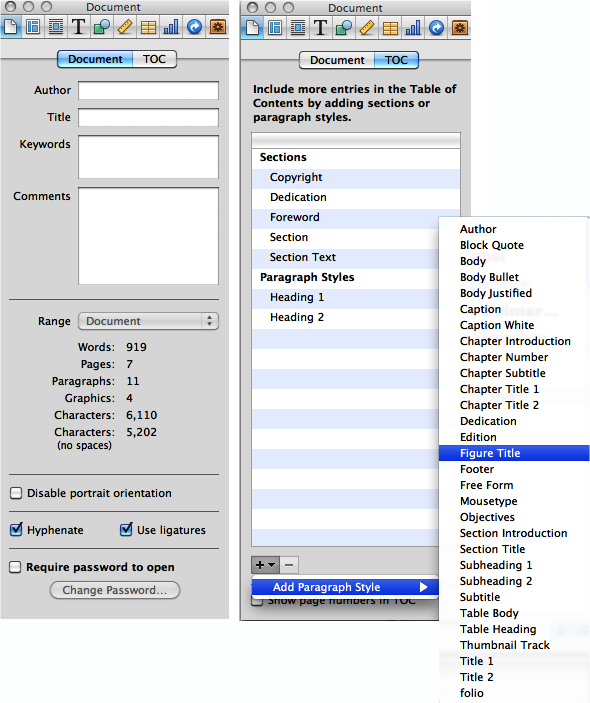
Your first option when you open the Inspector is the Document Inspector, where you’ll find some fields to add information about your book and set some basics. In the first boxes in the Inspector, you can note the author name and the book title, add keywords about the book, and insert any special comments about it.
The next section gives you some basic document data: word and character counts, number of pages and images in the book, and so on. You can get info for the entire document or just a selection.
Turn on “Disable portrait orientation” if you don’t want readers to be able to read your book in portrait mode on their iPads. There’s an argument to be made for both leaving this off and turning it on: On the one hand, you want to give your readers control over their reading experience, but on the other hand, why bother creating a complex layout in iBooks Author just to let readers ignore all your work by reading in portrait mode?
Turn off Hyphenate to keep your words from breaking across lines, and turn off “Use ligatures” to keep Author from adding ligature characters where it normally would. Ligatures are letters that run together to form one character. Some of the usual suspects are ff, fl, and fi. Turning off this checkbox keeps each letter separate, instead of combining them into one.
The last option on this tab is “Require Password to Open.” You can password-protect your file using this checkbox; just make sure you share the password with anyone else who needs to open the file.
Over on the TOC tab, you can customize your book’s Table of Contents by adding or removing section types and paragraph style types (Figure 1-11). By default, the TOC will include Chapters, Sections, and Headings. You can have it include text tagged with other paragraph styles by clicking the + button and choosing the style you want. For example, you can list every widget in the TOC by adding the Figure Title paragraph style to the list.
Note
Only chapters and sections appear in the TOC when you or your readers are in landscape mode; other paragraph styles appear when you switch to portrait orientation.
Now that you know your way around, it’s time to start adding pages and building your book.
Get Publishing with iBooks Author now with the O’Reilly learning platform.
O’Reilly members experience books, live events, courses curated by job role, and more from O’Reilly and nearly 200 top publishers.

