Chapter 11. Digital Inputs
11.0. Introduction
In this chapter, we look at recipes for using digital inputs, such as switches and keypads. This chapter also covers modules that have a digital output that can be connected to a Raspberry Pi input.
Most of the recipes require the use of a solderless breadboard and male-to-male jumper wires (see Recipe 8.10).
11.1. Connecting a Push Switch
Note
Be sure to check out the accompanying video for this recipe at http://razzpisampler.oreilly.com.
Problem
You want to connect a switch to your Raspberry Pi so that when you press it, some Python code is run.
Solution
Connect a switch to a GPIO pin and use the RPi.GPIO library in your Python program to detect the button press.
To make this recipe, you will need:
- Breadboard and jumper wires (see Prototyping Equipment)
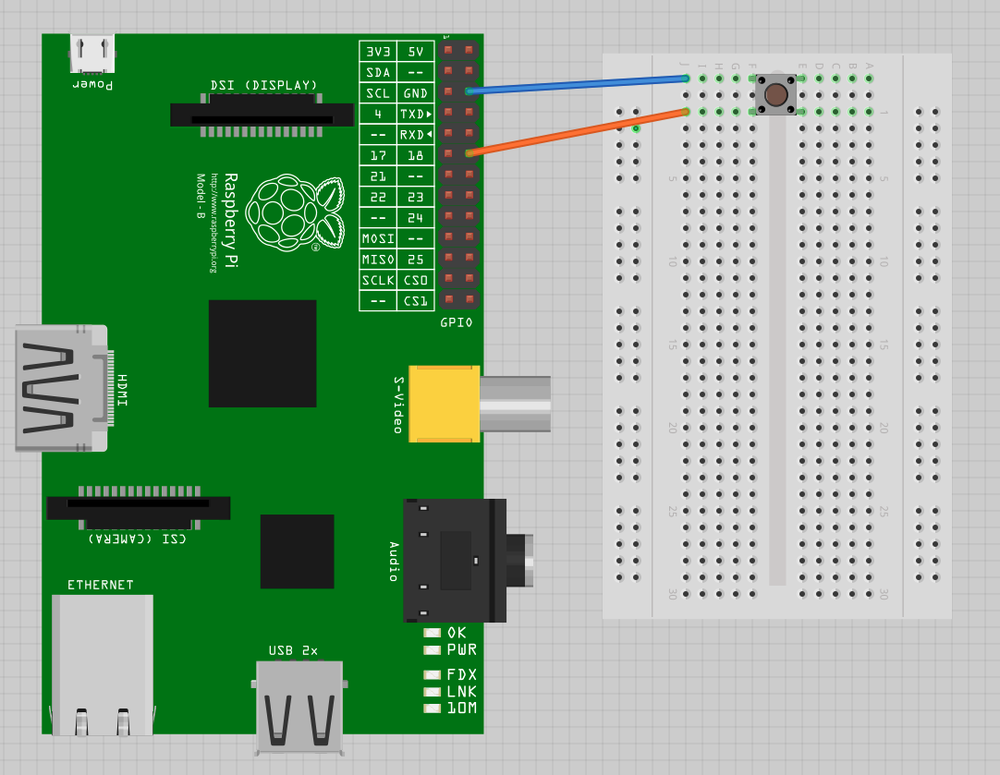
- Tactile push switch (see Miscellaneous)
Figure 11-1 shows how to connect a tactile push switch, using a breadboard and jumper wires.
Open an editor (nano or IDLE) and paste in the following code. As with all the program examples in this book, you can also download the program from the Code section of the Raspberry Pi Cookbook website, where it is called switch.py.
This example code displays a message when the button is pressed:
importRPi.GPIOasGPIOimporttimeGPIO.setmode(GPIO.BCM)GPIO.setup(18,GPIO.IN,pull_up_down=GPIO.PUD_UP)while
Get Raspberry Pi Cookbook now with the O’Reilly learning platform.
O’Reilly members experience books, live events, courses curated by job role, and more from O’Reilly and nearly 200 top publishers.

