Chapter VI. Enter Topaz Adjust
We have been exploring techniques for creating true HDR photographs as well as pseudo HDR photographs. Now we'll explore how to expand the dynamic range of a single image using Topaz Adjust, a plug-in from Topaz Labs (www.topazlabs.com).
Before we get started though, you should know that Topaz Adjust cannot expand the dynamic range of an image to the extent of Photomatix. In fact, you could probably arrive at the same creative place with an image using Topaz Adjust as you would if you are very skilled at using Adobe Camera RAW and Photoshop ... or even Lightroom or Aperture.
What Topaz does, behind the scenes and often with just a click of your mouse, is this: It expands/increases the contrast range, color range and detail range of a single image. Hey, who said HDR only applied to exposure?
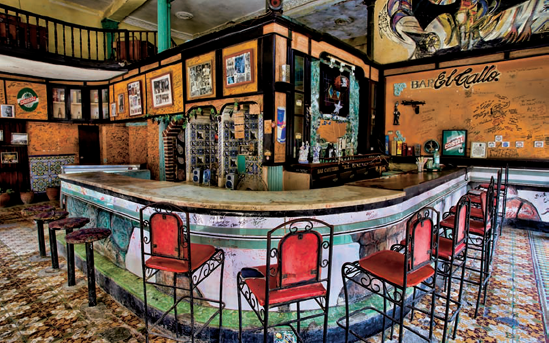
This shot of a bar in Old Havana, Cuba, is packed with color and detail. What's more, it looks as though the lighting was fairly even, resulting in an even exposure. Check out the original, untouched RAW file on page 91. There, I'll tell you what I did not like about the image and how Topaz Adjust worked its magic.
Topaz Command Center
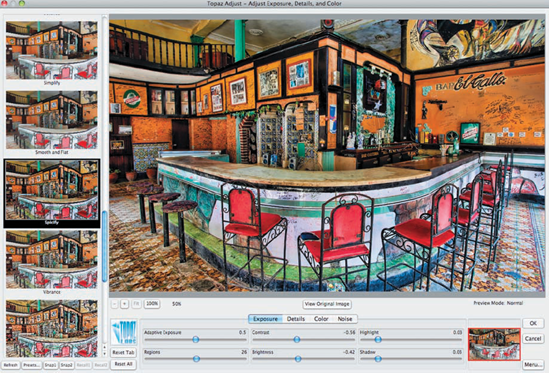
After you download Topaz Adjust, its icon will show up at the bottom of your filter menu in Photoshop. You can also access Topaz adjust through ...
Get Rick Sammon's HDR Photography Secrets for digital photographers now with the O’Reilly learning platform.
O’Reilly members experience books, live events, courses curated by job role, and more from O’Reilly and nearly 200 top publishers.

