Working with disks is very different on the Mac. Whereas Windows is designed to show the names (letters) and icons for your disk drives, the Mac shows you the names and icons of your disks. You’ll never, ever see an icon for an empty drive, as you do in Windows.
As soon as you insert, say, a flash drive, you see its name and icon appear on the screen. In fact, every disk inside, or attached to, a Macintosh is represented on the desktop by an icon (see Figure 1-7). (Your main hard drive’s icon may or may not appear in the upper-right corner, depending on your settings in Finder→Preferences.)
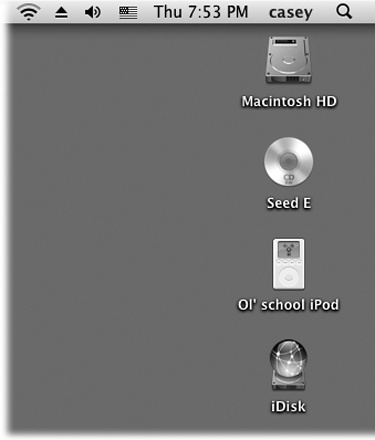
Figure 1-7. You may see all kinds of disks on the OS X desktop (shown here: hard drive, CD, iPod, flash drive)—or none at all, if you’ve chosen to hide them using the Finder→Preferences command. But chances are pretty good you won’t be seeing many floppy disk icons. If you do decide to hide your disk icons, you can always get to them as you do in Windows: by opening the Computer window (Go→Computer).
If you prefer the Windows look, in which no disk icons appear on the desktop, it’s easy enough to recreate it on the Mac; choose Finder→Preferences and turn off the four checkboxes you see there (“Hard disks,” “External disks,” “CDs, DVDs, and iPods,” and “Connected servers.”)
Ejecting a disk from the Mac is a little bit different, too, whether it’s a CD, DVD, USB flash drive, shared network disk, iDisk, iPod, or external hard drive. You can go about it in any of these ways:
Hold down the
 key on your keyboard, if you have one (CDs and DVDs only).
Right-click the disk’s desktop icon. From the shortcut menu that appears, choose “Eject [whatever the disk’s name is].”
Click the disk’s icon and then choose File→“Eject [disk’s name]” (or press ⌘-E).
Drag the icon of the disk onto the Trash icon at the end of the Dock. (You’ll see its icon turn into a giant
symbol, the Mac’s little acknowledgment that it knows what you’re trying to do.)
Get Switching to the Mac: The Missing Manual, Mavericks Edition now with the O’Reilly learning platform.
O’Reilly members experience books, live events, courses curated by job role, and more from O’Reilly and nearly 200 top publishers.

