56
Chapter 4 Making Minor Adjustments
The Adobe Lightroom eBook for Digital Photographers
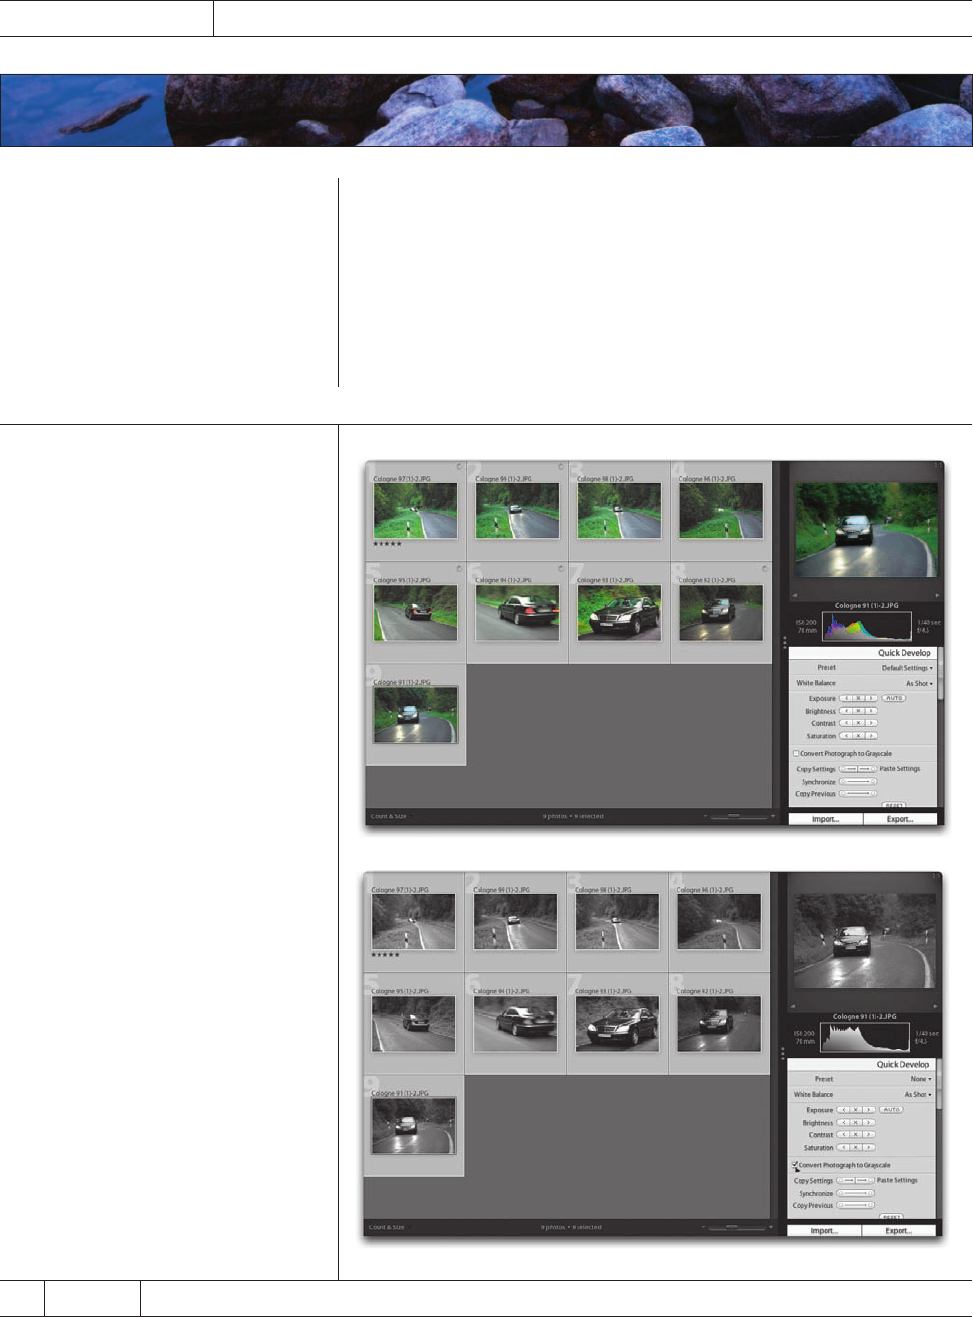
Step One:
If you want to make the exact same
change to a number of similar photos,
then this couldn’t be easier: you start by
Command-clicking on all the photos you
want to have the exact same adjustments
applied to (as shown here).
Step Two:
Now, just head over to the Quick
Develop panel and any changes you
make here will automatically be applied
to every selected photo (here I just sim-
ply turned on the Convert Photograph to
Grayscale checkbox, and all the selected
photos are then converted to grayscale,
as shown here).
Editing Multiple
Images the Easy Way
With digital photography, and “free” film, we’re pressing that shutter release more
than ever and instead of just editing 24 or 36 photos, we’re importing and editing
hundreds. That’s why it’s so important to be able to edit one photo and apply
those same edits to dozens, or even hundreds, of photos taken under similar light-
ing conditions. Here are a few different ways to make an edit once and have it
applied to as many photos as you’d like, quickly and easily.
©SCOTT KELBY
57Chapter 4Making Minor Adjustments
Continued
The Adobe Lightroom eBook for Digital Photographers
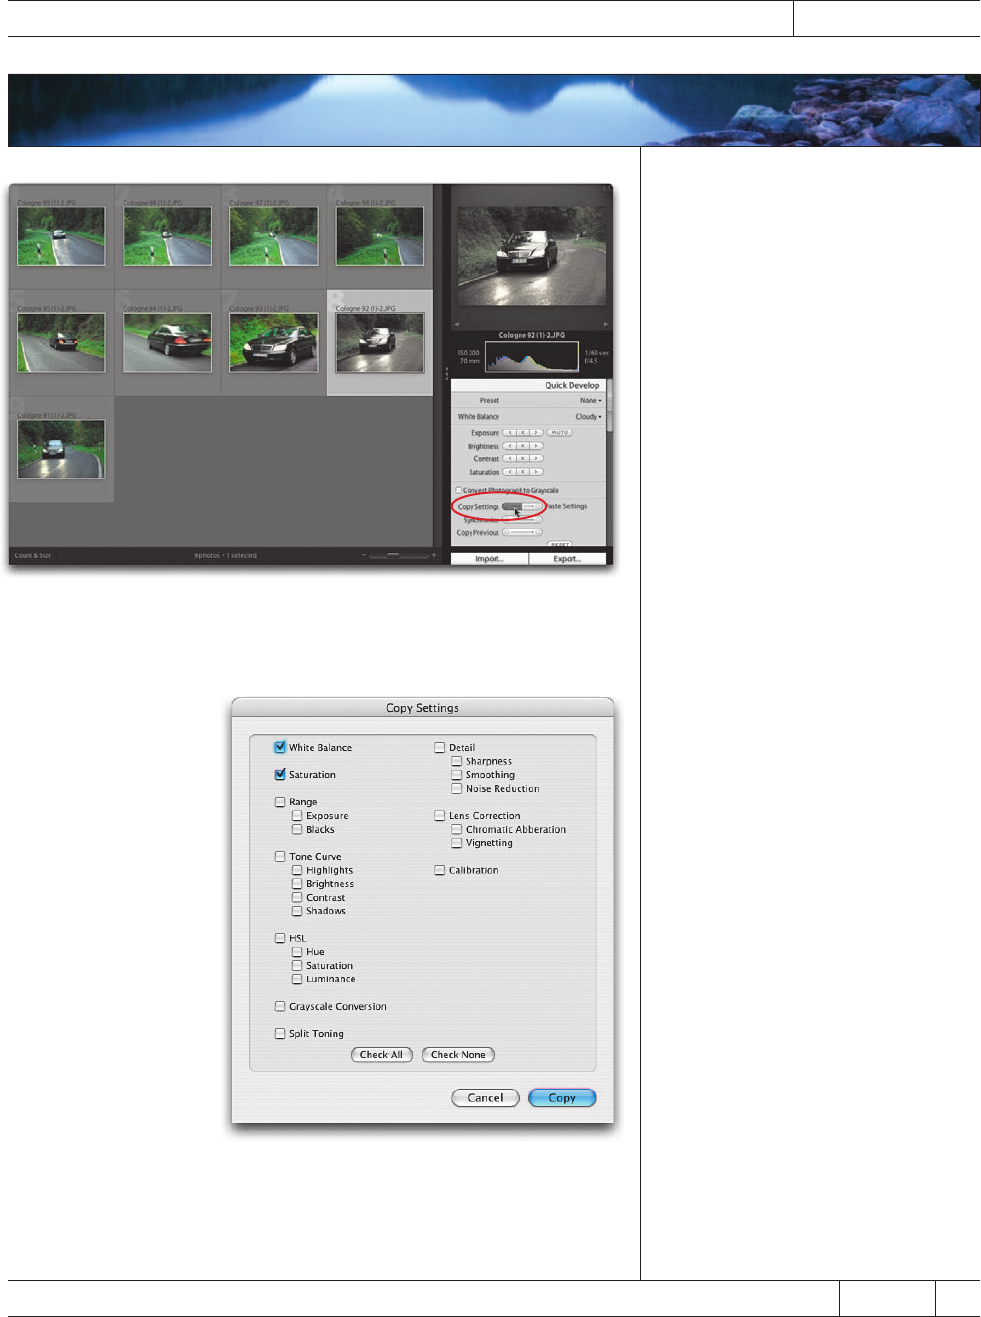
Step Three:
More likely, you’ll be performing your
edits all on one photo, and then if you’re
happy with some or all of your edits,
you’ll choose which other photos you
want to have those same edits applied to.
Start by choosing a photo and then make
your adjustments in the Quick Develop
panel (in the example shown here, I
increased the exposure and contrast by
clicking on the right arrow button for
each setting three times. I changed the
white balance to Cloudy by choosing it
from the White Balance pop-up menu,
and then I lowered the saturation a bit
to remove some of the green from the
photo). Now, click on the Copy Settings
button (shown circled in red here).
Step Four:
This brings up the Copy Settings dialog
(shown here). This is where you get to
choose which of the adjustments you
applied to the first photo that you want
applied to other photos you select.
(Note: If most of the checkboxes here
sound unfamiliar, it’s because most of
them are in the full Develop module,
instead of just Quick Develop.) I want
to apply just some of the changes I
made to the other photo, so first click
the Check None button (so all the
choices are unchecked), then only turn
on the checkboxes for White Balance
and Saturation, and then click the Copy
button. Now, only those two edits are
copied into memory—my exposure and
contrast changes are ignored.
58
Chapter 4 Making Minor Adjustments
The Adobe Lightroom eBook for Digital Photographers
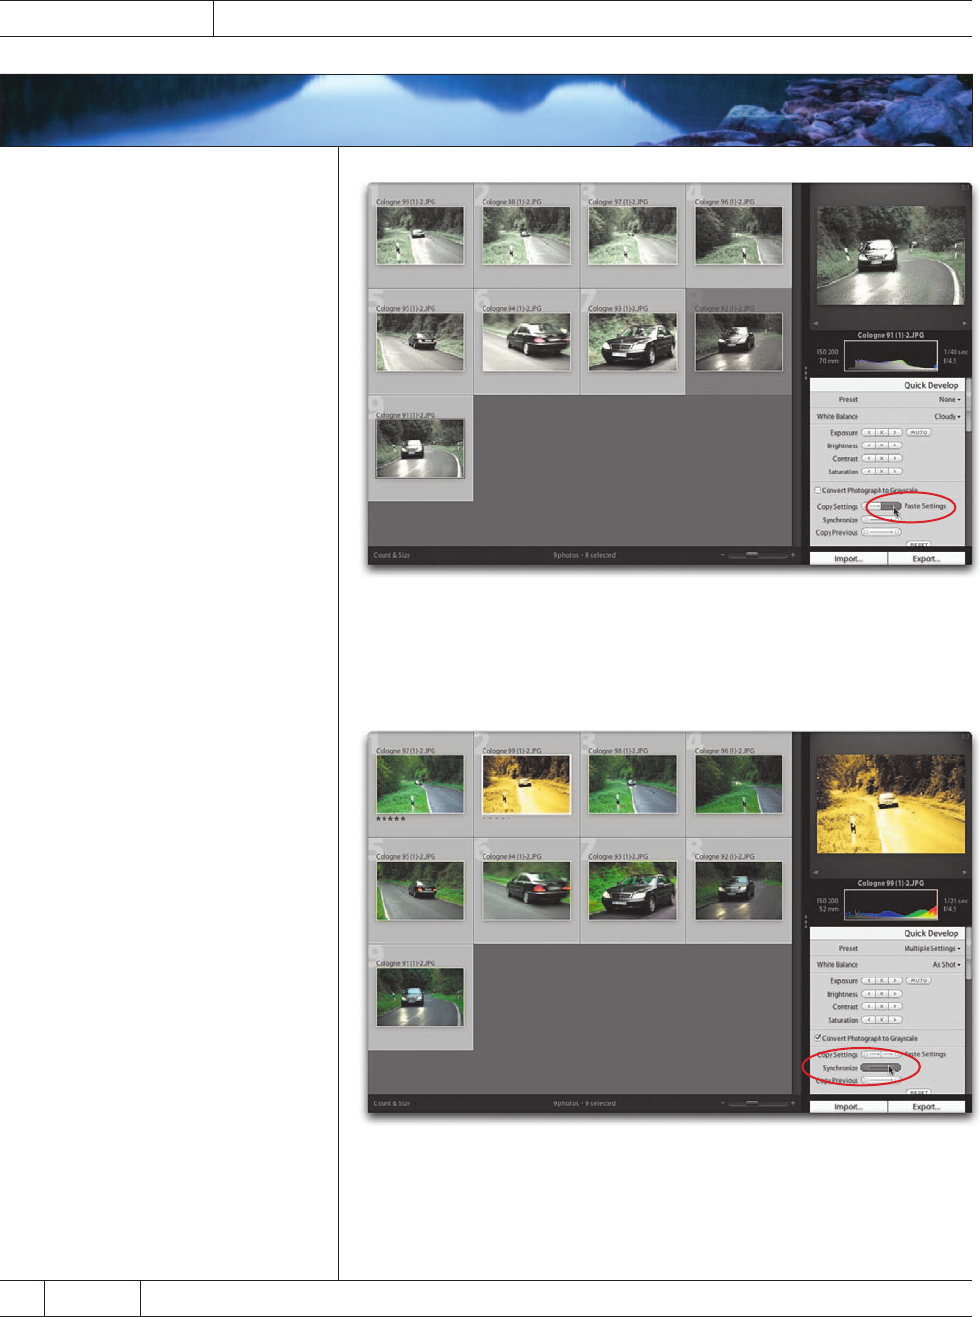
Step Five:
Press-and-hold the Command key, go to
the Grid view, and click on all the photos
that you want to have the same white
balance and saturation changes applied
to. Now, near the bottom of the Quick
Develop panel, click on Paste Settings
(it’s shown circled in red), and just those
two corrections that you applied to the
first image will now be applied to all your
selected images (as shown here).
Step Six:
If you’ve got hundreds (or thousands)
of photos to process, instead of copy-
ing-and-pasting your changes from one
photo to a group of other photos (too
slow), try Synchronize, which works par-
ticularly well when all your photos are in
the same collection. Here’s how it works:
You click on the photo that has the look
you like (in this case, I just applied the
Antique Grayscale preset to one image),
then press Command-A to select all
the other photos in your collection (or
Quick Collection). You’ll notice that your
selected photo has a thicker white border
around it, so you know which photo is
your source for the changes. Now press
the Synchronize button (shown here
circled in red).
59Chapter 4Making Minor Adjustments
The Adobe Lightroom eBook for Digital Photographers
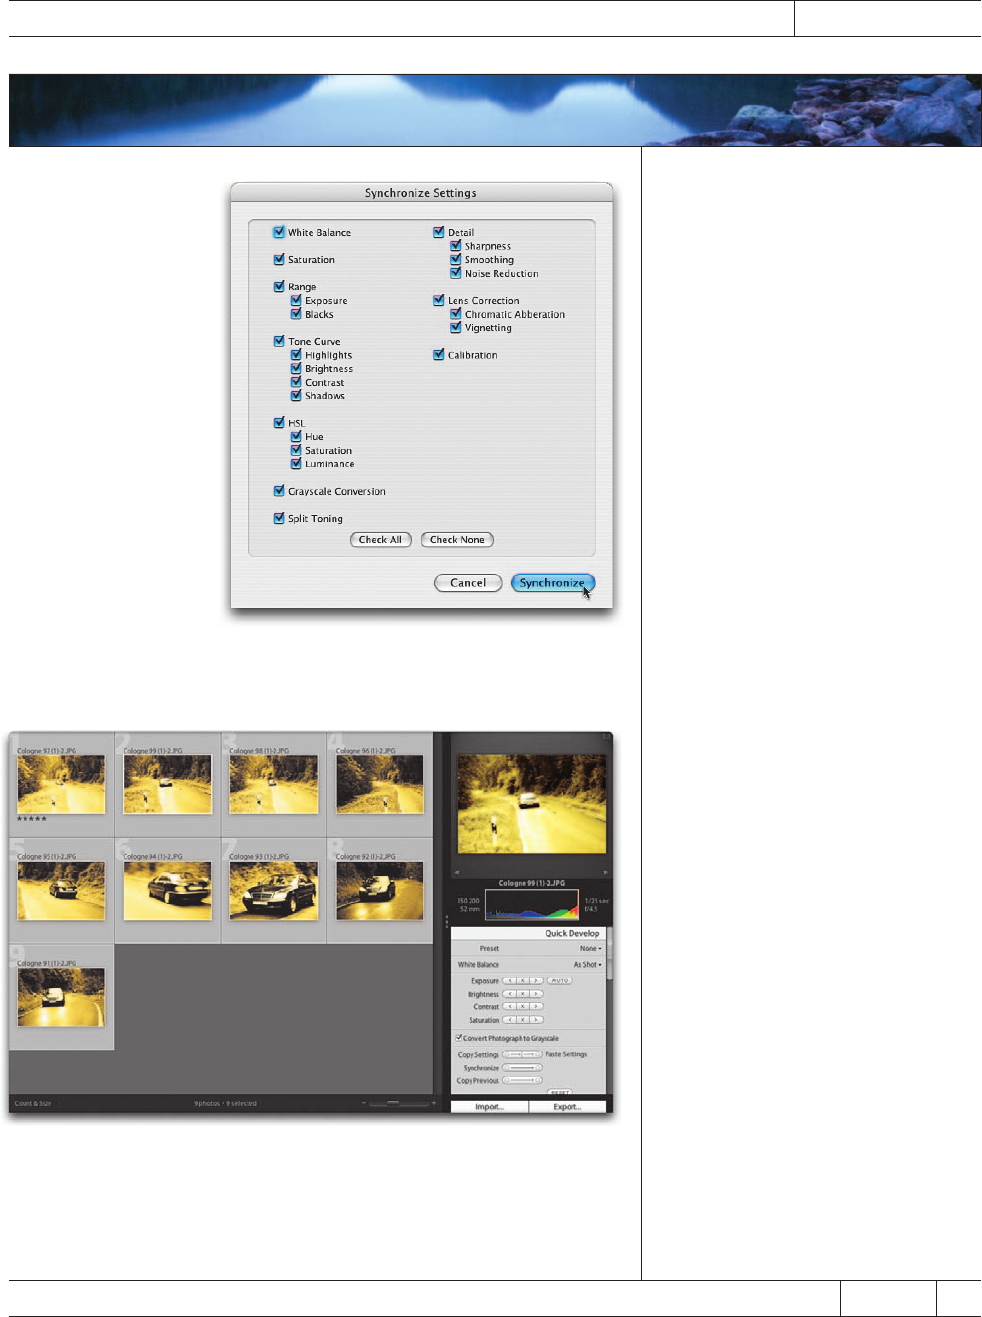
Step Seven:
As you can see, the Synchronize Settings
dialog looks exactly like the Copy Settings
dialog. In this case, since we used a pre-
set, I’m not sure which settings where
actually used, so click the Check All but-
ton (so we’re sure we got everything),
then click the Synchronize button (as
shown here).
Step Eight:
Now those edits are applied to every other
photo in your collection (as shown here).
Photo by Scott Kelby Exposure: 1/125 Focal Length: 46mm Aperture Value: ƒ/4.5
Get The Adobe now with the O’Reilly learning platform.
O’Reilly members experience books, live events, courses curated by job role, and more from O’Reilly and nearly 200 top publishers.

