88
Chapter 5 Making Serious Adjustments
The Adobe Lightroom eBook for Digital Photographers
Cropping and
Straightening
You should be happy that Lightroom now has the ability to crop and straighten
photos, because when it first came out (Beta 1), it didn’t have either. We would
all just sit around and say stuff like, “I love this program, but I can’t believe you
can’t crop a photo.” I guess Adobe heard our plaintive wails because in Beta 2
they added cropping, and although it’s an entirely different way of cropping than
in Photoshop, you might find that you like it even better. Hey, I said, “you might
find,” so it gives me a pretty big out if you don’t like it.
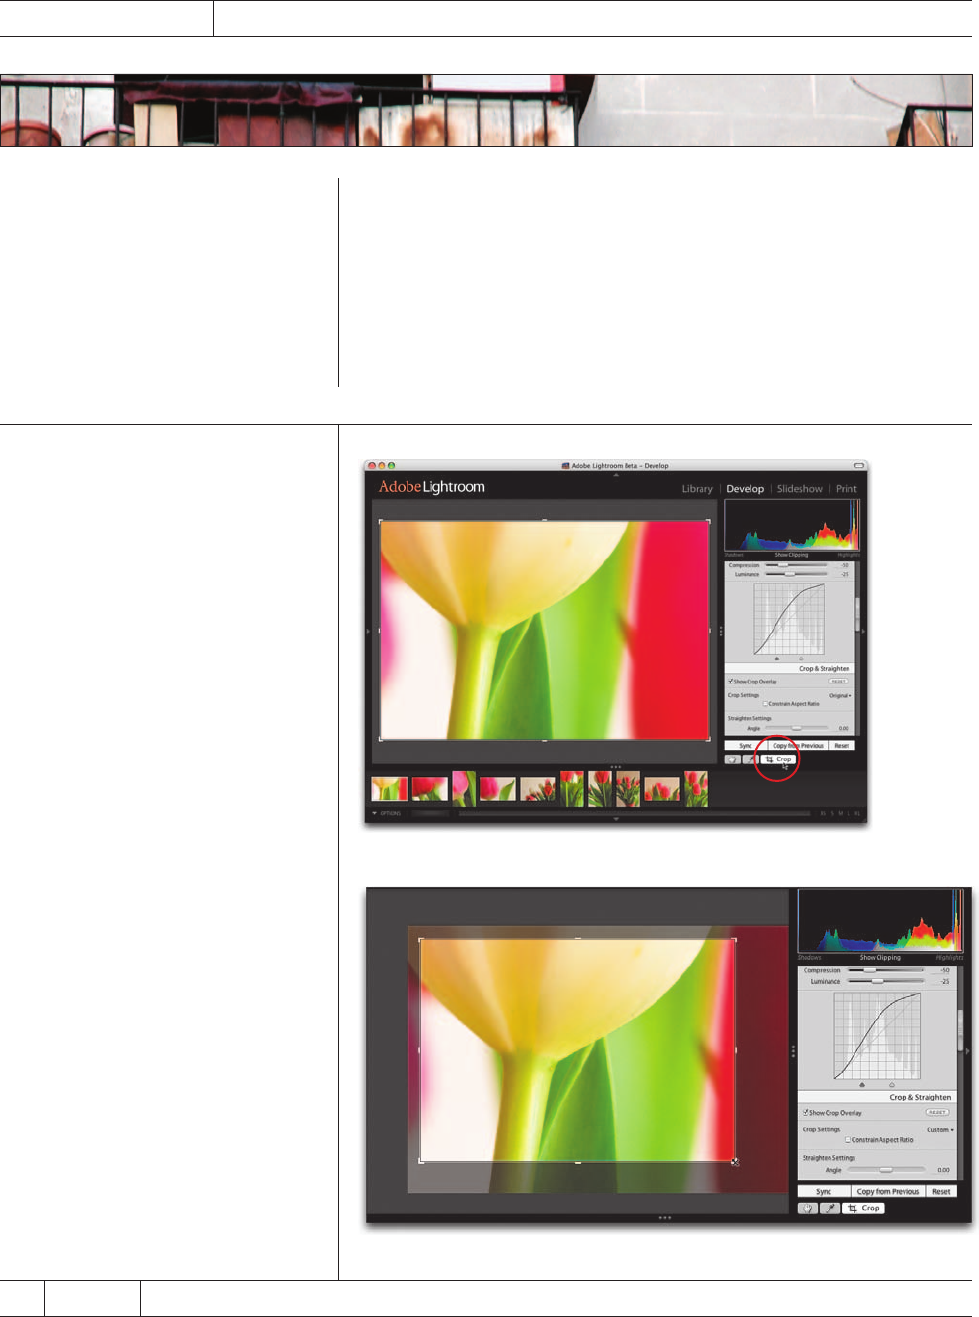
Step One:
To crop your photo, click on the Crop
icon (circled here in red) and two things
happen: (1) a cropping border appears
around your photo, and (2) the Crop &
Straighten panel appears in the list of
panels on the right side of Lightroom.
(Well, it doesn’t “appear.” It basically
scrolls down there in a jiffy.)
Step Two:
To crop your photo, just grab one of the
corners (or the sides, or anywhere on
that border for that matter) and drag
inward. As you drag, you’ll notice that a
grid appears dividing your cropped area
into thirds, giving you a “rule of thirds”
overlay as you drag (how sweet is that?!).
If you press-and-hold the Shift key while
you drag, the cropping border will stay
proportional. If you don’t press-and-hold
the Shift key, it’s a freeform crop, and you
can move any side, top, or bottom with-
out disturbing the other sides.
©SCOTT KELBY
89Chapter 5Making Serious Adjustments
Continued
The Adobe Lightroom eBook for Digital Photographers
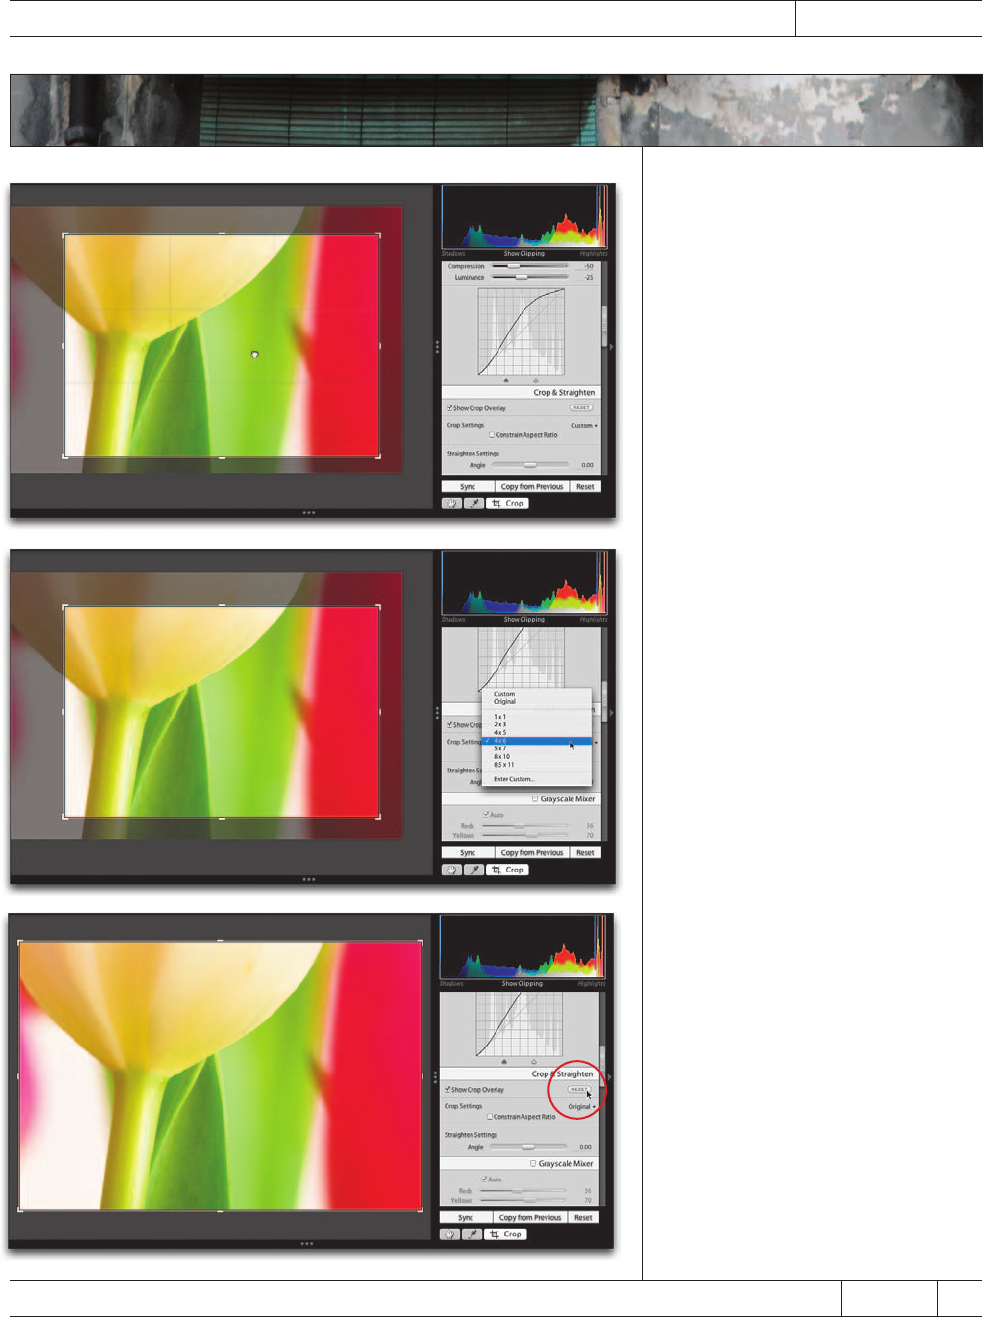
Step Three:
Once you let go of the borders, you can
reposition your photo within the crop-
ping border by moving your cursor inside
the border (as shown here), and just
clicking-and-dragging the photo around
right where you want it.
Step Four:
You also have the option of using preset
crop sizes by choosing them from the
Crop & Straighten panel’s pop-up menu
(as shown here). When you choose one
of these presets, your cropping border
resizes to fit your choice, and the area
that falls inside that border will be the
size you chose (so, for example, here we
chose 4x6, so the area inside the cropping
border will be exactly 4x6"). If you choose
Enter Custom from this pop-up menu, it
brings up a dialog where you can type in
the cropping aspect ratio you’d like.
Step Five:
If at any time you want to cancel
your cropping, just press the Reset
button in the Crop & Straighten panel
(as shown here).
90
Chapter 5 Making Serious Adjustments
The Adobe Lightroom eBook for Digital Photographers
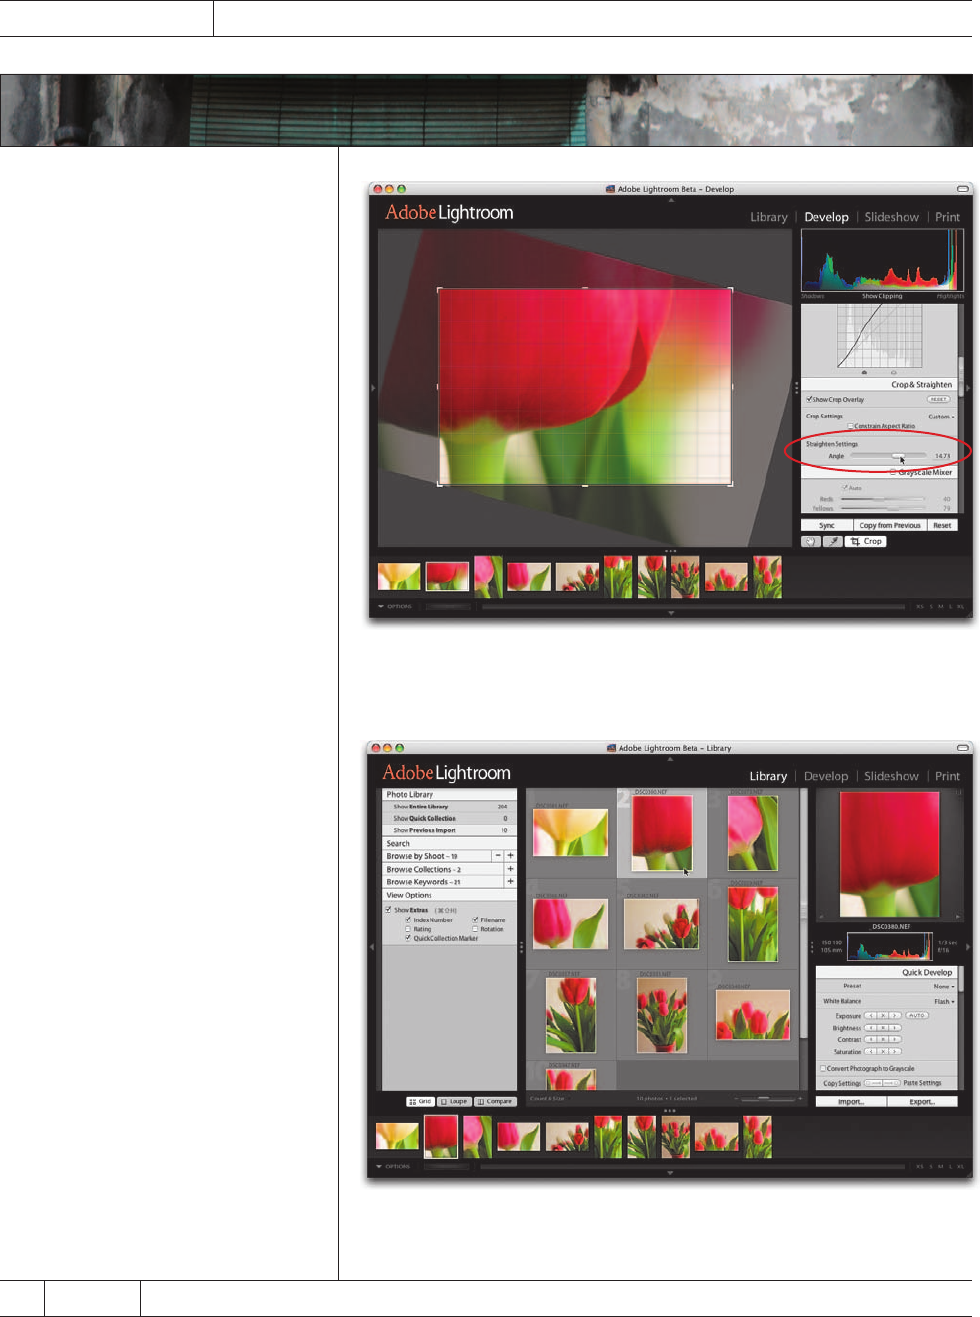
Step Six:
If you need to straighten your photo,
you do that in a similar way. You can do
it while you’re cropping by just moving
your cursor outside the cropping border,
and you’ll notice it turns into a curved,
two-headed arrow. Just click, hold, and
rotate. A grid will appear over your
cropping area to help you with visually
straightening your photo. You can also
just drag the Straighten Settings Angle
slider in the Crop & Straighten panel (as
shown here). No matter which method
you choose, as you rotate the photo,
Lightroom automatically adjusts the size
of the photo, so that when you’re done
straightening there are no white gaps in
the corners (like there would be if you
did this in Photoshop. Very helpful).
Step Seven:
Once you’re done with your cropping
and straightening, you can just move
on with your work, and from now on,
only the cropped and straightened view
of your photo will appear. For example,
when you return to the Library module,
you can see that the thumbnail (top cen-
ter) now displays just your cropped and
straightened version.
Get The Adobe now with the O’Reilly learning platform.
O’Reilly members experience books, live events, courses curated by job role, and more from O’Reilly and nearly 200 top publishers.

