Enabling Sharing
Once the permissions are appropriately set for data being shared, itâs time to set up file sharing and create each share. To do so, open the Server application from /Applications and then click on the File Sharing entry in the sidebar. Here, click on each share that you wonât be using and then click on the minus sign (â-â) to disable it (the data stays intact in its original location if there was any).
Once any shares that arenât needed have been removed, click on the ON and OFF switch (Figure 3-2) to enable the service. This enables both the AFP and SMB protocols to accept network connections, which are then enabled and disabled per share.
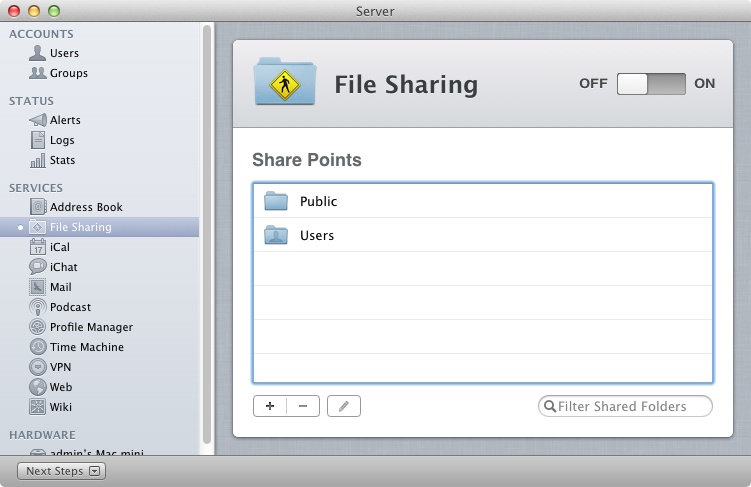
Figure 3-2. Configuring file sharing using Server.app
To create new shares, click on the plus sign (â+â) and choose the folder to be shared, clicking on the Choose button while the folder is highlighted. The new share is then created and appears in the Share Points list. Click on the new share and then click on the pencil icon to see the settings applied to the share. The first item is the permissions to the share, configured previously in the section Managing File and Folder Access with Permissions. Additionally, in the Settings portion of the screen, the following options are provided (as seen in Figure 3-3):
- Share with Mac clients (AFP)
Enables AFP so clients running OS X can access the share
- Share with Windows clients ...
Get Using Mac OS X Lion Server now with the O’Reilly learning platform.
O’Reilly members experience books, live events, courses curated by job role, and more from O’Reilly and nearly 200 top publishers.

