Chapter 21. Creating the business objects and connector 367
From this queue the connector takes the raw application data and sends it to the
DeliveryQueue (WEBTENANT.DELIVERY) as a business object that is ready for
processing.
For the initial testing, switch the polling to manual so that you can see the
contents of the messages at each step.
To start the connector:
1. Click the Connector Configurator.
2. Select the Standard Properties tab.
3. Change the value of the PollFrequency to key.
4. Save the connector configuration to the project and to file, ignoring the
warnings about the Trace and Log files. The file location is the JMS folder in
the connectors subdirectory for the adapters.
5. Start the connector by selecting Start → Programs → IBM WebSphere
Business Integration Adapters → Adapters → Connectors →
JMSConnector.
6. When the connector has completed its initialization, you see a message that
indicates that it is ready to accept polling requests.
7. Start the WebSphere Application Server that runs the front-end application
from the First Steps menu of WebSphere.
8. When the server is initialized and opened for e-business, open a Web
browser for the RedTenant application.
21.7 Unit Testing
To perform the first test:
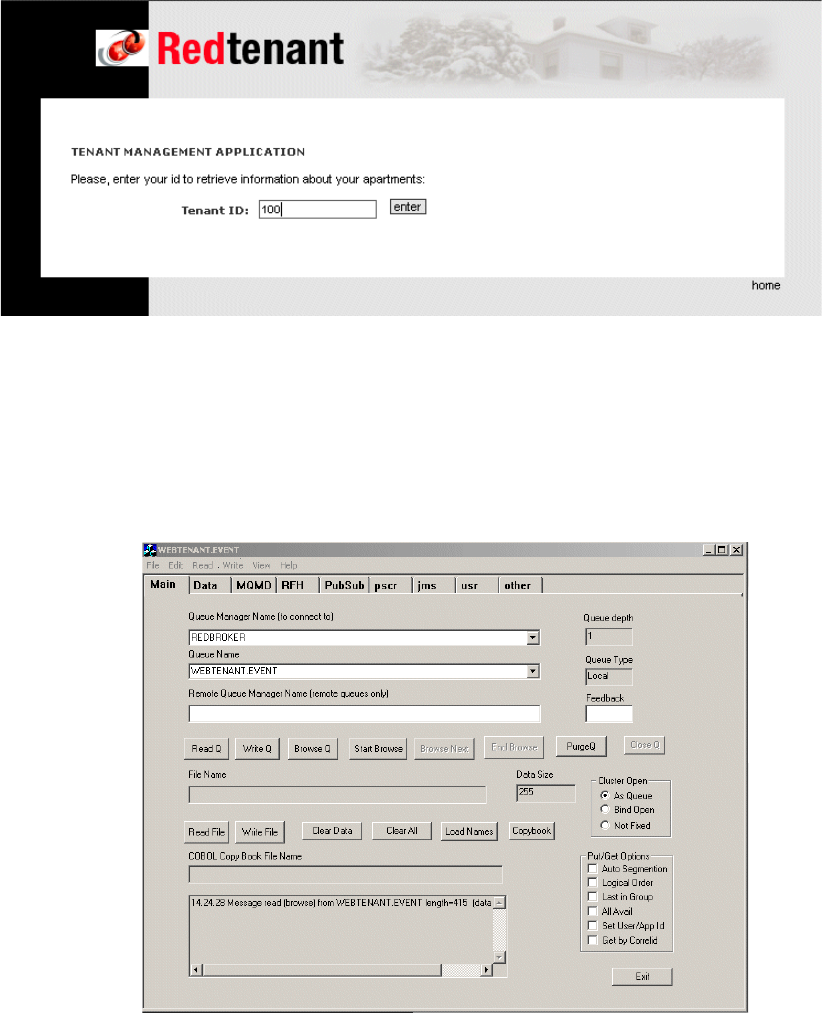
1. Enter an ID for the application logon. Use 100, as shown in Figure 21-34 on
page 368, because it is one that exists and is also one for which we have
created some sample messages for testing.
368 WebSphere Business Integration Adapters
Figure 21-34 RedTenant home page
You will receive an error from the server, because there is currently nothing
processing our requests.
2. Start an instance of rfhutil, which is included in the Additional Materials.
3. Select the WEBTENANT.EVENT queue on the REDBROKER queue
manager (Figure 21-35).
Figure 21-35 rfhutil
Chapter 21. Creating the business objects and connector 369
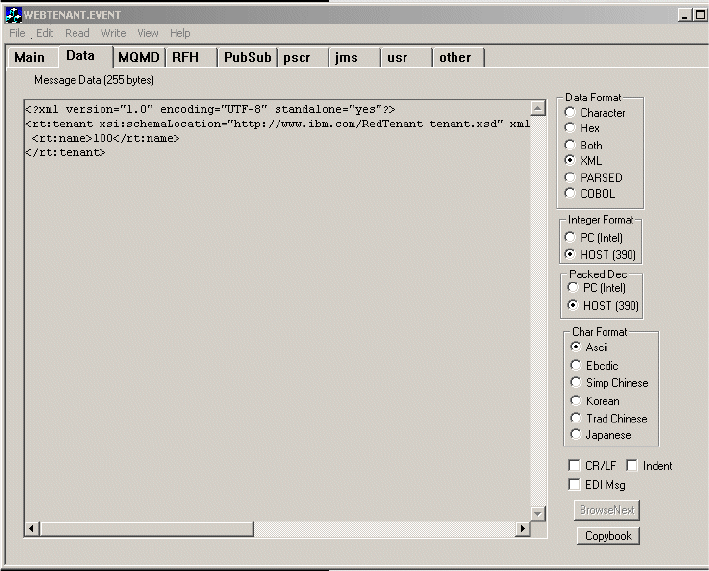
4. Browse the message on the queue using Browse Q, not Read Q.
5. Switch to the Data tab and select the XML Data Format of the message, as
shown in Figure 21-37 on page 370. This data is the raw data from the
front-end application.
Figure 21-36 Event data
370 WebSphere Business Integration Adapters
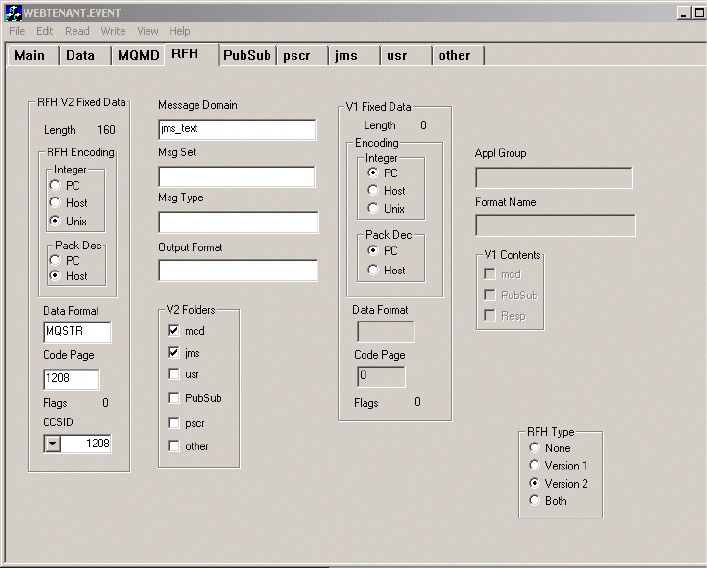
6. Switch to the RFH tab and look at the RFH header information, as shown in
Figure 21-37.
Figure 21-37 RFH2 header
7. Go to the connector DOS window and enter p to begin polling for an event.
You should see the connector pick up the message from the event queue,
transform it to a business object, and put the message on the delivery queue
for delivery to the Message Broker.
Chapter 21. Creating the business objects and connector 371
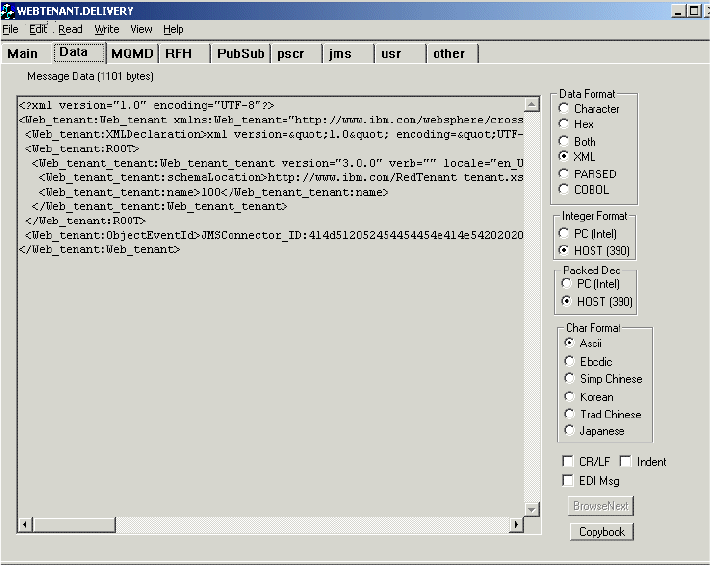
8. Go back to rfhutil, and get the message from the WEBTENANT.DELIVERY
queue (Figure 21-38). There is no need to browse it, because you do not
currently need this message.
Figure 21-38 Message delivered to the broker
9. Select the Data tab to see the transformed data.
10.Select the RFH tab, as shown in Figure 21-39 on page 372, and notice that
the information that you provided with the connector configuration and
metaobjects has caused the RHF2 header to populated correctly for the
Broker to interpret as follows:
– Message Domain = mrm
– Message Set = WebTenant
– Message Type = Web_tenant
– Message Format = CwXML
– Data Format = MQSTR
Get WebSphere Business Integration Adapters: An Adapter Development and WebSphere Business Integration Solution now with the O’Reilly learning platform.
O’Reilly members experience books, live events, courses curated by job role, and more from O’Reilly and nearly 200 top publishers.

