
Chapter 29. Integrating external contractors using WebSphere BI Connect 593
Figure 29-23 Create interaction from packaging AS to None for customXML
The server is now configured to handle incoming ContractorRequest documents
that are not packaged. The server can package the document in an AS2
package. The server can now also handle the reverse operation. That is, the
server can receive an AS2 packaged ContractorRequest document and remove
the AS2 packaging layer.
29.2.2 Configuring the community manager’s profile
So far, we have performed some global setup of the server, and we have created
two profiles for actual trading partners. We are now going to work with these
trading partner profiles.
594 WebSphere Business Integration Adapters
Opening the profile of RedMaint
To manage the profile, we could log on as the manager of the profile (user =
admin, company = RedMaint, and password = generated). However, for
simplicity we configure everything while logged on as hubadmin. To open the
profile:
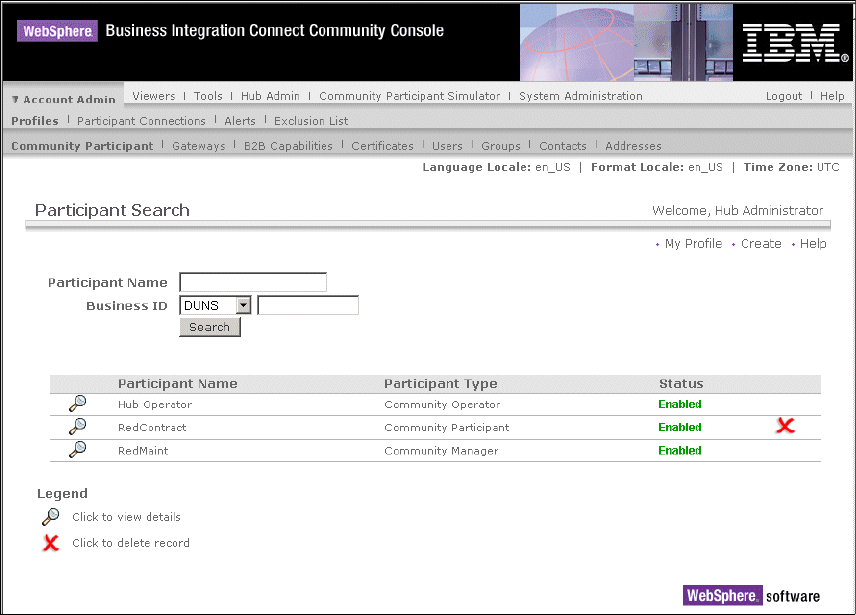
1. Select Account Admin → Profiles → Community Participant.
2. Click Search.
3. Click the magnifying glass next to RedMaint.
Figure 29-24 List of participants
You should now see the main page of the profile of RedMaint, as shown in
Figure 29-25 on page 595.
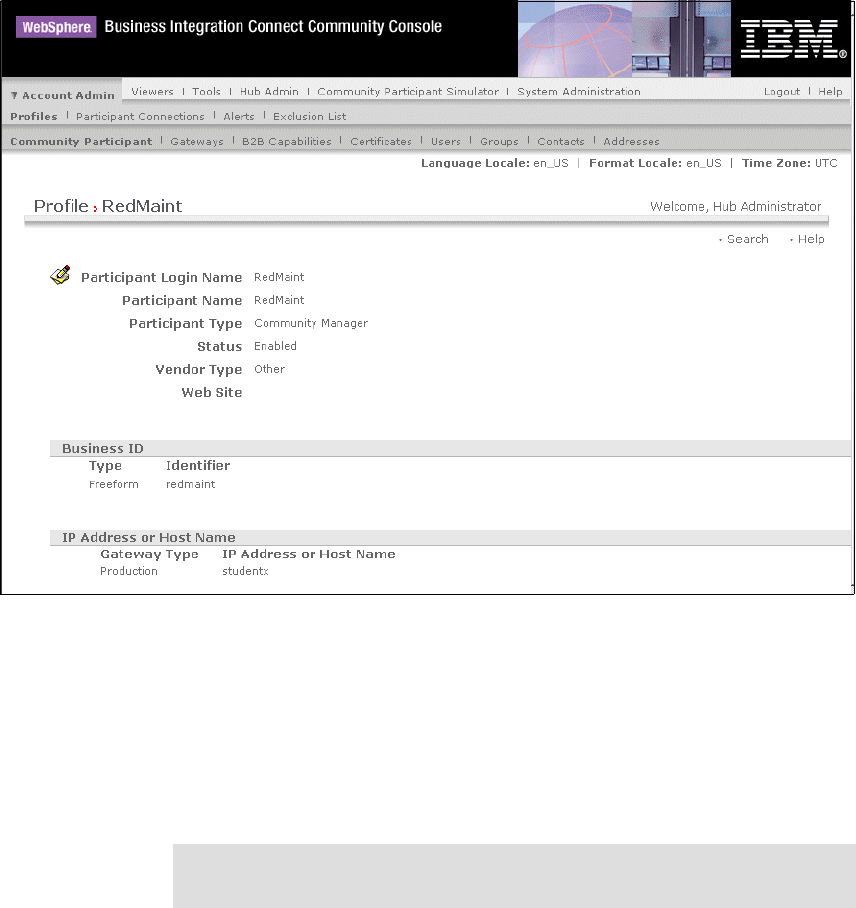
Chapter 29. Integrating external contractors using WebSphere BI Connect 595
Figure 29-25 Managing the profile of RedMaint
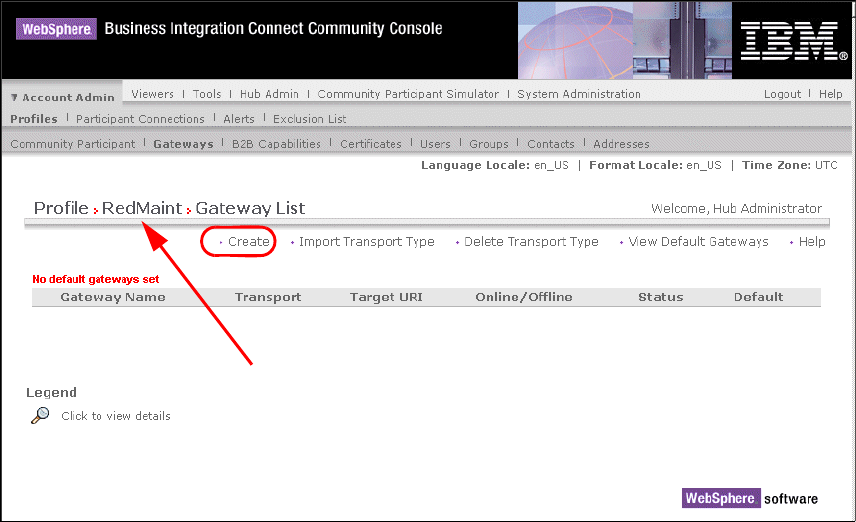
Defining gateways
To define gateways:
1. Before proceeding, use Explorer to create the C:\WBIConnect\data\input
directory (where WBIConnect is the installation directory).
2. Return to the WebSphere Business Integration Connect Console. While you
are still in the profile of RedMaint, select Gateways.
3. Click Create.
Attention: Verify that you are indeed working with the profile of RedMaint
(as shown in Figure 29-26 on page 596).
596 WebSphere Business Integration Adapters
Figure 29-26 List of gateways for redmaint
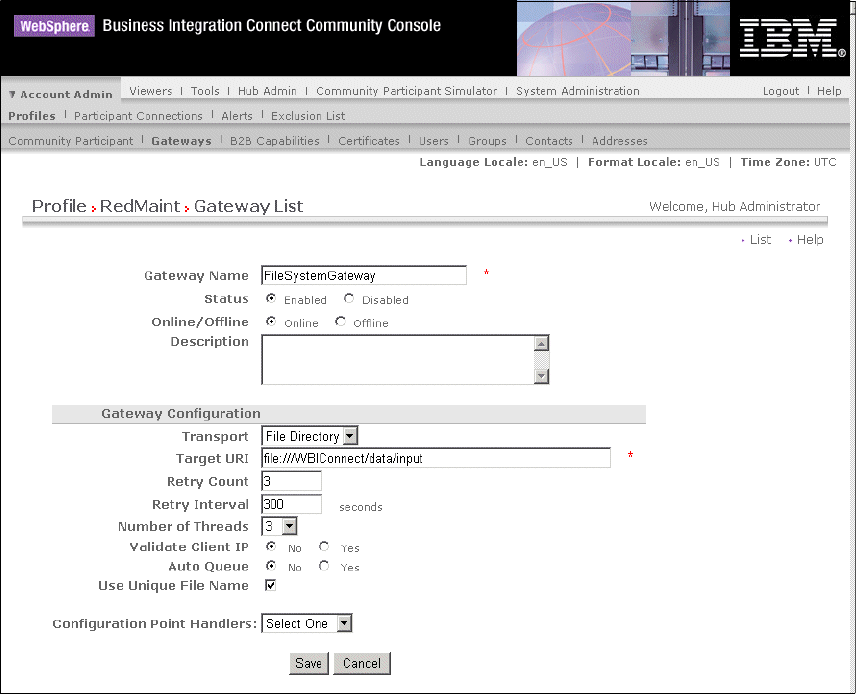
4. In the form that displays (Figure 29-7 on page 574), provide a name for the
gateway. We use FileSystemGateway.
5. Select the transport, which is File Directory for our scenario.
6. Provide the complete directory structure in the URI format. In our case, there
are three forward slash (/) characters following the colon character. If a disk
letter is required, add C: between the second and third slash character. In the
URI format, the usual Windows directory separator backslash (\) is not used.
7. Click Save to store the new gateway in the database.
Chapter 29. Integrating external contractors using WebSphere BI Connect 597
Figure 29-27 Create a new gateway
8. Click List to return to the list of defined gateways.
Figure 29-28 on page 598 lists the new gateway. It shows also that we have
not yet provided a default gateway.
9. To label a gateway as the default gateway, click View Default Gateways.
Get WebSphere Business Integration Adapters: An Adapter Development and WebSphere Business Integration Solution now with the O’Reilly learning platform.
O’Reilly members experience books, live events, courses curated by job role, and more from O’Reilly and nearly 200 top publishers.

