Windows Media Center, included with every edition of Windows 7, allows you to use your PC and some sort of TV tuner card as a DVR (Digital Video Recorder). Commonly known as a TiVo (just as a novelty flying disc is commonly known as a Frisbee), a DVR lets you pause, rewind, and record live television broadcasts.
Note
Want to watch your Media Center content remotely, say, on your cell phone? All you need is DLNA-compliant software (or hardware) to interface with Windows Media Player, which is fully DLNA-compliant for the first time in Windows 7. Also available is TVMOBiLi, which lets you share any media on your network with other DLNA-equipped devices.
Of course, you don’t have to stick with the bundled Windows Media Center (WMC) software. If you don’t like the program, if it crashes too often, or if it doesn’t like your tuner card or remote control, there are many alternatives. Free DVR software includes GB-PVR and MediaPortal. Commercial products, while not necessarily better than their free counterparts, include SnapStream BeyondTV and SageTV.
Unless you enjoy watching television on your tiny laptop screen while Windows hassles you about updates waiting to be installed, you probably want to hook up your Media Center PC to a real television set. Unfortunately, this is not always as easy as it sounds.
Note
An alternative to hooking your PC directly up to a television set is to use a Media Center Extender, a small box that streams recorded video from your PC over your wireless network and connects directly to your TV. Among other things, this means you can put your PC in a different room, and along with it the blinking lights and the whirr of your PC fan that can spoil a good movie. See the section Add DVDs to Your Movie Library for a way to create a virtual DVD library and use extenders to bring it to every TV in the house.
When you connect a TV to your computer (or is it the other way around?), you should see your entire desktop, Start menu, et al., on the big screen. If you see nothing at all, your video card’s TV port may be disabled. If you’re using a laptop, you may have to press a special keystroke combination to “activate” the TV-out and external VGA ports. On some Dell laptops, for instance, hold the Fn key while pressing F8 to switch between the internal display, the external display, and both; consult your computer’s documentation for details. Press these keys repeatedly until you see a picture.
Note
If you see everything except the video rectangle on the big screen, then you have a video overlay problem. See Fix Other Playback Problems for details.
Next, make sure you’re using the right kind of cable, and with cabling, there’s certainly no shortage of possibilities.
The first rule of mating a PC to a TV is to keep it all digital, if you can. If your PC has a DVI or HDMI port (standard on all new desktop PCs and many new laptops) and you have a high-definition television set, you can do precisely that.
If your computer doesn’t have a DVI port, you’ll need to replace your video card with one that does. If you’re using a laptop, you’ll need a DVI-equipped video card for your ExpressCard slot (or PC Card, if it’s an older model), and these can be very spendy.
Now, any modern HD television set will either have a DVI or HDMI plug (tired of acronyms yet?). Depending on what comes out of your PC, you might need a DVI-to-HDMI converter, which sell for a couple of bucks online. (Hint: look on eBay.)
Warning
As you’re setting up your nifty, all-digital home theater PC system, you may hit a roadblock in the form of HDCP (High-bandwith Digital Content Protection). HDCP is a nasty form of copy protection imposed upon high-definition content, such as that from an HD DVD or Blu-Ray drive, or HD cable signal. If your television or video card is of the older variety, it may be the reason you’re getting a black screen instead of the movie you’re trying to play. To fix the problem without replacing your equipment, you can either install a “HDCP stripper” or downgrade to an analog signal.
If your TV has no digital video inputs—or if they’re already being used—your next best option is to use a DVI-to-component adapter (a.k.a. YPbPr, or Green/Blue/Red). Although your TV’s component inputs are analog (not digital), they do support 16:9 wide format and progressive-scan video, which will still look a lot better than S-Video or (gasp) RCA composite connectors.
Note
Many HDTVs have only a single digital (HDMI or DVI) input, which may already be occupied (if you’re lucky) by a DVD player with a digital output. If you don’t want to settle for an analog connection between your PC and TV, you’ll need a HDMI or DVI switch, the best examples of which can be found in newer digital home theater receivers.
If your TV is not high-def, or if for whatever reason digital just isn’t going to work, then you’ve got to go analog.
If your PC has a TV-out port, it might accept a standard S-Video plug, or barring that, an ordinary RCA plug. (If it has a proprietary connector, you may need a special adapter from your PC manufacturer—at extra cost, of course.)
If your computer lacks a dedicated TV-out port, see whether your TV has a 15-pin analog VGA port, in which case you can simply use a VGA-to-VGA cable and connect your TV like a monitor. Otherwise, your PC may support TV-out directly through its VGA port (an admittedly uncommon feature), in which case you can get a VGA-to-RCA or VGA-to-S-Video adapter pretty cheaply online.
So, to sum up, here are the connection methods you can try, in order from best to worst.
Computer side | Television side | Signal | 16:9 supported? |
|---|---|---|---|
|
|
|
|
|
|
|
|
|
|
|
|
|
|
|
|
|
|
|
|
Once you’ve got the cabling in order, the next step is to set the resolution on your PC to optimize the picture quality. Set it too low, and it’ll look fuzzy and pixelated; set it too high, and you might have overscanning problems (where the video runs off the screen). If in doubt, try a few standard resolutions until you have one that looks good. For a widescreen TV, use a widescreen resolution like 1280×768 (768p) or 1800×1080 (1080p); for old-style 4:3 screens, 1024×768 usually works pretty well. If you still have trouble, use PowerStrip to find the optimal resolution and timing settings for your TV.
When you have a signal on your TV, open up Media Center and go to Tasks→Settings→General→Windows Media Center Setup→Configure Your TV or Monitor and follow the prompts.
Media Center supports two kinds of streaming video right out of the box: Internet TV and Netflix, in the TV and Movies sections, respectively. (Internet TV is free, while Netflix requires a paid Netflix account.) But neither service offers the breadth of current and classic television shows that you can watch for free at http://hulu.com.
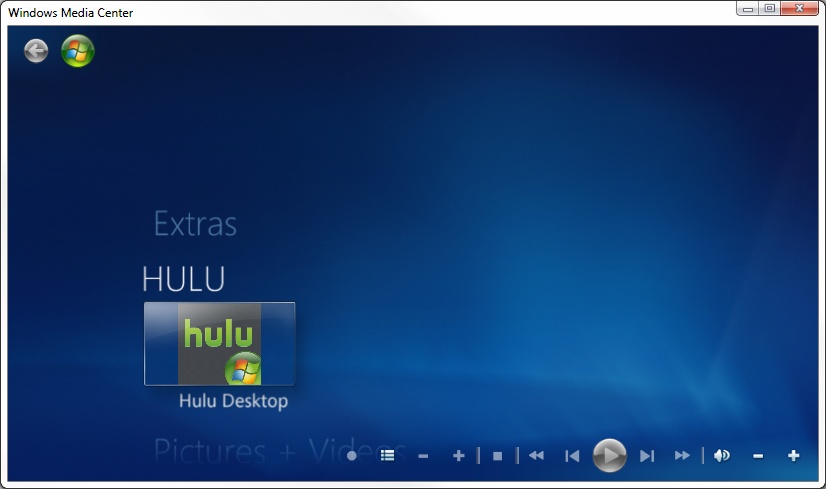
Although you can’t actually watch Hulu programming from within Media Center, you can do the next best thing with the free Hulu Desktop Integration utility. Once installed, a Hulu entry appears in Media Center’s main menu (see Figure 4-17); select it with your remote control to close Media Center and open Hulu Desktop (also free at http://www.hulu.com/labs/hulu-desktop). You can continue to navigate Hulu Desktop with the same remote control; exit Hulu, and Media Center starts back up.
Of course, it’s not as ideal as watching other TV or movies in Media Center (you can’t slip back to the Media Center menu while Hulu plays in the background), but it does allow quick switching between the two players without putting down your remote.
Note
Note that you don’t need the Hulu Desktop Integration utility to watch Hulu outside of a browser; your Media Center remote will work with Hulu Desktop regardless. Another way to watch Hulu is with Boxee (http://boxee.tv/), which pulls together your own music and video content, YouTube, and many other online streaming media sources.
Hulu Desktop Integration only works if you install it to the default folder suggested by the installer, although this may be fixed by the time you read this. Also, Hulu Desktop Integration won’t send Hulu content to Media Center extenders.
Whether you’ve connected your PC directly to a TV or you’re using an Media Center Extender, it’s hard to pass up the opportunity to combine your multi-terabyte hard disk and your vast DVD library. Why mess with a mechanical DVD/Blu-Ray jukebox (or, gasp, have to walk across the room and put discs in the tray by hand), when you can store all your movies on your hard disk and access them with a few clicks of the remote?
Note
If you’re going to be storing a bunch of movies on your hard disk, you might get to the point where you care about how much free disk space you have. If you’re also recording live TV with Media Center, you may want to limit the disk space it uses by going to Tasks→Settings→TV→Recorder→Recorder Storage.
There are a few ways to add movies to your Media Center Library. The most straightforward method involves creating ordinary video files (e.g., .wmv, .mpg, .avi) from DVDs and then accessing them through Movies→movie library; unfortunately, movies encoded this way may not work with your Media Center Extender.
A typical DVD rips to a video file of about 800 MB, which means you can store more than 1,200 movies per terabyte of storage. Here’s how you do it:
Using DVD ripper software, like Handbrake or DVDx, save your movies to a folder on your hard disk.
In the Media Center menu, select Tasks→Settings→Media Libraries.
Choose Movies and click Next.
Choose Add folders to the library and click Next.
Choose whether your videos are stored on the local PC or another PC on the network, click Next, and then navigate the tree to locate the folder (or folders) containing your videos. Place a checkmark next to each folder you’d like to include, and then click Next.
Select Yes, use these locations and then click Finish.
Thereafter, your movies will appear under Movies→movie library. Any new movies you add to the folders specified in step 4 will appear in your movie library automatically.
Note
Alternatively, you can use VideoReDo to convert VIDEO_TS folders from ripped DVDs to .DVR-MS files that Media Center recognizes as recorded TV. This offers many of the advantages of the second solution, next, with the simplicity of the first solution.
There are several drawbacks to compressing your movies into .avi or .mpg files. For one, you lose the DVD menus, supplemental audio tracks, and special features. Recompressing also takes a lot of time, and if you have a lot of DVDs, that time adds up fast. Finally, most DVD rippers use video codecs not supported by Windows Media Extenders, so you may not be able to play your movies on your TV after all. One way to get the full DVD experience with WMC (admittedly at the expense of considerable amounts of disk space), is to copy the VIDEO_TS folders from your DVDs to your hard disk, and then use a transcoder .dll and a special plugin to connect them to Media Center. Problem is, there’s no readily available transcoder that works with Windows 7 at the time of this writing. So, until one is released, try converting your video to the .mkv format; you can use the Haali Media Splitter to add .mkv playback support to Media Player and Media Center, although your Extender may unfortunately still not be able to play .mkv files.
Get Windows 7 Annoyances now with the O’Reilly learning platform.
O’Reilly members experience books, live events, courses curated by job role, and more from O’Reilly and nearly 200 top publishers.

