This audio app, new in Windows 8.1, is ideal for recording lectures, musical performances, notes to self, and cute child utterances. You can make very long recordings with this thing. Let it run all day, if you like. Even your most long-winded friends can be immortalized.
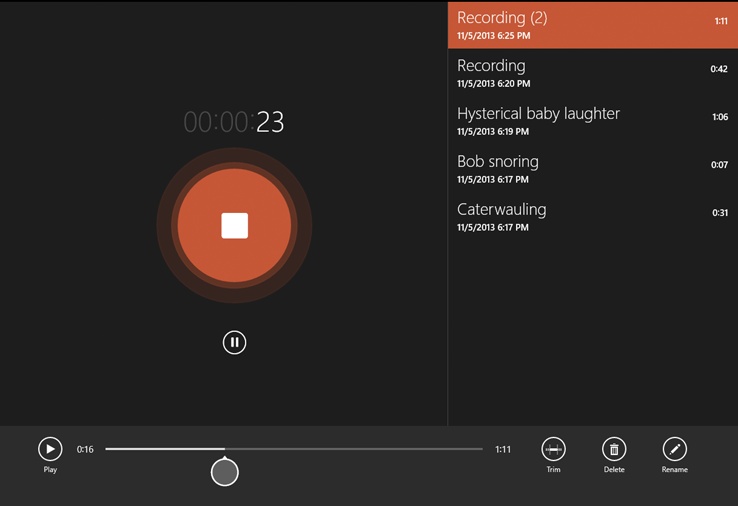
Hit the round, red microphone button to start recording. A
little timer clicks away, and the Stop button pulses, to show that
you’re rolling. You can pause or resume the recording at will
(![]() ) or, when it’s good and done, stop it by
tapping the huge red Stop button. (If you switch into another app, the
recording pauses automatically.)
) or, when it’s good and done, stop it by
tapping the huge red Stop button. (If you switch into another app, the
recording pauses automatically.)
When you stop the recording, the screen changes; see Figure 4-45.
At this point, you can proceed like this:
Name the recording using the Rename button.
Record another sound. Use the microphone button again. As you record more sounds, they pile up in the list at top left.
Play a recording. Select it, then select the
 button on the App bar.
Rewind, Fast-Forward. Drag the round gray handle in the scrubber bar to skip backward or forward in the recording. It’s a great way to skip over the boring pleasantries.
 . Tap to get rid of a recording (you’ll be
asked to confirm).
. Tap to get rid of a recording (you’ll be
asked to confirm).Trim off the ends. You might not guess that such a tiny, self-effacing app actually offers some basic editing functions, but it does. You can trim off the beginning or end of your audio clip. That, of course, is where you’ll usually find “dead air” or microphone fumbling before the good stuff starts playing. (You can’t otherwise edit the sound; for example, you can’t copy or paste bits or cut a chunk out of the middle.)
To trim the bookends of your clip, use the Trim button. At this point, the beginning and end of the recording are marked by big white dots; these are your trim points. Drag them inward to isolate the part of the clip you want to keep. Play the sound as necessary to guide you (
).Select OK to lock in your changes. From its shortcut menu, choose either “Save a copy” (which also saves the original file) or “Update original” (which doesn’t).
Send the file. When a sound is selected in the list, you can open the Charms bar and use the Share button to send this recording by email. This panel may offer other options for sending, too.
Tip
It’s a common question: Once you record these sounds, where are they? Yes, you can email them to yourself from within the app. But where on your PC are the actual recordings sitting?
Well, they’re buried, that’s for sure. Switch to the desktop. Make hidden files visible (on the View tab of an Explorer window’s ribbon, turn on “Hidden items”). Navigate to your personal folder→AppData→Local→Packages→Microsoft.WindowsSoundRecorder_8wekyb3d8bbwe→localstate→Indexed→recordings. (Yes, there really is a folder called Microsoft.WindowsSound-Recorder_8wekyb3d8bbwe.) And there they are—the actual .m4a music files that represent your recordings. Now you can back them up, share them, copy them to a flash drive, whatever.
Get Windows 8.1: The Missing Manual now with the O’Reilly learning platform.
O’Reilly members experience books, live events, courses curated by job role, and more from O’Reilly and nearly 200 top publishers.

