Setting Up Windows Live Mail
To start up Mail for the first time, you can use either of the two standard Windows methods: Either click its icon on the Start screen, or go to the Start screen and type mail; click Windows Live Mail in the results list.
You might see a Microsoft Services Agreement screen filled with legalese (the most significant part of which is that Microsoft can send you updated versions of the software). Click Accept.
Now you’re offered the “Add your email accounts” screen.
Now, if you had a Microsoft email account or program already, Windows Live Mail imports everything automatically: mail, address book, calendar, account settings. You’re ready to start doing email.
If not, it’s fairly easy to enter your email settings information for the first time. All you have to do is type your email name and password into the box (Figure 16-1). If Mail recognizes the suffix (for example, @gmail.com), then it does the heavy lifting for you.
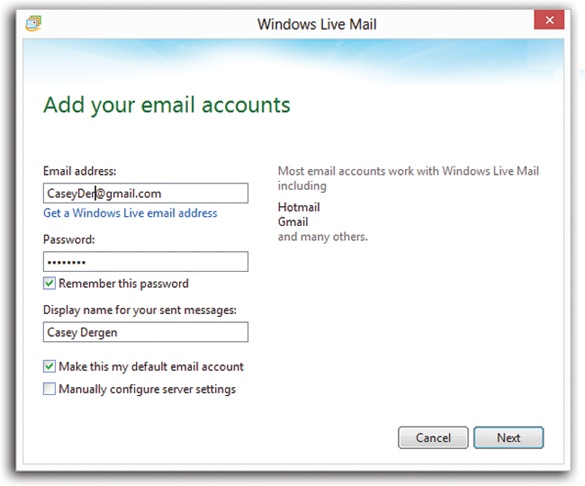
Figure 16-1. To set up an email account in Windows Mail, start by filling in the Display Name. This is the name people will see when you send them email, in the “From:” field. It does not have to be the same as your email address; it can be your full name, a nickname, or anything you like. When you’re done, click Next to continue.
Mail auto-recognizes the necessary server settings for all the common email services—Outlook.com, Hotmail, Gmail, Yahoo, ...
Get Windows 8.1: The Missing Manual now with the O’Reilly learning platform.
O’Reilly members experience books, live events, courses curated by job role, and more from O’Reilly and nearly 200 top publishers.

