Inserting a Photo Gallery
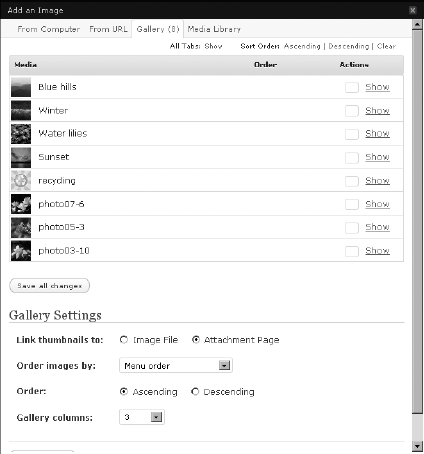
You can also use the WordPress Add an Image window to insert a full photo gallery into your posts. Upload all your images; then instead of clicking the Insert into Post button, click the Save All Changes button at the bottom of the Add an Image window (refer to Figure 3-1), and then click the Gallery link at the top of the Add an Image window (the Gallery link appears only on posts that have images uploaded to it). (See Figure 3-5.) This tab displays thumbnails of all the images you uploaded for your post.
Figure 3-5: The Gallery tab of the Add an Image window.
Follow these steps to insert a photo gallery into a blog post:
- (Optional) On the Gallery tab, below the Actions column, type the order that you want the images to appear in the gallery.
Type the number of the sequence in which you want this image displayed. (If you want this image displayed first, for example, type the number 1.)
- Set options for your gallery.
You can specify the following options:
- Link Thumbnails To: Image File or Attachment Page.
- Order Images By: Menu Order, Name, or Date/Time.
- Order: Ascending or Descending.
- Gallery Columns: Select how many columns of images you want to appear in your gallery.
- Click the Save All Changes button.
All the changes you made to each individual image listed in the gallery are saved.
- Click the Insert Gallery button.
WordPress inserts into your post ...
Get WordPress® All-in-One For Dummies® now with the O’Reilly learning platform.
O’Reilly members experience books, live events, courses curated by job role, and more from O’Reilly and nearly 200 top publishers.

