Verify that your organization meets the requirements below for adding SCIM to Microsoft Entra ID (formerly Azure AD), then follow the configuration instructions to set it up.
Prerequisites
The goal of adding SCIM to your existing Entra ID-to-O’Reilly SAML SSO integration is to have Entra ID become the “source of truth” for user access to the O’Reilly learning platform at your organization.
When Entra ID is the source of truth, the following principles apply:
- If a user is assigned to the O’Reilly SAML application in Entra ID, they have access to O’Reilly and occupy an O’Reilly seat/license.
- If a user isn’t assigned to the O’Reilly SAML application in Entra ID, they don’t have access to O’Reilly and do not occupy an O’Reilly seat/license.
After configuring Entra ID to use SCIM with O’Reilly, you should no longer use O’Reilly’s User Management page in the Admin Console to manage users. Once Entra ID manages your O’Reilly users automatically via SCIM, any user changes made outside of Entra ID cause misalignment between Entra ID and O’Reilly. Misalignment can result in a number of issues, including:
- Failure to automatically remove users who are no longer members of your organization
- Duplicating (rather than updating) an O’Reilly user whose email address has changed
- Running out of O’Reilly licenses unexpectedly
So prior to adding SCIM to Entra ID, it’s necessary to align your O’Reilly and Entra ID user access lists. To do so, complete the following steps:
- Confirm the maximum number of seats/licenses in your organization’s O’Reilly account.
- Review which users at your organization are currently activated in the O’Reilly learning platform.
- Review which users at your organization are currently assigned to the O’Reilly SAML application in Entra ID.
- Compare the two lists of users to ensure that the activated users in O’Reilly are the same as the users who are assigned to the O’Reilly SAML application in Entra ID.
These steps, which are detailed below, will need to be performed by your O’Reilly account admin (who has access to the User Management page) in cooperation with your Entra ID admin (who manages Entra ID for your organization, which generally falls under IT support).
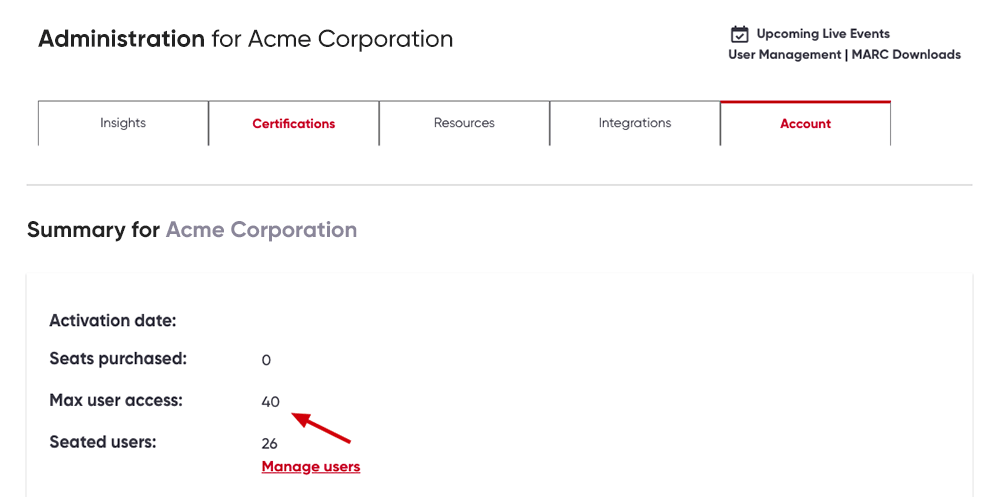
- Your O’Reilly account admin can determine your organization’s maximum number of O’Reilly seats by doing the following:
- Log in to the O’Reilly learning platform and click Admin in the top right corner.
- Click on the Account tab.
-
Check the number in the Max user access field.
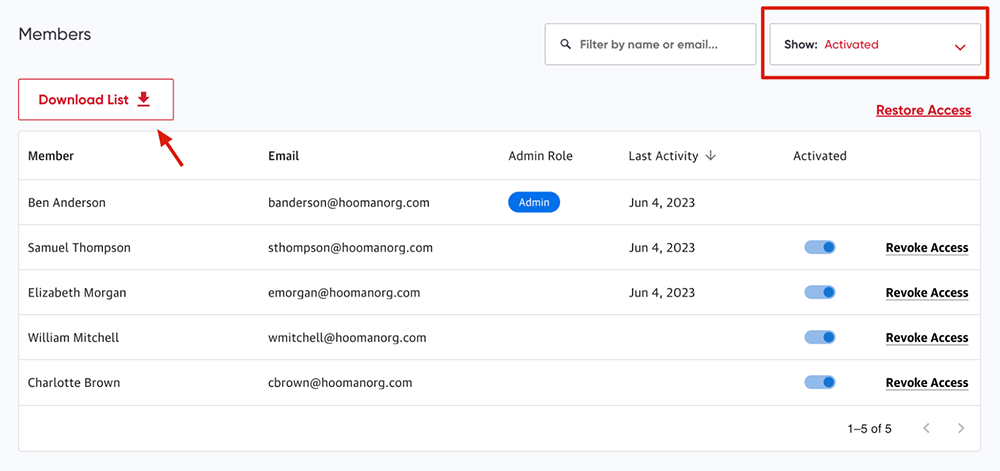
- Your O’Reilly account admin can download a CSV of your organization’s currently activated users by doing the following:
- Log in to the O’Reilly learning platform and click Admin in the top right corner.
- Click User Management.
- Verify that the Show: Activated filter is selected.
-
Click the Download List button.
- Your Entra ID admin can export a list of users at your organization who are currently assigned to the O’Reilly SAML application in Entra ID.
- Your O’Reilly account admin and your Entra ID admin should then compare their O’Reilly and Entra ID user access lists to ensure that the activated users in the O’Reilly learning platform are identical to the users who are assigned to the O’Reilly SAML application in Entra ID. Once a one-to-one user relationship has been established between O’Reilly and Entra ID, your Entra ID admin may proceed with enabling SCIM in Entra ID.
For more information on how to enable SCIM in Entra ID, see the Configuration section below.
If you have any questions about best practices when adding SCIM to your organization’s integration with O'Reilly, please reach out to your CSM or the O’Reilly integration team at
Configuration
Please obtain the required SCIM API token from the Integrations page of your Admin Console or from your customer success manager. Once you have the token, follow the steps below to implement SCIM for the O’Reilly learning platform with Microsoft Entra ID (formerly Azure AD).
-
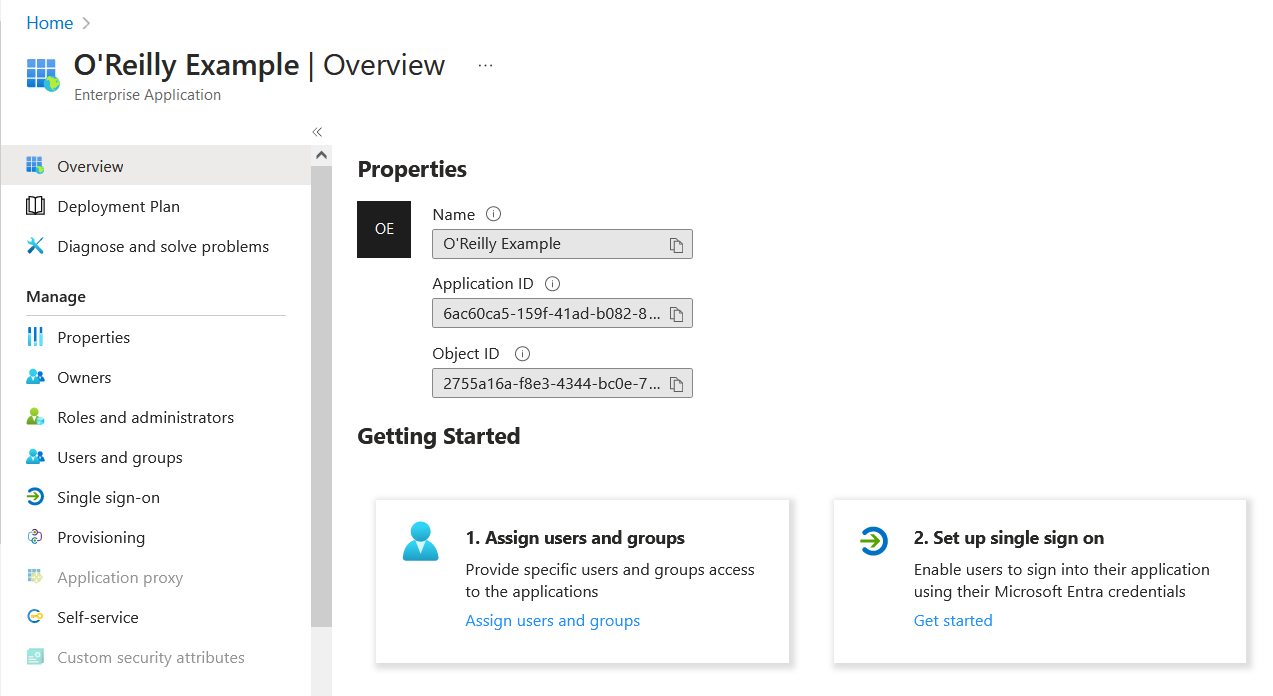
Log in to the Entra ID administrator dashboard and navigate to the application used for your O’Reilly integration. Once there, select Provisioning in the left menu.
-
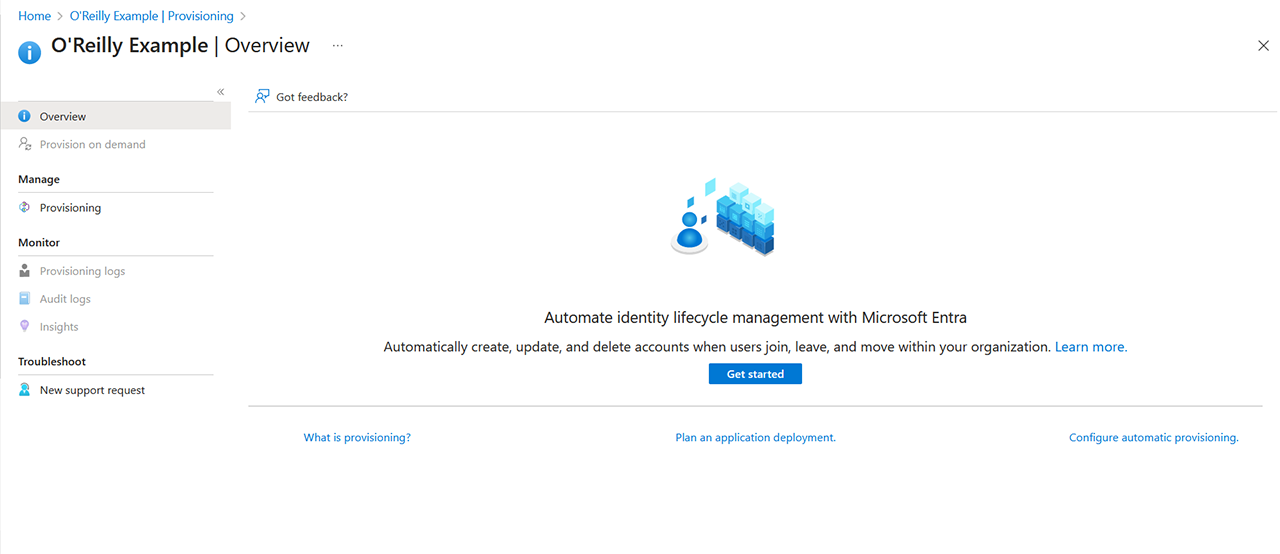
If provisioning has not yet been enabled for your O’Reilly application, you’ll see a Get started button. Click it to set up SCIM provisioning.
-
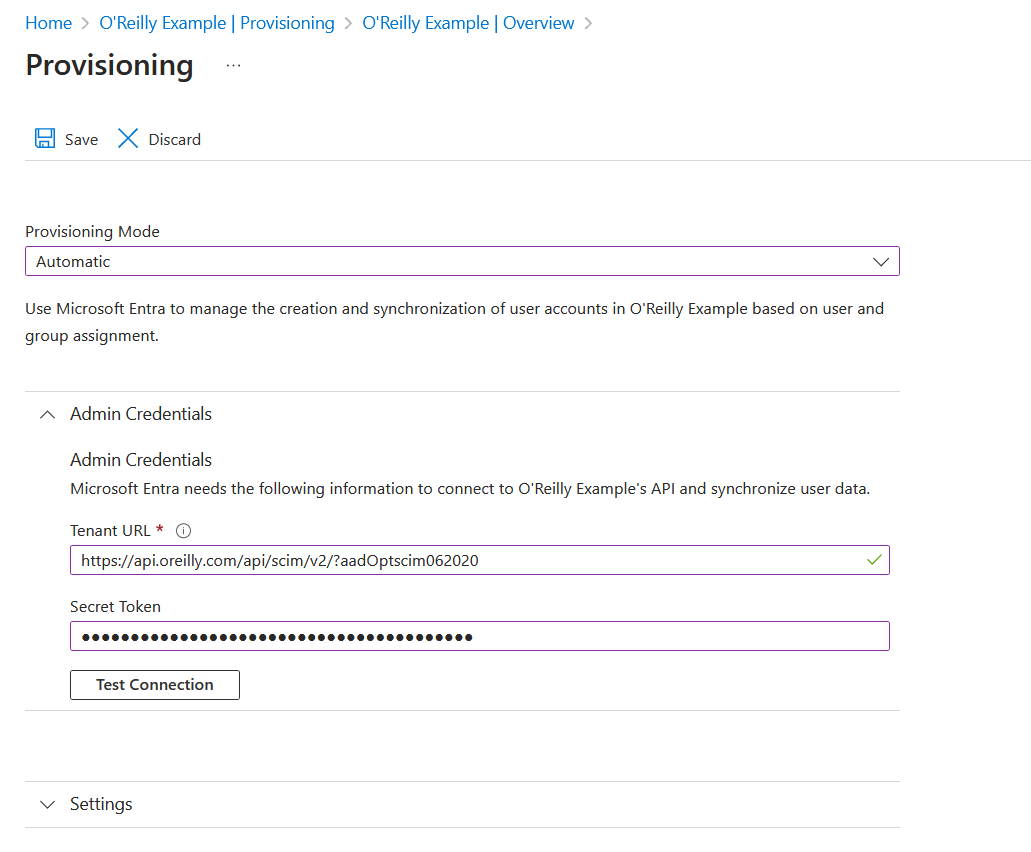
On the Provisioning page that appears, select Automatic from the Provisioning Mode dropdown menu. Then complete the Admin Credentials section using the following:
- Tenant URL: Enter https://api.oreilly.com/api/scim/v2/?aadOptscim062020
- Secret Token: Enter the SCIM API token you received from your customer success manager
Note: The Tenant URL includes an additional flag per Microsoft’s suggestion. Please refer to this Microsoft article for more details.
-
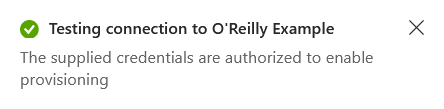
Click the Test Connection button. If it’s successful, you’ll see a confirmation message appear in the upper right corner. Once you receive confirmation of a successful test, click Save.
-
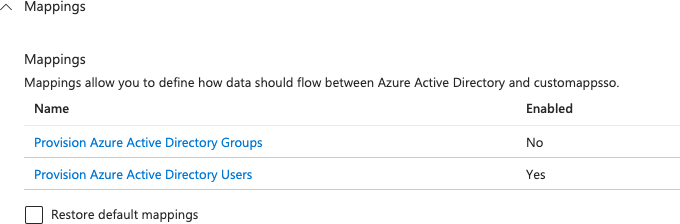
Click on the Mappings section that appears on the same page.
-
Select the Provision Azure Active Directory Groups link. Change the Enabled setting to No. Then click Save. The O’Reilly SCIM API does not support group membership provisioning at this time.
-
Return to the Provisioning page. Then select the Provision Azure Active Directory Users link in the Mappings section.
-
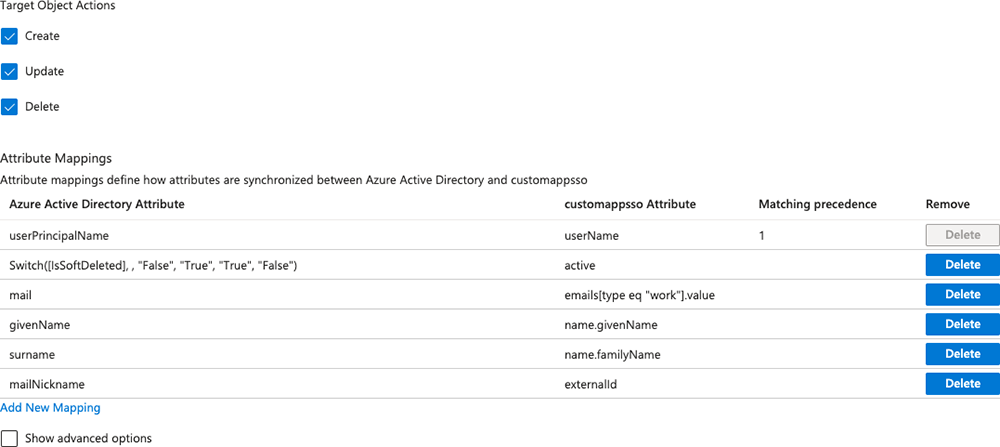
Under Target Object Actions, the Create, Update, and Delete actions are checked and enabled by default. The O’Reilly SCIM API supports all three of these actions. (We recommend retaining the default settings.)
- Create: A user will be created in the O’Reilly platform when you assign them to the O’Reilly learning platform application in Entra ID.
- Update: When you change a user’s name or email address in Entra ID, these changes will be pushed to the O’Reilly learning platform.
- Delete: If you remove permission for a user in Entra ID, the user will be updated to “revoked” status in the O’Reilly learning platform.
-
In the Attribute Mappings section, you’ll need to remove the attributes that aren’t used by the O’Reilly SCIM API using the Delete buttons.
Supported attributes
Azure Active Directory Attribute customappsso Attribute userPrincipalName userName Switch([IsSoftDeleted], , "False", "True", "True", "False") active mail emails[type eq "work"].value givenName name.givenName surname name.familyName mailNickname externalId Once you’ve completed steps 8 and 9, the Target Object Actions and Attribute Mappings sections should look like the image below. If everything looks right, click Save.
-
Return to the Provisioning page and click on the Settings section. In this section:
- You may want to enable the Send an email notification when a failure occurs feature per your organization’s communication policies.
- You may also want to enable Prevent accidental deletion if your organization uses this feature.
- Select the desired value from the Scope dropdown menu to define the users you’d like to provision to O’Reilly.
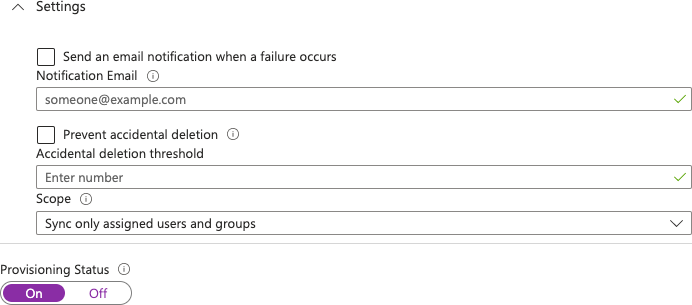
-
When you’ve finished updating the Settings section, change the Provisioning Status setting to On. Then click Save.
-
Your Entra ID integration is now ready to use SCIM.
SAML and SCIM support
If you have any questions during or after the integration, please reach out to your customer success manager or the O’Reilly integration team at