This chapter describes the Motif MainWindow widget,
which can be used to frame many types of applications. The MainWindow
is a manager widget that provides a menu bar, a scrollable work area,
and various other optional display and control areas.
As discussed in Chapter 3, Overview of the Motif Toolkit, the main window of an application is the most visible and the most used of all the windows in an application. It is the focal point of the user's interactions with the program, and it is typically the place where the application provides most of its visual feedback. To encourage consistency across the desktop, the Motif Style Guide suggests a generic main window layout, which can vary from application to application, but is generally followed by most Motif applications. Such a layout is shown in the figure. As described in Section #smainwindow, a main window can provide a menu bar, a work area, horizontal and vertical scrollbars, a command area, and a message area.
In an effort to facilitate the task of building a
main window, the Motif toolkit provides the MainWindow widget. This
widget supports the different areas of the generic main window layout.
However, the MainWindow widget is not the only way to handle the layout
of the main window of your application. You are not required to use the
MainWindow widget and you should not feel that you need to follow the
Motif specifications to the letter. While the Style Guide
strongly recommends using the main window layout, many applications
simply do not fit the standard GUI design model. For example, a clock
application, a terminal emulator, a calculator, and a host of other
desktop applications do not follow the Motif specifications in this
regard, but they can still have Motif elements within them and can
still be regarded as Motif-compliant. If you already have an
application in mind, chances are you already know whether or not the
main window layout is suited to the application; if you are in doubt,
your best bet is to comply with the Motif Style Guide.
Before we start discussing the MainWindow widget,
you should realize that this widget class does not create any of the
widgets it manages. It merely facilitates managing the widgets in a way
that is consistent with the Style Guide. In order to discuss the
MainWindow widget, we are going to have to discuss a number of other
widget classes and use them in examples. As a beginning chapter in a
large book on Motif programming, this may seem like a bit much to
handle, especially if you are completely unfamiliar with the Motif
toolkit. We encourage you to branch off into other chapters whenever
you find it necessary to do so. However, it is not our intention to
explain these other widgets ahead of time, nor is it our assumption
that you already understand them. The lack of an understanding of the
other widgets should not interfere with our goal of describing the
MainWindow widget and how it fits into the design of an application.
The MainWindow widget class is defined in <
Xm/MainW.h>, which must be included whenever you create a MainWindow
widget. As mentioned in Chapter 2, The Motif Programming Model,
you should probably use an ApplicationShell or TopLevelShell widget as
the parent of a MainWindow. If the MainWindow is being used as the main
application window, the ApplicationShell returned by
XtVaAppInitialize() (or another similar toolkit initialization
function) is typically used as the parent. The function
XtVaCreateManagedWidget() can be used to create an instance of a
MainWindow widget, as shown in the following code fragment:
   #include <Xm/MainW.h>
   ...
   main(argc, argv)
   int argc;
   char *argv[];
   {
       Widget toplevel, main_w;
       XtAppContext app;

       XtSetLanguageProc (NULL, NULL, NULL);
       toplevel = XtAppInitialize (&app, "App-Class",
           NULL, 0, &argc, argv, NULL, NULL);
       main_w = XtVaCreateManagedWidget ("mw",
           xmMainWindowWidgetClass, toplevel,
           resource-value-list,
           NULL);

       XtRealizeWidget(toplevel);
       XtAppMainLoop(app);
   }
The MainWindow class is subclassed from the ScrolledWindow class, which
means that it inherits all the attributes of a ScrolledWindow,
including its resources. A ScrolledWindow allows the user to view an
arbitrary widget of any size by attaching horizontal and vertical
ScrollBars to it. You can think of a MainWindow as a ScrolledWindow
with the additional ability to have an optional menu bar, command area,
and message area. Because the MainWindow is subclassed from the
ScrolledWindow widget, we will be referring to some ScrolledWindow
resources and disclosing some facts about the ScrolledWindow. For more
information about the ScrolledWindow, see Chapter 9, ScrolledWindows
and ScrollBars. You may eventually need to learn more about the
ScrolledWindow widget to best make use of the MainWindow, but this
chapter tries to present the fundamentals of the MainWindow widget,
rather than focus on the ScrolledWindow.
While a MainWindow does control the sizes and
positions of its widget children like any manager widget, the geometry
management it performs is not the classic management style of other
manager widgets. The MainWindow is a special-case object that handles
only certain types of children and performs only simple widget
positioning. It is designed to support the generic main window layout
specified by the Motif Style Guide.
Let's take a look at how the MainWindow can be used
in an actual application. the source code demonstrates how the
MainWindow widget fits into a typical application design.
XtSetLanguageProc() is only available in X11R5; there is no
corresponding function in X11R4.
   /* show_pix.c -- A minimal example of a MainWindow.  Use a Label as the
    * workWindow to display a bitmap specified on the command line.
    */
   #include <Xm/MainW.h>
   #include <Xm/Label.h>

   main(argc, argv)
   int argc;
   char *argv[];
   {
       Widget toplevel, main_w, label;
       XtAppContext app;
       Pixmap pixmap;

       XtSetLanguageProc (NULL, NULL, NULL);

       toplevel = XtVaAppInitialize (&app, "Demos",
           NULL, 0, &argc, argv, NULL, NULL);

       if (!argv[1]) {
           printf ("usage: %s bitmap-file0, *argv);
           exit (1);
       }

       main_w = XtVaCreateManagedWidget ("main_window",
           xmMainWindowWidgetClass, toplevel,
           XmNscrollBarDisplayPolicy, XmAS_NEEDED,
           XmNscrollingPolicy,        XmAUTOMATIC,
           NULL);

       /* Load bitmap given in argv[1] */
       pixmap = XmGetPixmap (XtScreen (toplevel), argv[1],
           BlackPixelOfScreen (XtScreen (toplevel)),
           WhitePixelOfScreen (XtScreen (toplevel)));

       if (pixmap == XmUNSPECIFIED_PIXMAP) {
           printf ("can't create pixmap from %s0, argv[1]);
           exit (1);
       }

       /* Now create label using pixmap */
       label = XtVaCreateManagedWidget ("label", xmLabelWidgetClass, main_w,
           XmNlabelType,   XmPIXMAP,
           XmNlabelPixmap, pixmap,
           NULL);

       /* set the label as the "work area" of the main window */
       XtVaSetValues (main_w,
           XmNworkWindow, label,
           NULL);

       XtRealizeWidget (toplevel);
       XtAppMainLoop (app);
   }
In this example, the MainWindow widget is not used to its full
potential. It only contains one other widget, a Label widget, that is
used to display a bitmap from the file specified as the first argument
on the command line (argv[1]). XtVaAppInitialize()
parses the command-line arguments that are used when the program is
run. The command-line options that are specific to Xlib or Xt are
evaluated and removed from the argument list. What is not parsed is
left in argv; our program reads argv[1] as the name
of a bitmap to display in the MainWindow. The Label widget is used as
the work area window for the MainWindow. We did this intentionally to
focus your attention on the scrolled-window aspect of the MainWindow
widget. The following command line:
% show_pix /usr/include/X11/bitmaps/xlogo64produces the output shown in the figure.
The file specified on the command line should
contain X11 bitmap data, so that the application can create a pixmap.
The pixmap is displayed in a Label widget, which has been specified as
the XmNworkWindow of the MainWindow. As shown in the figure,
the bitmap is simply displayed in the window. However, if a larger
bitmap is specified, only a portion of the bitmap can be displayed, so
ScrollBars are provided to allow the user to view the entire bitmap.
The output of the command:
% show_pix /usr/include/X11/bitmaps/escherknotis shown in the figure.
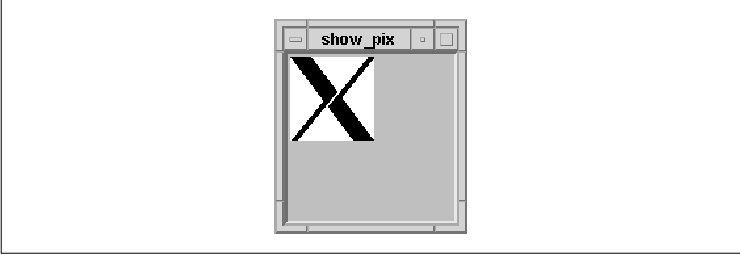
The bitmap is obviously too large to be displayed in
the MainWindow without either clipping the image or enlarging the
window. Rather than resize its own window to an unreasonable size, the
MainWindow can display ScrollBars. This behavior is enabled by setting
the MainWindow resources XmNscrollBarDisplayPolicy to
XmAS_NEEDED and XmNscrollingPolicy to XmAUTOMATIC
. These values automate the process whereby ScrollBars are managed when
they are needed. If there is enough room for the entire bitmap to be
displayed, the ScrollBars are not provided. Try resizing the
show_pix window and see how the ScrollBars appear and disappear as
needed. This behavior occurs as a result of setting
XmNscrollBarDisplayPolicy to XmAS_NEEDED.
Since we do not specify a size for the MainWindow,
the toolkit sets both the width and height to be 100 pixels.
These default values are not a documented feature. Both the MainWindow
and the ScrolledWindow suffer from the same problem: if you do not
specifically set the XmNwidth and XmNheight
resources, the default size of the widget is not very useful.
The XmNscrollBarDisplayPolicy and
XmNscrollingPolicy resources are inherited from the ScrolledWindow
widget class. Because XmNscrollingPolicy is set to
XmAUTOMATIC, the toolkit creates and manages the ScrollBars
automatically. Another possible value for the resource is
XmAPPLICATION_DEFINED, which implies that the application is going
to create and manage the ScrollBars for the MainWindow and control all
of the aspects of their functionality. Application-defined scrolling is
the default style for the MainWindow widget, but it is unlikely that
you will want to leave it that way, since automatic scrolling is far
easier to manage at this stage of the game. For complete details on the
different scrolling styles, see Chapter 9, ScrolledWindows and
ScrollBars.
Using the application-defined scrolling policy does
not necessarily require you to provide your own scrolling mechanisms.
It simply relieves the MainWindow widget of the responsibility of
handling the scrolling mechanisms. If you use a ScrolledList or
ScrolledText widget as the work area, you should definitely leave the
XmNscrollingPolicy as XmAPPLICATION_DEFINED, since these
widgets manage their own ScrollBars. They will handle the scrolling
behavior instead of the MainWindow. the source code shows an example of
a program that uses a ScrolledList for the work area in a MainWindow
widget. XtSetLanguageProc() is only available in X11R5; there
is no corresponding function in X11R4.
   /* main_list.c -- Use the ScrolledList window as the feature
    * component of a MainWindow widget.
    */
   #include <Xm/MainW.h>
   #include <Xm/List.h>

   main(argc, argv)
   char *argv[];
   {
       Widget toplevel, main_w, list_w;
       XtAppContext app;
       Pixmap pixmap;

       XtSetLanguageProc (NULL, NULL, NULL);

       toplevel = XtVaAppInitialize (&app, "Demos",
           NULL, 0, &argc, argv, NULL, NULL);

       main_w = XtVaCreateManagedWidget ("main_window",
           xmMainWindowWidgetClass,   toplevel,
           NULL);

       list_w = XmCreateScrolledList (main_w, "main_list", NULL, 0);
       XtVaSetValues (list_w,
           XtVaTypedArg, XmNitems, XmRString,
               "Red, Green, Blue, Orange, Maroon, Grey, Black, White", 53,
           XmNitemCount,           8,
           XmNvisibleItemCount,    5,
           NULL);
       XtManageChild (list_w);

       /* set the list_w as the "work area" of the main window */
       XtVaSetValues (main_w, XmNworkWindow, XtParent (list_w), NULL);

       XtRealizeWidget (toplevel);
       XtAppMainLoop (app);
   }
In order to simplify the application, we specified the items in the
ScrolledList as a single string:
   XtVaSetValues(list_w,
       XtVaTypedArg, XmNitems, XmRString,
           "Red, Green, Blue, Orange, Maroon, Grey, Black, White", 53,
       XmNitemCount,         8,
       XmNvisibleItemCount,  5,
       NULL);
This technique provides the easiest way to specify a list for a List
widget. The items in a List widget must be specified as an array of
compound strings. If we took the time to create each list item
separately, we would have to create each compound string, assemble the
array of XmString objects and specify it as the XmNitems
resource, and then free each string separately after the widget was
created. By using XtVaTypedArg, the whole list can be created
in one line using the List widget's type converter to convert the
string into a list of compound strings. We use this form of resource
specification frequently in the book to simplify examples. See
Volume Four, X Toolkit Intrinsics Programming Manual, for a
complete discussion on how this kind of type conversion is done. See
Chapter 12, The List Widget, for details on the List widget; see
Chapter 19, Compound Strings, for details on compound strings.
It is important to note that while
XmCreateScrolledList() creates both a ScrolledWindow widget and a
List widget, it returns the List widget. As a result, we must use
XtParent() to get access to the ScrolledWindow widget, so that it
can be specified as the work area of the MainWindow. A common
programming error with a ScrolledText or a ScrolledList widget is using
the actual Text or List widget rather than its ScrolledWindow parent.
Again, we refer you to Chapter 9, ScrolledWindows and ScrollBars
, for a complete discussion of the use of ScrolledText and ScrolledList
compound objects.
Creating a MenuBar is a fairly complex operation,
and one that is completely independent of the MainWindow itself.
However, one of the principal reasons for using the MainWindow widget
is that it manages the layout of a MenuBar. In this section, we
demonstrate the simplest means of creating a MenuBar. Once a MenuBar
has been created, you simply tell the MainWindow to include it in the
window layout by specifying the MenuBar as the value of the
XmNmenuBar resource for the MainWindow.
In the Motif toolkit, a MenuBar is not implemented
as a separate widget, but as a set of CascadeButtons arranged
horizontally in a RowColumn widget. Each CascadeButton is associated
with a PulldownMenu that can contain PushButtons, ToggleButtons,
Labels, and Separators. The managing RowColumn widget has a resource
setting indicating that it is being used as a MenuBar. You do not need
to know any specific details about any of these widgets in order to
create a functional MenuBar, since Motif provides convenience routines
that allow you to create self-sufficient menu systems. While the
specifics on creating PopupMenus, PulldownMenus, and MenuBars are
covered in more detail in Chapter 15, Menus, the basic case that
we present in this section is quite simple.
There are a variety of methods that you can use to
create and manage a MenuBar, but the easiest method is to use the
convenience menu creation routine provided by the Motif toolkit:
XmVaCreateSimpleMenuBar(). There is also a non-varargs version of
this function. It requires you to create each of the buttons in the
MenuBar individually and associate it with a PulldownMenu via
resources. The varargs function is much easier to use. This function is
demonstrated in the following code fragment:
XmString file, edit, help;
Widget menubar, main_w;
...
/* Create a simple MenuBar that contains three menus */
file = XmStringCreateLocalized ("File");
edit = XmStringCreateLocalized ("Edit");
help = XmStringCreateLocalized ("Help");
menubar = XmVaCreateSimpleMenuBar (main_w, "menubar",
XmVaCASCADEBUTTON, file, 'F',
XmVaCASCADEBUTTON, edit, 'E',
XmVaCASCADEBUTTON, help, 'H',
NULL);
XmStringFree (file);
XmStringFree (edit);
XmStringFree (help);
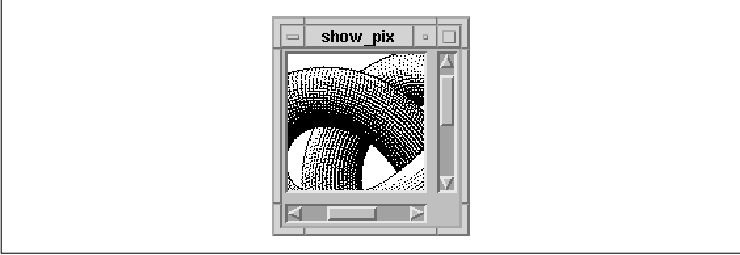
...
The output generated by this code is shown in the figure.
Like XtVaSetValues() and XtVaCreateWidget(), XmVaCreateSimpleMenuBar() takes a variable-length argument list of configuration parameters. In addition to resource/value pairs, it also takes special arguments that specify the items in the MenuBar. You can specify RowColumn-specific resource/value pairs just as you would for any varargs routine. Once all the items in a MenuBar have been created, it must be managed using XtManageChild().

If you are specifying an item in the MenuBar, the
first parameter is a symbolic constant that identifies the type of the
item. Since CascadeButtons are the only elements that can display
PulldownMenus, the first parameter should always be set to
XmVaCASCADEBUTTON. The label of the CascadeButton is given by the
second parameter, which must be a compound string. In the above
example, the variable file contains a compound string that
contains the text File. The third parameter specifies an
optional mnemonic character for the CascadeButton that can be used to
post the menu from the keyboard. The mnemonic for the File menu
is F. By convention, the first letter of a menu or menu item
label is used as the mnemonic.
We use the compound string creation function,
XmStringCreateLocalized(), to create the compound strings for the
menu labels. This function creates a compound string with the text
encoded in the current locale. XmStringCreateLocalized() is a
new routine in Motif 1.2; it replaces XmStringCreateSimple(),
which creates a compound string using the default character set
associated with the widget in which the string is rendered. For a
complete discussion of compound strings, see Chapter 19, Compound
Strings.
Since you are not creating each CascadeButton using
the normal creation routines, you are not returned a handle to each
button. You might think that the label string that you assign to each
button is used as the widget's name, but this is not the case. The
buttons are created sequentially, so the MenuBar assigns the name
button_n to each button. The value n
is the position of the button in the MenuBar, where positions are
numbered starting with 0 (zero). We will discuss how you can specify
resources for items on the MenuBar later in the chapter.
Do not attempt to install callback routines on the
CascadeButtons themselves. If you need to know when a particular menu
is popped up, you should use the XmNpopupCallback on the
MenuShell that contains the PulldownMenu associated with the
CascadeButton. The popup and popdown callback lists are described
briefly in Chapter 7, Custom Dialogs; for more information, see
Volume Four, X Toolkit Intrinsics Programming Manual.
Every CascadeButton in a MenuBar must have a
PulldownMenu associated with it. You can create the items in a
PulldownMenu using a method that is similar to the one for creating a
MenuBar. A PulldownMenu can be created using the function
XmVaCreateSimplePulldownMenu(). This routine is slightly more
involved than XmVaCreateSimpleMenuBar(). The routine takes the
following form:
   Widget
   XmVaCreateSimplePulldownMenu (parent, name, post_from_button,
                                 callback, ...)
       Widget     parent;
       String     name;
       int        post_from_button;
       XtCallbackProc callback;
       ...
The post_from_button parameter specifies the
CascadeButton that posts the PulldownMenu. This parameter is an index
(starting at zero) into the array of CascadeButtons in the
parent widget, which should be a MenuBar. The name
parameter specifies the widget name for the RowColumn widget that is
the PulldownMenu. This name is not the title of the CascadeButton
associated with the menu. The MenuShell that contains the PulldownMenu
uses the same name with _popup appended to it. The
callback parameter specifies a function that is invoked
whenever the user activates any of the items in the menu. The rest of
the arguments to XmVaCreateSimplePulldownMenu() are either
RowColumn resource/value pairs or special arguments that specify the
items in the PulldownMenu.
You should not manage a PulldownMenu after you
create it because you do not want it to appear until it is posted by
the user. The CascadeButton that posts the menu handles managing the
menu when it needs to be displayed. The following code fragment shows
the use of XmVaCreateSimplePulldownMenu() to create a
PulldownMenu:
   XmString open, save, quit, quit_acc;
   Widget menubar, menu;
   ...
   /* First menu is the File menu -- callback is file_cb() */
   open = XmStringCreateLocalized ("Open...");
   save = XmStringCreateLocalized ("Save...");
   quit = XmStringCreateLocalized ("Quit");
   quit_acc = XmStringCreateLocalized ("Ctrl-C");
   menu = XmVaCreateSimplePulldownMenu (menubar, "file_menu", 0, file_cb,
       XmVaPUSHBUTTON, open, 'O', NULL, NULL,
       XmVaPUSHBUTTON, save, 'S', NULL, NULL,
       XmVaSEPARATOR,
       XmVaPUSHBUTTON, quit, 'Q', "Ctrl<Key>c", quit_acc,
       NULL);
   XmStringFree (open);
   XmStringFree (save);
   XmStringFree (quit);
   XmStringFree (quit_acc);
   ...
Unlike a MenuBar, which can only contain
CascadeButtons, a PulldownMenu can contain a number of different types
of elements. As with XmVaCreateSimpleMenuBar(), these elements
are specified by a symbolic constant that identifies the type of the
item. The symbolic constant is followed by a variable number of
additional parameters that depend on the type of the menu item. You can
use the following values to specify the items in a PulldownMenu:
Just as with the CascadeButtons in a MenuBar, the
labels associated with each menu item are not the names of the widgets
themselves. The names of the buttons are button_n
, where n is the position of the button in the menu (starting
with zero). Similarly, the names of the separators and the titles are
separator_n and label_n,
respectively. We will discuss how you can use resources to specify
labels, mnemonics, and accelerators for menus and menu items later in
the chapter.
Menus are not intended to be changed dynamically.
You should not add, delete, or modify the menus on the MenuBar or the
menu items in PulldownMenus once an application is running. Rather than
delete an item on a menu when it is not appropriate, you should change
the sensitivity of the item using XmNsensitive. The menus in
an application should be static in the user's eyes; changing the menus
would be like changing the functionality of the program while the user
is running it. The one exception to this guideline involves menu items
that correspond to dynamic objects. For example, if you have a menu
that contains an item for each application that is running on a
display, it is acceptable for the items on the menu to change to
reflect the current state of the display.
The callback routine associated with the File
menu shown earlier is invoked whenever the user selects any of the
buttons in the menu. Just like any callback, the routine takes the form
of an XtCallbackProc:
   void
   file_cb (widget, client_data, call_data)
       Widget widget;
       XtPointer client_data;
       XtPointer call_data;
The widget parameter is a handle to the widget that was
selected in the menu. The client_data parameter is the index
of the menu item in the menu. The call_data parameter is a
pointer to a callback structure that contains data about callback. Both
the client_data and call_data parameters should be
cast to their appropriate types before the data that they contain is
accessed.
Every Motif callback routine has a callback
structure associated with it. The simplest such structure is of type
XmAnyCallbackStruct, which has the following form:
   typedef struct {
       int     reason;
       XEvent *event;
   } XmAnyCallbackStruct;
All of the Motif callback structures have these two fields, but they
also contain more detailed information about why the callback function
was invoked. The callback routine for the File menu would be
passed an XmPushButtonCallbackStruct, since all of the menu
items are PushButtons. This structure has the following form:
   typedef struct {
       int     reason;
       XEvent *event;
       int     click_count;
   } XmPushButtonCallbackStruct;
The click_count field is not normally used when a PushButton
is in a menu. If one of the items in the menu were a ToggleButton, the
call_data parameter would be of type
XmToggleButtonCallbackStruct, which has the following form:
   typedef struct {
       int     reason;
       XEvent *event;
       int     set;
   } XmToggleButtonCallbackStruct;
The set field indicates whether the item was selected (turned
on) or deselected (turned off).
When a menu contains both PushButtons and
ToggleButtons, you can determine which of the two callback structures
the call_data parameter points to by examining the reason
field. Since all callback structures have this field, it is always safe
to query it. As its name implies, this field indicates why the callback
routine was invoked. The value of this field may also indicate the type
of the widget that invoked the callback. While we can always determine
the type of the widget parameter by using the macro
XtIsSubClass(), using the reason field is more
straightforward. The PushButton widget uses the value XmCR_ACTIVATE
to indicate that it has been activated, while the ToggleButton uses
XmCR_VALUE_CHANGED to indicate that its value has been changed. In
our example, the reason will always be XmCR_ACTIVATE,
since there are only PushButtons in the menu. If there were also
ToggleButtons in the menu, we would know that the callback was invoked
by a ToggleButton if the value were XmCR_VALUE_CHANGED.
The event field in all of the callback
structures is a pointer to an XEvent structure. The XEvent
identifies the actual event that caused the callback routine to be
invoked. In this example, the event is not of particular interest.
In the callback function, you can choose to do
whatever is appropriate for the item that was selected. The callback
structure is probably not going to be of that much help in most cases.
However, the client_data passed to the function can be used to
identify which of the menu items was selected. The following code
fragment demonstrates the use of client_data:
   /* a menu item from the "File" pulldown menu was selected */
   void
   file_cb(widget, client_data, call_data)
   Widget widget;
   XtPointer client_data;
   XtPointer call_data;
   {
       extern void OpenNewFile(), SaveFile();
       int item_no = (int) client_data;

       if (item_no == 0)   /* the "new" button */
           OpenNewFile ();
       else if (item_no == 1)  /* the "save" button */
           SaveFile();
       else        /* the "Quit" button */
           exit (0);
   }
The callback routines for menu items should be as simple as possible
from a structural point of view. A well-designed application should
have application-specific entry points such as OpenNewFile()
and SaveFile(), as shown in the previous example. These
routines should be defined in separate files that are not necessarily
associated with the user-interface portion of the program. The use of
modular programming techniques helps considerably when an application
is being maintained by a large group of people or when it needs to be
ported to other user-interface platforms.
Let's examine an example program that integrates
what we have discussed so far. Example 4-3 modifies the behavior of our
first example, which displayed an arbitrary pixmap, by allowing the
user to change the bitmap dynamically using a Motif
FileSelectionDialog. The program also allows the user to dynamically
change the color of the bitmap using a PulldownMenu. As you can see by
the size of the program, adding these two simple features is not
trivial. Many functions and widgets are required in order to make the
program functional. As you read the example, don't worry about unknown
widgets or details that we haven't addressed just yet; we will discuss
them afterwards. For now, just try to identify the familiar parts and
see how everything works together. XtSetLanguageProc() is only
available in X11R5; there is no corresponding function in X11R4.
XmStringCreateLocalized() is only available in Motif 1.2;
XmStringCreateSimple() is the corresponding function in Motif 1.1.
XmFONTLIST_DEFAULT_TAG replaces XmSTRING_DEFAULT_CHARSET
in Motif 1.2.
   /* dynapix.c -- Display a bitmap in a MainWindow, but allow the user
    * to change the bitmap and its color dynamically.  The design of the
    * program is structured on the pulldown menus of the menubar and the
    * callback routines associated with them.  To allow the user to choose
    * a new bitmap, the "Open" button pops up a FileSelectionDialog where
    * a new bitmap file can be chosen.
    */
   #include <Xm/MainW.h>
   #include <Xm/Label.h>
   #include <Xm/MessageB.h>
   #include <Xm/FileSB.h>

   /* Globals: the toplevel window/widget and the label for the bitmap.
    * "colors" defines the colors we use, "cur_color" is the current
    * color being used, and "cur_bitmap" references the current bitmap file.
    */
   Widget toplevel, label;
   String colors[] = { "Black", "Red", "Green", "Blue" };
   Pixel cur_color;
   char cur_bitmap[1024] = "xlogo64"; /* make large enough for full pathnames */

   main(argc, argv)
   int argc;
   char *argv[];
   {
       Widget main_w, menubar, menu, widget;
       XtAppContext app;
       Pixmap pixmap;
       XmString file, edit, help, open, quit, red, green, blue, black;
       void file_cb(), change_color(), help_cb();

       XtSetLanguageProc (NULL, NULL, NULL);

       /* Initialize toolkit and parse command line options. */
       toplevel = XtVaAppInitialize (&app, "Demos",
           NULL, 0, &argc, argv, NULL, NULL);

       /* main window contains a MenuBar and a Label displaying a pixmap */
       main_w = XtVaCreateManagedWidget ("main_window",
           xmMainWindowWidgetClass,   toplevel,
           XmNscrollBarDisplayPolicy, XmAS_NEEDED,
           XmNscrollingPolicy,        XmAUTOMATIC,
           NULL);

       /* Create a simple MenuBar that contains three menus */
       file = XmStringCreateLocalized ("File");
       edit = XmStringCreateLocalized ("Edit");
       help = XmStringCreateLocalized ("Help");
       menubar = XmVaCreateSimpleMenuBar (main_w, "menubar",
           XmVaCASCADEBUTTON, file, 'F',
           XmVaCASCADEBUTTON, edit, 'E',
           XmVaCASCADEBUTTON, help, 'H',
           NULL);
       XmStringFree (file);
       XmStringFree (edit);
       /* don't free "help" compound string yet -- reuse it later */

       /* Tell the menubar which button is the help menu  */
       if (widget = XtNameToWidget (menubar, "button_2"))
           XtVaSetValues (menubar, XmNmenuHelpWidget, widget, NULL);

       /* First menu is the File menu -- callback is file_cb() */
       open = XmStringCreateLocalized ("Open...");
       quit = XmStringCreateLocalized ("Quit");
       XmVaCreateSimplePulldownMenu (menubar, "file_menu", 0, file_cb,
           XmVaPUSHBUTTON, open, 'N', NULL, NULL,
           XmVaSEPARATOR,
           XmVaPUSHBUTTON, quit, 'Q', NULL, NULL,
           NULL);
       XmStringFree (open);
       XmStringFree (quit);

       /* Second menu is the Edit menu -- callback is change_color() */
       black = XmStringCreateLocalized (colors[0]);
       red = XmStringCreateLocalized (colors[1]);
       green = XmStringCreateLocalized (colors[2]);
       blue = XmStringCreateLocalized (colors[3]);
       menu = XmVaCreateSimplePulldownMenu (menubar, "edit_menu", 1, change_color,
           XmVaRADIOBUTTON, black, 'k', NULL, NULL,
           XmVaRADIOBUTTON, red, 'R', NULL, NULL,
           XmVaRADIOBUTTON, green, 'G', NULL, NULL,
           XmVaRADIOBUTTON, blue, 'B', NULL, NULL,
           XmNradioBehavior, True,     /* RowColumn resources to enforce */
           XmNradioAlwaysOne, True,    /* radio behavior in Menu */
           NULL);
       XmStringFree (black);
       XmStringFree (red);
       XmStringFree (green);
       XmStringFree (blue);

       /* Initialize menu so that "black" is selected. */
       if (widget = XtNameToWidget (menu, "button_0"))
           XtVaSetValues (widget, XmNset, True, NULL);

       /* Third menu is the help menu -- callback is help_cb() */
       XmVaCreateSimplePulldownMenu (menubar, "help_menu", 2, help_cb,
           XmVaPUSHBUTTON, help, 'H', NULL, NULL,
           NULL);
       XmStringFree (help); /* we're done with it; now we can free it */

       XtManageChild (menubar);

       /* user can still specify the initial bitmap */
       if (argv[1])
           strcpy (cur_bitmap, argv[1]);
       /* initialize color */
       cur_color = BlackPixelOfScreen (XtScreen (toplevel)),

       /* create initial bitmap */
       pixmap = XmGetPixmap (XtScreen (toplevel), cur_bitmap,
           cur_color, WhitePixelOfScreen (XtScreen (toplevel)));

       if (pixmap == XmUNSPECIFIED_PIXMAP) {
           puts ("can't create initial pixmap");
           exit (1);
       }

       /* Now create label using pixmap */
       label = XtVaCreateManagedWidget ("label", xmLabelWidgetClass, main_w,
           XmNlabelType,   XmPIXMAP,
           XmNlabelPixmap, pixmap,
           NULL);

       /* set the label as the "work area" of the main window */
       XtVaSetValues (main_w,
           XmNmenuBar,    menubar,
           XmNworkWindow, label,
           NULL);

       XtRealizeWidget (toplevel);
       XtAppMainLoop (app);
   }

   /* Any item the user selects from the File menu calls this function.
    * It will either be "Open" (item_no == 0) or "Quit" (item_no == 1).
    */
   void
   file_cb(widget, client_data, call_data)
   Widget widget;        /* menu item that was selected */
   XtPointer client_data;  /* the index into the menu */
   XtPointer call_data;  /* unused */
   {
       static Widget dialog; /* make it static for reuse */
       extern void load_pixmap();
       int item_no = (int) client_data;

       if (item_no == 1) /* the "quit" item */
           exit (0);

       /* "Open" was selected.  Create a Motif FileSelectionDialog w/callback */
       if (!dialog) {
           dialog = XmCreateFileSelectionDialog (toplevel, "file_sel", NULL, 0);
           XtAddCallback (dialog, XmNokCallback, load_pixmap, NULL);
           XtAddCallback (dialog, XmNcancelCallback, XtUnmanageChild, NULL);
       }
       XtManageChild (dialog);
       XtPopup (XtParent (dialog), XtGrabNone);
   }

   /* The OK button was selected from the FileSelectionDialog (or, the user
    * double-clicked on a file selection).  Try to read the file as a bitmap.
    * If the user changed colors, we call this function directly from change_color()
    * to reload the pixmap.  In this case, we pass NULL as the callback struct
    * so we can identify this special case.
    */
   void
   load_pixmap(dialog, client_data, call_data)
   Widget dialog;
   XtPointer client_data;
   XtPointer call_data;
   {
       Pixmap pixmap;
       char *file = NULL;
       XmFileSelectionBoxCallbackStruct *cbs =
           (XmFileSelectionBoxCallbackStruct *) call_data;

       if (cbs) {
           if (!XmStringGetLtoR (cbs->value, XmFONTLIST_DEFAULT_TAG, &file))
               return; /* internal error */
           (void) strcpy (cur_bitmap, file);
           XtFree (file); /* free allocated data from XmStringGetLtoR() */
       }

       pixmap = XmGetPixmap (XtScreen (toplevel), cur_bitmap,
           cur_color, WhitePixelOfScreen (XtScreen (toplevel)));

       if (pixmap == XmUNSPECIFIED_PIXMAP)
           printf ("Can't create pixmap from %s0, cur_bitmap);
       else {
           Pixmap old;
           XtVaGetValues (label, XmNlabelPixmap, &old, NULL);
           XmDestroyPixmap (XtScreen (toplevel), old);
           XtVaSetValues (label,
               XmNlabelType,   XmPIXMAP,
               XmNlabelPixmap, pixmap,
               NULL);
       }
   }

   /* called from any of the "Edit" menu items.  Change the color of the
    * current bitmap being displayed.  Do this by calling load_pixmap().
    */
   void
   change_color(widget, client_data, call_data)
   Widget widget;     /* menu item that was selected */
   XtPointer client_data; /* the index into the menu */
   XtPointer call_data;  /* unused */
   {
       XColor xcolor, unused;
       Display *dpy = XtDisplay (label);
       Colormap cmap = DefaultColormapOfScreen (XtScreen (label));
       int item_no = (int) client_data;

       if (XAllocNamedColor (dpy, cmap, colors[item_no], &xcolor, &unused) == 0 ||
           cur_color == xcolor.pixel)
           return;

       cur_color = xcolor.pixel;
       load_pixmap (widget, NULL, NULL);
   }

   #define MSG "Use the FileSelection dialog to find bitmap files to0isplay in the scrolling area in the main window.  Use0he edit menu to display the bitmap in different colors."

   /* The help button in the help menu from the menubar was selected.
    * Display help information defined above for how to use the program.
    * This is done by creating a Motif information dialog box.  Again,
    * make the dialog static so we can reuse it.
    */
   void
   help_cb(widget, client_data, call_data)
   Widget widget;
   XtPointer client_data;
   XtPointer call_data;
   {
       static Widget dialog;

       if (!dialog) {
           Arg args[5];
           int n = 0;
           XmString msg = XmStringCreateLtoR (MSG, XmFONTLIST_DEFAULT_TAG);
           XtSetArg (args[n], XmNmessageString, msg); n++;
           dialog = XmCreateInformationDialog (toplevel, "help_dialog", args, n);
       }
       XtManageChild (dialog);
       XtPopup (XtParent (dialog), XtGrabNone);
   }
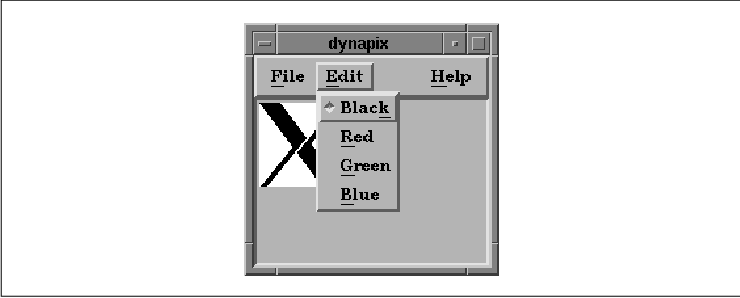
The output of the program is shown in the figure.
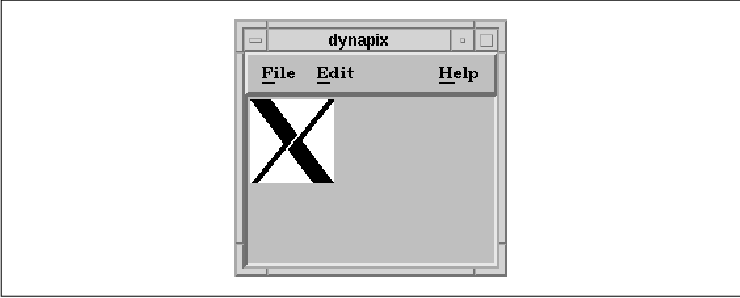
The beginning of the program is pretty much as
expected. After the toolkit is initialized, the MainWindow and the
MenuBar are created the same way as in the previous examples. Just
after the MenuBar is created, however, we make the following calls:
   if (widget = XtNameToWidget (menubar, "button_2"))
       XtVaSetValues(menubar, XmNmenuHelpWidget, widget, NULL);
The purpose of these statements is to inform the MenuBar which of its
CascadeButtons contains the Help menu. Setting the MenuBar's
XmNmenuHelpWidget resource to the CascadeButton returned by
XtNameToWidget() causes the MenuBar to position the menu specially.
The Help menu is placed at the far right on the MenuBar; this
position is necessary for the application to conform to Motif sytle
guidelines. For details on how to support a help system, see Chapter 7,
Custom Dialogs, and Chapter 21, Advanced Dialog Programming.
PulldownMenus are created next in the expected manner. The only variation is for the Edit menu, where each item in the menu represents a color. Since only one color can be used at a time, the color that is currently being used is marked with a diamond-shape indicator. In order to get this radio-box behavior, each menu item in the PulldownMenu is a XmVaRADIOBUTTON and the menu is told to treat the items as a RadioBox. The analogy is that of an old car radio, where selecting a new station causes the other selectors to pop out. Just as you can only have the radio tuned to one station at a time, you may only have one color set at a time. The RadioBox functionality is managed automatically by the RowColumn widget that is used to implement the PulldownMenu. Setting the XmNradioBehavior and XmNradioAlwaysOne RowColumn resources to True provides the RadioBox behavior. See Chapter 11, Labels and Buttons, for a complete description and further examples of this type of behavior. the figure shows the RadioBox-style Edit menu.
Although the RowColumn manages the RadioBox
automatically, we need to turn the radio on by setting the initial
color. After the PulldownMenu is created, the menu (RadioBox) is
initialized so that its first item is selected, since we know that we
are using black as the initial color. XtNameToWidget() is used
again to get the appropriate button from the menu. Since the menu items
were created using XmVaRADIOBUTTON, the widget that is
returned is a ToggleButton. The XmNset resource is used to
turn the button on. Once the menu has been initialized, the Motif
toolkit handles everything automatically.
Note that when we create the Help menu, there
is only one item in the menu. You might think that it is redundant to
have a single Help item in the Help menu, but this design
is an element of Motif style. The Motif Style Guide states that
items on the MenuBar should always post PulldownMenu, not perform
application actions directly.
It is important to note that
XmVaCreateSimplePulldownMenu() returns the RowColumn widget that
contains the items in the menu, even though the routine creates both
the RowColumn widget and its MenuShell parent. The routine does not
return the MenuShell widget that is actually popped up and down when
the menu posted. To get a handle to that widget, you need to use
XtParent() on the RowColumn widget. This design makes sense, since
you need access to the RowColumn widget much more often than you need
access to the MenuShell.
Once all of the items have been installed, the
MenuBar is managed using XtManageChild(). The approach to
creating MenuBars, PulldownMenus, menu items, and their associated
callback routines that we have described here is meant to be simple and
straightforward. In some cases, you may find that these techniques are
too limiting. For example, you cannot specify different callback
routines for different items in the same menu, you cannot pass
different client data for different items, and you cannot name the
widgets individually. The most inconvenient aspect of this method,
however, is that it requires so much redundant code in order to build a
realistically sized MenuBar. Our intent here is to introduce the basic
concepts of menus and to demonstrate the recommended design approach
for applications. We describe how the menu creation process can be
generalized for large menu systems in Chapter 15, Menus.
The rest of the source code is composed of callback
routines that are used by the PulldownMenu items. For example, when the
user selects either of the items in the File menu, the function
file_cb() is called. If the Quit item is selected, the
client_data parameter is 1 and the program exits. If the
Open item is selected, client_data is 0 and a
FileSelectionDialog is popped up to allow the user to select a new
bitmap file. The dialog is created using the convenience routine
XmCreateFileSelectionDialog(), which produces the results shown in
the figure. Two callback routines are installed for the dialog:
load_pixmap(), which is called when the user presses the OK
button, and XtUnmanageChild(), which is called when the user
selects the Cancel button. For more detailed information on the
FileSelectionDialog, see Chapter 6, Selection Dialogs.
The load_pixmap() function loads a new
bitmap from a file and displays it in the Label widget. This function
uses the same method for loading a pixmap as was used earlier in
main(). Since the function is invoked as a callback by the
FileSelectionDialog, we need to get the value of the file selection.
The value is taken from the value field of the
FileSelectionDialog's callback structure,
XmFileSelectionBoxCallbackStruct. Since the filename is represented
as a compound string, it must be converted to a character string. The
conversion is done using XmStringGetLtoR(), which creates a
regular C string for use by XmGetPixmap(). The
load_pixmap() routine is also called directly from
change_color(), so we need to check the call_data
parameter. This parameter is NULL if the routine is not
invoked as a callback.
If XmGetPixmap() succeeds, we get the old pixmap and destroy it using XmDestroyPixmap() before we install the new pixmap. XmGetPixmap() loads and caches a pixmap. If the function is called more than once for a given image, it returns the cached image, which saves space because a new version of the pixmap is not allocated for each call. XmDestroyPixmap() decrements the reference count for the image; if the reference count reaches to zero, the pixmap is actually destroyed. Otherwise, another reference to it may exist, so nothing is done. It is important to use these two functions in conjunction with each other. However, if you use other pixmap-loading functions to create pixmaps, you cannot use XmDestroyPixmap() to free them.

The function change_color() is used as the
callback routine for items in the Edit menu. The names of the
colors are stored in the colors array. The index of a color in
this array is the same as the index of the corresponding menu item in
the menu. The color name is parsed and loaded using
XAllocNamedColor(), provided that the string exists in the RGB
database (usually /usr/lib/X11/rgb.txt). If the routine is
successful, it returns a non-zero status and the XColor
structure is filled with the RGB data and pixel value. In this case,
load_pixmap() is called to reload the pixmap with the new color. If
XAllocNamedColor() returns zero, or if the returned pixel
value is the same as the current one, change_color() returns,
as there is no point in reloading an identical pixmap. For additional
information about loading and using colors, see Volume One, Xlib
Programming Manual, and Volume Two, Xlib Reference Manual.
The help_cb() function is the callback
routine for the Help menu item on the Help menu. It
simply displays an InformationDialog that contains a message describing
how to use the program. See Chapter 5, Introduction to Dialogs,
and Chapter 21, Advanced Dialog Programming, for a complete
description of these dialogs and suggestions on implementing a
functional help system.
We have already covered most of what you need to
know about the MainWindow of an application in this chapter and
Chapter 3, Overview of the Motif Toolkit. The material in the
rest of the chapter is considered somewhat advanced, so you could skip
the remaining sections and be relatively secure in moving on to the
next chapter. The remaining material provides details about the
MainWindow widget that need to be discussed in order to make this
chapter complete.
The greatest difficulty with the command and message
areas of the MainWindow is that these objects are better defined in the
Motif specification than in the Motif toolkit. The command area is
intended to support a tty-style command-line interface to an
application. The command area is not supposed to act like xterm
or any sort of terminal emulator; it is just a single-line text area
for entering individually typed commands for an application. The
message area is just an output-only area that is used for error and
status messages as needed by an application. While both of these areas
are optional MainWindow elements, the message area is usually more
common than the command area. Nevertheless, let's begin by discussing
the command area.
A command area is especially convenient for
applications that are being converted from a tty-style interface to a
graphical user interface. Properly converted, such applications can do
rather well as GUI-based programs, although the conversion can be more
difficult than you might expect. For example, a PostScript interpreter
could be implemented using a command area in the MainWindow. However,
since PostScript is a verbose language, it does not work well with
single-line text entry fields.
the source code shows how the command area can be
used to allow the user to input standard UNIX commands. The output of
the commands is displayed in the ScrolledText object, which is the work
area of the MainWindow. For simplicity, we've kept the MenuBar small so
as to dedicate most of the program to the use of the command area.
XtSetLanguageProc() is only available in X11R5; there is no
corresponding function in X11R4. XmStringCreateLocalized() is
only available in Motif 1.2; XmStringCreateSimple() is the
corresponding function in Motif 1.1. XmFONTLIST_DEFAULT_TAG
replaces XmSTRING_DEFAULT_CHARSET in Motif 1.2.
   /* cmd_area.c -- use a ScrolledText object to view the
    * output of commands input by the user in a Command window.
    */
   #include <Xm/Text.h>
   #include <Xm/MainW.h>
   #include <Xm/Command.h>
   #include <stdio.h>         /* For popen() */

   /* main() -- initialize toolkit, create a main window, menubar,
    * a Command Area and a ScrolledText to view the output of commands.
    */
   main(argc, argv)
   int argc;
   char *argv[];
   {
       Widget        top, main_w, menubar, menu, command_w, text_w;
       XtAppContext  app;
       XmString      file, quit;
       extern void   exec_cmd(), exit();
       Arg           args[5];
       int           n = 0;

       XtSetLanguageProc (NULL, NULL, NULL);

       /* initialize toolkit and create toplevel shell */
       top = XtVaAppInitialize (&app, "Demos",
           NULL, 0, &argc, argv, NULL, NULL);

       (void) close (0); /* don't let commands read from stdin */

       /* MainWindow for the application -- contains menubar, ScrolledText
        * and CommandArea (which prompts for filename).
        */
       main_w = XtVaCreateManagedWidget ("main_w",
           xmMainWindowWidgetClass, top,
           XmNcommandWindowLocation, XmCOMMAND_BELOW_WORKSPACE,
           NULL);

       /* Create a simple MenuBar that contains one menu */
       file = XmStringCreateLocalized ("File");
       menubar = XmVaCreateSimpleMenuBar (main_w, "menubar",
           XmVaCASCADEBUTTON, file, 'F',
           NULL);
       XmStringFree (file);

       /* "File" menu has only one item (Quit), so make callback exit() */
       quit = XmStringCreateLocalized ("Quit");
       menu = XmVaCreateSimplePulldownMenu (menubar, "file_menu", 0, exit,
           XmVaPUSHBUTTON, quit, 'Q', NULL, NULL,
           NULL);
       XmStringFree (quit);

       /* Menubar is done -- manage it */
       XtManageChild (menubar);

       /* Create ScrolledText -- this is work area for the MainWindow */
       XtSetArg (args[n], XmNrows,      24); n++;
       XtSetArg (args[n], XmNcolumns,   80); n++;
       XtSetArg (args[n], XmNeditable,  False); n++;
       XtSetArg (args[n], XmNeditMode,  XmMULTI_LINE_EDIT); n++;
       text_w = XmCreateScrolledText (main_w, "text_w", args, n);
       XtManageChild (text_w);

       /* store text_w as user data in "File" menu for file_cb() callback */
       XtVaSetValues (menu, XmNuserData, text_w, NULL);

       /* Create the command area -- this must be a Command class widget */
       file = XmStringCreateLocalized ("Command:");
       command_w = XtVaCreateWidget ("command_w", xmCommandWidgetClass, main_w,
           XmNpromptString, file,
           NULL);
       XmStringFree (file);
       XtAddCallback (command_w, XmNcommandEnteredCallback, exec_cmd, text_w);
       XtManageChild (command_w);

       XmMainWindowSetAreas (main_w, menubar, command_w,
           NULL, NULL, XtParent (text_w));
       XtRealizeWidget (top);
       XtAppMainLoop (app);
   }

   /* execute the command and redirect output to the ScrolledText window */
   void
   exec_cmd (cmd_widget, client_data, call_data)
   Widget cmd_widget;  /* the command widget itself, not its Text widget */
   XtPointer client_data; /* passed the text_w as client_data */
   XtPointer call_data;
   {
       char *cmd, buf[BUFSIZ];
       XmTextPosition pos;
       FILE *pp, *popen();
       Widget text_w = (Widget) client_data;
       XmCommandCallbackStruct *cbs =
           (XmCommandCallbackStruct *) call_data;

       XmStringGetLtoR (cbs->value, XmFONTLIST_DEFAULT_TAG, &cmd);

       if (!cmd || !*cmd) { /* nothing typed? */
           if (cmd)
               XtFree (cmd);
           return;
       }

       /* make sure the file is a regular text file and open it */
       if (!(pp = popen (cmd, "r")))
           perror (cmd);
       XtFree (cmd);
       if (!pp)
           return;

       /* put the output of the command in the Text widget by reading
        * until EOF (meaning that the command has terminated).
        */
       for (pos = 0; fgets (buf, sizeof buf, pp); pos += strlen (buf))
           XmTextReplace (text_w, pos, pos, buf);

       pclose (pp);
   }
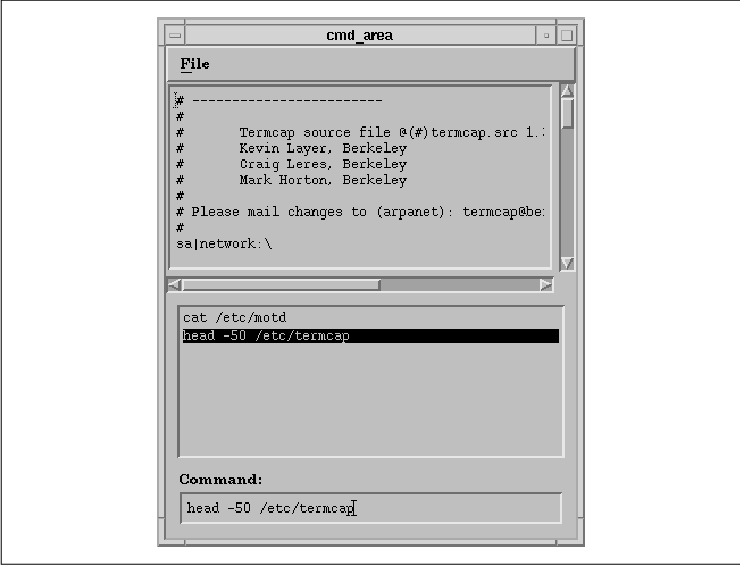
This example uses a Command widget for the command area. The output of
the program is shown in the figure. The Command widget provides a
command entry area and a command history area. However, you do not
necessarily have to use a Command widget for the command area. A
TextField widget can be used instead to provide a simple command area.
When we created the MainWindow, we set the
XmNcommandWindowLocation resource to XmCOMMAND_BELOW_WORKSPACE
, which caused the command area to be placed below the work window.
Although the default value of the resource is XmCOMMAND_
ABOVE_WORKSPACE, the Style Guide recommends that the
command area be positioned beneath the work window, rather than above
it. You need to explicitly set the value of
XmNcommandWindowLocation to ensure that the command area is
positioned appropriately.
Note that we use the ScrolledWindow that is created
by XmCreateScrolledText() for the work window, rather than the
scrolling area provided by the MainWindow. Since
XmCreateScrolledText() returns a Text widget, we are careful to use
the parent of the Text widget for the XmNworkWindow resource
of the MainWindow. We set the areas of the MainWindow using
XmMainWindowSetAreas(), which is a convenience function that tells
the MainWindow which of its child widgets should be used for its
different predefined areas. The routine takes the following form:
   void
   XmMainWindowSetAreas (main_w, menubar, cmd_w, h_scroll,
                         v_scroll, work_w)
       Widget main_w;
       Widget menubar;
       Widget cmd_w;
       Widget h_scroll;
       Widget v_scroll;
       Widget work_w;
The function is really a front end for
XmScrolledWindowSetAreas(). Basically, both of these functions
manage the appropriate widgets so that they appear in the correct
locations in the MainWindow, while making sure there is enough space
for all of them to be visible. Neither function is entirely necessary,
though. When you create a widget as a child of a MainWindow widget, the
MainWindow checks the type of the widget you are adding. If the new
widget is a RowColumn that is being used as a MenuBar (
XmNrowColumnType is XmMENU_BAR), the MainWindow
automatically uses it for the menu bar. This same check is performed
for a Command widget, which is automatically used as the command area.
The MainWindow also provides resources for its different areas that you
can set using XtVaSetValues(). The resources you can use are:
   XmNmenuBar
   XmNcommandWindow
   XmNverticalScrollBar
   XmNhorizonalScrollBar
   XmNworkWindow
   XmNmessageWindow
Once one of these values is set, it cannot be reset to NULL, although it can be reset to another widget. However, XmMainWindowSetAreas() can be used to set the different areas to NULL. You should only use this routine when you are doing the initial layout of your application; changing the major elements of the MainWindow while an application is running would be quite disruptive.
You might notice that XmMainWindowSetAreas()
does not have a parameter to specify the widget that is used as the
message area. There is, however, a resource to support the message
area. The message area is important in most applications, since it is
typically the place where brief status and informational messages are
displayed. The message area can be implemented using different widgets,
such as a read-only Text widget, a read-only ScrolledText object, or a
Label widget. Using a Label widget as the message area is quite simple
and really doesn't require any explanation. Chapter 14, Text Widgets
, describes how to use a read-only text area for the message area in a
MainWindow in Section #soutputtext.
If you specify the XmNmessageWindow
resource, the message area is positioned across the bottom of the
MainWindow. If you are not satisfied with how the MainWindow handles
the layout of the message area, you can make the message area widget a
child of the work area manager widget and handle the layout yourself.
Resources specific to the MainWindow and its
sub-elements can be useful when configuring the default appearance of
your application. If you set these resources in an app-defaults
file, the specifications can also provide a framework for users to
follow when they want to set their own configuration parameters. Even
users who are sophisticated enough to figure out how X resource files
work still copy existing files and modify them to their own tastes. To
assist users, the app-defaults file for an application should be
informative and complete, even though it might be lengthy.
Of course, the first step in specifying resources in
an app-defaults file is to determine exactly which aspects of the
program you want to be configurable. Remember, consistency is the only
way to keep from completely confusing a user. Once you have decided
which portions of the application are going to be configurable, you can
set resource values by specifying complete widget hierarchies. As an
example, let's specify some resources for the menu system from
dynapix.c. The application creates the File menu in the
following way:
   XmVaCreateSimplePulldownMenu(menubar, "file_menu", 0, file_cb,
       XmVaPUSHBUTTON, open, 'O', NULL, NULL,
       XmVaSEPARATOR,
       XmVaPUSHBUTTON, quit, 'Q', NULL, NULL,
       NULL);
We can add accelerators to both the Open and Quit menu
items using the following resource specifications:
   dynapix.main_window.menubar*button_0.accelerator: Ctrl<Key>O
   dynapix.main_window.menubar*button_0.acceleratorText: Ctrl+O
   dynapix.main_window.menubar*button_1.accelerator: Ctrl<Key>C
   dynapix.main_window.menubar*button_1.acceleratorText: Ctrl+C
The result is shown in the figure.

These resource settings work because
XmNaccelerator and XmNacceleratorText were not hard-coded
by the application. By the same token, the labels of the MenuBar titles
and the menu items in the PulldownMenus are hard-coded values that
cannot be modified through resources. To relax this restriction, you
could try setting the label and mnemonic parameters
to NULL in calls to XmVaCreateSimplePulldownMenu().
Unfortunately, this technique makes resource specification awfully
messy, since the CascadeButtons in the MenuBar and the various
PulldownMenus all have names of the form button_n
. The other alternative is to use the more advanced methods of menu
creation that are described in Chapter 15, Menus.
The MainWindow provides a few other resources that
control different visual attributes: XmNshowSeparator,
XmNmainWindowMarginWidth, and XmNmainWindowMarginHeight.
The XmNshowSeparator resource controls whether or not
Separator widgets are displayed between the different areas of a
MainWindow. The margin resources specify the width and height of the
MainWindow's margins. Generally, these resources should not be set by
the application, but left to the user to specify. For example:
   *XmMainWindow.showSeparator: True
   *XmMainWindow.mainWindowMarginWidth: 10
   *XmMainWindow.mainWindowMarginHeight: 10
The class name for the MainWindow widget is XmMainWindow. If these resource settings were specified in an app-defaults file, they would affect all of the MainWindow widgets in the application. If a user makes these specifications in his .Xdefaults file, they would apply to all MainWindow widgets in all applications.
This chapter introduced you to the concepts involved
in creating the main window of an application. To a lesser degree, we
showed you how the MainWindow widget can be used to accomplish some of
the necessary tasks. We identified the areas involved in a MainWindow
and used some convenience routines to build some adequate prototypes.
The MainWindow can be difficult to understand
because of its capabilities as a ScrolledWindow and because it supports
the management of so many other objects. The work area of a MainWindow
usually contains a manager widget that contains other widgets. Although
the MainWindow can handle the layout of its different areas, we do not
necessarily encourage you to use all its of its features. For larger,
production-style applications, you would probably be better off using
the MainWindow for the sake of the MenuBar, while placing the rest of
the layout in the hands of a more general-purpose manager widget. These
are described in Chapter 8, Manager Widgets.
You could also decide not to use the MainWindow
widget at all. If done properly, you could probably use one of the
manager widget classes described in Chapter 8 and still be
Motif-compliant. Depending on your application, you might find this
technique easier to deal with than the MainWindow widget.
Based on the material in this chapter, you should be
able to do the following exercises: