 Fire (source: AbelEscobar)
 OAuth is the undisputed standard for authenticating over the web or in native mobile apps. The promise of one-click signups and logins has obvious appeal, but getting this up and running is often quite challenging. Over the years we have heard countless horror stories from developers who have spent weeks trying to add OAuth support to their applications, with varying degrees of success.
This article provides a 15 minute, step-by-step guide to adding OAuth support to a CLI-generated Angular application using Firebase. We will implement OAuth with a Google account, but other platforms supported by Firebase include: Facebook, Twitter, and GitHub.
Firebase
But first, what is Firebase? Firebase got its start as a realtime cloud-hosted NoSQL database supporting multi-user synchronization. Since being acquired by Google in October of 2015 it has become an entire publishing platform for web and mobile applications. Many major companies, including Lyft, Shazam, The New York Times, and NPR, use Firebase to support their apps . Some of these applications see over 100 million monthly users and update the database more than 3,000 times per second, providing strong evidence that the platform can scale.
At Andromeda, we use Firebase to build and deploy solutions rapidly without the high cost of platform and infrastructure maintenance. For example, our parking app FlexePark lets business owners turn their private parking lots into public paid lots after business hours. FlexePark uses Firebase to authenticate users with their existing social media accounts for faster and easier signups, but also supports traditional email/password accounts.
You can also have one-click signups in your applications by following the step-by-step instructions below.
Getting Started
The following example walks you through the creation of a fully-functional Angular application with Google authentication. This demo will include the following features:
- Login with a Google account using OAuth
- Logout
- Retrieving user metadata from the auth provider
- Protecting a URL from unauthenticated access
We will be using the AngularFire2 library to work with Firebase from our code. Although Firebase provides a universal JavaScript API, AngularFire provides a convenient Angular wrapper around this functionality, allowing us to more easily add Firebase features within our framework.
Initialize Project
The following instructions expect you to already have NPM installed on your system. You will also need to have the Angular CLI installed.
Let’s start by initializing a new Angular project and then adding both firebase and angularfire to this project using npm:
$ ng new firebase-oauth-demo
$ cd firebase-oauth-demo
$ npm install firebase angularfire2 --save
Set Up Firebase
Before we can begin implementing OAuth, you will need your own Firebase account. Using your Google Account, sign in to the Firebase Console:
https://console.firebase.google.com/
(If you do not yet have a Google Account, you can create one here.)
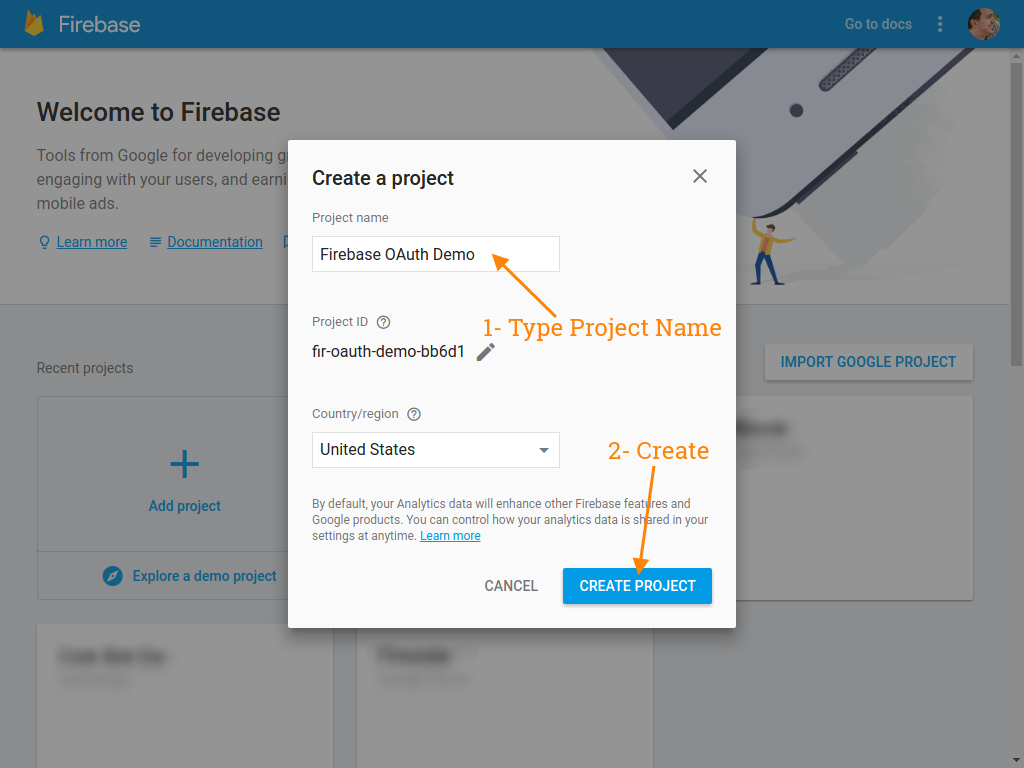
Once in, you’ll need to click Add project and type a new project name.
Because we are going to implement OAuth, we need to activate authentication within the Console. Click on Authentication and then Sign-In Method, and finally select Google from the list of Sign-in providers.

Part of implementing OAuth is the generation of API keys with the authentication provider (such as Facebook or Twitter). This involves creating a developer account with that provider, and copying the keys into Firebase. Since Firebase is a Google product, you already have a developer account by virtue of signing up for Firebase. Therefore, Firebase requires no manual creation of API keys for OAuth. Simply click the Enable slider and then Save.

Configure Firebase
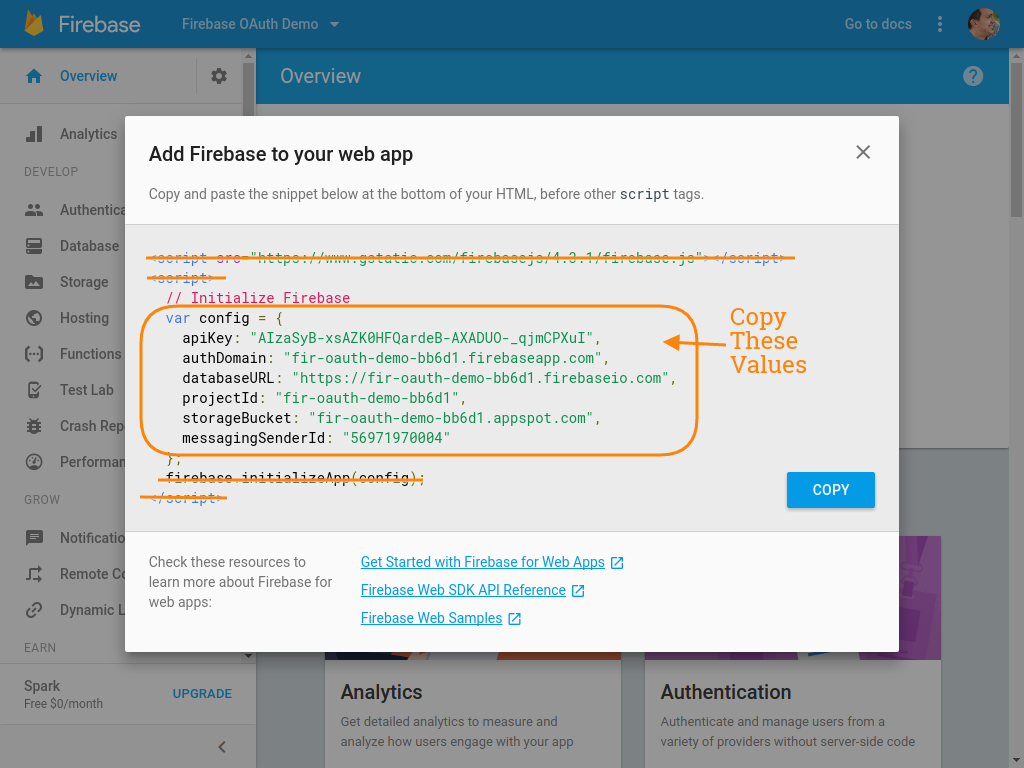
Now we need to initialize Firebase within our application in order to connect to the authentication services. Go to the overview section in the firebase console and click on Add Firebase to your web app.

This will give you configuration details you can copy into your project. Copy just the JSON values in the middle. (We don’t want the HTML script tags, because we will be inserting code directly into a TypeScript file.)
Now create a new firebase key in the environments.ts file in your Angular project and paste in the copied values.
environment.ts:
//  Initialize info from firebase console
export const environment = {
 production: false,
 firebase: {
   apiKey: "yourApiKey",
   authDomain: "yourAuthDomain",
   databaseURL: "yourDatabaseURL",
   projectId: "yourProjectId",
   storageBucket: "yourStorageBucket",
   messagingSenderId: "yourMessagingSenderId"
 }
};
(Note: You will need to perform the same update to your environment.prod.ts file if you want to support Firebase auth from a --prod build.)
The final setup step is to initialize the Firebase API using these configuration values. This is done in the app.module.ts file using the AngularFireModule, which provides an Angular-friendly way to initialize the firebase API. Be sure to update your file to include the following code.
app.module.ts (fragment):
// Import environment configuration
import { environment } from '../environments/environment';
// Import AngularFire
import { AngularFireModule } from 'angularfire2';
import { AngularFireAuthModule } from 'angularfire2/auth';

@NgModule({
 imports: [
   // Init Firebase with environment configuration
   AngularFireModule.initializeApp(environment.firebase),
   AngularFireAuthModule
 ]
})
Login Component
Before we can authenticate, we need an Angular component to provide the user with a way to access this functionality. Our login component will simply provide Login and Logout buttons, and will bind to the root URL.
Create component
Use the Angular CLI to generate a new component named login.
$ ng generate component components/login
Start by stubbing out two functions, login and logout. We will add the functionality a bit later.
login.component.ts (fragment):
export class LoginComponent {
  login() { console.log('login'); }
  logout() { console.log('logout'); }
}
In the new login component, create two buttons named login and logout. Add a click event to each button to call the login and logout functions for which we just created stubs.
login.component.html:
<button (click)="login()">Login</button>
<button (click)="logout()">Logout</button>
Routing
Next we will configure a route to the Login component so that we can view and interact with it. Create a new file named app-routing.module.ts within the app folder and set the contents as follows, noting that we are importing the LoginComponent and setting it to the root path.
app-routing.module.ts:
import { NgModule} from '@angular/core';
import { Routes, RouterModule } from '@angular/router';

// Components
import { LoginComponent } from './components/login/login.component';

// Routes
const appRoutes: Routes = [
 { path: '', pathMatch: 'full', redirectTo: '/' },
 { path: '', component: LoginComponent }
];

export const AppRouting = RouterModule.forRoot(appRoutes);
To activate the new routes, we need to configure the new Routing module in the application module file.
app.module.ts (fragment):
// Routing
import { AppRouting } from './app-routing.module';

@NgModule({
 imports: [
   AppRouting,
 ]
})
And finally we should set up the home page with something relevant to our demo. This should include navigation, along with a router-outlet to display our component. Replace the existing app.component.html file with something like this:
app.component.html:
<h1>Firebase OAuth Demo</h1>

<nav>
  <a routerLink="/">Login</a>
</nav>
<router-outlet></router-outlet>
Validation
At this point you should be able to run the application for a quick check.
$ npm start
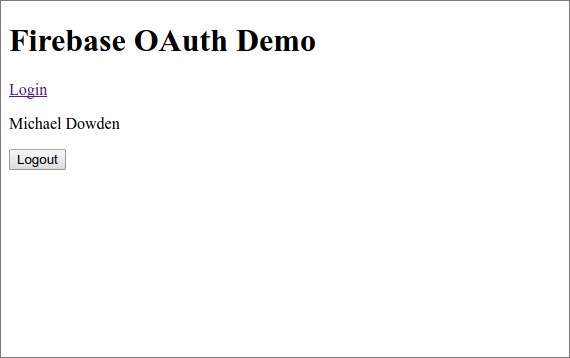
You can preview the application at http://localhost:4200/ and should see the simple screen shown below. Note that clicking Login and Logout will write a message to your developer console. You can view the console in Google Chrome by pressing F12.

Authentication Service
Now that we have the Login component set up, it’s time to tie it into the Firebase authentication provider. We’ll do this by creating an Angular authentication service. Although this is not strictly necessary (you could just use the AngularFire authentication services directly from the login component), it provides a couple immediate benefits. You can:
- Decorate authentication (including the creation of a User Profile in the database) without refactoring code
- Write unit tests against your component code without having to mock the 3rd party AngularFire2 library
Create service
Use the Angular CLI to generate a new authentication service.
$ ng generate service services/authentication
Import AngularFireAuth into your service to access the authentication functions. Because Angular Fire uses observables, we also need to import Observable. You will also need to import the firebase module in order to reference the User type and the Auth Providers.
authentication.service.ts (fragment):
// Import Observable
import { Observable } from 'rxjs';

// Import Firebase and AngularFire
import { AngularFireAuth } from 'angularfire2/auth';
import * as firebase from 'firebase/app';
Define the authInfo observable, which will return a Firebase User upon login. Add AngularFireAuth to the constructor and use this to initialize authInfo by setting it to authState, which is an Observable managed by AngularFire. This authInfo property will be your way to obtain information about the currently authenticated user.
authentication.service.ts (fragment):
export class AuthenticationService {
  public authInfo: Observable<firebase.User>;

  constructor(private afAuth: AngularFireAuth) {
    this.authInfo = this.afAuth.authState;
  }
}
Add login and logout functions to the service and implement them by calling the appropriate methods from AngularFire. The signInWithPopup method will launch a popup window to connect to Google for authentication. The result of this method is a Promise that we are using here to log to the developer console.
Another option would be the signInWithRedirect method, which would redirect to Google and then back to your application. The downside of this approach on a single-page application is that your entire application will unload and then re-initialize, which can have performance implications, among other considerations.
Both of the sign-in methods require a Provider, which is available from the core Firebase API. Supported providers include Google, Facebook, Twitter, GitHub, phone, email/password, and anonymous.
authentication.service.ts (fragment):
login() {
  this.afAuth.auth.signInWithPopup(new firebase.auth.GoogleAuthProvider())
    .then((user) => { console.log(user); });
}

logout() {
  this.afAuth.auth.signOut().then(() => { console.log('logged out') });
}
Now we must register the service within the app.module.ts to make it available to our components.
app.module.ts (fragment):
// Services
import { AuthenticationService } from './services/authentication.service';

@NgModule({
 providers: [
   AuthenticationService
 ]
})
Now you have a service to log the user in and out. We just need next to add it to your login component.
Add auth service in login component
Import the AuthenticationService, add it to the constructor, and delegate the login and logout methods to the service.
login.component.ts (fragment):
import { AuthenticationService } from '../../services/authentication.service';

export class LoginComponent {
  user;

  constructor(private auth: AuthenticationService) {
    this.user = auth.authInfo;
  }

  login() {
    this.auth.login();
  }

  logout() {
    this.auth.logout();
  }

}
Now let’s display the Name of the logged-in user, and hide the Login/Logout buttons when a user is already logged in. Note that authInfo is an Observable, so we must use async to avoid errors when the value has not been set.
login.component.html:
<p></p>
<button (click)="login()" *ngIf="!(user | async)?.uid">Login</button>
<button (click)="logout()" *ngIf="(user | async)?.uid">Logout</button>
Validation
At this point you should have a simple page with header text, navigation links, user name (assuming you have logged in), and either a Login or Logout button, based upon your authentication status.
Route Protection
Now you’ve successfully implemented OAuth with Firebase, but there’s one more thing to cover to make this a comprehensive example of authentication in Angular. It is quite common to want to restrict access to one or more pages until the user has logged in. So let’s add this capability to our example now.
Create component
To start, we’ll need to create a new component to protect. Let’s just call it ‘protected’.
$ ng generate component components/protected
And then we need to set up a route to this component. We’ll use /protected.
app-routing.module.ts (fragment):
// Components
import { ProtectedComponent } from './components/protected/protected.component';

// Routes
const appRoutes: Routes = [
 { path: 'protected', component: ProtectedComponent },
];
Update the nav in the app.component.html to include the new protected resource.
app.component.html (fragment):
<nav>
  <a routerLink="/">Login</a>
  <a routerLink="/protected">Protected</a>
</nav>
At this point you can freely access /protected even without being logged in. To change this, we will be making use of CanActivate, which expects a Boolean to determine whether the route should be resolved. We will create a new service that will return a boolean Observable based upon authentication status to satisfy the requirements of CanActivate.
Create service
Use the Angular CLI to generate a new authGuard service.
$ ng generate service services/authGuard
Now we must implement the service using the previously created AuthenticationService in order to react to changes in the authenticated state. The take(1) captures the first object resolved by the Observable (which will be a firebase.User). The map(...) converts the authInfo into a boolean value that should be true whenever it isn’t falsey (null or undefined).
In our example, the do(...) performs a redirect to the login URL whenever the user is not authenticated. This is just one possible way to handle unauthenticated access to a protected resources, but it both facilitates logins and addresses the case where a user is logged out while on a protected URL.
auth-guard.service.ts:
import { Injectable } from '@angular/core';
import { CanActivate, Router } from '@angular/router';
import { Observable } from 'rxjs';
import 'rxjs/add/operator/map';
import 'rxjs/add/operator/take';
import 'rxjs/add/operator/do';
import { AuthenticationService } from './authentication.service';

@Injectable()
export class AuthGuardService implements CanActivate {

  constructor(private router: Router, private auth: AuthenticationService) { }

  canActivate(): Observable<boolean> {
   return this.auth.authInfo
     .take(1)
     .map(authInfo => !!authInfo)
     .do(auth => !auth ? this.router.navigate(['/']) : true);
  }

}
And of course we must register the service within the app.module.ts to make it available to the application.
app.module.ts (fragment):
// Services
import { AuthGuardService } from './services/auth-guard.service';

@NgModule({
 providers: [
   AuthenticationService,
   AuthGuardService
 ]
})
Protecting the Routes
We can now apply the AuthGuardService to our routes. Simply add the service to the canActivate list.
app-routing.module.ts (fragment):
// Services
import { AuthGuardService } from './services/auth-guard.service';

// Routes
const appRoutes: Routes = [
    { path: 'protected', component: ProtectedComponent,
      canActivate: [AuthGuardService] },
];
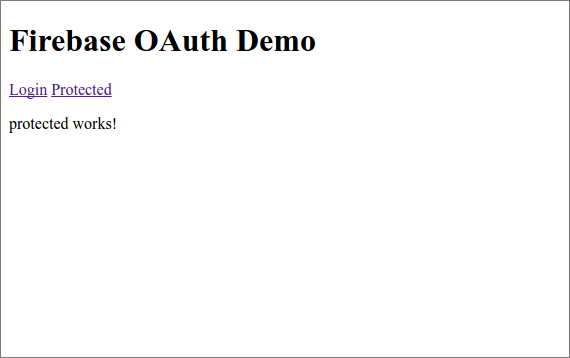
Validation
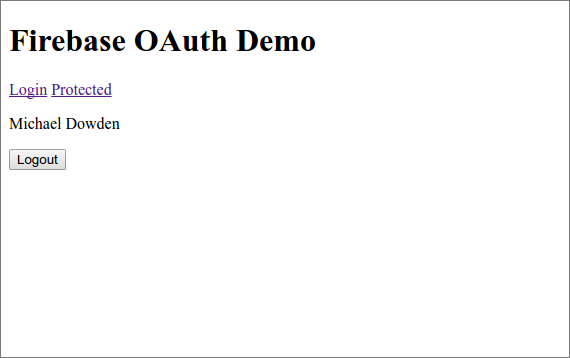
At this point you should have navigation links for both Login and Protected. Clicking Protected while not logged in should navigate to the login URL (/). Note that clicking this link while already on this default root URL will make it appear to do nothing. Upon logging in, clicking Protected should display the message “protected works!”

Congratulations
In about 15 minutes you have learned how to use Firebase to add OAuth to your Angular applications! This starter application allows users to log in using a Google Account and to logout, while restricting access to URLs for unauthenticated users. You can now use this as a base application for future projects to get started with OAuth already baked-in.
All of the example code used in this article is available on GitHub if you would like to clone our project to get started right away. You will need to copy your own Firebase configuration values to get it running.
For more hands-on experience developing with Firebase, check out our workshop, Playing With Fire.