

When I first became interested in using deep learning for computer vision I found it hard to get started. There were only a couple of open source projects available, they had little documentation, were very experimental, and relied on a lot of tricky-to-install dependencies. A lot of new projects have appeared since, but they’re still aimed at vision researchers, so you’ll still hit a lot of the same obstacles if you’re approaching them from outside the field.
In this article — and the accompanying webcast — I’m going to show you how to run a pre-built network, and then take you through the steps of training your own. I’ve listed the steps I followed to set up everything toward the end of the article, but because the process is so involved, I recommend you download a Vagrant virtual machine that I’ve pre-loaded with everything you need. This VM lets us skip over all the installation headaches and focus on building and running the neural networks.
Setting up the virtual machine
You’ll need an OS X or Linux machine and the free Vagrant virtualization software to run the virtual machine. If you don’t already have Vagrant, go to http://www.vagrantup.com/ and follow the “Getting Started” instructions.
Once you have Vagrant installed, open up a new terminal window. The first step will be to create a directory for the VM to use, by running these commands:
mkdir ~/dl_webcast
cd ~/dl_webcast
Then you’ll download the image of the virtual machine, which is almost 2GB, so it may take a while.
vagrant box add dl_webcast https://d2rlgkokhpr1uq.cloudfront.net/dl_webcast.boxNow that you have the box downloaded, we’ll spin up a new virtual server:
vagrant init dl_webcast
vagrant up
Next, you’ll log into the virtual machine:
vagrant sshRunning a pre-built network
I’m going to show you how to use the Caffe deep learning framework started by Yangqing Jia and the Berkeley Vision and Learning team. It has an active developer community, the code is entirely open source (though you can’t use the pre-built networks commercially), and there’s a lot of documentation, so it’s a great starting point. To begin, move into the project directory:
cd ~/caffeYou’re going to run a network that’s based on the architecture used by Krizhevsky et al to win the Imagenet 2012 contest. The BVLC team trained the network themselves, but because it’s built on a set of images that are only available for non-commercial use, it’s not licensed for anything other than research. It attempts to recognize 1,000 different categories of objects, and running it is as simple as this:
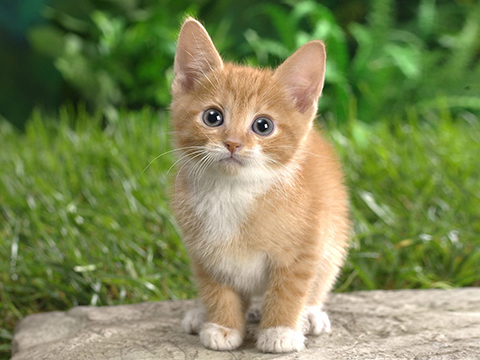
python python/classify.py --print_results examples/images/cat.jpg fooYou should see a whole stream of logging messages, with a final line that looks like this:
[('kit fox', '0.27215'), ('red fox', '0.19984'), ('wood rabbit', '0.13209'), ('hare', '0.07283'), ('Egyptian cat', '0.06632')]Congratulations — you’ve just run your first deep neural network! The output is an array of guesses about what the image contains, with the numbers representing how confident the algorithm is, and the text describing each category. If you check out the image it’s being run on, you’ll see it’s not quite a Kit Fox, but you can understand the mistake.
To try it on your own images, copy them into the
~/dl_webcast/folder from your main OS, and they’ll show up inside
/vagrant/in the VM’s file system.
Training your own network
The Imagenet network you just used had a thousand categories, so it requires more than a million different images in its training set, and takes more than a week to train even on a high-end GPU. Luckily, there are simpler image recognition problems that take a lot less time to teach a network how to solve, and I’ll show you how to train a network for one of those.
One of the first tasks that convolutional neural networks were used for was recognizing handwritten digits. Yann LeCun did a lot of pioneering work on this in the 90s, and a version of his LeNet architecture is included in Caffe. You’ll need to download his MNIST database of 70,000 examples of handwritten digits:
cd data/mnist
./get_mnist.sh
cd ../..
cd examples/mnist
Once those images have been downloaded, you’ll need to make one change to the settings for the training process. I’ve already done this on the supplied VM, but if you’re starting from scratch you’ll need to run nano (or your favorite editor) on lenet_solver.prototxt, and update the final line to specify CPU rather than GPU, since there’s no usable graphics card within the virtual machine. Then, running a supplied script will kick off the training process:
./train_lenet.shYou should see a lot of logging messages, and after a few minutes a completion message. If you do an
ls -l, you should see a recent
lenet_iter_10000file that contains the weights of the trained network. Now you can run that network on a test image to check its performance. I’ve supplied several inside the VM, but you should be able to use any white-on-black digit.
python python/classify.py --print_results --model_def examples/mnist/lenet.prototxt --pretrained_model examples/mnist/lenet_iter_10000 --force_grayscale --center_only --labels_file data/mnist/mnist_words.txt --images_dim 28,28 data/mnist/sample_digit.png foo
The final output should be a score indicating a 100% probability that this digit is a 4, which it is!
Setup instructions
Below you’ll find the commands I ran to build the Vagrant VM this section uses. If you’re using Vagrant, create a clean Ubuntu 14.04 box like this:
vagrant box add ubuntu-14.04 https://cloud-images.ubuntu.com/vagrant/trusty/current/trusty-server-cloudimg-amd64-vagrant-disk1.box
Once you’ve created and initialized your VM, or if you’re using another method of running 14.04, log into the machine and start the CUDA setup. Caffe relies on the CUDA headers and libraries being present to build, even if you’re only going to run on the CPU, so you have to install the 900Mb package.
sudo apt-get install linux-headers-
uname -r
curl -O "http://developer.download.nvidia.com/compute/cuda/6_0/rel/installers/cuda_6.0.37_linux_64.run"
chmod +x cuda_6.0.37_linux_64.run
sudo ./cuda_6.0.37_linux_64.run --kernel-source-path=/usr/src/linux-headers-3.13.0-30-generic/
At this point, you’ll see a series of prompts. You want to answer ‘No’ to installing the driver (since we don’t have a compatible GPU), but yes to the samples and SDK, leaving the paths at the default. Once that’s complete, you’ll need to update the library path to include the SDK.
echo 'export LD_LIBRARY_PATH=$LD_LIBRARY_PATH:/usr/local/cuda/lib64' >> ~/.bashrc
source ~/.bashrc
Now we need a grab bag of dependencies installed via apt-get:
sudo apt-get install -y libprotobuf-dev libleveldb-dev libsnappy-dev libopencv-dev libboost-all-dev libhdf5-serial-dev protobuf-compiler gcc-4.6 g++-4.6 gcc-4.6-multilib g++-4.6-multilib gfortran libjpeg62 libfreeimage-dev libatlas-base-dev git python-dev python-pipGoogle’s logging framework isn’t available through a repository, so you have to build that from source:
wget https://google-glog.googlecode.com/files/glog-0.3.3.tar.gz
tar zxvf glog-0.3.3.tar.gz
cd glog-0.3.3
./configure
make
sudo make install
cd ..
You should be ready to pull down the Caffe source code:
git clone https://github.com/BVLC/caffe.git
cd caffe
CUDA has problems with the default gcc 4.8 compiler, so you’ll need to switch to 4.6:
 sudo update-alternatives --install /usr/bin/cc cc /usr/bin/gcc-4.6 30
sudo update-alternatives --install /usr/bin/c++ c++ /usr/bin/g++-4.6 30
There’s a list of Python module dependencies inside the Caffe project, so you’ll use PIP to install those, which can take a while:
sudo pip install -r python/requirements.txt
The current version of Caffe isn’t set up to allow compiler switching, so you’ll need to do some patching of the make files:
cp Makefile.config.example Makefile.config
echo "CXX := /usr/bin/g++-4.6" >> Makefile.config
sed -i 's/CXX :=/CXX ?=/' Makefile
The next step is compiling the project itself:
 make all
make test
Finally, download the pre-built neural network and label data:
examples/imagenet/get_caffe_reference_imagenet_model.sh
mv caffe_reference_imagenet_model examples/imagenet
data/ilsvrc12/get_ilsvrc_aux.sh
What now?
You’ve run and even trained deep neural networks, but you haven’t been able to see very far inside the black box. I’m betting you need to recognize more than just digits and kittens, so in my next installment I’ll go into more detail about what’s happening under the hood and how you can start adapting them to the problems you want to solve!