146 LESSON 6 Working with Effects
Changing speed using the Time Stretch tool
Previously, you learned how to change the speed of clips bounded in the Timeline
by other clips on both sides. Now, you’ll learn how to use the Time Stretch tool to
accomplish the same task, but in a more visual way.
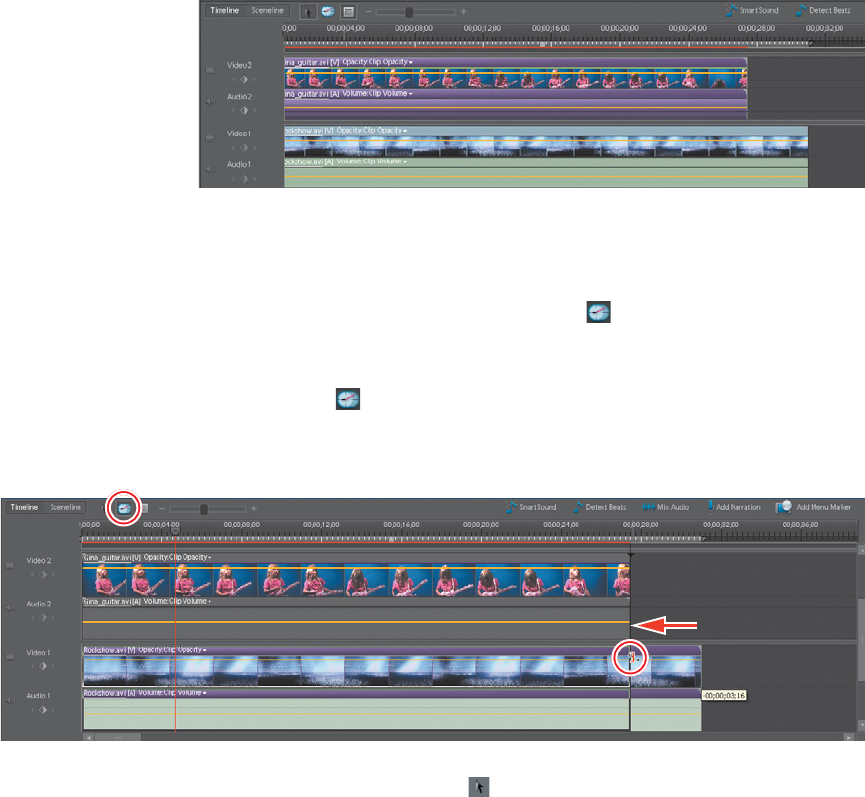
Here’s the problem you’ll solve. e Rockshow.avi clip used as a background in
the last two exercises is 31 seconds long, and the Gina_guitar.avi clip is about 27
seconds long. You could just trim the Rockshow clip to the same duration, but that
would delete content at the end of that clip.
A more elegant solution is to use Adobe Premiere Elements’ Time Stretch feature
to speed up the Rockshow.avi clip so that it’s the same duration as Gina_guitar.avi.
Follow this procedure:
1 In the Timeline, click the Time Stretch icon (
) on the upper left of the My
Project panel.
2 Hover your pointer over the right edge of the Rockshow.avi clip until the Time
Stretch icon (
) appears.
3 Click and drag the right edge of the Rockshow.avi clip to the left until it aligns
with the end of the Gina_guitar.avi clip.
4 Click the Selection Tool icon (
) on the upper left of the My Project panel to
restore the normal pointer.
Get Adobe Premiere Elements 7 Classroom in a Book now with the O’Reilly learning platform.
O’Reilly members experience books, live events, courses curated by job role, and more from O’Reilly and nearly 200 top publishers.

