Time for action – displaying aliasing
The best way to understand aliasing is to see it using the following steps:
- Create a new file in Blender.
- Press F12.
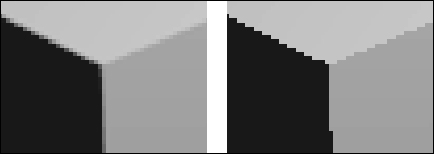
- Press Ctrl + MMB and use the mouse to zoom into the rendered image so that you can see only the corner of the cube closest to you. It should look like the following image on the left.
- In the Anti-Aliasing subpanel of the Properties window, uncheck the Anti-Aliasing checkbox.
- Press F12.
- Now, what you see looks like the right half of the following image, with a jagged line where different surfaces meet.
What just happened?
When you unchecked the Anti-Aliasing checkbox and rendered the cube, the three ...
Get Blender 3D Basics Beginner's Guide Second Edition now with the O’Reilly learning platform.
O’Reilly members experience books, live events, courses curated by job role, and more from O’Reilly and nearly 200 top publishers.

