Chapter 1. Body contours
Slim legs against plain background
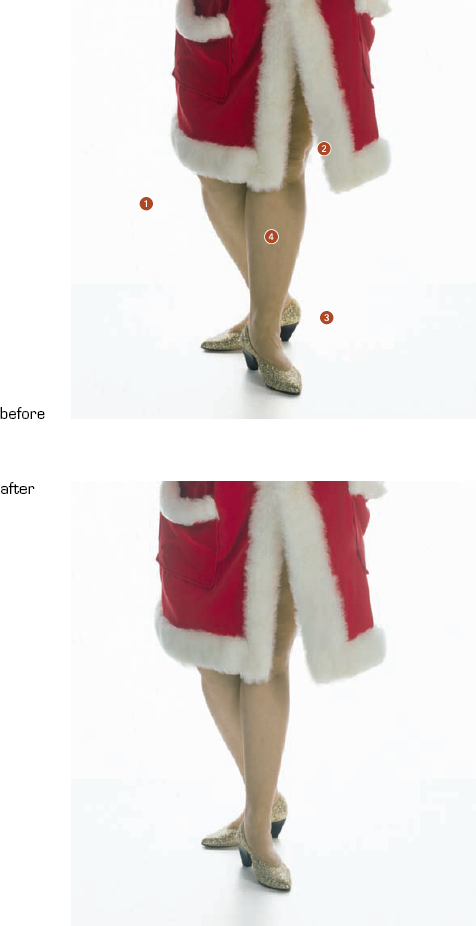
Picture analysis
Slim legs, maintaining original size of coat
Reduce raised veins and knee wrinkles
Smooth ankles
Adapt skin tone
These legs appear ungraceful not only because of their shape, but also due to other features such as raised veins, strong and hard shade transition between foot and shoe, wrinkles on the knee and the unhealthy skin tone.
Slim legs
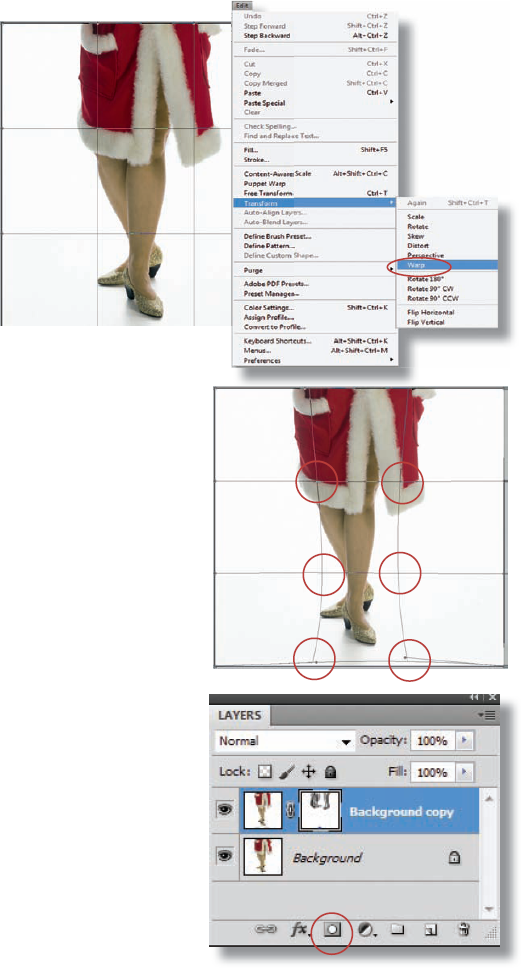
To make the legs and feet slimmer, apply the Warp tool to the entire picture.
Duplicate the background layer to make sure the original pixels remain unchanged. Select Edit/Transform/Warp.
The Warp tool places a grid onto the picture. You can drag any of the intersection and corner points of the rectangles in order to compress or stretch the picture or achieve curves.
Drag the four intersection points of the center square slightly inwards, but keep the points on about the same horizontal. This compresses and thereby slims the legs. Now drag the lower intersection points of the bottom middle square slightly upwards. This slims the feet.
Apply a layer mask by clicking on the mask symbol at the bottom of the Layer palette and paint the coat back in its original size with black (D). Use the Brush tool (B, Size 120 pixels, Hardness 0%, Opacity 50%).
Correct mistakes
Copy the layer "Background" ...
Get Bodyshop: The Photoshop Retouching Guide for the Face and Body now with the O’Reilly learning platform.
O’Reilly members experience books, live events, courses curated by job role, and more from O’Reilly and nearly 200 top publishers.

