
control supports three display modes. You can change the current mode using
its ChangeMode method, providing as parameter one of these values:
DetailsViewMode.ReadOnly
This is the default mode, which is used to display data. When you execute
your project, and load the details of an employee, you see those details in
ReadOnly mode.
DetailsViewMode.Edit
This mode is used to edit an existing record. We saw this mode in action
earlier, when we clicked the Edit button.
DetailsViewMode.Insert
We use this mode to insert a new record. It’s similar to the edit mode, except
all the controls are empty, so you can fill in data for a new item.
If you look at the employeeDetails_ModeChanging, you’ll see it receives a para-
meter named e that is an object of class DetailsViewModeEventArgs. e’s NewMode
property tells us which display mode was requested by the user. Its value will be
DetailsViewMode.Edit when the ModeChanging event is fired as a result of the
Edit button being clicked. We pass this value to the DetailsView control’s
ChangeMode method, which does exactly as its name suggests: it changes the mode
of the DetailsView. With this code, you’ve implemented the functionality to
make both the Edit and Cancell buttons work correctly, as we’ll see in an example
shortly.
However, note that once you switch to edit mode, clicking the Update button
will generate an error, because we still haven’t handled the ItemUpdating event
that’s fired when the user tries to save changes to a record. We’ll create the event
handler later; next, we want to improve our existing solution using templates.
Using Templates
The built-in column types are sufficiently varied and configurable to provide for
most of the functionality you’re likely to need, but in cases where further custom-
ization is required, you can make the desired changes using templates. In the
smart tag menu of the GridView and DetailsView controls, an option called Edit
Columns (for the GridView) or Edit Fields (for the DetailsView) is available. Se-
lecting that option opens a dialog that provides us with a great deal of control
over the options for each column or field.
459
Using Templates
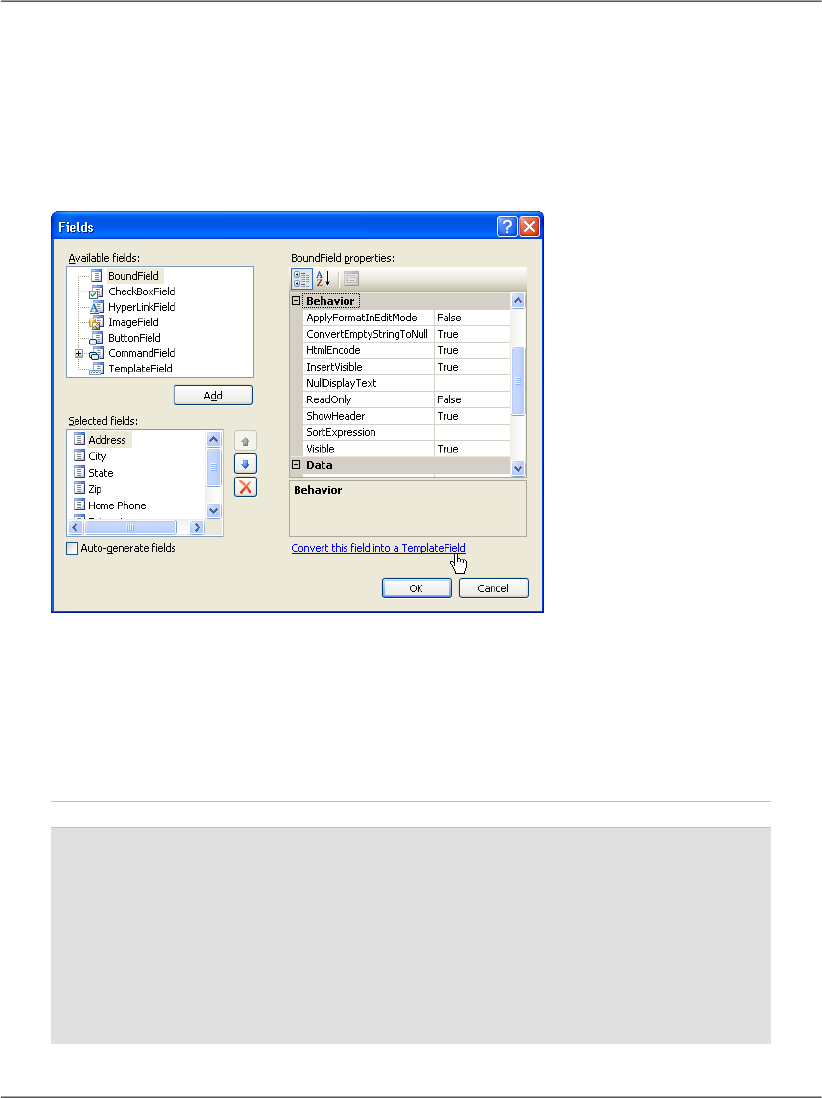
You’ll notice a Convert this field into a TemplateField link in the dialog. Let’s see
how this works. Click the smart tag of your DetailsView control, then click Edit
Fields. In the dialog that appears, select the Address field from the Selected fields
list, as shown in Figure 11.16.
Figure 11.16. Editing a field’s properties
Click the Convert this field into a TemplateField link to have Visual Web Developer
create a template that simulates the current functionality of the field, then click
OK to close the dialog.
So, what happened? Let’s switch AddressBook.aspx to Source View. After you
convert the field to a template field, its definition will look like this:
File: AddressBook.aspx (excerpt)
<asp:DetailsView id="employeeDetails" runat="server"
AutoGenerateRows="False">
<Fields>
<asp:TemplateField HeaderText="Address">
<EditItemTemplate>
<asp:TextBox ID="TextBox1" runat="server"
Text='<%# Bind("Address") %>'></asp:TextBox>
</EditItemTemplate>
<InsertItemTemplate>
<asp:TextBox ID="TextBox1" runat="server"
460
Chapter 11: Managing Content Using Grid View and Details View

Text='<%# Bind("Address") %>'></asp:TextBox>
</InsertItemTemplate>
<ItemTemplate>
<asp:Label ID="Label1" runat="server"
Text='<%# Bind("Address") %>'></asp:Label>
</ItemTemplate>
</asp:TemplateField>
<asp:BoundField DataField="City" HeaderText="City" />
⋮
<asp:CommandField ShowEditButton="True" />
</Fields>
<HeaderTemplate>
<%#Eval("Name")%>
</HeaderTemplate>
</asp:DetailsView>
Pretty cool, huh? Visual Web Developer did a little bit of magic for us: it replaced
the BoundField column that used to display the address with a TemplateField
containing an ItemTemplate, an EditItemTemplate, and an InsertItemTemplate.
Despite these alterations, the current functionality hasn’t changed: you can still
execute your project and load the address book, and it will continue to work as
before. The difference is that now you can easily refer to these inner controls
from your code, you can easily change their appearance using custom HTML
code, and, if you wish, you can replace them with totally different controls. The
power is in your hands. For example, you can widen the TextBox controls used
to edit your fields, as well as performing other kinds of customizations. You can
also give specific IDs to the inner template controls, rather than using their default
generic names, so you can find them easily when you need to.
Beware of ReadOnly
Note that if you set a column as read-only (by setting the column’s ReadOnly
property to True) prior to its conversion, Visual Web Developer will use a
Label control instead of a TextBox control in the EditItemTemplate for
that field. Thus, when the grid enters edit mode, that particular column
won’t be transformed into a TextBox, so its read-only behavior will be
conserved.
Now, convert the other fields—except for CommandField—to template fields.
Then, we’ll modify the generated code by altering the TextBox controls, and as-
signing appropriate names to our controls. To keep things simple, we’re only
461
Using Templates
Get Build Your Own ASP.NET 2.0 Web Site Using C# & VB, Second Edition now with the O’Reilly learning platform.
O’Reilly members experience books, live events, courses curated by job role, and more from O’Reilly and nearly 200 top publishers.

