Control add-in deployment
To use a control add-in on NAV, we need to perform the following steps:
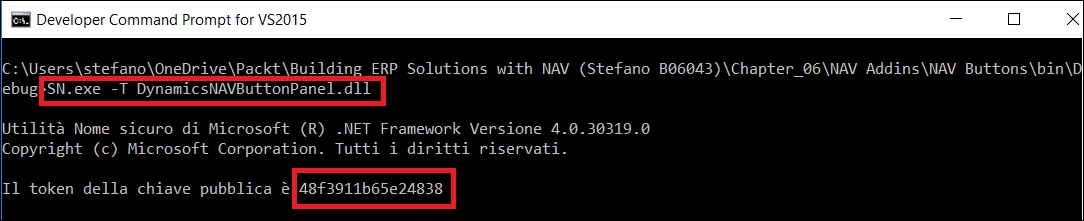
- You first to need to sign the control add-in assembly. Open the Visual Studio Command Prompt and go to the directory where you have the compiled control add-in DLL (usually it's in the
BINdirectory on your project's folder).Here you have to launch this command:
SN.exe -T <NameOfYourDLLAddinFile><NameOfYourDLLAddinFile>is the control add-in DLL file.Visual Studio signs the assembly and returns a public key token (a 16-character key):
- Now we have to copy the control add-in files (DLLs) in the Microsoft Dynamics NAV Windows client add-ins folder, which ...
Get Building ERP Solutions with Microsoft Dynamics NAV now with the O’Reilly learning platform.
O’Reilly members experience books, live events, courses curated by job role, and more from O’Reilly and nearly 200 top publishers.

