Time for action – adding a Cisco PIX Firewall to Cacti
- Download the
cacti_host_template_pix_firewall.xmlfile. - Login to Cacti as an admin user.
- Go to Import/Export and click on the Import Templates link.
- Select the downloaded file in the Import Template from Local File box
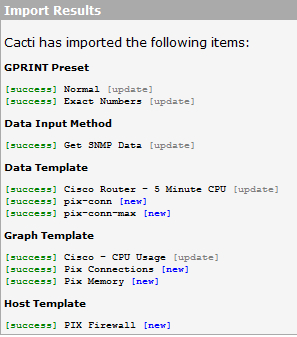
- Click on the Import button.
- Go to Management and click on Devices.
- Click on the Add link in the top right corner.
- Enter the hostname and description of your Cisco PIX firewall.
- Select PIX Firewall as the host template.
- Select Version 2 for the SNMP Version and enter the community name of your Windows system.
- Click on the Create button.
What just happened?
You've just imported the Cisco ...
Get Cacti 0.8 Beginner's Guide now with the O’Reilly learning platform.
O’Reilly members experience books, live events, courses curated by job role, and more from O’Reilly and nearly 200 top publishers.

