Chapter 1. Getting Started with Docker
1.0 Introduction
Getting started with Docker is straightforward. The core of Docker is made of the Docker engine, a single-host software daemon that allows you to create and manage containers. Before diving into using Docker, you need to install the Docker engine on a host, either your desktop, laptop, or a server.
The first recipes in this chapter go through the installation steps to get Docker running in your server. The official Docker documentation covers almost all cases of operating systems. Here we cover Ubuntu 14.04 (Recipe 1.1), CentOS 6.5 (Recipe 1.2) and CentOS 7 (Recipe 1.3). If you want to use Vagrant, Recipe 1.4 is for you.
We also show how to install Docker on Raspberry Pi (Recipe 1.5) to present an installation for ARM processors. For Windows and OS X hosts you can use the Docker toolbox, which packages several Docker utilities in addition to the Docker engine (see Recipe 1.6). The Docker toolbox uses a virtual machine running via VirtualBox to act as a Docker host. This machine is called boot2docker. While using boot2docker is now deprecated in favor of the Docker toolbox, we still present a Docker installation using boot2docker in Recipe 1.7.
To round up the installation recipes, we introduce docker-machine, a Docker utility that lets you starts a machine in the public cloud of your choice and automatically configures it to be used with your local Docker client. Recipe 1.9 shows you how to do it with the Digital Ocean cloud.
Once you have installed Docker on your favorite target, you are ready to explore the basic commands necessary to create and manage containers. Recipe 1.11 shows you the first steps to run a container, while Recipe 1.13 walks you through the standard life cycle of a container, creating, starting, stopping, killing, and removing containers.
With those first concepts covered, we dive straight into introducing the Dockerfile (Recipe 1.14). A Dockerfile is a manifest that describes how to build a container image. This is a core concept in Docker and while Chapter 2 will expand much further on the topic, we cover it here in its most simple form. This allows us to introduce a much more complex example right away, running WordPress.
First we do it in a single container by building a Docker image from scratch and running multiple processes in the container (Recipe 1.15). Docker makes you change your application designer mindset from packaging everything together to creating multiple independent services that can then be interconnected. However, it does not mean that you cannot run multiple services in a single container. Using supervisord you can, and Recipe 1.15 shows you how. But the strength of Docker comes with the ease of composing services to run your application. Therefore in Recipe 1.16 we show you how to split the single container example into two containers using container linking. This is your first example of a distributed application, even though it runs on a single host.
The last concept that we introduce in this chapter is data management. Making data accessible in a container is a critical component. You might use it to load configuration variables or datasets, or to share data between containers. We use the WordPress example again and show you how to back up your database (Recipe 1.17), how to mount data in your host into your containers (Recipe 1.18), and also how to create so-called data-containers (Recipe 1.19).
In summary, in this chapter you will go from installing the Docker engine on a host to running a two-container WordPress site in a flash.
1.1 Installing Docker on Ubuntu 14.04
Solution
On Ubuntu 14.04, installing Docker is achieved in three lines of bash commands at most. The recommended installation by the Docker project uses a bash script that is available on the Internet. Be careful, because a preexisting docker package is included in the Ubuntu repositories that is not related to Docker. Perform the recommended installation:
$ sudo apt-get update
$ sudo apt-get install -y wget
$ sudo wget -qO- https://get.docker.com/ | sh
You can test that the installation worked fine by checking the version of Docker:
$ sudo docker --version
Docker version 1.7.1, build 786b29d
You can stop, start, and restart the service. For example, to restart it:
$ sudo service docker restart
Note
If you want to use docker from a nonroot user, add the user account to the docker group:
$ sudo gpasswd -a <user> docker
Exit the current shell and log in again or start a new shell for the change to take effect.
Discussion
You can look at the installation script available at https://get.docker.com to perform the installation step by step and customize it to your liking. On Ubuntu 14.04 (trusty release), at a minimum you would do the following:
$ sudo apt-get update
$ sudo apt-get install -y linux-image-extra-$(uname -r) linux-image-extra-virtual
$ sudo apt-key adv --keyserver hkp://p80.pool.sks-keyservers.net:80
                   --recv-keys 58118E89F3A912897C070ADBF76221572C52609D
$ sudo su
# echo deb https://apt.dockerproject.org/repo ubuntu-trusty main > \
/etc/apt/sources.list.d/docker.list
# apt-get -y install docker-engine
See Also
-
For installation of Docker on other operating systems, see the official installation documentation.
1.2 Installing Docker on CentOS 6.5
Solution
On CentOS 6.5, getting Docker is achieved by installing the docker-io package from the Extra Packages for Enterprise Linux (EPEL) repository:
$ sudo yum -y update
$ sudo yum -y install epel-release
$ sudo yum -y install docker-io
$ sudo service docker start
$ sudo chkconfig docker on
On CentOS 6.5, it installs version 1.6.2:
# docker --version
Docker version 1.6.2, build 7c8fca2/1.6.2
Discussion
CentOS 6.x is no longer supported by Docker. Instead, CentOS 7 should be used if you want the latest version of Docker (see Recipe 1.3).
1.3 Installing Docker on CentOS 7
Solution
Install the Docker package by using the yum package manager. CentOS uses systemd, so to manage the docker service, you can use the systemctl command:
$ sudo yum update
$ sudo yum -y install docker
$ sudo systemctl start docker
You can also use the official Docker installation script, which will use packages from the Docker repository:
$ sudo yum update
$ sudo curl -sSL https://get.docker.com/ | sh
1.4 Setting Up a Local Docker Host by Using Vagrant
Solution
Use Vagrant to start a virtual machine (VM) locally and bootstrap the VM by using a shell provisioner in the Vagrantfile.
With a working VirtualBox and Vagrant installation, create a text file called Vagrantfile that contains the following:
VAGRANTFILE_API_VERSION="2"$bootstrap=<<SCRIPTapt-getupdateapt-get-yinstallwgetwget-qO-https://get.docker.com/|shgpasswd-avagrantdockerservicedockerrestartSCRIPTVagrant.configure(VAGRANTFILE_API_VERSION)do|config|config.vm.box="ubuntu/trusty64"config.vm.network"private_network",ip:"192.168.33.10"config.vm.provider"virtualbox"do|vb|vb.customize["modifyvm",:id,"--memory","1024"]endconfig.vm.provision:shell,inline:$bootstrapend
You can then bring up the virtual machine. Vagrant will download the ubuntu/trusty64 box from the Vagrant cloud (now part of Atlas), start an instance of it using VirtualBox, and run the bootstrap script in the instance. The instance will have 1GB of RAM and two network interfaces: a Network Address Translation (NAT) interface that will be used for outbound traffic to the public Internet and a host-only interface 192.168.33.10. You will then be able to ssh to the instance and use Docker:
$ vagrant up
$ vagrant ssh
vagrant@vagrant-ubuntu-trusty-64:~$ docker ps
CONTAINER ID    IMAGE     COMMAND     CREATED     STATUS      PORTS       NAMES
Note
In this Vagrant setup, the vagrant user was added to the Docker group. Hence Docker commands can be issued even if you are not root. You can get these scripts from the how2dock repository in the ch01 directory.
Discussion
If you have never used Vagrant, you will need to install it. The download page on the Vagrant website lists all major package families. For example, on Debian-based systems, grab the .deb package and install it like so:
$ wget https://dl.bintray.com/mitchellh/vagrant/vagrant_1.7.4_x86_64.deb
$ sudo dpkg -i vagrant_1.7.4_x86_64.deb
$ sudo vagrant --version
Vagrant 1.7.4
1.5 Installing Docker on a Raspberry Pi
Problem
You use Raspberry Pi a lot at your company or you are a hobbyist who enjoys hacking with Raspberry Pi. In either case, you would like to know how to install Docker on your device.
Solution
Use the preconfigured Secure Digital (SD) card image from Hypriot. You need to follow these steps:
-
Transfer it to your SD card.
-
Install the SD card on your Raspberry Pi and boot it.
-
Log in to your Raspberry Pi and use Docker.
Discussion
For example, on an OS X host, you can follow the instructions from Hypriot.
Download and unzip the SD image:
$ curl -sOL http://downloads.hypriot.com/hypriot-rpi-20150416-201537.img.zip
$ unzip hypriot-rpi-20150416-201537.img.zip
Now insert your SD card in your host card reader; list the available disks to find out which one the SD card is. Unmount this disk and transfer the image onto it by using dd. Assuming the disk is disk1:
$ diskutil list
...
$ diskutil unmountdisk /dev/disk1
$ sudo dd if=hypriot-rpi-20150416-201537.img of=/dev/rdisk1 bs=1m
$ diskutil unmountdisk /dev/disk1
Once the image has been transferred, you can eject the disk cleanly, remove the SD card from the card reader, and put it in your Raspberry Pi.
You will need to find the IP address of your Raspberry Pi, and then you can ssh to it and use hypriot as the password like so:
$ ssh root@<IP_OF_RPI>
...
HypriotOS: root@black-pearl in ~
$ docker ps
CONTAINER ID     IMAGE     COMMAND     CREATED     STATUS     PORTS     NAMES
HypriotOS: root@black-pearl in ~
$ uname -a
Linux black-pearl 3.18.11-hypriotos-v7+ #2 SMP PREEMPT Sun Apr 12 16:34:20 UTC \
2015 armv7l GNU/Linux
HypriotOS: root@black-pearl in ~
You will have a functioning Docker on ARM.
Because containers use the same kernel as the Docker host, you will need to pull images that have been prepared for an ARM-based architecture. Go to the Docker Hub and look for ARM-based images; the ones from Hyperiot are a good start.
See Also
-
Windows instructions
-
Linux instructions
1.6 Installing Docker on OS X Using Docker Toolbox
Solution
Use Docker Toolbox, an installer that contains the Docker Client, Docker Machine, Docker Compose, Docker Kitematic, and VirtualBox. Docker Toolbox allows you to start a tiny virtual machine in VirtualBox that runs the Docker daemon. The Docker client installed on your OS X machine is configured to connect to this Docker daemon. Docker Machine (see Recipe 1.9), Docker Compose (see Recipe 7.1), and Kitematic (see Recipe 7.5) are also installed.
Download the installer from the download page. Once the download is complete (see Figure 1-1), open the installer and go through the steps in the wizard. Once the installation is complete, the finder will open and you will see a link to the Docker quickstart terminal. Click it to open a terminal and automatically start a virtual machine in VirtualBox. The Docker client will be automatically configured to communicate with this Docker daemon.
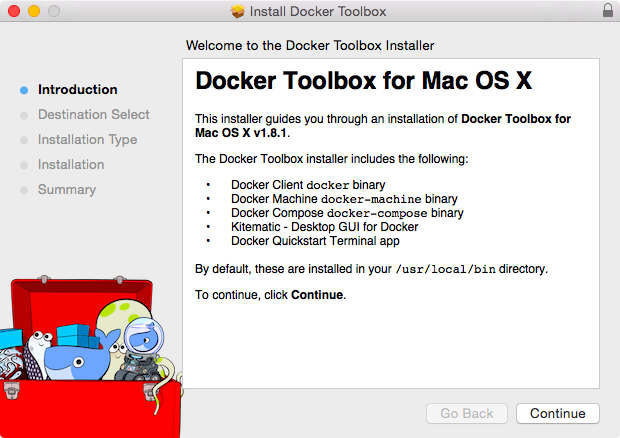
Figure 1-1. The Docker Toolbox on OS X
The Toolbox terminal shows you that the Docker client is configured to use the default machine. Try a few docker commands as shown here:
                       ##         .
                 ## ## ##        ==
              ## ## ## ## ##    ===
          /"""""""""""""""""\___/ ===
     ~~~ {~~ ~~~~ ~~~ ~~~~ ~~~ ~ /  ===- ~~~
          \______ o           __/
            \    \         __/
             \____\_______/


docker is configured to use the default machine with IP 192.168.99.100
For help getting started, check out the docs at https://docs.docker.com

bash-4.3$ docker ps
CONTAINER ID        IMAGE   COMMAND     CREATED     STATUS      PORTS       NAMES
bash-4.3$ docker images
REPOSITORY          TAG     IMAGE ID    CREATED     VIRTUAL SIZE
bash-4.3$ docker
docker          docker-compose  docker-machine
You see that the docker-machine and docker-compose binaries are also available to you.
Discussion
The Docker Toolbox was introduced in Docker 1.8 and should be the default installation method on OS X and Windows hosts. Prior to the Docker Toolbox, you could use Boot2Docker (see Recipe 1.7 and Recipe 1.8). Recipes for Boot2Docker are also in this book, but Docker Toolbox should be used. In fact, Boot2Docker is still used in Toolbox, as it is the image of the virtual machine started by the Toolbox. You can see this by using the docker-machine ssh command to log in to the VM as shown here:
bash-4.3$ docker-machine ssh default
                       ##         .
                 ## ## ##        ==
              ## ## ## ## ##    ===
          /"""""""""""""""""\___/ ===
     ~~~ {~~ ~~~~ ~~~ ~~~~ ~~~ ~ /  ===- ~~~
          \______ o           __/
            \    \         __/
             \____\_______/
_                 _   ____     _            _
| |__   ___   ___ | |_|___ \ __| | ___   ___| | _____ _ __
| '_ \ / _ \ / _ \| __| __) / _` |/ _ \ / __| |/ / _ \ '__|
| |_) | (_) | (_) | |_ / __/ (_| | (_) | (__|   <  __/ |
|_.__/ \___/ \___/ \__|_____\__,_|\___/ \___|_|\_\___|_|
Boot2Docker version 1.8.1, build master : 7f12e95 - Thu Aug 13 03:24:56 UTC 2015
Docker version 1.8.1, build d12ea79
1.7 Using Boot2Docker to Get a Docker Host on OS X
Solution
Use the Boot2Docker lightweight Linux distribution. Boot2Docker is based on Tiny Core Linux and configured specifically to act as a Docker host. After installation, a boot2docker command will be available to you. You will use it to interact with a virtual machine started through VirtualBox that will act as a Docker host. The Docker client—which runs on OS X, unlike the daemon—will be set up on your local OS X machine.
Let’s start by downloading and installing Boot2Docker. Go to the site where you will find several download links. From the release page, grab the latest release. Once the download is finished, launch the installer shown in Figure 1-2.
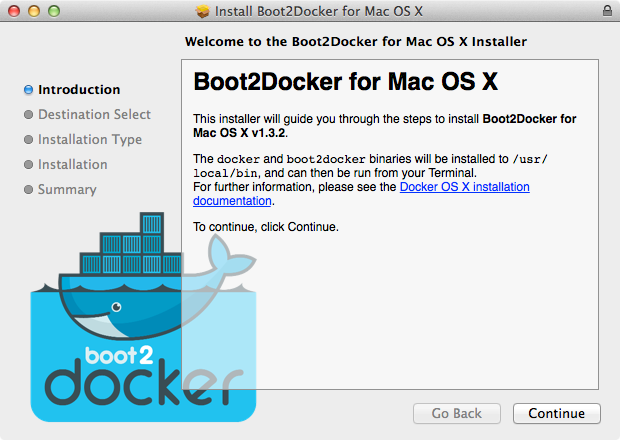
Figure 1-2. Boot2Docker installer wizard
Once the installation is finished (Figure 1-3), you are ready to use Boot2Docker.
In a terminal window, type boot2docker at the prompt, and you should see the usage options. You can also check the version number that you installed:
$ boot2docker
Usage: boot2docker [<options>] {help|init|up|ssh|save|down|poweroff|reset|
                                restart|config|status|info|ip|shellinit|delete|
                                download|upgrade|version} [<args>]
$ boot2docker version
Boot2Docker-cli version: v1.3.2
Git commit: e41a9ae
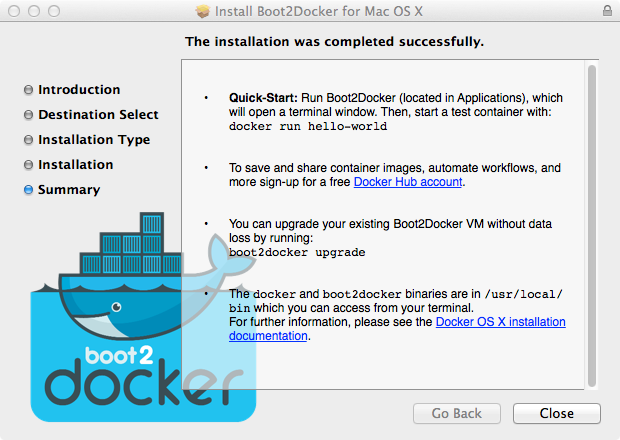
Figure 1-3. Boot2Docker installer completion
With Boot2Docker installed, the first step is to initialize it. If you have not downloaded the Boot2Docker ISO, this step will do so and create the virtual machine in VirtualBox:
$ boot2docker init
Latest release for boot2docker/boot2docker is v1.3.2
Downloading boot2docker ISO image...
Success:
    downloaded https://github.com/boot2docker/boot2docker/releases/download/\
  v1.3.2/boot2docker.iso
    to /Users/sebgoa/.boot2docker/boot2docker.iso
As you can see, the ISO will be located in your home directory under .boot2docker/boot2docker.iso. When you open the VirtualBox UI, you will see the boot2docker VM in a powered-off state (see Figure 1-4).
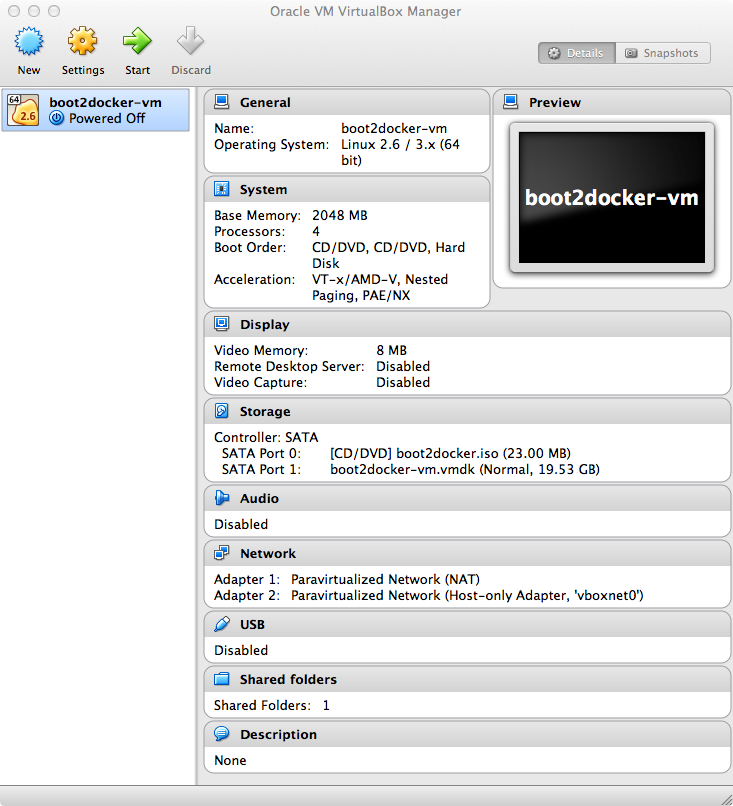
Figure 1-4. boot2docker VirtualBox VM
Note
You do not need to have the VirtualBox UI open; the snapshots are here only for illustration. Boot2Docker uses the VBoxManage commands to manage the boot2docker VM in the background.
You are now ready to start Boot2Docker. This will run the VM and return some instructions to set environment variables for properly connecting to the Docker daemon running in the VM:
$ boot2docker start
Waiting for VM and Docker daemon to start...
.........................ooooooooooooooooooooo
Started.
Writing /Users/sebgoa/.boot2docker/certs/boot2docker-vm/ca.pem
Writing /Users/sebgoa/.boot2docker/certs/boot2docker-vm/cert.pem
Writing /Users/sebgoa/.boot2docker/certs/boot2docker-vm/key.pem

To connect the Docker client to the Docker daemon, please set:
    export DOCKER_CERT_PATH=/Users/sebgoa/.boot2docker/certs/boot2docker-vm
    export DOCKER_TLS_VERIFY=1
    export DOCKER_HOST=tcp://192.168.59.103:2376
Although you can set the environment variables by hand, Boot2Docker provides a handy command: shellinit. Use it to configure the Transport Layer Security (TLS) connection to the Docker daemon, and you will have access to the Docker host from your local OS X machine:
$ $(boot2docker shellinit)
Writing /Users/sebgoa/.boot2docker/certs/boot2docker-vm/ca.pem
Writing /Users/sebgoa/.boot2docker/certs/boot2docker-vm/cert.pem
Writing /Users/sebgoa/.boot2docker/certs/boot2docker-vm/key.pem
$ docker ps
CONTAINER ID    IMAGE    COMMAND    CREATED    STATUS    PORTS    NAMES
Discussion
When a new version of Boot2Docker is available, you can upgrade easily by downloading the new Boot2Docker installer and downloading a new ISO image with the download command.
1.8 Running Boot2Docker on Windows 8.1 Desktop
Solution
Use the Boot2Docker windows installer, shown in Figure 1-5.
After downloading the latest version of the Windows installer (an .exe binary), run it through the command prompt or through your file explorer (see Figure 1-5). It will automatically install VirtualBox, MSysGit, and the Boot2Docker ISO. MSysGit is necessary to get the ssk-keygen binary on your Windows machine. Going through the installer wizard, you will need to accept a couple of VirtualBox licenses from Oracle. The installer can create shortcuts on your desktop for VirtualBox and to start Boot2Docker.
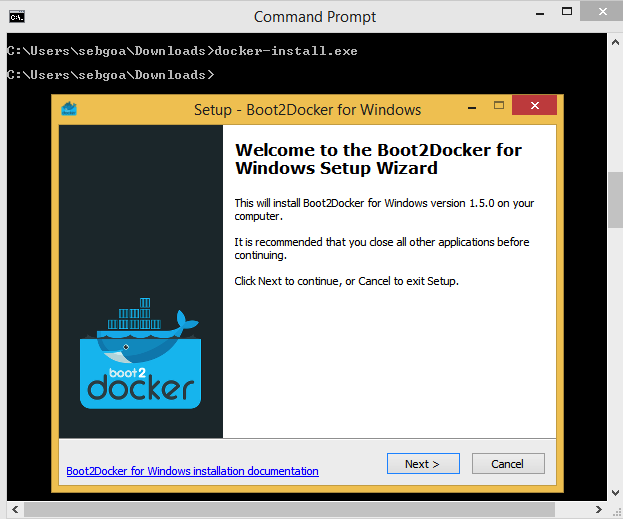
Figure 1-5. Boot2Docker Windows 8.1 installer
Once the installation is finished, double-click the shortcut for Boot2Docker. This will launch the VM in VirtualBox, and you will get a command prompt inside it (see Figure 1-6). You can now use Docker on your Windows desktop.
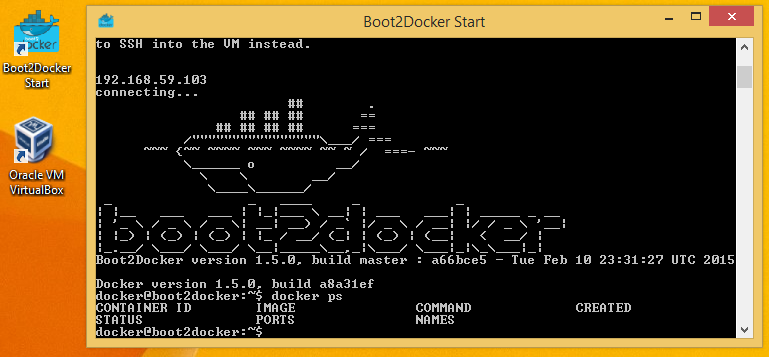
Figure 1-6. Boot2Docker Windows 8.1 command
Discussion
Docker Machine (see Recipe 1.9) also comes with a Hyper-V driver. If you set up Hyper-V on your desktop, you could start a Boot2Docker instance with Docker Machine instead.
See Also
-
Boot2Docker for Windows official Docker documentation
1.9 Starting a Docker Host in the Cloud by Using Docker Machine
Problem
You do not want to install the Docker daemon locally using Vagrant (Recipe 1.4) or Boot2Docker (Recipe 1.7). Instead, you would like to use a Docker host in the cloud (e.g., AWS, DigitalOcean, Azure, or Google Compute Engine) and connect to it seamlessly using the local Docker client.
Solution
Use Docker Machine to start a cloud instance in your public cloud of choice. Docker Machine is client-side tool that you run on your local host and that allows you to start a server in a remote public cloud and use it as a Docker host as if it were local. Machine will automatically install Docker and set up TLS for secure communication. You will then be able to use the cloud instance as your Docker host and use it from a local Docker client. See Chapter 8 for more recipes dedicated to using Docker in the cloud.
Note
Docker Machine beta was announced on February 26, 2015. Official documentation is now available on the Docker website. The source code is available on GitHub.
Let’s get started. Machine currently supports VirtualBox, DigitalOcean, Amazon Web Services, Azure, Google Compute Engine (GCE), and a few other providers. Several drivers are under development or review, so we should definitely expect much more soon. This recipe uses DigitalOcean, so if you want to follow along step by step, you will need an account on DigitalOcean.
Once you have an account, do not create a droplet through the DigitalOcean UI. Instead, generate an API access token for using Docker Machine. This token will need to be both a read and a write token so that Machine can upload a public SSH key (Figure 1-7). Set an environment variable DIGITALOCEAN_ACCESS_TOKEN in your local computer shell that defines the token you created.
Note
Machine will upload an SSH key to your cloud account. Make sure that your access tokens or API keys give you the privileges necessary to create a key.
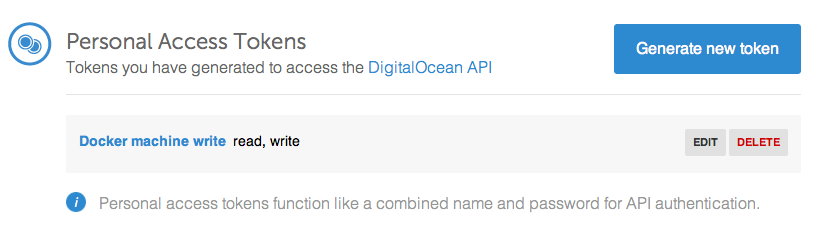
Figure 1-7. DigitalOcean access token for Machine
You are almost set. You just need to download the docker-machine binary. Go to the documentation site and choose the correct binary for your local computer architecture. For example, on OS X:
$ curl -sOL https://github.com/docker/machine/releases/download/v0.3.0/ \
docker-machine_darwin-amd64
$ mv docker-machine_darwin-amd64 docker-machine
$ chmod +x docker-machine
$ ./docker-machine --version
docker-machine version 0.3.0
With the environment variable DIGITALOCEAN_ACCESS_TOKEN set, you can create your remote Docker host:
$ ./docker-machine create -d digitalocean foobar
Creating SSH key...
Creating Digital Ocean droplet...
To see how to connect Docker to this machine, run: docker-machine env foobar
If you go back to your DigitalOcean dashboard, you will see that an SSH key has been created, as well as a new droplet (see Figures 1-8 and 1-9).

Figure 1-8. DigitalOcean SSH keys generated by Machine
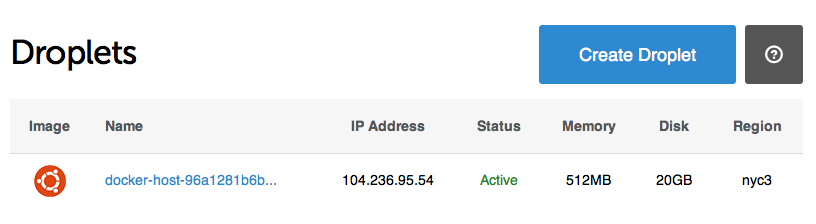
Figure 1-9. DigitalOcean droplet created by Machine
To configure your local Docker client to use this remote Docker host, you execute the command that was listed in the output of creating the machine:
$ ./docker-machine env foobar
export DOCKER_TLS_VERIFY="1"
export DOCKER_HOST="tcp://104.131.92.15:2376"
export DOCKER_CERT_PATH="/Users/sebastiengoasguen/.docker/machine/machines/foobar"
export DOCKER_MACHINE_NAME="foobar"
# Run this command to configure your shell:
# eval "$(docker-machine env foobar)"
$ eval "$(./docker-machine env foobar)"
$ docker ps
CONTAINER ID    IMAGE    COMMAND    CREATED    STATUS    PORTS    NAMES
Enjoy Docker running remotely on a DigitalOcean droplet created with Docker Machine.
Discussion
Note
If not specified at the command line, Machine will look for DIGITALOCEAN_IMAGE, DIGITALOCEAN_REGION, and DIGITALOCEAN_SIZE environment variables. By default, they are set to docker, nyc3, and 512mb, respectively.
The docker-machine binary lets you create multiple machines, on multiple providers. You also have the basic management capabilities: start, stop, rm, and so forth:
$ ./docker-machine
...
COMMANDS:
   active Get or set the active machine
   create Create a machine
   config Print the connection config for machine
   inspect  Inspect information about a machine
   ip   Get the IP address of a machine
   kill   Kill a machine
   ls   List machines
   restart  Restart a machine
   rm   Remove a machine
   env    Display the commands to set up the environment for the Docker client
   ssh    Log into or run a command on a machine with SSH
   start  Start a machine
   stop   Stop a machine
   upgrade  Upgrade a machine to the latest version of Docker
   url    Get the URL of a machine
   help, h  Shows a list of commands or help for one command
For instance, you can list the machine you created previously, obtain its IP address, and even connect to it via SSH:
$ ./docker-machine ls
NAME     ACTIVE   DRIVER         STATE     URL                        SWARM
foobar   *        digitalocean   Running   tcp://104.131.92.15:2376
$ ./docker-machine ip foobar
104.131.92.15
$ ./docker-machine ssh foobar
Welcome to Ubuntu 14.04.2 LTS (GNU/Linux 3.13.0-57-generic x86_64)
...

Last login: Mon Mar 16 09:02:13 2015 from ...
root@foobar:~#
Before you are finished with this recipe, do not forget to delete the machine you created:
$ ./docker-machine rm foobar
See Also
-
Official documentation
1.10 Using Docker Experimental Binaries
Solution
Use the Docker experimental binaries. You can download the binaries or use the experimental channel that is updated nightly.
Get the nightly builds of Docker in the form of Linux distribution packages:
$ wget -qO- https://experimental.docker.com/ | sh
$ docker version | grep Version
 Version:      1.8.0-dev
 Version:      1.8.0-dev
Or you can grab the nightly built binaries directly; for example on 64-bit systems:
$ wget https://experimental.docker.com/builds/Linux/x86_64/docker-latest
$ chmod +x docker-latest
$ ./docker-latest version | grep Version
 Version:      1.8.0-dev
 Version:      1.8.0-dev
If you want to use this binary by default, follow Recipe 4.4.
See Also
-
Docker experimental channel announced recently
-
Running experimental docker binaries
1.11 Running Hello World in Docker
Solution
Typing docker at the prompt returns the usage of the docker command:
$ docker
Usage: docker [OPTIONS] COMMAND [arg...]

A self-sufficient runtime for linux containers.

...

Commands:
    attach    Attach to a running container
    build     Build an image from a Dockerfile
    commit    Create a new image from a container's changes
...
    rm        Remove one or more containers
    rmi       Remove one or more images
    run       Run a command in a new container
    save      Save an image to a tar archive
    search    Search for an image on the Docker Hub
    start     Start a stopped container
    stop      Stop a running container
    tag       Tag an image into a repository
    top       Lookup the running processes of a container
    unpause   Unpause a paused container
    version   Show the Docker version information
    wait      Block until a container stops, then print its exit code
You have already seen the docker ps command, which lists all running containers. You’ll explore many more commands in other recipes of this book. To get started, you want to run a container. Let’s get straight to it and use docker run:
$ docker run busybox echo hello world
Unable to find image 'busybox' locally
busybox:latest: The image you are pulling has been verified
511136ea3c5a: Pull complete
df7546f9f060: Pull complete
e433a6c5b276: Pull complete
e72ac664f4f0: Pull complete
Status: Downloaded newer image for busybox:latest
hello world
Containers are based on images. An image needs to be passed to the docker run command. In the preceding example, you specify an image called busybox. Docker does not have this image locally and pulls it from a public registry. A registry is a catalog of Docker images that the Docker client can communicate with and download images from. Once the image is pulled, Docker starts a container and executes the echo hello world command. Congratulations—you ran your first container.
Discussion
If you list the running containers, you will see that none are running. That’s because as soon as the container did its job (echoing hello world) it stopped. However, it is not totally gone, and you can see it with the docker ps -a command:
$ docker ps
CONTAINER ID    IMAGE    COMMAND      CREATED   STATUS     PORTS        NAMES
$ docker ps -a
CONTAINER ID    IMAGE           COMMAND            ...    PORTS    NAMES
8f7089b187e8    busybox:latest  "echo hello world" ...          thirsty_morse
You see that the container has an ID (8f7089b187e8) and an image (busybox:latest) as well as a name, and you see the command that it ran. You can permanently remove this container with docker rm 8f7089b187e8. The image that you used was downloaded locally, and docker images returns it:
$ docker images
REPOSITORY       TAG             IMAGE ID        CREATED         VIRTUAL SIZE
busybox          latest          e72ac664f4f0    9 weeks ago     2.433 MB
If no running or stopped containers are using this image, you can remove it with docker rmi busybox.
Running echo is fun but getting a terminal session within a container is even better. Try to run a container that executes /bin/bash. You will need to use the -t and -i options to get a proper interactive session and while we are at it, let’s use an Ubuntu image:
$ docker run -t -i ubuntu:14.04 /bin/bash
Unable to find image 'ubuntu:14.04' locally
ubuntu:14.04: The image you are pulling has been verified
01bf15a18638: Pull complete
30541f8f3062: Pull complete
e1cdf371fbde: Pull complete
9bd07e480c5b: Pull complete
511136ea3c5a: Already exists
Status: Downloaded newer image for ubuntu:14.04
root@6f1050d21b41:/#
You see that Docker pulled the Ubuntu:14.04 image composed of several layers, and you got a session as root within a container. The prompt gives you the ID of the container. As soon as you exit this terminal, the container will stop running just like our first hello world example.
Tip
If you skipped the first few recipes on installing Docker, you should try the web emulator. It will give you a 10-minute tour of Docker, and you will get your first practice with it.
1.12 Running a Docker Container in Detached Mode
Solution
Use the -d option of docker run.
To try this, you will run a simple HTTP server with Python in a python:2.7 Docker image pulled from Docker Hub (see also Recipe 2.9):
$ docker run -d -p 1234:1234 python:2.7 python -m SimpleHTTPServer 1234
$ docker ps
CONTAINER ID  IMAGE       COMMAND                ...   NAMES
0fae2d2e8674  python:2.7  "python -m SimpleHTT   ...   suspicious_pike
If you open your browser at the IP of your Docker host on port 1234, you will see the listing of the root directory inside your container. Docker automatically creates a correct port mapping between the container and host port 1234, thanks to the -p 1234:1234 option. In Recipe 3.2, you will learn more about this networking behavior.
Discussion
The -d option makes the container run in the background. You can connect to the container by using the exec command and running a bash shell:
$ docker exec -ti 9d7cebd75dcf /bin/bash
root@9d7cebd75dcf:/# ps -ef | grep python
root         1     0  0 15:42 ?        00:00:00 python -m SimpleHTTPServer 1234
Lots of other options are available for docker run. Experiment by specifying a name for the container, changing the working directory of the container, setting an environment variable, and so on.
See Also
-
Docker run reference
1.13 Creating, Starting, Stopping, and Removing Containers
Solution
Use the create, start, stop, kill, and rm commands of the Docker CLI. Find the appropriate usage of each command with the -h or --h option or by typing the command with no arguments (e.g., docker create).
Discussion
In Recipe 1.12, you started a container automatically with docker run. You can also stage a container with the docker create command. Using the same example of running a simple HTTP server, the only difference will be that you will not specify the -d option. Once staged, the container will need to be started with docker start:
$ docker create -P --expose=1234 python:2.7 python -m SimpleHTTPServer 1234
a842945e2414132011ae704b0c4a4184acc4016d199dfd4e7181c9b89092de13
$ docker ps -a
CONTAINER ID  IMAGE       COMMAND              CREATED       ... NAMES
a842945e2414  python:2.7  "python -m SimpleHTT 8 seconds ago ... fervent_hodgkin
$ docker start a842945e2414
a842945e2414
$ docker ps
CONTAINER ID  IMAGE       COMMAND              ...   NAMES
a842945e2414  python:2.7  "python -m SimpleHTT ...   fervent_hodgkin
To stop a running container, you have a choice between docker kill (which will send a SIGKILL signal to the container) or docker stop (which will send a SIGTERM and after a grace period will send a SIGKILL). The end result will be that the container is stopped and is not listed in the list of running containers returned by docker ps. However, the container has not yet disappeared (i.e., the filesystem of the container is still there); you could restart it with docker restart or remove it forever with docker rm:
$ docker restart a842945e2414
a842945e2414
$ docker ps
CONTAINER ID    IMAGE       COMMAND              ...   NAMES
a842945e2414    python:2.7  "python -m SimpleHTT ...   fervent_hodgkin
$ docker kill a842945e2414
a842945e2414
$ docker rm a842945e2414
a842945e2414
$ docker ps -a
CONTAINER ID    IMAGE       COMMAND     CREATED     STATUS      PORTS       NAMES
Tip
If you have a lot of stopped containers that you would like to remove, use a subshell to do it in one command. The -q option of docker ps will return only the containers’ IDs:
$ docker rm $(docker ps -a -q)
1.14 Building a Docker Image with a Dockerfile
Solution
Use a Dockerfile. A Dockerfile is a text file that describes the steps that Docker needs to take to prepare an image—including installing packages, creating directories, and defining environment variables, among other things. In Chapter 2, we will expand much further about Dockerfiles and image creation. This recipe covers the basic concept of building an image.
As a toy example, let’s say you want to create an image based on the busybox image but that you want to define an environment variable. The busybox image is a Docker image that contains the busybox binary, which combines most Unix utilities in a single binary. Create the following text file named Dockerfile in an empty working directory:
FROM busybox

ENV foo=bar
Then to build a new image called busybox2, you use the docker build command like so:
$ docker build -t busybox2 .
Sending build context to Docker daemon 2.048 kB
Step 0 : FROM busybox
latest: Pulling from library/busybox
cf2616975b4a: Pull complete
6ce2e90b0bc7: Pull complete
8c2e06607696: Pull complete
Digest: sha256:df9e13f36d2d5b30c16bfbf2a6110c45ebed0bfa1ea42d357651bc6c736d5322
Status: Downloaded newer image for busybox:latest
 ---> 8c2e06607696
Step 1 : ENV foo bar
 ---> Running in f46c59e9bdd6
 ---> 582bacbe7aaa
Once the build completes, you can see the new images returned by docker images and you can launch a container based on it to check that the container has the environment variable foo set to bar:
$ docker images
REPOSITORY      TAG        IMAGE ID        CREATED         VIRTUAL SIZE
busybox2        latest     582bacbe7aaa    6 seconds ago   2.433 MB
busybox         latest     8c2e06607696    3 months ago    2.433 MB
$ docker run busybox2 env | grep foo
foo=bar
1.15 Using Supervisor to Run WordPress in a Single Container
Problem
You know how to link containers together (see Recipe 1.16), and would like to run all services needed for your application in a single container. Specifically for running WordPress, you would like to run MySQL and HTTPD at the same time in a container. Because Docker executes foreground processes, you need to figure out a way to run multiple “foreground” processes simultaneously.
Solution
Use Supervisor to monitor and run both MySQL and HTTPD. Supervisor is not an init system, but is meant to control multiple processes and is run like any other program.
Note
This recipe is an example of using Supervisor to run multiple processes in a container. It can be used as the basis to run any number of services via a single Docker image (e.g., SSH, Nginx). The WordPress setup detailed in this recipe is a minimum viable setup, not meant for production use.
The example files can be found on GitHub. They include a Vagrantfile to start a virtual machine that runs Docker, a Dockerfile that defines the image being created, a Supervisor configuration file (supervisord.conf), and a WordPress configuration file (wp-config.php).
Tip
If you do not want to use Vagrant, you can take the Dockerfile, supervisord, and WordPress configuration files and set things up on your own Docker host.
To run WordPress, you will need to install MySQL, Apache 2 (i.e., httpd), and PHP, and grab the latest WordPress release. You will need to create a database for WordPress. In the configuration file used in this recipe, the WordPress database user is root, its password is root, and the database is wordpress. Change these settings to your liking in the wp-config.php file and edit the Dockerfile accordingly.
A Dockerfile, a manifest that describes how a Docker image is built, is described in detail in the following chapters. If this is your first use of a Dockerfile, you can use it as is and come back to it later (see Recipe 2.3 for an introduction to Dockerfiles):
FROM ubuntu:14.04

RUN apt-get update && apt-get -y install \
    apache2 \
    php5 \
    php5-mysql \
    supervisor \
    wget

RUN echo 'mysql-server mysql-server/root_password password root' | \
    debconf-set-selections && \
    echo 'mysql-server mysql-server/root_password_again password root' | \
    debconf-set-selections

RUN apt-get install -qqy mysql-server

RUN wget http://wordpress.org/latest.tar.gz && \
    tar xzvf latest.tar.gz && \
    cp -R ./wordpress/* /var/www/html && \
    rm /var/www/html/index.html

RUN (/usr/bin/mysqld_safe &); sleep 5; mysqladmin -u root -proot create wordpress

COPY wp-config.php /var/www/html/wp-config.php
COPY supervisord.conf /etc/supervisor/conf.d/supervisord.conf

EXPOSE 80

CMD ["/usr/bin/supervisord"]
Supervisor is configured via the supervisord.conf file like so:
[supervisord]
nodaemon=true

[program:mysqld]
command=/usr/bin/mysqld_safe
autostart=true
autorestart=true
user=root

[program:httpd]
command=/bin/bash -c "rm -rf /run/httpd/* && /usr/sbin/apachectl -D FOREGROUND"
Two programs are defined to be run and monitored: mysqld and httpd. Each program can use various options like autorestart and autostart. The most important directive is command, which defines how to run each program. With this configuration, a Docker container needs to run only a single foreground process: supervisord. Hence the line in the Dockerfile, CMD ["/usr/bin/supervisord"].
On your Docker host, build the image and start a background container off of it. If you are using the Vagrant virtual machine started via the example files, do this:
$ cd /vagrant
$ docker build -t wordpress .
$ docker run -d -p 80:80 wordpress
Port forwarding will be set up between your host and the Docker container for port 80. You will just need to open your browser to http://<IP_OF_DOCKER_HOST> and configure WordPress.
Discussion
Although using Supervisor to run multiple application services in a single container works perfectly, it is better to use multiple containers. It promotes the isolation of concerns using containers and helps create a microservices-based design for your application (see Building Microservices). Ultimately, this will help with scale and resiliency.
See Also
-
Supervisor documentation
-
Docker Supervisor article
1.16 Running a WordPress Blog Using Two Linked Containers
Problem
You want to run a WordPress site with containers, but you do not want to run the MySQL database in the same container as WordPress. You want to keep the concept of separation of concerns in mind and decouple the various components of an application as much as possible.
Solution
You start two containers: one running WordPress using the official image from the Docker Hub, and one running the MySQL database. The two containers are linked using the --link option of the Docker CLI.
Start by pulling the latest images for WordPress and MySQL:
$ docker pull wordpress:latest
$ docker pull mysql:latest
$ docker images
REPOSITORY      TAG             IMAGE ID        CREATED         VIRTUAL SIZE
mysql           latest          9def920de0a2    4 days ago      282.9 MB
wordpress       latest          93acfaf85c71    8 days ago      472.8 MB
Start a MySQL container, give it a name via the --name CLI option, and set the MYSQL_ROOT_PASSWORD via an environment variable:
$ docker run --name mysqlwp -e MYSQL_ROOT_PASSWORD=wordpressdocker -d mysql
Note
By not specifying the tag for the mysql image, Docker automatically chose the latest tag, which is the one you downloaded specifically.
The container was daemonized with the -d option.
You can now run a WordPress container based on the wordpress:latest image. It will be linked to the MySQL container using the --link option, which means that Docker will automatically set up the networking so that the ports exposed by the MySQL container are reachable inside the WordPress container:
$ docker run --name wordpress --link mysqlwp:mysql -p 80:80 -d wordpress
Both containers should be running in the background, with port 80 of the WordPress container mapped to port 80 of the host:
$ docker ps
CONTAINER ID    IMAGE             COMMAND                CREATED              ...
e1593e7a20df    wordpress:latest  "/entrypoint.sh apac   About a minute ago   ...
d4be18e33153    mysql:latest      "/entrypoint.sh mysq   5 minutes ago        ...

...             STATUS              PORTS                NAMES
...             Up About a minute   0.0.0.0:80->80/tcp   wordpress
...             Up 5 minutes        3306/tcp             mysqlwp
Open a browser at http://<ip_of_host> and it should show the WordPress installation screen with the language selection window, as shown in Figure 1-10. If you go through the WordPress setup, you will then have a fully functional WordPress site running with two linked containers.
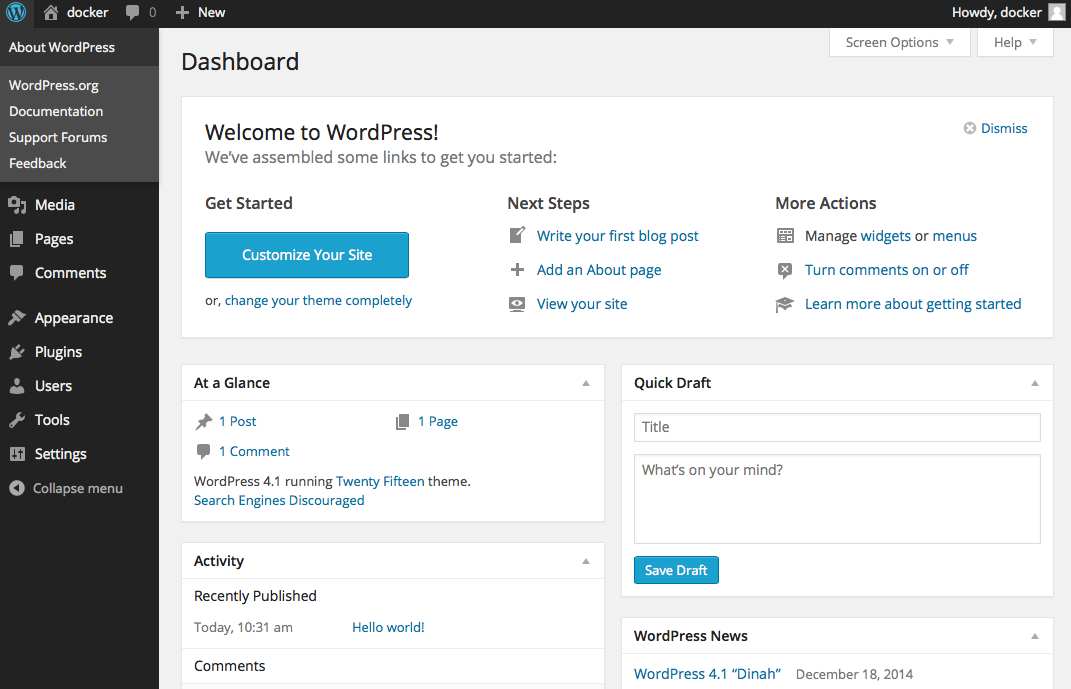
Figure 1-10. Working WordPress site within containers
Discussion
The two images for WordPress and MySQL are official images maintained by the WordPress and MySQL communities. Each page on the Docker Hub provides additional documentation for configuration of containers started with those images.
Tip
Do not forget to read the WordPress image documentation and the MySQL image documentation.
Of interest is that you can create a database and a user with appropriate privileges to manipulate that database by using a few environment variables: MYSQL_DATABASE, MYSQL_USER, and MYSQL_PASSWORD. In the preceding example, WordPress is run as the root MySQL user and this is far from best practice. It would be better to create a wordpress database and a user for it, like so:
$ docker run --name mysqlwp -e MYSQL_ROOT_PASSWORD=wordpressdocker \
                            -e MYSQL_DATABASE=wordpress \
                            -e MYSQL_USER=wordpress \
                            -e MYSQL_PASSWORD=wordpresspwd \
                            -d mysql
Tip
If you need to remove all existing containers, you can use a shortcut making use of a subshell command:
$ docker stop $(docker ps -q)
$ docker rm -v $(docker ps -aq)
The -v option of docker rm removes the volume defined by the MySQL image.
Once the database container is running, you run the WordPress container and specify the database tables you defined:
$ docker run --name wordpress --link mysqlwp:mysql -p 80:80 \
                              -e WORDPRESS_DB_NAME=wordpress \
                              -e WORDPRESS_DB_USER=wordpress \
                              -e WORDPRESS_DB_PASSWORD=wordpresspwd \
                              -d wordpress
1.17 Backing Up a Database Running in a Container
Solution
Several backup strategies are possible alone or in combination. The two main concepts with containers are that you can execute a command inside a container running in the background and that you can also mount a host volume (i.e., a single accessible storage area in your host filesystem) into the container. In this recipe, you will see how to do the following:
-
Mount a volume from the Docker host into the MySQL container
-
Use the
docker execcommand to callmysqldump
Starting from the Recipe 1.16, where you set up a WordPress site by using two linked containers, you are going to modify the way you start the MySQL container.
Once the containers are started and you have a fully functional WordPress site, you can stop the containers, which stops your application. At that point, the containers have not been removed entirely yet and the data in the database is still accessible. However, as soon as you remove the containers (docker rm $(docker ps -aq)), all data will be lost.
A way to keep the data, even when containers are removed with the docker rm -v command, is to mount a volume from your Docker host inside a container. If you were to delete the MySQL container with only the docker rm command, the volume defined by the image would still persist even if you delete the container. If you look at the Dockerfile used to build the MySQL image, you still see a reference to VOLUME /var/lib/mysql. This means that when you start a container based on this image, you can bind mount a host directory to this mount point inside the container. Let’s do it:
$ docker run --name mysqlwp -e MYSQL_ROOT_PASSWORD=wordpressdocker \
                            -e MYSQL_DATABASE=wordpress \
                            -e MYSQL_USER=wordpress \
                            -e MYSQL_PASSWORD=wordpresspwd \
                            -v /home/docker/mysql:/var/lib/mysql \
                            -d mysql
Note the -v /home/docker/mysql:/var/lib/mysql line that performs this mount. After doing the WordPress configuration, the /home/docker/mysql directory on the host is populated:
$ ls mysql/
auto.cnf  ibdata1  ib_logfile0  ib_logfile1  mysql  performance_schema  wordpress
To get a dump of the entire MySQL database, use the docker exec command to run mysqldump inside the container:
$ docker exec mysqlwp mysqldump --all-databases \
                                --password=wordpressdocker > wordpress.backup
You can then use the traditional techniques for backup and recovery of the database. For instance, in the cloud, you might want to use an Elastic Block Store (e.g., AWS EBS) mounted on an instance and then mounted inside a container. You can also keep your MySQL dumps inside an Elastic Storage (e.g., AWS S3).
Discussion
Although this recipe uses MySQL, the same techniques are valid for Postgres and other databases. If you use the Postgres image from Docker Hub, you can also see in the Dockerfile that a volume is created (VOLUME /var/lib/postgresql/data).
1.18 Sharing Data in Your Docker Host with Containers
Solution
Use the -v option of docker run to mount a host volume into a container.
For example, to share the working directory of your host within a /cookbook directory in a container, do this:
$ ls
data
$ docker run -ti -v "$PWD":/cookbook ubuntu:14.04 /bin/bash
root@11769701f6f7:/# ls /cookbook
data
In this example, you mount the working directory in the host into the /cookbook directory in the container. If you create files or directories within the container, the changes will be written directly to the host working directory, as shown here:
$ docker run -ti -v "$PWD":/cookbook ubuntu:14.04 /bin/bash
root@44d71a605b5b:/# touch /cookbook/foobar
root@44d71a605b5b:/# exit
exit
$ ls -l foobar
-rw-r--r-- 1 root root 0 Mar 11 11:42 foobar
By default, Docker mounts the volume in read-write mode. If you want to mount it in read-only mode, you can specify it after the name of the volume, using a colon. For example, to mount the previous working directory to /cookbook as read-only, you would use -v "$PWD":/cookbook:ro. You can inspect your mount mapping with the docker inspect command. See Recipe 9.1 for more information about inspect.
$ docker inspect -f {{.Mounts}} 44d71a605b5b
[{ /Users/sebastiengoasguen/Desktop /cookbook   true}]
See Also
1.19 Sharing Data Between Containers
Solution
Use data containers. In Recipe 1.18, you saw how to mount a host volume into a container. You used the -v option of docker run, specifying a host volume and a path within a container to mount that volume to. If the host path is omitted, you create a data container.
The volume specified is created inside the container as a read-write filesystem not layered on top of the read-only layers used to create the container image. Docker manages that filesystem, but you can read and write to it from the host. Let’s illustrate this (with a truncated ID of the volumes for brevity):
$ docker run -ti -v /cookbook ubuntu:14.04 /bin/bash
root@b5835d2b951e:/# touch /cookbook/foobar
root@b5835d2b951e:/# ls cookbook/
foobar
root@b5835d2b951e:/# exit
exit
bash-4.3$ docker inspect -f {{.Mounts}} b5835d2b951e
[{dbba7caf8d07b862b61b39... /var/lib/docker/volumes/dbba7caf8d07b862b61b39... \
/_data /cookbook local  true}]
$ sudo ls /var/lib/docker/volumes/dbba7caf8d07b862b61b39...
foobar
Note
The directory created by the Docker engine to store the data in the volume defined resides on the Docker host. If you are using Docker Machine to set up a remote Docker host, you will need to connect to this remote Docker host to see the data path of the Docker volumes.
When the container is started, Docker creates the /cookbook directory. From within the container, you can read and write to this directory. Once you exit the container, you can use inspect (see Recipe 9.1) to know where the volume has been created on the host. Docker created it under /var/lib/docker/volumes/. From the host you can read and write to it. Changes will persist and be available if you restart the container:
$ sudo touch /var/lib/docker/volumes/dbba7caf8d07b862b61b39.../foobar2
$ docker start b5835d2b951e
$ docker exec -ti b5835d2b951e /bin/bash
root@b5835d2b951e:/# ls /cookbook
foobar  foobar2
To share this data volume with other containers, use the --volumes-from option. Let’s start fresh and create a data container, and then start another container that will mount the volume from this source data container:
$ docker run -v /data --name data ubuntu:14.04
$ docker ps
CONTAINER ID    IMAGE   COMMAND     CREATED   STATUS   PORTS    NAMES
$ docker inspect -f {{.Mounts}} data
[{4ee1d9e3d453e843819c6ff... /var/lib/docker/volumes/4ee1d9e3d453e843819c6ff... \
/_data /data local true]
Tip
The data container is not running. Still, the volume mapping exists and the volume has persisted in /var/lib/docker/vfs/dir.
You can remove the container and the volume only with docker rm -v data. If you do not use the rm -v option to delete containers and their volumes, you will end up with lots of orphaned volumes.
Even though the data container is not running, you can mount the volume from it with the --volumes-from option:
$ docker run -ti --volumes-from data ubuntu:14.04 /bin/bash
root@b94a006377c1:/# touch /data/foobar
root@b94a006377c1:/# exit
exit
$ sudo ls /var/lib/docker/volumes/4ee1d9e3d453e843819c6ff...
foobar
See Also
-
Understanding volumes
-
Data container
-
Docker volumes
-
Official Docker documentation
-
The aha moment of Docker volumes
1.20 Copying Data to and from Containers
Solution
Use the docker cp command to copy files from a running container to the Docker host. The docker cp command allows you to copy files to and from the host to a container.
The usage is as follows and is straightforward:
$ docker cp
docker: "cp" requires 2 arguments.
See 'docker cp --help'.

Usage:  docker cp [OPTIONS] CONTAINER:PATH LOCALPATH|-
  docker cp [OPTIONS] LOCALPATH|- CONTAINER:PATH

Copy files/folders between a container and your host.
...
Let’s illustrate this by first starting a container that will just sleep. You can enter the container and create a file manually:
$ docker run -d --name testcopy ubuntu:14.04 sleep 360
$ docker exec -ti testcopy /bin/bash
root@b81793e9eb3e:/# cd /root
root@b81793e9eb3e:~# echo 'I am in the container' > file.txt
root@b81793e9eb3e:~# exit
Now to get the file that you just created in the container back in the host, docker cp does the work:
$ docker cp testcopy:/root/file.txt .
$ cat file.txt
I am in the container
To copy from the host to the container, use docker cp again but the other way around:
$ echo 'I am in the host' > host.txt
$ docker cp host.txt testcopy:/root/host.txt
A nice use case is to copy from one container to another container, which is a matter of combining the two methods by temporarily saving the files on the host. For example, if you want to transfer /root/file.txt from two running containers with the names c1 and c2, use the following:
$ docker cp c1:/root/file.txt .
$ docker file.txt c2:/root/file.txt
Discussion
Prior to Docker 1.8, docker cp did not support copying files from the host to a container. However, you could do it with a combination of docker exec and some shell redirection:
$ echo 'I am in the host' > host.txt
$ docker exec -i testcopy sh -c 'cat > /root/host.txt' < host.txt
$ docker exec -i testcopy sh -c 'cat /root/host.txt'
I am in the host
This is not needed anymore but is a good showcase of the power of the docker exec command.
See Also
-
The original idea for this recipe from Grigoriy Chudnov
Get Docker Cookbook now with the O’Reilly learning platform.
O’Reilly members experience books, live events, courses curated by job role, and more from O’Reilly and nearly 200 top publishers.

