Chapter 11. Adding custom functions to the search results window 243
11.3 Installing sample code
To test the sample code on your workstation you need to install updates to two
JSPs and add a new JSP to the eClient.
Follow these steps to install the sample code using the command line:
1. Copy the new IDMSearchToolbar.jsp from the redbook samples over the
standard eClient 8.2 JSP in the eclient82.war directory in the WebSphere
installedApps directory.
2. Copy the new heading.jsp over the standard eClient 8.2 JSP in the
eclient82.war\pageComponents directory in the WebSphere installedApps
directory.
3. Copy the new YXZProcessDocuments.jsp and IDMProcessDocumentList.jsp
to the eclient82.war directory in the WebSphere installedApps directory.
4. Create directory named exports below the eclient82.war directory. Temporary
document files will be stored here.
Follow these steps to install the sample code using WebSphere Studio
Application Developer:
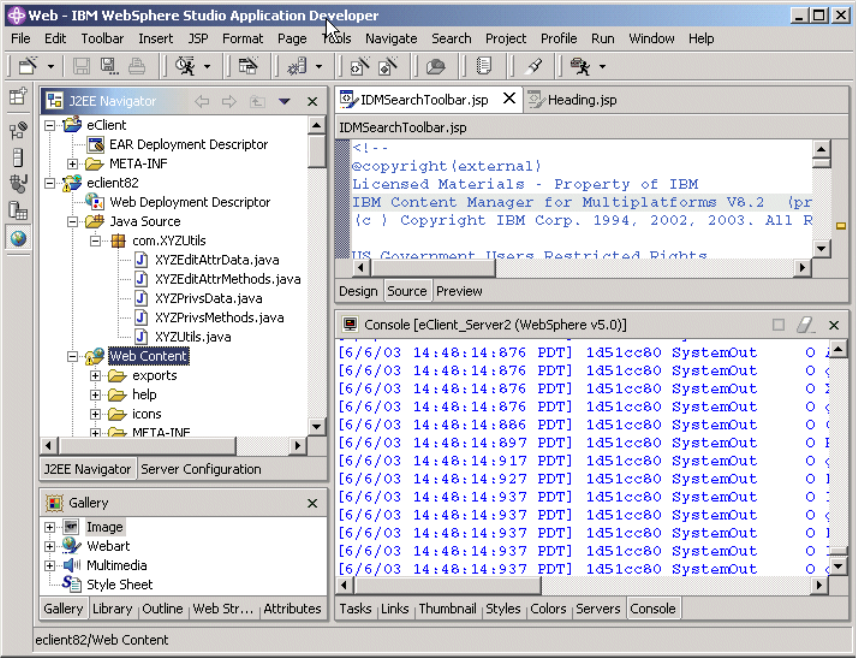
1. Open the eClient 8.2 IDMSearchToolbar.jsp and heading.jsp with the
WebSphere Studio Application Developer editor.
2. Open the IDMSearchToolbar.jsp and heading.jsp custom files provided with
the redbook samples in Notepad or another editor. Copy and paste the new
code into the WebSphere Studio Application Developer editor for both
IDMSearchToolbar.jsp and heading.jsp. Press Ctrl+S in the WebSphere
Studio Application Developer editor for each file to save the changes.
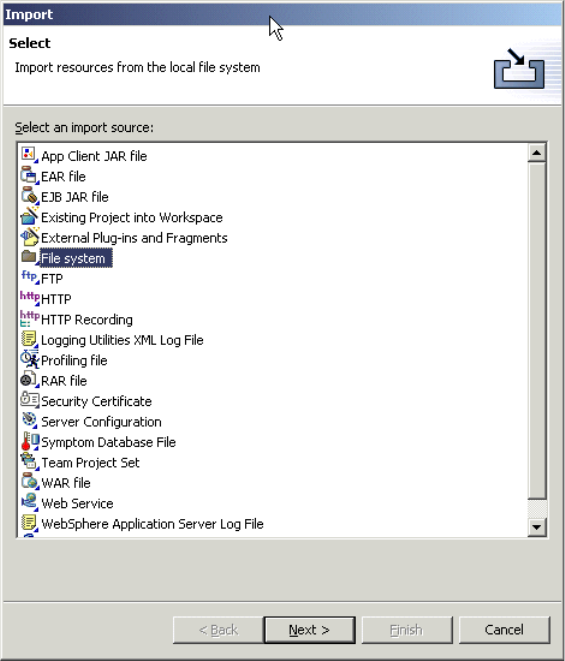
3. Import new JSPs into eClient as follows:
a. Open the J2EE Navigator view in WebSphere Studio Application
Developer and expand eclient82 -> Web Content as shown in
Figure 11-3 on page 244.
Chapter 11. Adding custom functions to the search results window 245
Figure 11-4 WebSphere Studio Application Developer file import window
c. Select File system and click Next.
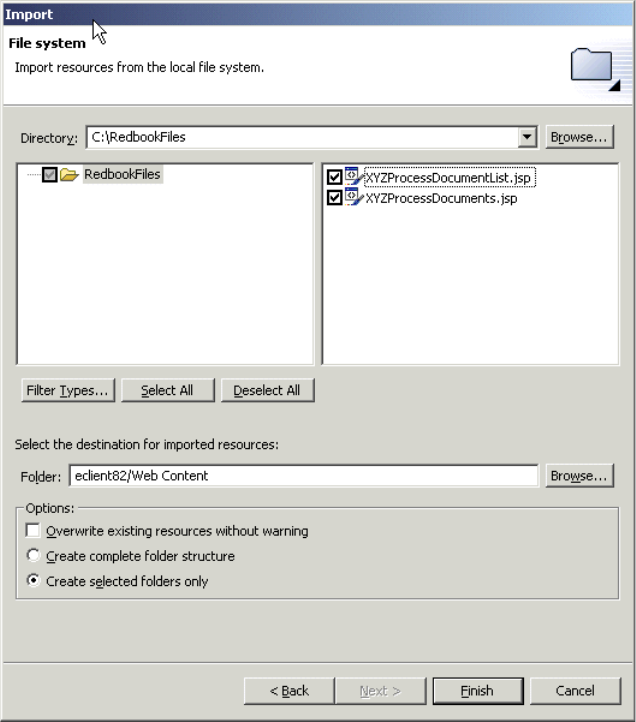
d. Browse to the directory where the source code is located. Select the files
you want to import into your eClient project. See Figure 11-5 on page 246.
246 eClient 101 Customization and Integration
Figure 11-5 WebSphere Studio Application Developer import file selection window
e. After you select all the files to import, click Finish.
f. Go back to the J2EE Navigator window. Scroll down to the bottom and you
should see the two files that are imported. See Figure 11-6 on page 247.
Get eClient 101 Customization and Integration now with the O’Reilly learning platform.
O’Reilly members experience books, live events, courses curated by job role, and more from O’Reilly and nearly 200 top publishers.

