Chapter 5. Orthographic Views
5-1 Introduction
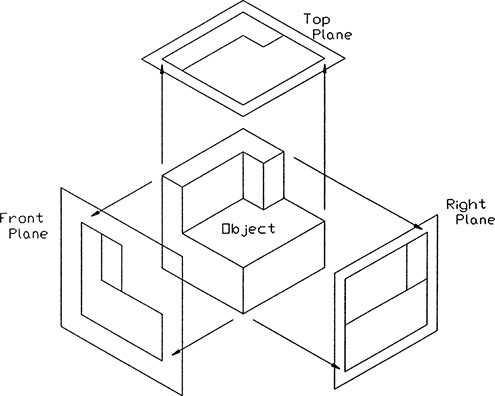
This chapter introduces orthographic views. Orthographic views are two-dimensional views of three-dimensional objects. Orthographic views are created by projecting a view of an object onto a plane which is usually positioned so that it is parallel to one of the planes of the object. See Figure 5-1.

Figure 5-1
Orthographic projection planes may be positioned at any angle relative to an object, but in general, the six views parallel to the six sides of a rectangular object are used. See Figure 5-2. Technical drawings usually include only the front, top, and right-side orthographic views because together ...
Get Engineering Graphics with AutoCAD® 2017 now with the O’Reilly learning platform.
O’Reilly members experience books, live events, courses curated by job role, and more from O’Reilly and nearly 200 top publishers.

