Chapter 4. Swift Package Manager
Reinventing the wheel is a great way to waste your time and effort. When another developer has already created a solid library that performs a function needed by your application, you can save weeks of time if you are able to reuse it. The Swift ecosystem is growing very quickly, and often there are many similar libraries that solve the same problem. If you adopt Swift for your project, you will find hundreds of Swift packages on GitHub or listed in the IBM Swift Package Catalog, which can be easily incorporated with the aid of the Swift Package Manager (SwiftPM). Whether you are looking to store your data in a database, parse JSON, or use reactive programming, chances are that there is a Swift package out there that can do what you need it to.
As a developer, you might want to add one of these libraries to your project. This is where the SwiftPM comes into play. If you already use a package manager such as Rust’s Cargo, NodeJS’s npm, Java’s Maven, or Ruby’s Gem, you will feel right at home using the SwiftPM. It helps to resolve dependencies by automatically downloading the sources that match the version you want, and arranges the build process so that you have the executable or Swift library that you need. Because the SwiftPM works on many platforms, you can kick off builds, test, or fetch dependencies with shell commands. In addition, you can use it to generate an Xcode project, as described in “Developing in Xcode”.
Semantic Versioning
When SwiftPM fetches a required package, it must fetch an appropriate version that will work with your project. So, each package uses a three-level version number, consisting of major, minor, and patch numbers:
- The major version indicates API compatibility.
- The minor version indicates functionality.
- The patch version indicates fixes.
The major version is incremented when there are changes made to the API that could break the packages that depend on it. The minor version is incremented when there is a new feature added that does not break the compatibility with older versions. The patch version is incremented when bugs are fixed that do not break backwards compatibility.
SwiftPM will only clone the dependencies at specific revision points set by the developer’s tags. Therefore, you cannot fetch the latest commit from the head of a specific branch; instead, SwiftPM will clone the source code at specific tagged revisions in the repository. Although this requirement may seem limiting, it prevents broken builds and introduction of bugs by ensuring that every commit made to the repository does not affect the many applications that could be using the library.
Consider this typical workflow: suppose your project uses the master branch for your production-ready releases, and currently your project is at version 0.1.3. When developing a new API-breaking feature, you can branch from the master into a new feature branch called add_feature. From this feature branch, you can tag a new release: 0.2.0. The existing stable code at 0.1.3 will not be affected. You can change the Package.swift file in your executable to point to majorVersion 0 and minor version 2 for your development. This will clone the repository at version 0.2.0 and not 0.1.3.
Creating an Application
This section steps you through the process of using the SwiftPM to create a new project from scratch, find a package to include, import that package, and build your project.
First, generate a new executable project by creating a new directory called MyProject. The following command uses the name of the current working directory for automatically creating a new project with that name:
~$cdMyProjectMyProject$swiftpackageinit--typeexecutableCreatingexecutablepackage:MyProjectCreatingPackage.swiftCreating.gitignoreCreatingSources/CreatingSources/main.swiftCreatingTests
There were a few files created in that step. The Sources/main.swift is the main entry file, and it starts off with very basic Swift code for a “Hello, World!” application. All executable projects or targets will contain a main.swift in the Sources directory or a subdirectory in the Sources directory, respectively.
("Hello, world!")
The Tests directory is empty. See “Creating Your Own Library” for unit-testing information.
The built .gitignore file specifies which files or directories to exclude from the git repository. Here, these are the .build directory, Packages directory, and any .xcodeproj files. These files and folders will be built during the compilation step, and are not necessary to check into your project.
The Package.swift file is a manifest file containing the name of the package and other information such as the dependencies that your project has:
importPackageDescriptionletpackage=Package(name:"MyProgram")
Now, produce an executable file from your project by running swift build:
$ swift build
Compile Swift Module ‘MyProject’ (1 sources)
Linking ./.build/debug/MyProject
The swift build command reads the Package.swift file and checks if there are any dependencies to fetch. Next, it runs the Swift compiler, swiftc, on each of your .swift files to convert them into swift modules. Finally, it links the .swiftmodule files to produce your executable, which is left in the .build/debug/ directory. Run your program now:
$./build/debug/MyProjectHello,world!
Compiling in Release Mode
Projects can be built in either debug or release mode. By default, swift build compiles the project in debug mode. When moving your project to production, consider building your project in release mode so that you have the best performance. You may compile with swift build –-configuration release, which will generate an optimized executable in the directory .build/release. Consequently, debugging symbols will be included and optimizations excluded so that LLDB can examine data, add breakpoints, and step through your program.
The Package.swift file describes the project and how to build it. Builds are not described by a special language like Gradle or a Makefile—it’s native Swift code! You don’t have to learn another language to control the build process. You can write if statements that will select the correct library to use based on whether you are running on Darwin or Linux:
#ifos(macOS)||os(iOS)||os(tvOS)||os(watchOS)importDarwin#elseifos(Linux)importGlibc#endif
The system’s environment variables can also influence the build process. For example, you can check for the existence of an environment variable before executing a code block:
letenv=ProcessInfo.processInfo.environmentifenv["MY_SYSTEM_ENV"]=="true"{...}
Importing a Library in Your Project
Once the necessary boilerplate for a Swift project has been created, you can add new dependencies to it—for example, that nifty pipe operator ( |>) introduced in Chapter 1. First, find the source code, which is often in GitHub. You can find libraries with the IBM Swift Package Catalog. Open the Catalog in your browser and search for “Pipes” in the search bar as shown in Figure 4-1.
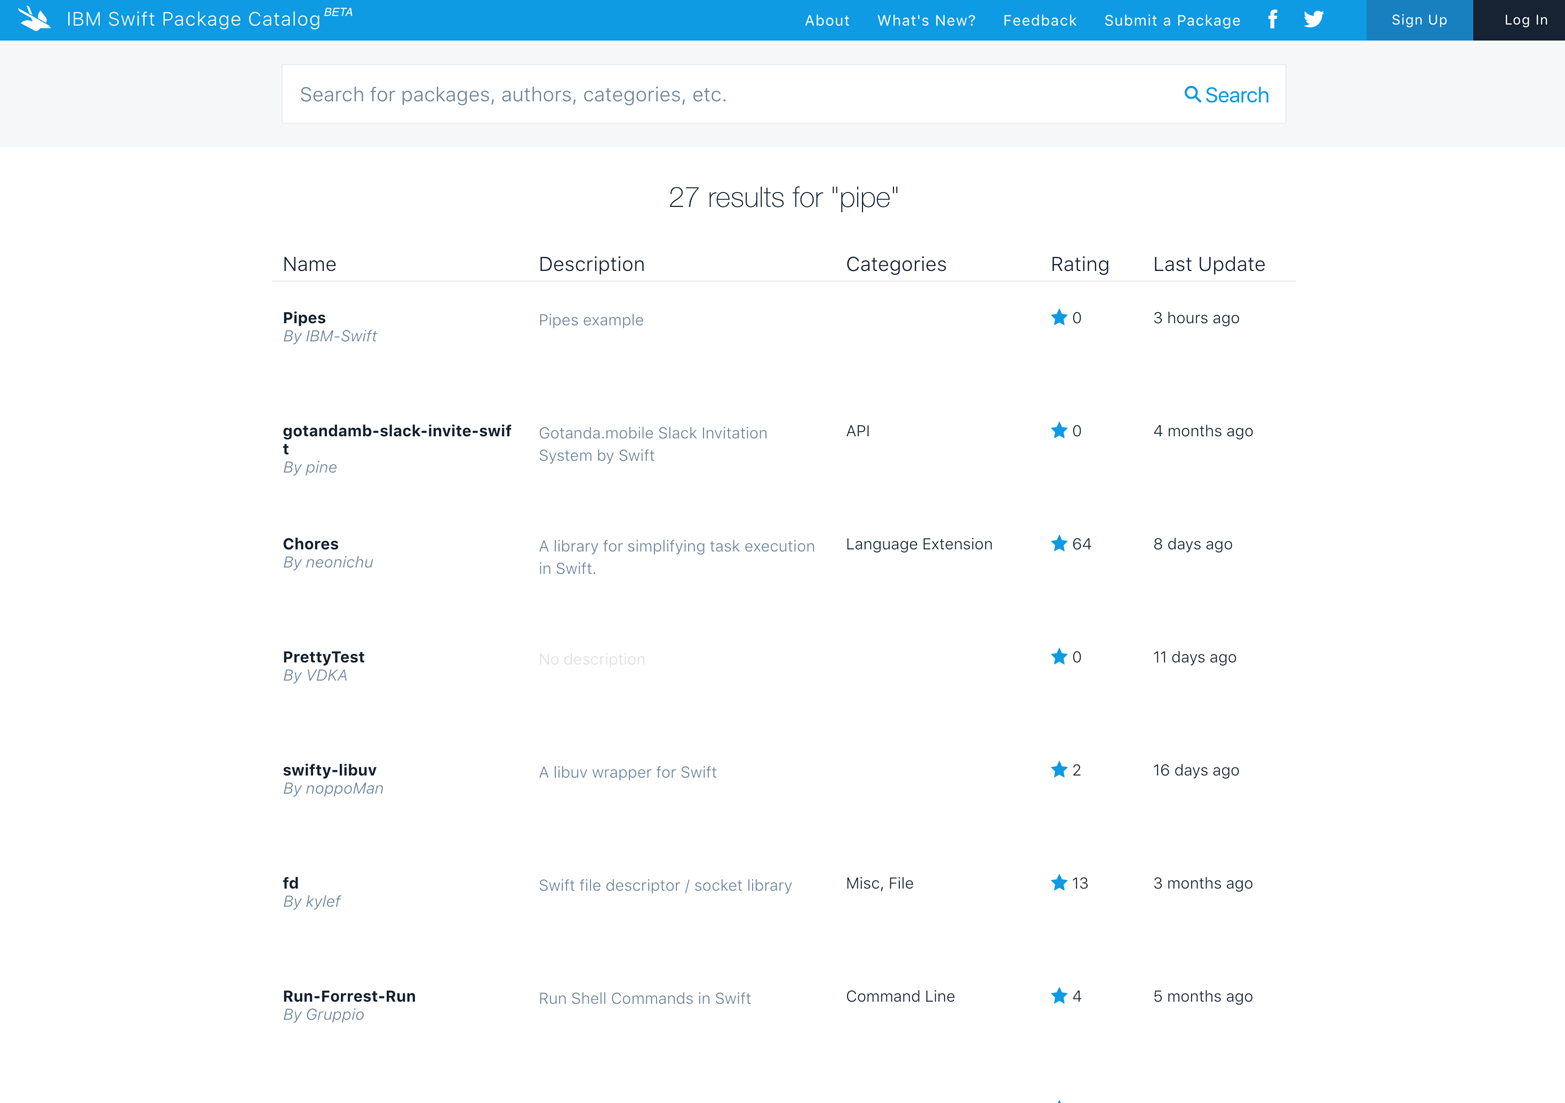
Figure 4-1. Searching for a package in the IBM Swift Package Catalog
Select the Pipes package to view the details about the project shown in Figure 4-2. These include the last tagged version number, displayed at the top of the right column:
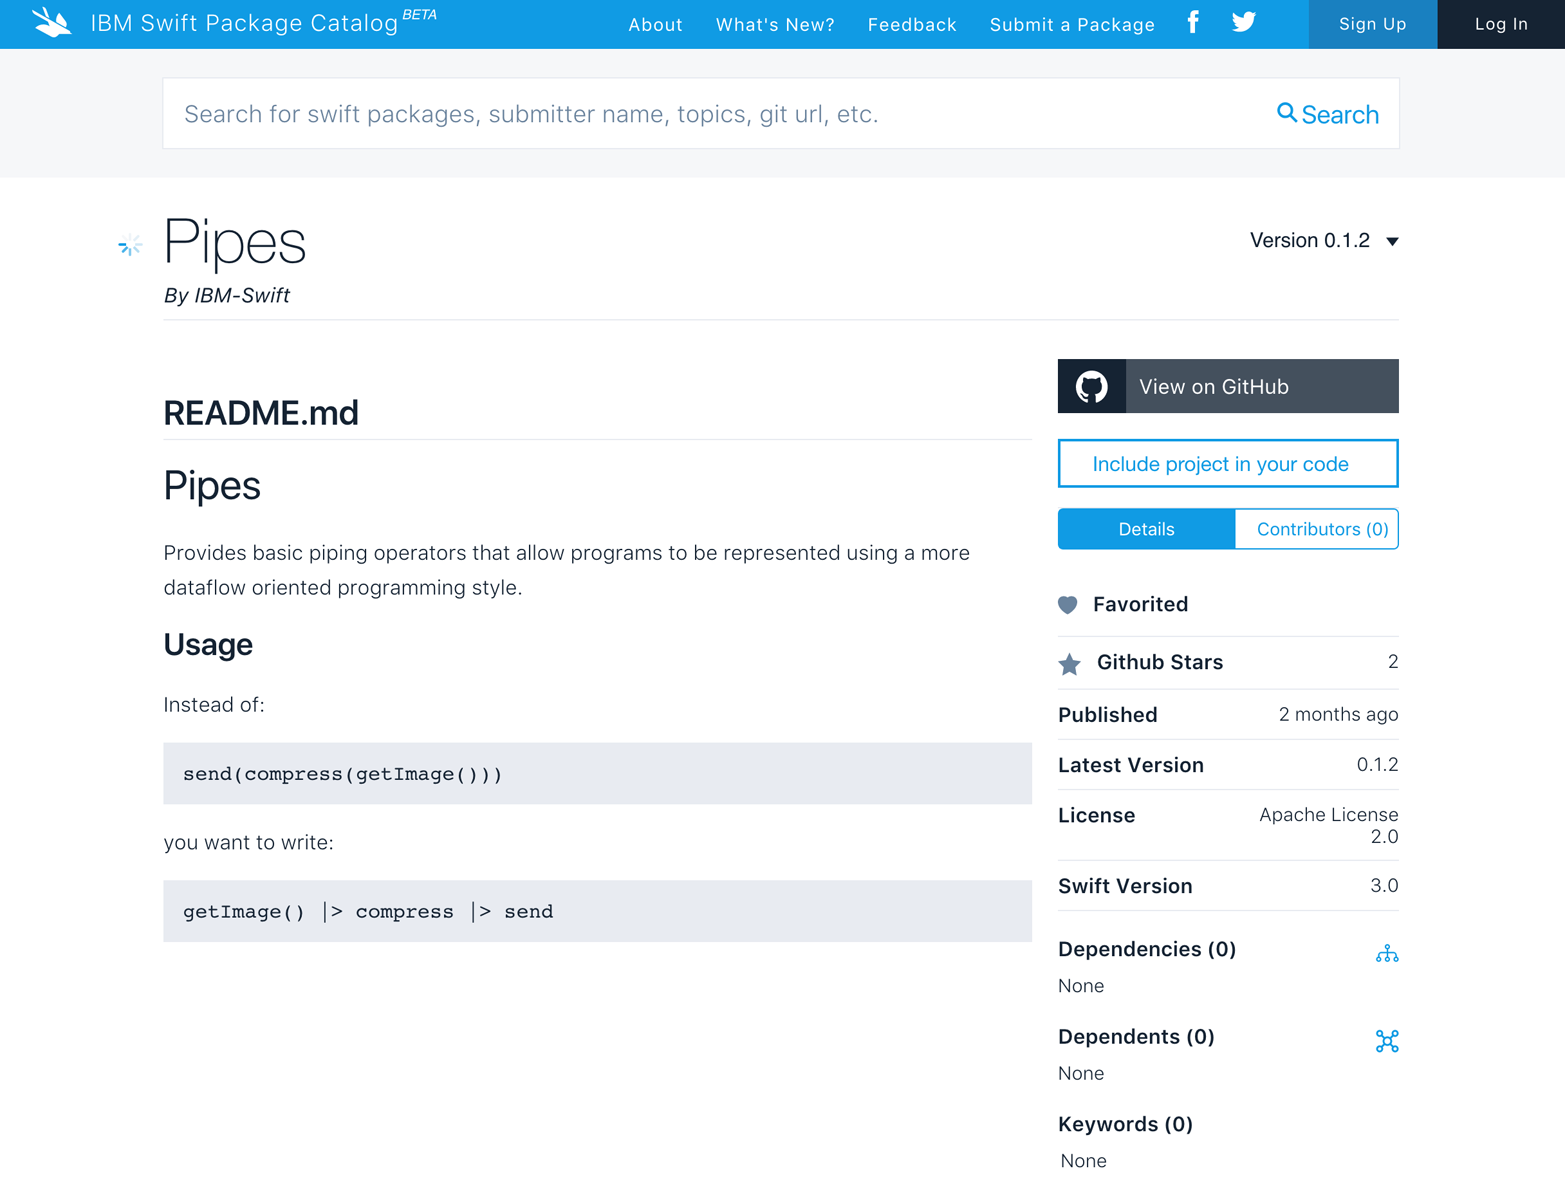
Figure 4-2. Pipes library description page on IBM Swift Package Catalog
Click on “Include project in your code,” which will copy the necessary dependency link to your clipboard so you can paste it into Package.swift.
Go back to your Package.swift file and insert that dependency in your Package constructor:
importPackageDescriptionletpackage=Package(name:"MyProject",dependencies:[.Package(url:"https://github.com/IBM-Swift/Pipes.git",majorVersion:0,minor:1),])
Other Git Servers
In the dependencies package definition, any Git repository can work: it can be on the local filesystem, a private Git server, or on GitHub. You can use the file, https, or ssh protocols for any of these repositories.
There are different ways to specify the package versions as described in Table 4-1:
| Version Range: | Version(0, 1, 0)..<Version(0, 2, 0) |
| Major Version only: | majorVersion: 0 |
| Major and Minor Version: | majorVersion: 0, minor: 1 |
| Version: | Version(0, 1, 0) |
| Version String: | 0.1.0 |
Although you have the flexibility to use a large version range (such as only specifying the major version), we recommend locking down both the major and minor versions. Although, in theory, minor version changes should not break a build, they often do so at early version numbers.
You can now write code that uses Pipes. Open main.swift and import the Pipes module, and write some basic code:
importPipesfuncsayHello(str:String)->String{return“Hello,\(str)”}"Alice"|>sayHello|>
Compile with swift build. Before the compilation begins, the SwiftPM will clone the Pipes library into a subdirectory of the Packages directory.
$ swift build
Cloning https://github.com/IBM-Swift/Pipes
HEAD is now at 71c2c80 Improve Pipes
Resolved version: 0.1.2
Compile Swift Module 'Pipes' (1 sources)
Compile Swift Module 'MyProject' (1 sources)
Linking ./.build/debug/MyProject
The compiled program is located in the .build/debug folder. You can now run your program:
$./.build/debug/MyProgramHello,Alice!
Other useful Swift Package Commands
swift package fetch |
fetches package dependencies only |
swift package update |
updates packages to latest version while matching constraints |
Developing in Xcode
While you can easily develop entirely on the command line using your favorite text editor, many macOS users will want to use Xcode for their server-side Swift development. You can use Xcode to edit and compile the code, run tests, and profile your Swift code just like you can with iOS and macOS projects. But first, in order to use Xcode, a project must be created from your Package.swift. The following command will create your project:
$swiftpackagegenerate-xcodeproj
Running this command line fetches the necessary dependencies before creating the Xcode project. When you build with Xcode, it does not use SwiftPM to build your project, but instead will use Xcode’s native build system.
In the future, we expect to see tighter integration of SwiftPM and Xcode.
Beware of Manually Changing Xcode Project Files
If you add or remove a dependency to your Package.swift file, it will be necessary for you to recreate the Xcode project again. Note that any changes made to your project will be lost when a new project file is generated over the old one.
You can open the project in Xcode, and once in Xcode, tools such as the debugger, instruments, code coverage, and testing will work as expected. If you want to run an executable, make sure you change your active scheme in Xcode to the executable before you use the Run (<Cmd>-r) command.
Creating Your Own Library
Suppose you wanted to create a new library from scratch. What would you have to do to create one? You could use the SwiftPM! This section walks you through the steps to create a Pipes library from scratch.
To start, create a new subdirectory called Pipes. Go inside this directory and run the SwiftPM project generator to create a boilerplate for a library:
$ swift package init --type library
This time the following files are generated:
./Package.swift
./.gitignore
./Sources/Pipes.swift
./Tests/LinuxMain.swift
./Tests/PipesTests/PipesTests.swift
swift init generates files for a library, just as it does for an executable. But instead of generating a main.swift file, it generates a file named after the module. Instead of nothing in Tests, it creates a very basic test suite.
Next, open Sources/Pipes.swift, erase what’s there, and add an implementation of the Pipe operator that will be used for your library:
precedencegroupLeftFunctionalApply{associativity:lefthigherThan:AssignmentPrecedencelowerThan:TernaryPrecedence}infixoperator|>:LeftFunctionalApply@discardableResultpublicfunc|><A,B>(x:A,f:(A)throws->B)rethrows->B{returntryf(x)}
What hasn’t been tested doesn’t necessarily work, so add a test by opening the Tests/PipesTests.swift file. Erase the content inside of the testExample() function and replace it with:
importXCTest@testableimportPipesfuncdouble(a:Int)->Int{return2*a}classPipesTests:XCTestCase{functestDouble(){XCTAssertEqual(6|>double,12)}}
Tell the Linux test runner which methods of PipeTests to run:
extensionPipesTests{staticvarallTests:[(String,(PipesTests)->()throws->Void)]{return[("testDouble",testDouble)]}}
The allTests array is not needed to run your tests in Xcode, but it is important for the SwiftPM to run the tests with the swift test command.
Now, compile and test your library by running swift build, then swift test:
Pipes$ swift build
Compile Swift Module 'Pipes' (1 sources)
Pipes $ swift test
Compile Swift Module 'PipesTestSuite' (1 sources)
Linking .build/debug/PipesTests.xctest/Contents/MacOS/PipesTests
Test Suite 'All tests' started ...
Test Suite 'PipesTests.xctest' ...
Test Suite 'PipesTests' started ...
Test Case '-[PipesTestSuite.PipesTests testDouble]'
             started.
Test Case '-[PipesTestSuite.PipesTests testDouble]'
             passed (0.001 seconds).
Test Suite 'PipesTests' passed at ...
  Executed 1 test, with 0 failures (0 unexpected) in 0.001
                                        (0.001) seconds
Test Suite 'PipesTests.xctest' passed at 2016-07-22 13:59:39.629.
  Executed 1 test, with 0 failures (0 unexpected) in 0.001
                                        (0.001) seconds
Test Suite 'All tests' passed at 2016-07-22 13:59:39.629.

Executed 1 test, with 0 failures (0 unexpected) in 0.001
                                        (0.001) seconds
This example includes a single test case. But the SwiftPM can run many test cases or even larger test suites in the test directory. The library has been built and tested, but it’s still confined to one computer. How can you set it loose to conquer the world?
Sharing a Library with the Swift Community
Now that you have a working and tested Pipes library, you should share this library with the community. Initialize a new Git repository in the Pipes directory:
$ git init
Initialized empty Git repository in Pipes/.git/
Stage these source files, create a first commit, and then tag it as version 0.1.0:
$ git add .
$ git commit -m "Initial release"
Next, sign up for a GitHub account, if you don’t already have one, and create a new repository with your GitHub account. Once you have your repository created remotely, you can link your local repository in your directory with this GitHub one as its remote origin. To set this remote, use:
$ git remote add origin https://github.com/<my-org>/Pipes.git
Finally, push your code out to the GitHub repository with the tag 0.1.0 with:
$ git tag 0.1.0
$ git push –u origin master --tags
We suggest you add a LICENSE file, copyright headers for each of your source files, and a README file before making your library available to the public.
Version conflicts
When building, you may get the dreaded error message: “The dependency graph could not be satisfied.”
If your dependency tree contains several common libraries on different major, minor, and patch versions, your build will break when the SwiftPM fetches the Packages.swift file recursively throughout the entire dependency chain, clones the dependencies into the packages directory, and links the libraries in each of the repositories. For example, if there are Pipes 1.0.1 and Pipes 1.2.3 in the dependency tree, there will be a dependency collision and the linker will fail.
Producing More Complex Projects
A complex Swift project often incorporates multiple modules, each contained in a different subdirectory of the Sources directory. Because these modules might depend on one another, the build steps must follow a logical ordering. For instance, if A depends on B, B must be built first. The SwiftPM will compute the transitive closure and generate an appropriate ordering, but you must specify the individual dependency relationships.
This process is analogous to the way a Makefile specifies individual dependencies: for each target, you add a list of dependencies. For example, assume your Sources directory contains the following:
Sources/A/main.swift |
(which requires B) |
Sources/B/WebController.swift |
(which requires C) |
Sources/C/DatabaseConnector.swift |
A Package.swift file will contain the following to describe the targets and the dependencies so that the project gets built in the correct order:
importPackageDescriptionletpackage=Package(name:"MyWebApp",targets:[Target(name:"A",dependencies:[.Target(name:"B")]),Target(name:"B",dependencies:[.Target(name:"C")]),Target(name:"C")])
With this information, SwiftPM will ensure that C is built first, then B, then A.
Now that you can have a single repository containing multiple Swift modules, it might be unclear whether you should put them in a single repository or separate them into different repositories. When making this decision, consider the following:
- Is there valuable reusable code in the Swift modules within your complex project? If so, factor it out.
- Does the Swift package have executable targets as well as library targets? Keep in mind that when someone adds your package as their dependency, these executables will be built, too. This might be surprising if the user was expecting only a library.
Using C Dynamic Libraries
A Swift package can leverage existing C libraries, which can be installed with Homebrew or a Linux package manager like Ubuntu or Debian’s APT (Advanced Package Tool). In order to create a binding to this C dynamic library that can be used in your Swift projects, create a system module package:
$ swift package init --type system-module
Creating system-module package: CSQlite
Creating Package.swift
Creating .gitignore
Creating module.modulemap
Inside module.modulemap, you write a simple specification that points to the library’s header file and dynamic library. The header files must be on absolute paths. The link argument is the name of the dynamic library. For instance, if it is “sqlite3”, SwiftPM will find files named libsqlite.dylib on macOS or libsqlite.so on Linux as it traverses the library search path.
module CSQLite [system] {
    header "/usr/local/opt/sqlite/include/sqlite3.h"
    link "sqlite3"
    export *
}
When you include this Swift system module package, the Swift importer will read from the header file and automatically generate the necessary code to call C from Swift.
SwiftPM does not install the C library automatically, because that would require superuser privileges. Instead, you can let each user know how to install the C library using the operating system’s package manager. If you do, the package name will be presented to the user during the swift build. Currently, SwiftPM only supports the package managers Homebrew and APT.
letpackage=Package(name:"CSQLite",providers:[.Brew("sqlite"),.Apt("libsqlite3-dev")])
The SwiftPM makes it easy to generate a project, import an external library into an existing project, and also create a new library for others to use. In addition, it supports interfacing with other libraries not written in Swift.
Get Extending Swift Value(s) to the Server now with the O’Reilly learning platform.
O’Reilly members experience books, live events, courses curated by job role, and more from O’Reilly and nearly 200 top publishers.

