
57
with my scissors, but you might need to use pliers
depending on the thickness of your wire. When
drawing with wire remember to watch out for the
end as you don’t want it to accidentally ping into
anyone’s eye!
The tricky thing about drawing this way is how each
bend and fold created moves the existing bends
and folds. This means you have to keep altering and
adjusting as you go, keeping in mind the overall
look of the drawing, while also focusing on the small
section in progress. The finished pieces are gorgeous
but very fragile; they’re easily squashed so store them
in a safe place until you’re ready to tape them into
your book.
Drawing with wire is a really beautiful way to create
a line drawing in space. I have lots of these drawings
taped to the walls of my studio and I love their
elegance and the different shadows they create
over the course of the day. Using wire is a sculptural
approach to drawing, allowing us to create lines in
three dimensions and to view our emerging and
finished work from every angle. These drawings work
beautifully hung as mobiles or simply taped or pinned
directly onto the wall. For inspiration before you begin,
research the exquisite wire drawings of Alexander
Calder and CW Roelle to see how far this approach can
be taken and inspire you before you begin.
You will need a small amount of thin, soft, pliable
wire that is really easy to bend with your fingers. I
recommend floral wire, but you can also use 2mm
aluminum wire or modeling wire. I can cut floral wire
Drawing
with Wire
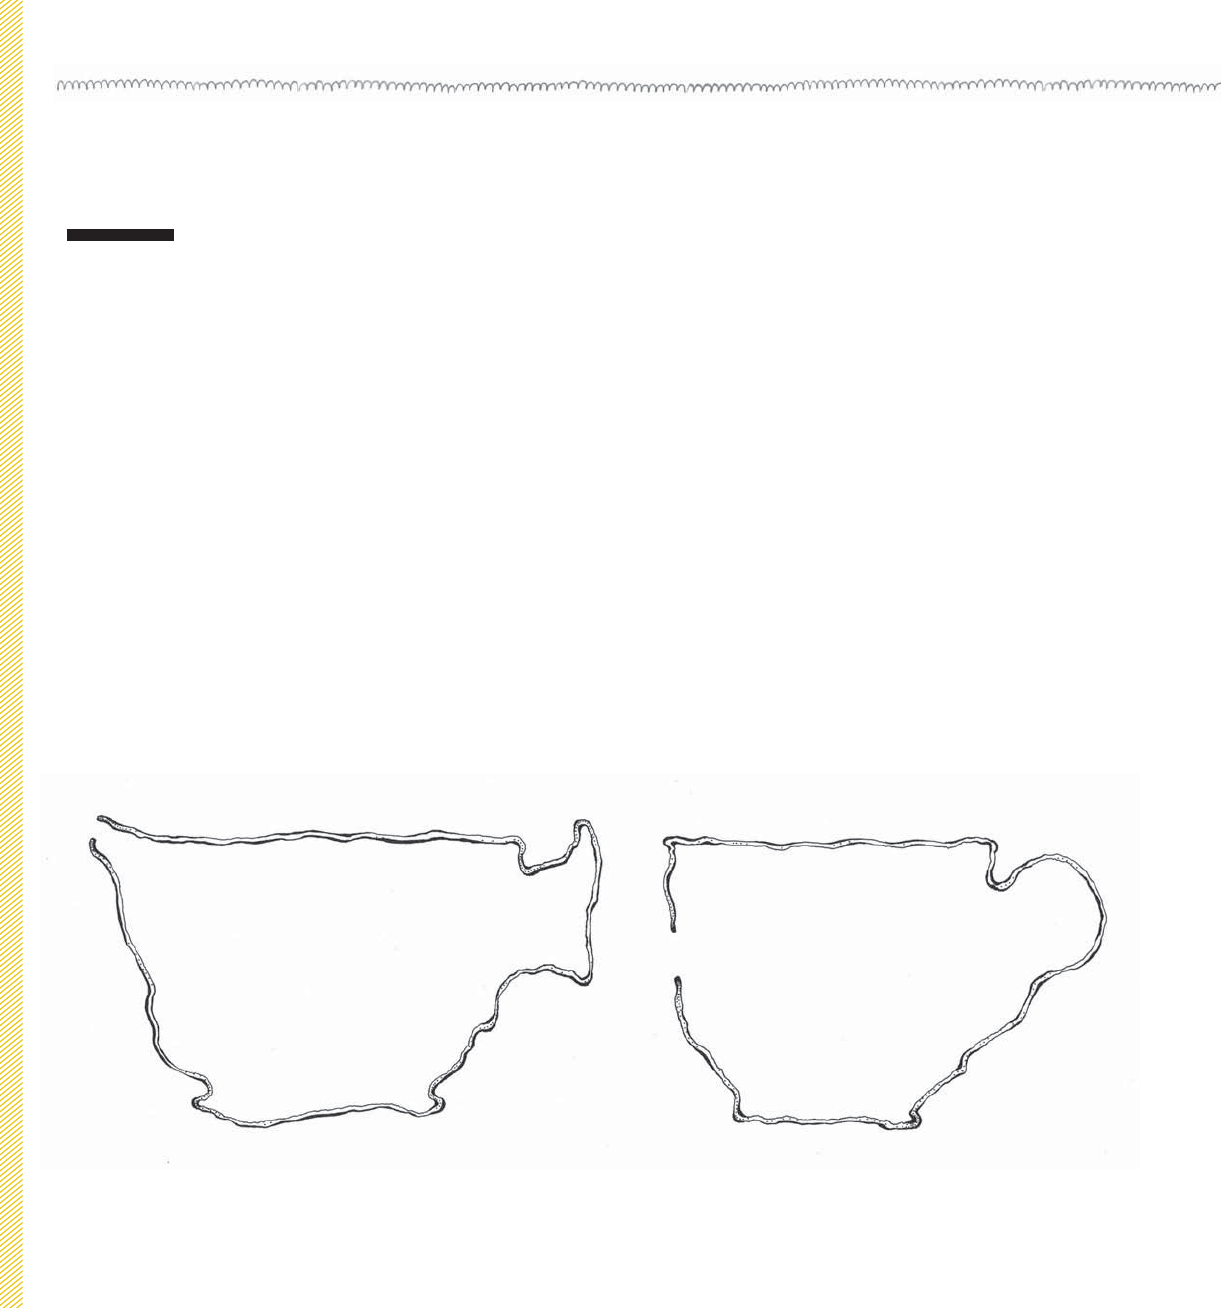
CUPS
To complete this exercise, we will repeat the adventure in chapter 8—creating a
continuous-line drawing without breaks—but this time in three dimensions. Let’s revisit
those cups. We are now familiar with their shape, so let’s re-create our continuous
drawing in wire. I want you to draw the entire silhouette of the cup using one long
piece of wire. For now make sure you are working from the actual cups rather than your
drawings. This is important as we are now at the stage in our journey where we are
beginning to really see. All the answers of how to draw an object can be found through
careful and thoughtful study of the object. The problem is that when we are asked to
draw, we panic and we rush into drawing without any real contemplation of the object
we are trying to draw. Instead, slow down, spend time looking, enjoy the process, and
don’t fret about the end result. In time your looking and drawing skills will develop
in tandem; you will learn how to look more closely, and with practice your hand will
respond with confidence. For now save your wire drawings in a safe place where they
will not get damaged.
58 > Fearless Drawing

Drawing with Wire > 59
Once you have completed all the adventures in the book, tape your wire
cups here.
60 > Fearless Drawing
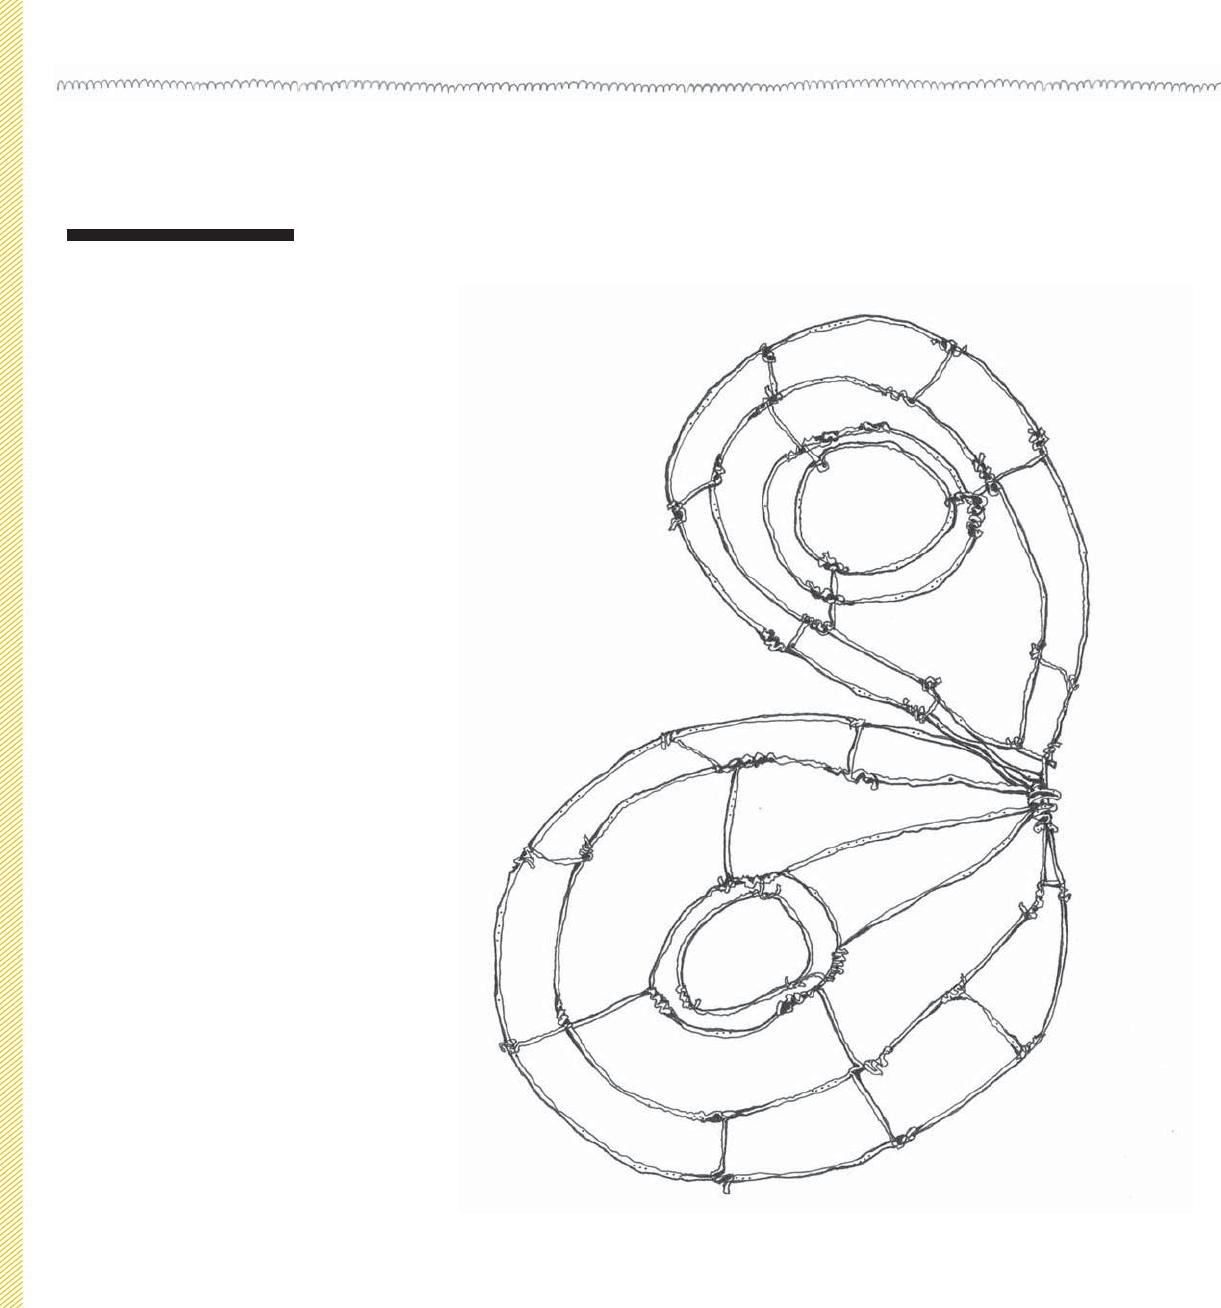
BUTTERFLY
Here’s half a butterfly; I’d like you to make the other wing on the
opposite page. You can see it’s been built up gradually, using
many small pieces of wire. I started with the wing outlines and
then created the designs within them. Don’t worry if your design
is not symmetrical. You can follow my design if you’d prefer,
but please do take the time to explore your own shapes and
patterns as well. Once you have completed all the adventures in
the book you can tape your wings on the opposite page.
Drawing with Wire > 61
TIPS
Create the outline with a large piece of
wire and then fill the interior with pattern
by attaching smaller pieces of wire to your
outline frame.
To join one piece of wire to another, wrap it
around in a circular fashion to create a bind
and then snip off any overhanging wire.
Be careful using small pieces of wire; don’t
make them too short as it will be difficult to
bind them to the structure.
Get Fearless Drawing now with the O’Reilly learning platform.
O’Reilly members experience books, live events, courses curated by job role, and more from O’Reilly and nearly 200 top publishers.

