Chapter 3. Creating and Editing
In this chapter weâll look at how you can create and work with your first repository. Creating this repo means that youâll always have access to the code and the additional information contained in pull requests, issues, projects, and wikis. Weâll then look at how you can add, edit, rename, or delete a file directly on GitHub. Weâll also look at how to work with directories on GitHub, and finally weâll discuss what to do when you want to make multiple changes as part of a single commit. From this point forward, if you want to follow along youâll need to create an account by going to https://github.com/join.
Creating a Repository
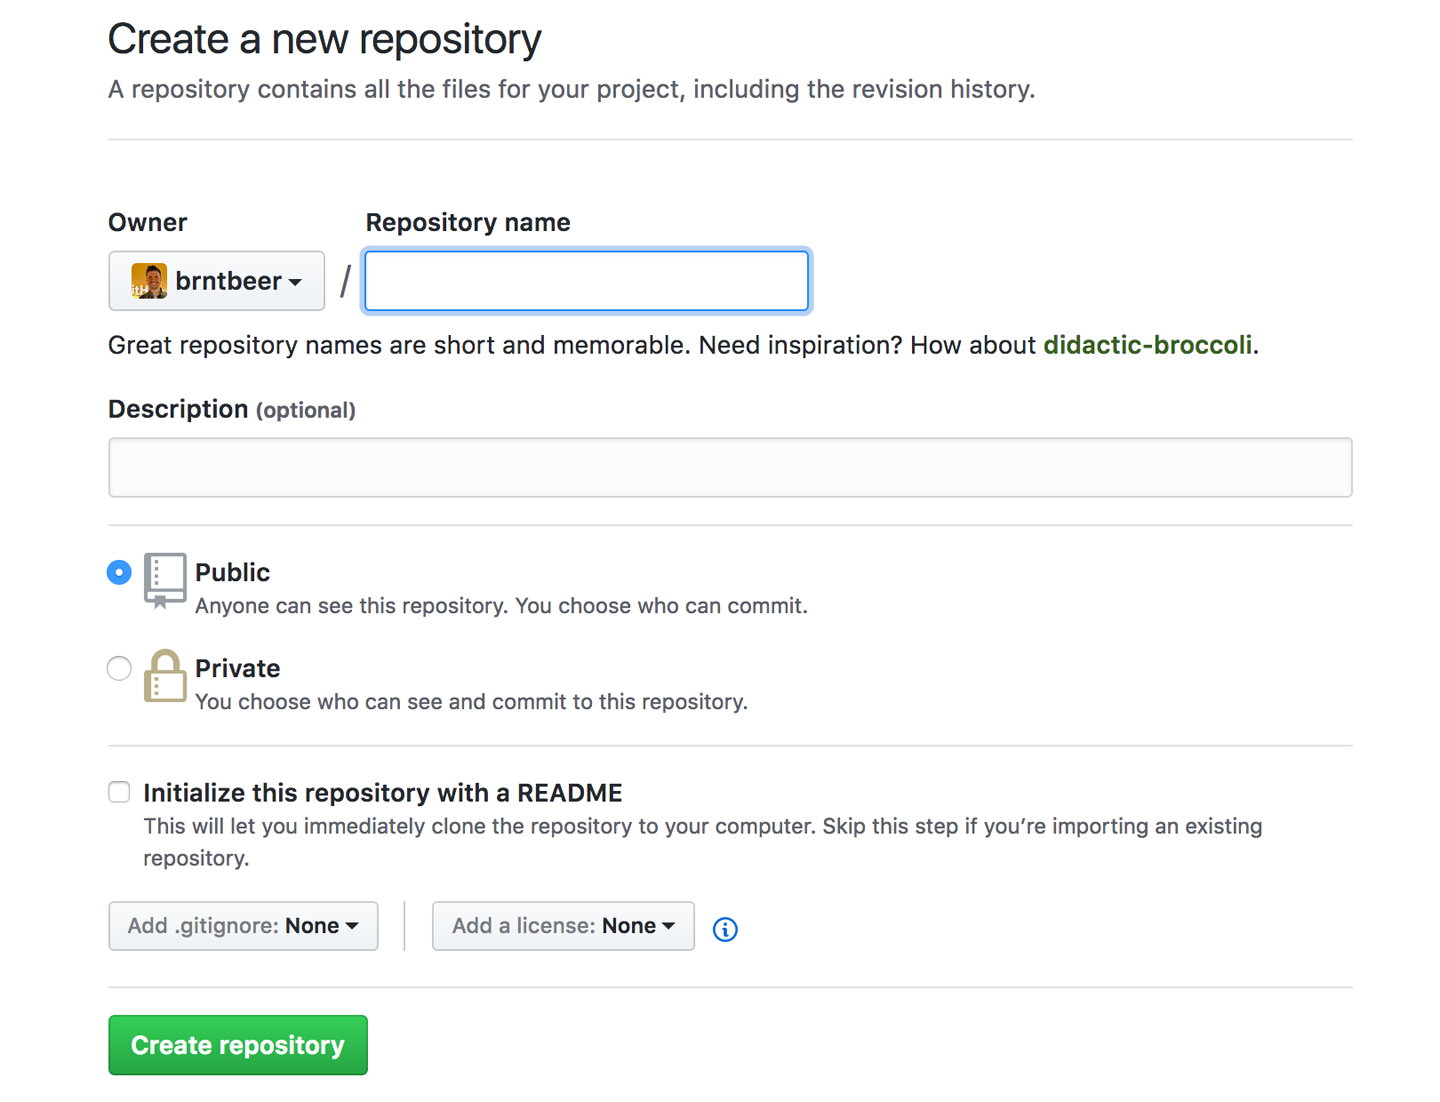
To create a new project on GitHub, click the + sign to the right of your username at the top right of the page. Then click the âNew repositoryâ option in the drop-down list. Youâll see the new repository form, as shown in Figure 3-1.

Figure 3-1. The new repository form
The first thing to do is decide whether to create the repository under your username or under an organization. You can see in Figure 3-2 a list of the possible organizations to which I could add a new repository. If you donât have access to any organizations, just leave this defaulted to your username. Remember, youâll always be able to transfer the project later if you want to.
Figure 3-2. Selecting who should own the new repository ...
Get Introducing GitHub, 2nd Edition now with the O’Reilly learning platform.
O’Reilly members experience books, live events, courses curated by job role, and more from O’Reilly and nearly 200 top publishers.

